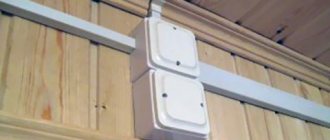
Cable channels are plastic or metal boxes for hidden or open laying of wires and cables. Can be used both outdoors and indoors. They are also called cable trays and boxes, sometimes the word “electrical” is added.
Consists of a body and a cover. The cross-section is mainly rectangular and square, but there are others, more specific. The body can be solid, or perforated. Perforated housings are rarely needed for better ventilation and faster cooling. In this article we will talk about how to attach a cable channel to your wall in the house.
Types of cable channels
Several criteria are used to classify a cable channel:
- Size. There are small products for laying one wire of a small cross-section or large boxes designed to mount up to eight conductors of different cross-sections on the wall;
- Material of manufacture. They produce aluminum, steel and plastic structures. For indoor installation, plastic models are more in demand, and fastening steel and aluminum boxes is more often used when laying electrical wiring along the facade of a house;
- Location. The cable channel can be fastened in several places. The design of the product is maximally adaptable depending on the installation location. There are plinth, parapet, main and floor models.
Main advantages of CC
Flexible cable channel
Electrical boxes have the following advantages:
- mechanical strength sufficient to protect laid wires from external damage;
- non-flammability, preventing local fires during short circuits;
- increased dielectric properties;
- chemical inertness, immunity to fungi and mold;
- aesthetics that allow it to fit into the interior of any style;
- environmental friendliness.
How to choose a cable channel
The cable channel is a rectangular, usually U-shaped profile, closed with a flat snap-on cover made of the same material.
Sometimes they are called boxes. Installation of cable channels is carried out around the perimeter of the rooms under the ceiling at a distance of 15 cm with vertical outlets to sockets and switches. To lay wires through walls, holes are drilled in opposite channels and the wall. To The standard length of the box for walls and ceilings is 2 meters, the minimum profile section is 8x8 mm, the maximum is 100x60 mm. For laying a small number of wires, usually low-current, in the corners between the floor and walls, there are specially designed skirting boards. If you need to connect the wire to a device far from the walls, there are floor-mounted options with a rounded surface.
Boxes vary in cost and performance characteristics depending on the material. Products are produced by:
- made of plastic. The most common option and the cheapest. For rooms with high humidity and on the external walls of a building, IP 55 plastic with a high degree of protection can be used. The color palette of plastic boxes allows you to choose the desired tone;
- aluminum with polyethylene coating. More expensive, but stronger and more durable than plastic ones. The number of cycles of opening and closing the lid is small due to the extension of the locks. The polyethylene coating is easily destroyed by mechanical stress. The color is given to the channels by a polyethylene coating and is quite varied;
- galvanized steel. Such structures are the most durable and expensive. Mainly used under high load conditions. For example, with floor wiring and in the external environment. The color of the products is varied.
The choice of the type and size of boxes begins with determining the wiring throughout the house from the electrical panel and entry points for television, computer network, telephone and security alarm cables to sockets, switches and lamps, drawing the wire lines on the drawing of the apartment or house. Depending on the power of the connected equipment, the wires will be of different thicknesses; this should be noted on the drawing.
You should immediately calculate for each section of the box the number of internal and external corners along the wiring line, the number of end transitions of the plugs, the number of T-shaped transitions to the branches and their cross-section. Of course, you can do without them, but the gaps at the joints and the difference in cross-sections will be noticeable. Using sealant to seal cracks will lead to difficulties when necessary, for example, adding or replacing a wire in the main.
The wiring will take on an aesthetically finished look if sockets and switches are installed from the same manufacturer. They are ideal in both size and design.
We advise you to pay attention to the walls. The unevenness of the walls will be especially visible when installing the boxes. If the type of room is important, in this case it is worth considering installing the structure along the wall along the floor
If the appearance of the room is important, in this case it is worth considering installing the structure along the wall along the floor.
Main varieties
Depending on the modification, the dimensions of the cable channels, their shape, material of manufacture and technical parameters vary. In everyday life or for registration of wiring in offices, the following are most often found:
| Name | Peculiarities | Areas of application |
| Mini | Box with a small cross-section. They hold up to 3 small cables. Installation of mini cable channels is carried out using self-tapping screws. When turning the wires, the joints are poured at an angle of 45° or plugs are installed. Typical sizes range from 10x10 mm to 60x80 mm | Most often used for Internet, television and telephony. |
| Flattened floor | An oval profile, which is used if it is not possible to route cables around the perimeter of an office or apartment. When installing, one edge of the box is attached to the floor with self-tapping screws, then it is closed with a lid and plugs are placed at the joints. Made from aluminum, galvanized or hard plastic. Size variations: from 16×6.5 cm to 7.5×1.5 cm. Colors include white, black grey, brown and a natural wood option. | They are laid in offices where it is necessary to run the wire to office equipment or a workplace in the center of the wall. Suitable for one or more medium sized cables. |
| Parapet guides | Main (parapet) boxes are made of plastic. There are several variations depending on the type of profile: similar to the “P” burka without a partition, “W” - with three sections, “G” for corners, curly and universal. The main advantage is the ability to adjust the rotation angle from 7 to 45° using adapters. Dimensions from 10×6 cm to 1×2 cm. | Can be used in any domestic premises. |
| Perforated with open access | Made of plastic or metal, it is 30-40% lighter than conventional options with easier installation. They provide good air circulation, have constant access to the wire in different parts of the network and can be installed on curved surfaces. | They are used to connect wires to each other when entering electrical panels or in production workshops, where the appearance of the wiring is not important. |
| Skirting floors | This type of cable duct is fastened using self-tapping screws to the walls or floor. Their design resembles hollow sections with a lid on top. The main selection parameter is the width of the diagonal wall (5 and 7 cm). The advantages include versatility for residential and office premises, variability of colors and immunity to ultraviolet rays. After dismantling the plinth cable channel, it can be reused. | Offices, administrative buildings, apartments and private houses. |
| Flexible | Prefabricated structures made of metal or plastic. Available in different colors, there are corrugated models. Such cable channels protect against mechanical damage, vibration or chemical reactions with the external environment. Such a box is flexible, can reduce noise levels and provide free access to wiring. At the same time, it is easy to replace a separate element, and installation does not require much time. By diameter you can find the following subtypes:
| When connecting wires to machines and other equipment in production. |
| Corner under the ceiling | Installation of the corner cable channel is carried out at the joint between the wall and the ceiling. The triangular shape of the structure fits perfectly into a flat corner. The maximum dimensions of the internal cavity are 4 by 4 cm. Simple installation and light weight of the structure are among the positive aspects of the box. Such cable channels are fixed only under the ceiling due to their fragility. | Any office and residential premises. |
| Transparent with backlight | Externally similar to corner ceiling models. They have a completely transparent lid, tilted at an angle of 45°. They have built-in lighting. | They are used to decorate lighting systems under the ceiling, frame kitchen cabinets and other decorative elements. |
| Industrial wire | Made from metal wire. They provide free air circulation, quick access to wires and do not accumulate dust inside the structure. | Installed in warehouses and workshops, as well as behind suspended ceilings. |
The types of cable channels listed can be divided according to the degree of rigidity, the presence of a cover or the type of locks at the joints. However, installation of wiring boxes in an apartment is carried out according to the same principle and with general rules.
Tips and tricks
Before purchasing and installing cable channels, determine the position and number of power and low-current outlets in each location. If you know where and what furniture and electrical appliances will be located, it will not be difficult to count the sockets.
Related article: How to attach a photo frame to a wall without nails
It is more convenient to lay the wires in the channels in one bundle, while simultaneously closing the box. You can pull the wires one by one, securing the already laid covers with a small piece every half meter.
Criterias of choice
More often they use options with a double lock, which makes the structure durable and independent of mechanical stress. Such clamps allow you to open and close the lid many times, while the rigidity and integrity of the box does not change.
When choosing a channel model, the following factors are taken into account:
- material of the walls and base, presence of a lid;
- appearance of the channel or tray, shape;
- ability to use standard fasteners .
of the width and height matters Pay attention to the presence of separation barriers if power and low-current lines are combined in one channel. The regulations state that the wires in the box should not fill more than 1/3 of the internal space.
Valera
The voice of the construction guru
Ask a Question
The PUE recommendations contain a recommendation that the sum of the external cross-sections of all wires inside the channel should not be more than 35% of the internal cross-section of the box. The method of laying the cable (loose or orderly) does not matter.
Method No. 2 – Dowel-nails
If you need to attach a cable channel to a concrete or brick wall, which is a typical situation for an apartment or a house, you cannot do without dowel nails, also called “quick installation”. In addition, for fastening you will need a hammer drill with a 6 mm drill. So, in order to independently fix the electrical box for the cable on a wall made of concrete or brick, you need to perform the following steps:
- Pre-drill 6 mm holes in the bottom of the cable channel every 40-50 cm.
- Attach the box to the wall according to the markings (more on this later) and mark the drilling points that coincide with the finished holes in the cable channel.
- Drill holes according to the marks on the wall.
- Place the plastic box and drive the dowels into the appropriate places.
- Hammer the nails.
Using these simple instructions, you can install the cable duct yourself in a wall made of concrete or brick
We draw your attention to one very important point - you should not drill holes with a drill while leaning the box against the wall. When drilling plastic, the impact mode can cause cracks to appear, which can have a negative impact both visually and on the durability of the finished wiring.
Fastening KK to brick walls
To fasten the KK to brick walls, plastic expansion dowels (from German Dübel - insert tenon, dowel) are used, which are hollow rods with persistent tenons-notches along the outer surface. For installation of plastic CCs, dowels with a diameter of 6-8 mm are suitable. Drilling a hole for a dowel is done with a drill, since when using a hammer drill, the fragile brick in the hole area is destroyed. To fix the KK box to a brick wall, screws are used, which are screwed into dowels through holes in the base of the box.
Additional Information. Using the same method, PVC cable ducts are attached to concrete walls.
Installation rules
The installation procedure depends on whether shaped products - corners, branches and plugs - will be used or not. If they exist, the manufacturer gives clear recommendations about what distance should be left for proper installation. They should be followed to the nearest millimeter. Then everything looks neat. We will talk about the basic rules for installing cable channels of the usual type below in more detail.
How to choose a size
If you decide to route wires into cable channels, first you need to decide what size they are needed. Dimensions are selected based on the number and size of conductors that will need to be laid and some reserve added for the future - so that if necessary, one or two more wires can be laid.
When choosing a size, you need to take into account the number of cables that will need to be laid
The number of conductors in a cable channel is not standardized. The main thing is to be able to close the lid without problems. A limitation may be the need for separate placement of power and low-current cables. In this case, select the cross-section so that there is at least a small distance between the groups of cables.
Installation procedure and features
According to the rules, wiring is laid horizontally and vertically; inclined installation is permissible only on stairs. In other cases, the rules are not deviated from when wiring is open. To obtain an even cut when installing plastic cable channels with thin stacks, use metal scissors or others, but the cutting edge must be sharp. Aluminum and metal trays are cut with a hacksaw. Thick plastic can also be cut with the same tool - there will be a smooth edge and the profile will not wrinkle.
If you need a piece of a certain length - for a outlet, for example, you need to cut it in this order: snap the lid, align the edge, apply marks on the lid and body at the same time. Then you can cut it separately. With this order, the length of both products will be the same.
Please note that when passing the corner, the lid is not cut into two parts, but only the side walls are cut so that it can be bent. Do not forget that when going around the outer corner, the cover should be longer than the tray; in this case, it is better to mark the places of cuts on it after the cable channel body is secured
Rules for installing plastic cable trays
The cable channel is attached to a non-wooden surface using nails with a wide head (screws can be used), or to plaster or plasterboard walls using self-tapping screws. For installation on brick or concrete walls, installation with dowels is required. The fastening step of the fasteners is about 60-70 cm; at the ends of the profile and at the joints, the fasteners are installed at a distance of 3-5 cm from the edge.
If two pieces of cable channels are joined, the cover must be positioned so that the joints of the housing and the cover do not coincide. Otherwise, the joint will be too noticeable and an unevenness may form, which will further emphasize the joint.
Order of laying wires
We lay conductors in the mounted housings. To prevent the walls of the cable channels from sagging, we install supporting jumpers with some steps, and then snap the covers. At this point, the installation of wiring in the cable channels can be considered complete.
Types of CC
Cable channels are classified according to the following main characteristics:
- According to the material of manufacture, they are distinguished:
- metal QC;
- plastic.
- Based on location, cable boxes are divided into the following types:
- floor products;
- wall, parapet or main (the same wall, only with dimensions over 80 mm in width and 40 mm in height);
- ceiling;
- baseboards.
QC Types
- According to the degree of rigidity, CC is divided into:
- rigid cabinet products, represented by rigid straight plastic or metal boxes;
- flexible cable channels that can bend in different directions.
Rigid wall PVC boxes
Skirting board with cable channel
Structurally, wall-mounted rigid PVC cable channels consist of two parts:
- hollow box of different cross-sectional shapes with a flat base;
- removable lid with latch lock.
Rigid type KK designs made of PVC have a locking system formed by profiled grooves and protrusions on the edges of the box and lid. The KK rigid type snap-on PVC cover panel is available with one-way and two-way locking systems.
Important! After snapping the lid, a rigid closed profile is created that is resistant to external mechanical loads and does not change the geometry of the CC.
The locking system reliably prevents spontaneous release of the cover with the box from gravity, vibrations, shocks, preventing opening of the laid cable system.
Rigid KK wall-mounted PVC
Soft Vinyl QC
Soft boxes made of PVC plastic are endowed with increased elastic and plastic properties, allowing the channels to change their shape under strong mechanical stress and then restore it without any changes. In case of excessive bending, the CCs retain their performance qualities.
Additional Information. Flexible KK boxes can easily bend around external and internal corners without the use of special corner fittings.
The design of flexible cable covers uses flexible covers that can follow the shape of the profile along the entire length of the cable route being laid and gently fit into turns at external and internal corners while maintaining reliable locking with the box.
Installation of PVC cable ducts
CCs made of PVC can be mounted only vertically and horizontally.
Note! Laying polyvinyl chloride CC on wooden surfaces is not allowed.
PVC boxes of any type of rigidity are installed using standard fasteners in a unified way, which involves the step-by-step implementation of the following work:
- Marking the cable route using a pencil and tape measure. Control of horizontal and vertical of marked areas.
- Cutting strips of PVC boxes into assembly sections.
- Drilling holes in the wall. The segments are alternately applied along the marking line, pressed with the base against the wall, after which holes in the wall are drilled with a hammer drill directly through the plastic of the base at a distance of 30-40 cm from each other.
- Installation of plastic dowels in the holes made.
- Fixing the boxes with screws to firmly secure the PVC channel to the wall. The screws should have a wide head so as not to deform the plastic base when screwing in the fasteners.
Attaching the KK base to the wall
- Laying electrical wiring in boxes.
- Installing covers on boxes with snap locks along the entire cable route.
In some cases, double-sided tape is recommended for fixing the CC, which can secure the CC on surfaces made of glass, metal, plastic or cardboard.
QC made of galvanized steel and aluminum
Metal KK are solid rolled profiles made from:
- cold-rolled steel grade 08 PS, coated with zinc grade Ts1, less often Ts2, coating thickness from 19 to 90 microns;
- rolled aluminum sheets, followed by anodizing or painting with high-quality enamels in color shades according to the RAL palette.
Metal CCs are characterized by the following advantages that distinguish them favorably from plastic products:
- increased strength and rigidity;
- fire resistance;
- the possibility of re-using the CC after correctly dismantling;
- ensuring protection of laid wires from external electromagnetic influences.
Perforated metal boxes have additional advantages:
- the overall weight of the structure is reduced while maintaining mechanical strength;
- KK perforation allows you to attach additional fastening and marking elements;
- the presence of holes contributes to high-quality cooling of the cable system, preventing it from overheating.
Metal QC
Metal cable boxes are in demand for laying cable routes in industrial premises and offices, however, anodized aluminum boxes are popular when arranging wire communications in residential premises with a Hi-Tech style interior.
Corrugated PVC cable channels
One of the types of flexible cables for laying electrical wiring are corrugated pipes made of PVC. A corrugated pipe for electrical wiring, also commonly called a corrugated hose or simply a corrugated pipe, is a PVC pipe of variable cross-section, in which sections with a thin wall alternate with thicker ones. Thick walls provide the corrugation with strength, while thinner walls give the product flexibility, allowing the corrugated hose to bend in all directions.
The corrugated pipe for electrical wiring is supplied complete with a special probe - a thin wire broach, with the help of which the wires are pulled into the pipe. When installing short corrugated cables, one can do without a broaching probe, but for relatively long routes one cannot do without a probe. Corrugated PVC CC must be attached to the wall or ceiling with special mounting clips in the following sequence:
- in accordance with the marking of the cable route line, holes for dowels are drilled with a hammer drill;
- through the mounting openings in the clip, screws are screwed into dowels to fix the clip on the wall, similar to fixing KK boxes;
- a flexible corrugated hose snaps into brackets with clips.
Due to the lack of aesthetic appearance, PVC corrugation in residential buildings is used in utility rooms.
Floor KK skirting boards
Skirting boards are installed along the junctions of floors and walls and serve to perform the following functions:
- protective - as an electrical box;
- decorative - as an artistic element of the interior, hiding the gap between the wall and the floor.
The cover of the plinth KK is made in the form of a removable strip between the vertical and horizontal shelves of the product.
Floor KK-plinth
Ceiling cornices-fillets
To lay wires on the ceiling, ceiling cables are used, which in appearance resemble finishing cornices-fillets used to hide the joints of the ceiling and walls. By analogy with fillets, for ceiling KK the profile section resembles a right triangle, the diagonal size of which is 50-70 mm. When installing fillets for electrical wiring, mounting holes are drilled in the walls along the perimeter of the ceiling in increments of 300 mm. After laying the wire communications, the CC boxes are closed with snap-on panel-type covers.
Movable chain CC
Chain-type electrical boxes belong to the category of flexible cable ducts that can bend in one plane. The design of the chain CC is assembled from individual track links connected to each other by hinges. The materials used to manufacture the tracks are high-strength nylon reinforced with fiberglass or steel; there are products of a combined type. Multi-section chain-shaped CCs are used in production conditions to protect the moving electrical wiring of complex mechanisms of machine tools that perform reciprocating movements. Chain-type CCs are in demand for the operation of elevators and conveyors, stone processing and CNC machines, construction machines and actuators of industrial robotics.
Chain-shaped CC
Preparation for installation, surface marking
Open installation imposes increased aesthetic requirements: everything must be “smooth and parallel.” In this case, the box is fixed along the preliminary marking lines. It is carried out using a level (laser or water, construction), a square, a tape measure, a marker, a ruler, a pencil (marker).
Installation instructions Install the box according to the marked markings
Here's how to properly divide the process into stages:
- Initially, a diagram of the optimal electrical wiring is drawn up;
- lines on the wall are drawn by tapping according to the level, all branches are strictly at right angles;
- on them, with a pencil, according to the existing plan, the location of distribution boxes, sockets, switches is marked;
- necessary adjustments are made as work progresses.
You can make turns and angles yourself
At the end, you should calculate the length of the marking stripes, the number of installation points, turns, and corners. This will allow you to order the exact amount of working material.
Turns and corners can be purchased either ready-made or made from cable duct yourself. Using the former leads to increased costs. But work on difficult sections is faster, and the appearance of the route is better than when using homemade ones.
Self-production will require the additional use of sealants to seal seams.
If you have a laser, you don’t have to make markings
Boxes for installation can be cut in advance (for a large area) or during the process. The first case begins with precise measurements using a tape measure along the marking lines.
Then they cut the working material into the required lengths in order to install it later. Accuracy of measurements is important here.
It is easier to carry out the work according to the scheme: try it on - cut it - fasten it.
General information
Features of the material
The usual type of cable channel is a white box with a square or rectangular cross-section, but you can always choose a product of a different color and shape to suit your taste. Due to its low price, ease of installation and use, the plastic version is widely used and can be mounted on a wall made of all materials. Often, the floor plinth has a compartment for one cable, since it is not recommended to use more than one wire in a channel; to lay several wires, you will need to purchase a multifunctional box.
The procedure for attaching the cable channel to the wall
During the construction of a new house or major renovation, electrical wiring is laid differently, namely, mounted inside the walls, i.e. it turns out to be a closed method. Such work includes cutting grooves. But what to do if the wall material is not suitable for hiding wires (for example, if we are talking about a wooden bathhouse), or if there is no desire to carry out repairs in a cloud of dust, you need to power the devices?
In this case, the electrical wiring should be installed in an open manner. The ideal option would be to use an electrical box. But before attaching the cable channel to the wall, especially if you plan to do it yourself, it is advisable to thoroughly understand all the nuances.
Classification
Using a cable channel makes it possible to fix the cable on any base - brick, concrete, plasterboard, stone and foam block. However, the mounting methods will be different. Depending on the room in which the cable will be laid, i.e. schematic layout of the wiring line and the number of wires, we recommend using different types of boxes. Their detailed classification is in the table. The construction market makes it possible to choose a product for certain conditions of use. The most expensive option is aluminum cable channels, and the cheapest is plastic. The latter are worth taking, but only if they do not ignite, but only melt.
Preparation, surface marking
The open installation method places high aesthetic demands - everything must be parallel and even. In this case, the box must be secured along the marking line. This line is drawn using a building level (or a laser, water level), a tape measure, a square, a ruler, a marker and a marker (pencil).
This process should be divided into stages:
- First, draw up a diagram for laying electrical wiring in the most convenient and rational way.
- Lines on the wall should be drawn using a level, and all branches should be strictly at right angles.
- The location of distribution boxes, as well as switches and sockets should be marked on them according to the plan.
- You can make adjustments as you work, if necessary.
You can make the corners and turns yourself. Finally, calculate the total length of the marking strips, as well as the number of installation points, corners and turns. This will make it possible to order the exact amount of working material. Angles and turns can be purchased ready-made, or you can make them yourself from a cable channel. Using the first option will lead to increased costs, but at the same time, work on difficult sections will be accelerated, and the appearance of the route will be better than when using home-made elements.
Making your own corners is easy, but it will require additional sealants to seal the seams. If you have a laser, you don't have to make markings. Boxes for installation can be cut in advance for large areas, or during operation. In the first case, you will need to take precise measurements using a tape measure along the marking lines.
After this, the working material should be cut into the required lengths, and after that it can be installed. The accuracy of the measurement is very important here. The easiest way to do the work is according to the principle of “fitting - cutting - fixing”. Applying straight marking lines and using ready-made components makes it possible to create a cable channel that will look aesthetically pleasing in the room.
2 best ways
The main advantages are:
The ability to install everything yourself.- The wires will be insulated from each other.
- The appearance of the structure is acceptable.
- Can be fixed on any surface.
So, how do you attach a cable duct to a wall? There are two great ways.
- A box with a single section, with a one-sided lid. An ideal option if you need to stretch the cable from the PC/TV to the entrance to the apartment, or hide the cord to the outlet.
- Box with two sections with a double-sided lid. This is a great option if two cables go in the same direction.
If you have more wires, you will have to install several cable channels on top of each other. But in this case, it is better to think about laying grooves if the connection is stationary, and the owner does not intend to move the devices to which the cables lead.
Sometimes people get confused about the shape of the electrical box. It may seem rude to some and does not fit into the interior. We would like to please you - the cable channel comes in many types, and you can find soft, rounded outlines. It will take a little longer to search for such a channel, but it is difficult to call it a scarce commodity. The method is quite simple to implement, but there is one drawback - if necessary, the cable channel can only be dismantled with pieces of finishing/plaster. In addition, if your walls are far from ideal, then there will be an uneven gap between the surface and the box, and this is not very attractive visually and it is better not to use such a structure. But if you are sure that dismantling is not required and your walls are smooth, use these instructions.
- Cut the cable channel to size, attach it to the floor, wall or ceiling and check the alignment of the markings and the tightness of the joining of the parts.
- Apply adhesive or liquid nails in wavy lines on the wrong side of the piece. The wave width should be equal to 1.5 times the width of the cable channel.
- Next, press the element to the surface for a few seconds and immediately remove it. Wait until the remaining trace of glue on the wall becomes thicker.
- Then return the cable channel to its place and press it firmly, this time as firmly as possible, so that it adheres well to the wall.
Often, in order to enhance the reliability of fastening the cable channel to the wall and ceiling, you can use driven nails or screws (it all depends on the wall material). A special case of the adhesive method is the installation of cable channels based on which there is already an adhesive composition. But this option does not inspire confidence, and because of this it is also supplemented with self-tapping screws.
The second option is more expensive, but it is much more reliable and there is the possibility of safe dismantling. The cover should be removed from the cut cable channel, i.e. top part. After this, the base should be attached to the wall and a hole should be drilled directly through it in the wall. If the base is made of reinforced concrete, blocks or bricks, it is better to use a hammer drill. The hole spacing should be from 0.4 to 0.5 meters. If the walls have a large curvature, the distance can be reduced to install the box around the entire perimeter so that it fits well to the surface. We remove the base, and you can screw the plastic parts of the dowels into the holes. The lower half can be put back and secured using the main part of the fastening.
Now all that remains is to route the wire and put the cover in place. That's it, the issue of fastening the cable channel can be considered resolved. Whichever method you like best, use it, but the advice is the following - when choosing an adhesive composition, at least occasionally use dowels.
Features of open wiring with CC
Open wiring using electrical boxes tempts with ease of installation, repair and simplicity of carrying out an ongoing audit of the condition of cable lines inside the CC.
Note! Installation of hidden wiring is inherently comparable to the overhaul of the entire room. During the replacement of hidden wiring elements, the room is virtually unsuitable for work or even staying in it due to clouds of dust formed when previously sealed grooves are opened
https://www.youtube.com/watch?v=ytaboutru
The industry produces sets of accessories for CC, with the help of which an external type cable route is mounted, duplicating the outlines of the walls, floor and ceiling of the room.
Accessories for cable channels
During the operation of cable lines, if it is necessary to repair or replace the electrical wiring laid in the KK box, it is enough to remove the cover and perform the required work. An important advantage of open wiring in CC is the possibility of laying additional wires and cables in already laid boxes without finishing work.
Features and varieties
Cable channels are boxes for laying wires made of metal or plastic. The scope of their application is quite wide: interior decoration of offices and apartments, external wiring and ensuring the safety of cables in enterprises.
The functional purpose of such structures is to protect wiring from mechanical damage and open interaction with the environment. Elegant design and ease of use are additional advantages.
All cable channels according to types and sizes are divided into two large subgroups:
- rigid for electrical wiring;
- flexible from corrugated pipes or sections.
In construction, a metal modification of the cable channel is common, where the box body is cast or perforated.
Important! Boxes with a perforated metal body are used only when it is necessary to create a sufficient amount of ventilation in the wiring.
In everyday life, plastic structures are used that are sufficiently rigid to perform their direct functions and have an attractive appearance.
Installation Tips
So, so that you can install the cable channel correctly and at the same time quickly, we recommend that you familiarize yourself with the following installation nuances:
- First of all, carefully align the wall with the ceiling and prepare it for attaching the plastic box. The smoother the surface, the larger the pitch between fasteners can be. In addition, the absence of gaps will have a positive effect on the interior of the room.
- To connect the cable duct at corners (external, internal, the junction of a vertical route with a horizontal one), make special angles at 45 o. To do this, you can use a miter box, as shown in the photo.
- In addition to point 2 - in order not to bother with cutting out identical corners, use ready-made components from the manufacturer: internal and external plastic corners, T-shaped connectors, plugs, etc.
- The cable channel must be fastened evenly, both vertically and horizontally. To attach the box horizontally and level, use a building level. To level the route vertically, it is best to use a plumb line.
- Before installing a cable channel on the wall with your own hands, you need to mark these walls. There are certain standards on this issue, which we discussed in detail in the article - how to install open electrical wiring.
- If you need to mount a plastic electrical box on a plasterboard or wooden wall, do not drill holes in the surface in advance. The self-tapping screws will fit into the wall well without this. As you understand, this option for attaching the cable box will not work with concrete and brick.
- If possible, start laying the cable duct from a corner, so that later it will be easier to join sections and trim them if necessary.
- There is not much difference in when you decide to install the cable duct - before or after the decorative finishing of the walls. We recommend laying the product last, because... Installing a cable channel on wallpaper is much easier to do than gluing wallpaper, cutting it due to the already laid route.
- If you decide to place plastic wire protection on the ceiling, do not forget to prepare the ceiling surface in the same way as the walls. The cable channel is attached to the ceiling in the same way as on the walls.
That's all you need to know about how to attach a cable channel to a wall with your own hands. We hope that the provided detailed description with photos and video examples was useful for you!
Also read:
Features of application
The choice of technology depends on the building material of the walls, the cross-section and number of cables, operating conditions, and network voltage - 220 V or 380 V. Each fastening element has application nuances that should be taken into account when carrying out installation work:
- “Butterflies”, “umbrellas”, fasteners with a drill and other elements with a wide middle or end are suitable for attaching to thin and porous materials - drywall, foam block, chipboard.
- Self-tapping screws of various types are used for fixing to plaster, wood and other dense bases.
- Dowels with plates or clamps are used if the structure needs to be secured to a brick or concrete surface.
vote
Article rating
Types of cable channels
Several criteria are used to classify a cable channel:
- Size. There are small products for laying one wire of a small cross-section or large boxes designed to mount up to eight conductors of different cross-sections on the wall;
- Material of manufacture. They produce aluminum, steel and plastic structures. For indoor installation, plastic models are more in demand, and fastening steel and aluminum boxes is more often used when laying electrical wiring along the facade of a house;
- Location. The cable channel can be fastened in several places. The design of the product is maximally adaptable depending on the installation location. There are plinth, parapet, main and floor models.
Open wiring in plastic pipes
KK boxes provide protection for the cable system from mechanical damage, but they are not able to protect laid wires from moisture or fine dust. If the requirements for dust and moisture protection of electrical wiring are quite high, then it is preferable to use PVC pipes. Compared to metal counterparts, the use of PVC pipes for electrical wiring creates the following advantages:
- lower cost estimates due to relatively cheap prices for plastic pipes and low labor intensity of installation work;
- low weight of plastic products;
- high electrical insulating qualities;
- chemical inertness to corrosion and the effects of chemicals in finishing materials;
- no condensation due to temperature changes.
Mounting clips are used to fasten PVC pipes to walls and ceilings.
What kind of cable channel does a bathhouse owner need?
To organize open-type electrical wiring, a wide range of products of various shapes, dimensions and colors are now produced. Affordable white plastic boxes with a length of 2 m or more with variations of a couple of tens of cm predominate on sale.
Those who want to choose products that exactly match the wooden walls have a chance to buy channels of the required color. There are complex systems in stores with a full range of accessories for forming a network of any degree of complexity. There are mini-channels without additional devices to facilitate installation.
Cable channels are not cut to the sizes required by the buyer in stores. You will need to prepare the sections for installation of the main yourself. You will need to stock up on a hacksaw for metal, preferably a grinder. You will need a miter box for cutting workpieces at an angle.
The choice determines the purpose of the work:
- if the task is to install an additional switch or socket, it is enough to purchase an overhead version of this electrical installation product and buy one mini-channel for it;
- if the electrification of the bathhouse will be done from scratch, it makes sense to buy partially or completely a set of channels with accessories: corner and T-shaped adjustable elements, plugs, devices for installing sockets, distribution boxes, switches, etc.;
- If you plan to set up a simple circuit yourself with cable routing in inexpensive plastic boxes, you need to first draw up a diagram, calculate the footage of the channels and stock up on accessories of the same brand.
Buyers of an integrated system, along with a pleasant purchase, will receive detailed instructions on installing the main and additional elements to connect them into a single highway.
DIYers who decide to use mini-boxes for organizing electrical wiring will not be offered instructions. This article will be useful to them about how the cable channel is laid and what rules must be followed.
Cable laying under plasterboard, behind suspended and suspended ceilings
The laying of hidden wiring inside frame partitions, under plasterboard or plastic sheathing, as well as behind various types of ceilings is regulated by the set of building rules SP 31-110-2003 (clause 14.15) and the PUE rules (clause 7.1.38.). In accordance with these regulations, hidden wiring can be installed in two ways:
- If partitions, wall bases or their cladding are made of flammable materials, then conductors (for example, marked VVG) should be placed in metal pipes with localization ability, or in closed boxes.
- If building structures are made of non-flammable materials, then the wiring should consist of flame retardant wires (cables) (for example, VVGng), and it should be mechanically protected with non-flammable non-metallic boxes or pipes (for example, a corrugated self-extinguishing pipe).
In both cases, the wiring must be replaceable.
If the wiring is mounted under plasterboard sheathing, and the supporting profile is almost flush against the wall, then it is advisable to lay the wires in grooves made in the wall or plaster.
KorectorFORUMHOUSE Member
I would not make holes in the profile; you need to leave space for the wires between the profile and the wall, or ditch the wall - if there is no other way.
Tips for installing corners and joints of cable channels
When using special accessories, the places where plastic CC passes through the external and internal corners of the walls or floor are closed, respectively, with external and internal corners, aesthetically fitting into the interior of the room. The joints of the KK boxes can be trimmed with slight deviations from right angles and straightness of the cut if connectors are used that hide the joints of the sections.
In the absence of factory-made elements, corner transitions can be made as follows:
- To pass the internal corner you need:
- in the place where the KK route bends, make cuts along the sides of the box with a cutting depth to the level of the plastic base;
- bend the box at the desired internal angle;
- install the box at the transition site and attach it to the wall using one of the previously described methods (depending on the wall material);
- close the box with pieces of lids.
- To install the CC on the outer corner, the box is cut and fixed in the same way as the work for the inner corner. However, cuts are made on the lid at an angle of 450 with the center of the angle on the bend line.
The use of cable channels when arranging home and workshop electrical wiring greatly simplifies the design and installation of cable networks, speeds up installation work and allows the full reuse of wires and cables after dismantling the wiring.
CC with cable wiring
Fastening on the surface of plasterboard boards
Attaching boxes to plasterboard boards (hereinafter referred to as GCP) with standard hardware is very problematic, since GCP are a layer of gypsum located between layers of paper. The compressive strength of such drywall is critical. If you are slightly “overzealous” when tightening the self-tapping screw while screwing the base of the box to the GKP, then the threaded part of the fastener in the plaster will begin to turn idle, reducing the strength of the fastening to zero.
To fix the boxes on the fragile surface of the GCP, reliable fastening can only be ensured by using special dowels, commonly called “butterflies”, or by using mounting adhesive, called “liquid nails”.
General rules for marking QC
Correctly executed markings clearly indicate how to attach the cable channel to the wall, taking into account all the executive elements of the electrical wiring. To apply marking lines you need to prepare:
- ruler and pencil;
- bubble or other type building level;
- beating cord, also called coated thread, with pigment.
The sequence of applying QC markings is as follows:
- In accordance with the architecture of the room and the electrical wiring diagram from the distribution board, the placement points for sockets, switches, and mounting boxes are determined. The optimal dimensions of their distance from the joints of the floor with the walls, corners, etc. are measured with a ruler. Appropriate marks are made on the walls with a pencil.
- In all places where the cable route is supposed to be laid, straight lines are drawn with a tapping cord.
- The construction level controls compliance with the vertical and horizontal lines.
QC marking
Wiring types
In modern buildings, it is customary to install two types of wiring: hidden and open. Hidden wiring is laid in the voids of building structures or inside walls (in channels made by gating, drilling, etc.).
Open type wiring is laid directly on the surface of the walls. The wires are either attached to special insulators or laid in standard cable channels.
When choosing the type of wiring when building a house, you should not be guided by your own preferences, because only SNiPs, GOSTs and PUE should be taken as the basis.
“Self-taught builders” have the least questions if the electrical wiring is installed on walls made of non-combustible building materials. First, let's talk about such cases.
Method No. 1 - Self-tapping screws
If you decide to install electrical wiring in a wooden house or apartment with plasterboard partitions, then the installation of the cable channel must be done with special wood screws. The fastening step depends on what load will be placed on the plastic box, or more precisely, how many wires need to be stretched inside, and what their cross-section is. As a rule, to securely fasten a cable channel to a wooden wall or drywall, it is enough to screw screws every 40-50 cm. If the walls are uneven, it is better to reduce the fastening step, this will hide all defects and gaps.
You should not choose screws that are too long to install the cable channel yourself. To securely fix the box in the wall, it will be enough to screw in fasteners about 40 mm long. For screwing, it is best to use a screwdriver with a Phillips bit. We talked about how to choose a screwdriver for home repairs in the corresponding article!
Fastening methods
Attaching the cable to the wall is done in various ways. The choice of a specific option depends on the composition of the working surface. The materials used and work with them are discussed in the table.
| Fastening method | Operating procedure, tips | Mounting surface |
| using self-tapping screws | wood screws are screwed in with a screwdriver on average every 50 cm; It is recommended to use them with a length of about 40 mm; used for quick installation of plastic channels; no pre-drilling required | |
| dowel-nails (quick installation) | the lid is removed from the box; holes are drilled in it in increments of about 45 cm; it is adjusted to the surface, marking the location of the drilling points on it; use a hammer drill to make a hole in the wall; the plastic part of the nail is inserted through the box into the hole, the metal part is then hammered in | allows you to securely attach it to a concrete wall, brick, stone |
| "bugs" | screwed with a screwdriver through the distance indicated above | thin metal (less than 2 mm) |
| glue (liquid nails) | apply the adhesive inside out the prepared section; lean it against the marked place for a few seconds, move it away; wait for the glue to thicken; pressed back; additionally it is required to use dowels and screws | wood, drywall, wallpaper, tiles, can also be glued to a concrete surface |
The step width is adjusted based on surface unevenness. For more information on how to select and install a cable channel, watch this video:
The first 3 methods provide the ability to dismantle the elements intact, and the 4th - only with fragments of finishing. The installed box looks great only on smooth walls.
It is recommended to install wiring in the cable channel after all finishing work has been carried out (pasting wallpaper, applying decorative plaster).
With this method of laying lines, the rules of the PUE are observed, and you can easily get to the place of the problem.
The presented fastening options reliably join the surfaces. The variety of materials fits the laid routes into the apartment’s decor.
Decoration of corners
When installing electrical wiring in cable channels, you may need to make corner joints in the corners of the room or between the vertical and horizontal parts of the channel on the wall. To make a joint in the corner of a room, the end of the cable channel is cut from the side adjacent to the corner at an angle of 45 degrees. It is better to start installing the cable channel from a corner.
To make the junction of the vertical and horizontal parts, the cable channel is also cut at an angle of 45 degrees, but in a different plane. You can do it another way: cut the lid to the full width of the box. Minor defects can be covered with sealant.
Instructions on making corner joints
The main requirement of this work is the absence of visible “gaps” between the elements after snapping the covers. To avoid any cracks, you need to carefully measure and cut carefully, using a metal blade and a miter box or trimmer. Therefore, those who want to build a cable channel system on their own are strongly recommended to use accessories that hide all the flaws.
Minor errors can be masked with a color-matched sealant, but there is also a way to form a corner transition. Instead of cutting two pieces at the traditional 45º angle, you can simply cut the walls of the bases to their full width. In such cases, the boxes are installed with an overlap. Cuts and cutouts on the walls of the cable channel are made with metal scissors.
We are convinced that there are no special tricks in fastening electrical boxes. Connecting sockets and switches to the mains laid in them is done in a standard way. If the performer is patient, you can rightfully be proud of the result.
Classification of cable channels
Using a cable channel allows you to fix the cable on a base made of concrete, brick, wood, plasterboard, foam block, stone.
However, the attachment methods will be different.
Depending on the room, the schematic arrangement of the wiring lines and the number of wires in them, it is recommended to use boxes of various types.
Their detailed classification is presented in the table.
| Classification feature | Kinds | Description |
| installation location | floor | in their shape and appearance they are optimally adapted to the installation location; |
| main | ||
| skirting | ||
| color | Available in different colors and shades | fit harmoniously into the interior of the rooms |
| size | different channel volumes - for one, 2, 3 or more cables | dimensions from 12×12 to 100×60 mm; have different shapes of corners - from sharp to rounded |
| number of locks | with one | 2 latches – more securely hold the cover on the channel, reducing the possibility of deformation; |
| with two | ||
| product material | aluminum | covered with film; a variety of shades gives an attractive look; fireproof |
| steel | installed indoors or outdoors; Available with a galvanized surface in different colors; do not burn; susceptible to corrosion when scratched |
The most expensive option is aluminum, the cheapest is plastic. In any case, the latter should be taken, which do not burn, but melt.
Calculation of the size of a plastic box for electrical wiring
Before you purchase cable channels for installing electrical wiring, you must first draw a layout diagram of the structure in the room, indicating the type of cable channels and the length of each section. After this, determine the required size of each type of tray. To calculate the size of the box, you need to know the cross-section of the wires and their number.
Attention! It is recommended to take a cable channel with a small margin in length (10%) and width.
The length reserve takes into account the additional costs that arise during installation in places with corners, as well as in the event of material damage. It is also advisable to have free space inside the box, which may be needed when laying additional electrical cables.
There is no need to purchase a wide tray if you initially plan to lay only one cable, since its price also depends on the width of the product. Usually the calculation is carried out taking into account an increase in the number of wires by 2-3 pieces.
Also, taking into account the “Rules for Electrical Installations”, in the case of multi-layer filling of plastic cable channels, the sum of the cross-sections of all conductors located in them should not exceed 40% of the cross-section of the product itself in the case of using a box with a lid or 30% in the case of a blind box.
Table for calculating the minimum dimensions of cable channels
Wire cross-section, mm2 Design and dimensions (height and width, mm) of the box
| single-section | two-section | three-section | |||||||||
| 10x22 | 10x30 | 10x22 | 10x30 | 15x54 | 10x40 | ||||||
| number of wires in one section | |||||||||||
| 1,5 | 10 | 12 | 3 | 3 | 5 | 5 | 19 | 13 | 5 | 4 | 5 |
| 2,5 | 7 | 10 | 2 | 2 | 3 | 3 | 13 | 13 | 3 | 3 | 3 |
| 4 | 4 | 8 | 1 | 1 | 2 | 2 | 10 | 13 | 2 | 2 | 2 |
| 6 | 2 | 3 | 1 | 1 | 1 | 1 | 5 | 5 | 1 | 1 | 1 |
Cable channels are delivered to hardware stores in packages. Depending on the size of the trays, the packaging differs in the number of products and, accordingly, in the total footage. To calculate the total length of cable channels in a package, the number of products is multiplied by the standard length of one tray (2 m).
A table of parameters for one package, depending on the size of one box, is shown in the figure. Parameters of one package of electrical boxes, depending on their size
On a note. When purchasing boxes, it is advisable to purchase fittings for them (plugs, corners, branches, etc.).
Also, for household purposes, it is better to purchase single-lock products, as they will last longer than double-lock ones. This is due to the fact that the wall thickness of single-lock structures is greater, and, consequently, the products themselves are more durable.
Correctly sized cable channels will allow you to quickly install the system, and the additional space inside the box will make it possible to easily add wires to the system without the use of additional trays.
How to fix a cable duct to a concrete wall
During the construction of a house, electrical wiring is installed in a hidden way, under the plaster. A complete replacement of the electrical wiring is usually carried out during a major overhaul. In this case, grooves are made in the wall, into which the wire is laid.
But what to do when there is no opportunity or desire to engage in dusty wall slitting? Or do you need to connect a recently installed powerful electrical appliance, such as a water heater? In this case, many choose the open method of laying electrical wiring, and fastening to the wall is carried out using a cable channel.
Fixing the cable channel along the marked route
Fastening the electrical tray to the wall can be done with liquid nails, wood or metal screws, or dowel nails. It is recommended to screw in the fasteners in a staggered pattern. When using liquid nails, glue should be applied to the back of the box in a zigzag pattern.
Attaching the cable channel to the wall
Fastening the cable channel to the wall using self-tapping screws.
If you decide to install a cable channel in a wooden house or apartment with plasterboard partitions, then the installation must be done with special wood screws. The fastening step depends on what load will be placed on the plastic box, or more precisely, how many wires need to be stretched inside, and what their cross-section is.
As a rule, to securely fasten a cable channel to a wooden wall or drywall, it is enough to screw screws every 40-50 cm. If the walls are uneven, it is better to reduce the fastening step, this will hide all defects and gaps.
You should not choose too long self-tapping screws for installing the cable channel. To securely fix the box in the wall, it will be enough to screw in fasteners about 40 mm long. For screwing, it is best to use a screwdriver with a Phillips bit.
Fastening the cable channel to dowel-nails.
You will need the following tools:
- Hammer.
- Dowel-nails.
- Sharp knife.
- Level and pencil.
- Screwdriver.
To begin, draw a straight line on the wall (ceiling) (for walls at a level) and prepare dowel-nails for work, from which you need to cut off the plastic cap with a sharp knife. This is done so that the channel fits tightly to the wall. We will use a concrete drill with a diameter of 6 mm and, accordingly, dowel-nails No. 6.
Next, attach the cable channel to the line and punch it with a hammer drill, going deep into the wall to the length of the dowel. Insert the cut plastic insert and screw the dowel-nail with a screwdriver until it stops. The next attachment point is located 40-50 cm, the extreme one 5-7 cm from the edge of the box. Insert the wire into the channel and snap the cover on.
How to attach a cable channel with glue (liquid nails).
Fastening with glue is not very reliable; it is used where others cannot be used, for example, for fastening to tiles. You can combine it with others - with fastening with self-tapping screws or dowel - nails.
To glue the box to the wall, glue is applied to it in a zigzag line, then pressed against the wall along the markings so that the glue is imprinted on the surface, and removed. After a few minutes, when the liquid nails have set a little (the time depends on the specific type of glue, this can be read in the instructions on the package), the box is pressed firmly against the wall again.
Remember that dismantling a cable channel glued to the wall with liquid air without damaging the coating or the electrical box itself is impossible. The cable can only be laid after the adhesive has completely hardened.
Fastening the cable channel to metal.
If there is a need to attach a cable channel to metal less than 2 mm thick or an aluminum profile, then we advise you to use metal screws, also called “bugs,” for fastening. There is nothing difficult about installing an electrical box on a metal surface; the main thing is to choose good screws and charge the screwdriver.
This is interesting: Non-return valve for sewerage - characteristics and installation
Wall mounting options
There are several ways to attach cable ducts to a ceiling or wall:
- Glue the structure with superglue or a special solution. Not the most reliable option, since under the influence of moisture or other harmful factors, the integrity of the adhesive base may be damaged and the cable channel may come off. And there is also no way to dismantle without harming the repair.
- Screw to the surface using galvanized self-tapping screws. Suitable for wooden or plasterboard surfaces.
- For a concrete or brick wall, dowel-nails are used.
- Combine the method of gluing and screwing in screws.
In specialized stores you can find a separate type of cable channels, which have one adhesive side. For their installation, no additional devices are required, only the material itself.
Important! The boxes must be cut with the lids snapped on them. And when constructing several sections into one route, ensure that the joints match.
Stages of wiring installation in CC
The process of installing wiring in cable ducts is divided into the following stages:
- Development of a wiring diagram for the premises.
- Drawing up a drawing of the CC route.
- Carrying out CC markings on the wall, during which the installation locations of sockets, switches, mounting boxes and the expected locations of adapters are determined.
- Drawing up a specification for the drawing with a complete list of required accessories for the marked QC route.
- Purchase of CC and accessories.
Should be considered! The standard length of the CC box is 2 meters, so the actual length of the purchased CC will exceed the nominal length of the route by 10-12%.
- Preparation of QC for installation work. Experts do not recommend immediately cutting all the material into assembly sections for the entire route, since after the work is completed, any deviations will certainly be revealed, especially on the lines where the wall meets the floor or the wall meets the ceiling.
- Installation of CC boxes along the marked route. QC installers work according to the formula:
- cut off - exposed;
- secured with fasteners;
- installed the accessory;
- further in the same sequence: cut - installed, etc.
Important! Fasteners for installing KK boxes are selected in accordance with the material of the surface to which the KK is attached (plasterboard, brick or concrete, wood)
- Laying and securing wires in the CC box.
- Fixing lids on QC boxes.
- Installation of sockets and switches.
Installation nuances
Creating convenient and high-quality wiring in an apartment or private house ensures reliable and safe connection of all electrical appliances. Before deciding how to attach the cable channel to the wall, and which screws are best to install the boxes on, it’s worth planning.
Important! You can plan the route for laying wires in any direction and with a different number of turns, but you need to make sure that there are no places where the wires could be damaged.
General recommendations include:
- place the switches on the side of the door handle at a height of 90–160 cm from the floor;
- a minimum distance of 15 cm is required from the ceiling, and 10 cm from the window;
- horizontal wiring lines should be located at a distance of at least 30 cm from the floor.
Beginners installing cable ducts for electrical wiring of any kind should stock up on material 10–15% more than calculated in the drawings.
Advice: do not cut the entire box into pieces at once: during the fastening process, shifts may occur upward or downward and parts of a different length will be required.
Prerequisites for use
1. This design is necessary if you plan to lay electrical communications yourself, without resorting to the help of specialists, because its installation does not require specific skills.
2. If the surface of the walls does not allow grooves, for example, in the presence of finishing or if you have to install wiring on a wooden, metal brick surface, or on a plasterboard ceiling, the cable channel has its undeniable advantages over other installation methods.
3. Laying electrical wiring inside plastic boxes is a budget-friendly way to ergonomicize electrical communications. As a rule, such boxes are relatively inexpensive, but they can effectively disguise the wires and protect them from injury.
4. The channel method of installing electrical wiring allows easy access to this system, since the box has a special, easily dismantled cover - a plug, equipped with a special snap lock.
5. The speed of installation will allow you to attach the cable channel to the surface in a matter of hours.
Useful tips
1) The optimal distance between fastenings is 40-50 centimeters, but the more wall irregularities, the more often you will have to take a step. This is necessary in order to reduce the number of gaps between the box and the wall.
2) After measuring and marking the route, in order to facilitate connections between individual elements and ensure a more aesthetic appearance of the structure, calculate the number of additional materials and joint parts (angles, tees, plugs and connectors).
3) If you are attaching a cable channel to a metal surface, do not forget that metal screws are used only if the thickness of the base is no more than 2 mm. So-called “bugs” are well suited for these purposes.
4) When screwed, self-tapping screws with a special tip drill holes for themselves, so additional drilling of the base is not required.
5) For drilling materials such as concrete and brick, drills with pobedit tips are used.
Note! It is unacceptable to use drills for materials softer than concrete or brick.
6) Using a building level when marking will allow you to perform this action more accurately and accurately.
7) If you decide to attach the cable duct using glue, choose an adhesive that is compatible with the materials of both surfaces being glued.
Types and purpose
The materials from which the boxes are made usually have fire-resistant characteristics. This is usually galvanized steel, aluminum or plastic.
1.Plastic cable channels are quite versatile in use, as they have good flexibility and softness of the material, as well as exceptional moisture resistance.
These qualities allow them to be used on relatively uneven surfaces, in rooms with high humidity or outdoors. They can be easily sawed using a regular wood saw with a medium-sized tooth. In addition, the plastic profile is the cheapest existing box option.
When choosing plastic boxes, you should consider the thickness and quantity of your wiring. It is recommended to use a separate cell inside the channel for each wire.
Note! Cheap cable channels that have only one lock are very short-lived, since the plastic on the moving bends easily wears out, so it is better to buy devices with two locks.
2. Products made of steel are durable and have decorative colors, which allows you to choose the box of the required color.
This profile is made of galvanized steel to prevent corrosion and increase the service life of the structure.
When choosing a steel channel, you need to pay attention to the presence or absence of scratches on the body or cover. Since damage to the protective layer can lead to oxidation of the metal, their presence on the product is not permissible, especially if you are going to use the product for outdoor installation.
The steel frame profile often has a perforated base to avoid drilling holes when installing the structure.
3. Aluminum boxes, like steel ones, have excellent fire resistance properties, which allows them to be used in industrial premises. It is also worth noting that aluminum is a very light metal, so using cable ducts made from it allows you to reduce the load on the wall surface.
Do not forget that the cable channel made of metal should be fastened on a flat surface, in order to avoid deformation and breaks of the profile and ensure its tight fit and easy latching of the cover lock.
Note! It is better not to purchase aluminum products with excessively thin walls. Since this is an extremely soft material, the locks and latches on such boxes will quickly fail. The choice of shape and color depends only on your preferences and interior features.