The main task of the vapor barrier shell is to protect the insulation layer from the penetration of household fumes. In the path of water suspended in the air, which contributes to the rotting of roofing materials and a significant reduction in insulating properties, it is necessary to build a reliable barrier.
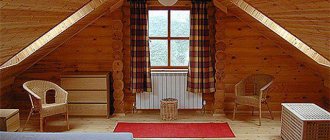
For attic roofs, thermal insulation is installed along the top floor. In such cases, vapor barrier is performed on the ceiling, and not on the pitched planes. They arrange it in a special way, which should be familiarized with by independent roofers and zealous owners of country property.
How to choose the right materials to put a vapor barrier on the ceiling
Vapor barrier, as the name implies, is a material that can hold not water, but steam. Its purpose is to protect the insulating material from moisture.
The principle is this: warm air rises to the ceiling, collides with the cold ceiling and cools. In this case, the moisture contained in the air settles in the form of condensation, but not on the ceiling itself, but in the ceiling material. If condensation penetrates into the insulation, the latter will lose its thermal insulation properties.
The vapor barrier allows air to pass through, but retains moisture from it, thereby protecting the insulation. There are many types of such material with very different characteristics:
- film roll materials are the simplest option; this category includes polyethylene and polypropylene film, the latter is stronger and more practical;
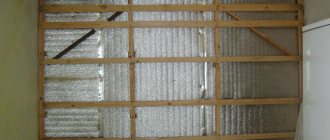
- foil sheets - the material not only protects the insulation from moisture, but also reflects heat back into the room due to the foil, the sheets can be either single- or double-sided, the material is only laid end-to-end, and the seams are sealed with tape;
- rolled materials with controlled action - partially allow steam to pass through, this option is usually used for vapor barrier of outbuildings, the membranes provide a one-way effect: in this case, moisture is removed outside, but does not penetrate into the thickness of the insulation; in this case, it is important to correctly determine which side to lay the vapor barrier on the ceiling, since one- or two-sided membranes work differently;
- liquid material - there are penetrating, painting and coating vapor barriers; the first is a mixture that forms an elastic protective layer when hardened, the coating is a one- or two-component composition that is applied to the ceiling; it is intended for rooms with high humidity; paints are varnishes and special paints that have a vapor barrier effect.
For wooden buildings, a recommended option is glassine. This is thick cardboard with a layer of bitumen applied to one side. The material perfectly protects the insulation from moisture and is inexpensive.
Important! When using liquid vapor retarders, you must carefully study the manufacturer's recommendations. The materials are intended for use in different conditions.
Application of varnishes and mastics
Mastics and varnishes are applied to concrete floor slabs. Their purpose is the same as that of rolled materials, i.e. they protect the insulation from moisture getting into it. The application technology is simple: using a brush or spatula.
Before starting work, you should carefully read the attached instructions, paying special attention to the temperature conditions for the work. Solvents used in varnishes and mastics are fire hazards, so special attention should be paid to preventing fires.
Tools needed to properly install a vapor barrier on a ceiling
Installing a vapor barrier is not difficult. This is simply attaching a film or membrane to the sheathing. To do this you need the simplest tools:
- knife or scissors to cut rolled materials to length;
- construction stapler - fastening with staples is the most convenient, but if you choose fastening with nails, you need a hammer;
- when using liquid vapor barrier, you will need a brush to apply the mixture;
- adhesive tape - single-sided or construction tape for securing overlapping material; if foil sheets are used, then it is better to choose metallized tape.
You will also need measuring tools like a tape measure.
Selection of insulation depending on the type of base
When deciding on the type of material, you need to take into account the type of base base, its evenness, the heat insulators used and the type of structure in general. For temporary objects, it is better to choose insulators that can withstand temperature changes and will not crack due to frost, while in a permanent home, products that provide ventilation are ideal - they maintain a comfortable microclimate.
For wooden ceilings
It is better to cover wooden surfaces with rolled materials that insulate structures and do not interfere with ventilation. Suitable films are polyethylene, polypropylene, membrane, foil materials and glassine.
On a note! To avoid the accumulation of condensation on the film, a gap should be left between the insulation and the ceiling for ventilation.
For concrete ceilings
All products that are attached to a base are suitable here: mastics, varnishes, foil materials. The latter are fixed both to the ceiling with glue and to the lathing. If a frame is formed, then in addition to holding foil insulators, it will serve as a base for attaching the finishing cladding: gypsum plasterboard sheets, plywood, and other materials.
Preparing to install vapor barrier on the ceiling
Preparing the floor for laying a vapor barrier begins not when the material is being installed, but at the stage of repairing the wooden ceiling.
- Remove the old finish, if any, being careful not to damage the beams and ceiling. The surface is cleaned of dirt and dust and carefully inspected. If rot or mold is found, these areas should be removed.
- The wood is primed with antiseptic compounds in order to prevent rotting. Then the overlap is treated with fire retardants. These substances reduce the wood's ability to ignite. If it is necessary to install lathing for insulation, then the slats are also treated with antiseptics and fire retardants.
- The thermal insulation layer can be quite thick and match the height of the joist. In this case, a counter-lattice should be installed specifically for vapor barrier. According to the installation conditions, there must be a ventilation gap between the vapor barrier and the heat insulator.
Depending on the characteristics of the ceiling, additional preparation steps may be necessary.
Video description
This video clearly shows the consequences of improper formation of a vapor barrier on a ceiling in a wooden house:
There are several different techniques used to attach the vapor barrier to the supporting structure:
- Hardware.
Experts consider staples for a construction stapler to be the best option. This way, the material is fixed to wooden supports quickly, and damage is caused to a minimum. Some craftsmen place strips of cardboard under the staples before “shooting” in order to soften the blow and prevent through penetration.
In any case, it is recommended to additionally secure counter-lattice slats on top of the ceiling vapor barrier from inside the room. They are needed to reduce the likelihood of the film breaking due to stretching. Additionally, this creates a ventilation gap or space for laying utilities.
- Scotch.
This involves the use of double-sided adhesive tape with a foam backing. It is better to choose from a group of plumbing samples, as they last longer under conditions of temperature and humidity changes. For reliability, you can supplement the canvas with a counter-lattice.
Using vapor barrier tape to fix the canvas Source bauemotion.de
How to lay a vapor barrier on a ceiling
Vapor barrier materials are very diverse. To install them correctly for maximum efficiency, the following factors should be considered:
- side of laying the vapor barrier - for some materials this does not matter, but if, for example, a double-sided membrane is used, attention should be paid to this issue, such a film does not allow water to pass through only on one side;
- docking - the vapor barrier coating must be solid; for this, different techniques are used;
- ventilation gaps - vapor barriers cannot be laid close to the ceiling insulation.
The purpose of the room and the nature of the wooden ceiling are also important: it separates the heated rooms or living room and attic.
Which side to put the vapor barrier on the ceiling
Which side to lay the vapor barrier on the ceiling depends on the type of vapor barrier chosen. The exception is coated and painted material, since in this case the functionality is ensured by the vapor barrier composition.
For all other options, the following recommendations apply:
- with a double-sided film, one side is rough and the other is smooth; the material is laid with the rough side outward and the smooth side inward; the outer layer retains moisture but allows it to evaporate; the smooth layer is impenetrable to steam and does not allow moisture to pass into the insulation;
- one-sided polypropylene film with a laminated layer is mounted according to the same principle: the smooth side inward, towards the insulation, and the regular side outward;
- ordinary plastic film has both smooth sides, so how exactly it is laid does not matter;
- foil sheets are laid with a metal layer outward, this option is designed to retain heat in the room, and it is the foil layer that reflects thermal radiation back into the room.
Important! There are always exceptions. For example, Izospan film is laid contrary to generally accepted recommendations: with the rough side inward and the smooth side outward.
How to install a vapor barrier on the ceiling
The vapor barrier coating must be a solid structure. Even fastening with nails can disrupt its vapor barrier properties:
- if a coating vapor barrier is used, then make sure that there are no untreated areas left; it is necessary to also cover the upper section of the wall in order to isolate the joints between the ceiling and the walls;
- films and membranes are laid with an overlap of 8–15 cm and the joints are taped, the sheets are laid as closely as possible to each other, the seams are taped.
If a sheet vapor barrier is performed, then a special profile can be used. The latter can be done with your own hands.
Ventilation gap when installing ceiling vapor barrier
There should be a ventilation gap of 50 mm between the layer of insulation and the vapor barrier on the ceiling. If the height of the logs is greater than the thickness of the insulation, such a gap is formed automatically. If the values coincide, then a wooden sheathing 50 mm high is first attached to the logs, and then a vapor barrier is laid on top.
A ventilation gap should also be maintained between the vapor barrier coating and the finishing of the ceiling. They use the same technique for this: install a sheathing of thin slats.
What are the material options?
There are a number of specialized materials on the market:
- foil - have a thin layer of aluminum, the smooth side is attached to the insulation;
- membranes - durable, expensive materials, can pass air in one direction, must be installed, like the previous option;
- polypropylene - withstands different temperatures well, the material is durable, is mainly produced in two layers, and is laid in the same way as the previous ones;
Polypropylene films Source miremonta.ru
- polyethylene - the most inexpensive option, thickness not less than 150 microns, short service life and low strength, deteriorates in rooms with constant high temperatures;
- roll waterproofing - used to protect structures, can be laid on either side, has a high level of protection on both sides.
The most expensive materials are coated with aluminum on one side. However, they are the most effective in combating steam and are durable.
How to attach a vapor barrier to the ceiling
Ceiling installation includes 3 stages: waterproofing, insulation and vapor barrier. This is the last layer before finishing. Its installation is determined by the type of material used, as well as the design of the ceiling.
Fasteners for proper installation of vapor barrier on the ceiling
Construction staples are preferable for fastening the covering. They are much thinner, provide the same reliable fixation of the film, but do not violate the vapor barrier properties of the coating. Thick cardboard or other similar material should be placed under the staples.
It is allowed to use nails with wide heads. It is better to choose galvanized ones, as they are resistant to moisture and will last much longer.
Scotch tape also serves as a fastening element. It is used both for attaching film to joists and for vapor barrier of joints. In special cases, a profile is also used to connect sheets to each other.
How to install and secure different types of vapor barrier on the ceiling
In order for the vapor barrier to effectively perform its functions, it is necessary to follow all the rules for waterproofing during installation:
- during installation, it is allowed to use vapor barrier materials that are less resistant to water than waterproofing materials;
- it is very important to achieve a solid surface; for this, the film is laid overlapping, the sheets are glued with tape, and so on;
- it is necessary to exclude moisture in the vapor barrier coating; work cannot be carried out during snowfall, rain, or fog;
- when laying rolled vapor barrier, the material must first be kept in a warm room for at least 20 hours;
- The film should not be stretched too much, it should sag slightly;
- When vapor barrier corners, be sure to use solid material.
Important! When choosing different types of coatings, the list of rules is supplemented with recommendations from the manufacturer.
Manufacturers
There is a huge selection of films from different manufacturers on sale. At the same time, high-quality vapor barriers can be found not only in time-tested brands. This means that when choosing a little-known supplier, there is a risk of receiving material that is not of the same quality as planned.
No, not a marriage, but a combination of characteristics. The conclusion is simple: either you need to have a recommendation from acquaintances, friends or professional builders regarding an unpromoted brand, or you still need to buy a product from a well-known company.
Promoted brands include:
"Izospan" - produces polypropylene films of all types (A, B, C, D, F). Products:
- elastic;
- UV resistant;
- with a wide range of operating temperatures;
- environmentally friendly.
You can buy "Izospan" DM for 44 rubles/m2, "Izospan" C - 25 rubles/m2, "Izospan" FB - 35 rubles/m2.
"URSA SECO" (). Under the URSA SECO brand, membranes of type A and AM, films B and D are produced. These are high quality products designed to protect various structural elements of a building from steam. Effectively performs its assigned functions throughout the entire service life of the insulation.
Membranes can be purchased from 110 rubles/m2, films in the range of 11-19 rubles/m2 (depending on the density of the material).
"TechnoNIKOL". For the ceiling, a universal film is used, consisting of 3 layers, the top and bottom of which are polypropylene. Price 1 m2 - about 20 rubles.
"Axton" is a trademark of the French company Leroy Merlin. Membranes (type A) and films of types B, C and D are produced. For the ceiling you need to buy membranes (price starts from 21 rubles/m2) and film type B for 15-17 rubles/m2.
In addition, the following companies should be noted:
- "Ecolife";
- Tyvek;
- "Utah";
- "Ondytis".
Sometimes they talk about such criteria as resistance to ultraviolet radiation and the possibility of leaks under the weight of rainwater. Such characteristics have nothing to do with the ceiling.
How to properly install a vapor barrier on the ceiling: step-by-step instructions
The finished vapor barrier in appearance resembles a pallet with sides. The coating should cover not only the insulation on the ceiling, but also the gap between the heat insulation and the walls. In addition, the film must cover each beam.
The first stages of finishing the ceiling are carried out as usual. The wooden surface is cleaned, treated with antiseptics and fire retardants, and communications are installed. Then the ceiling is waterproofed and insulation is laid on it.
- Laying begins from any wall. The roll or sheets are cut to size and secured to wooden beams with staples. In this case, a gap must be maintained between the heat insulator and the vapor barrier. If necessary, pre-attach the sheathing.
- The film or membrane must cover each beam. There are two ways to do this. A simpler option involves fastening the material around the beams. In this case, the canvases are laid perpendicular to the beams, taking into account some recess into the interblock space. If the length of the film is not enough, gluing the vapor barrier is allowed.
- Another option: cut the film into fragments of the appropriate size; you need to wrap each compartment separately. All seams and joints are additionally taped with tape. As a rule, this method is used for vapor barrier of panel-box ceilings. Laying is done with an overlap. The tolerance on walls is 10–15 cm.
- The joints are sealed with tape according to the following scheme. First, glue the seams between the canvases. To do this, bend the overlap, secure the edge of the vapor barrier with tape, then remove the protective strip from the adhesive tape and attach the overlap on top. The joints with the wall are sealed in the same way. In this case, you cannot stretch the film; it should sag by about 2 cm.
- Then the second and third layers of vapor barrier are laid, following the same rules. Make sure that the joint of the next layer does not coincide with the seam on the first layer. The displacement should be at least 30–40 cm.
Foil material, especially sheet material, is mounted according to a different scheme.
Content
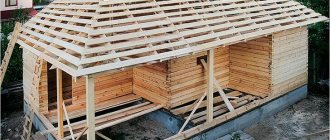
If it is not planned to install a heated attic within the roof structure, there is no point in worrying about reducing heat loss through the slopes. The thermal insulation layer is then laid on a slab reinforced concrete attic floor, placed in the spaces between wooden joists or in box sections installed close to each other in panel versions.
Regardless of the insulation method and the type of base being installed, a vapor barrier material must be laid under the heat-insulating layer. It will prevent the penetration of steam into the roofing pie, which is regularly released during breathing, cooking, cleaning, etc., and will protect the wooden elements of the roof frame from the appearance of fungus and premature failure.
Previously, when there were no insulating materials that are popular today, oily clay played the role of protection against evaporation. It was this that was applied in a continuous layer to the ceiling. A soil-vegetative layer was laid on top of the ceiling as insulation.
The thermal effect of such a design was the most effective. Neither frost, nor water, nor heat penetrated into the housing. Wooden elements, adjacent to natural organic matter, served for a hundred or more full years.
Now the ancient technology, together with its natural components, has been replaced by new techniques and a wide range of all kinds of insulating materials. However, they do not have an effect equal to the clay-soil tandem.
In addition, their production uses synthetic sources, the direct contact of which with wooden structures is extremely undesirable. Therefore, when laying insulating layers on the floor, you should strictly follow the technological requirements that will be discussed in this article.
