How can you dry wood?
When approaching the matter directly, the question immediately arises about how to remove moisture from wood.
To prevent the boards from warping, it is important, first of all, to choose the right time of year. Autumn or winter is best suited for this.
It is at this time that the largest number of blanks falls. This is due to the small amount of moisture in the trees, and, therefore, the high quality of the prepared boards. Thanks to this, you won't have to do most of the work. Just dry the boards a little. But as? There are several easy-to-use options, the decision to use which will depend on the conditions under which the workpieces are produced.
Remember that home drying is different from industrial drying. Of course, self-dried boards will be inferior to the same ones, but processed by industrial equipment. However, do not be upset: with some effort, you can achieve excellent results.
The first method of natural drying of wood is standing drying. If you decide to use this method, we recommend starting work in the spring and then continuing in the summer. It is at this time that the tree is most susceptible to natural drying. You need to remove a fairly wide ring of bark near the root. This will stop the flow of water to the crown. Gradually the tree will dry out. And the foliage will help him with this by drawing moisture from the trunk. After some time, you can fell this tree and saw it into boards.
There is another option for naturally drying wood. In this case, you need to first fell it, then clear two-thirds of the bark, leaving branches and leaves. For two weeks, the foliage will pump out moisture, drying out the trunk. This is a fairly short period of time, considering that simply leaving the boards in the air would take months to dry. However, the most effective method at the moment is considered to be drying the boards in the open air. You need to place them under a canopy, protecting them from precipitation and direct sunlight and first installing a flat base made of logs, thick pipes or bars under the canopy. You lay the boards on a pre-prepared base. They should lie across the foundation bars
Pay attention to the distance from the ground to the bottom boards. It must be at least 30 cm
It is preferable to cover the ground with roofing felt, straw or hay before installing the base and laying the boards in order to protect the boards from the penetration of excess moisture from wet soil.
Try to lay out the foundation beams so that the bars or pipes are in the same plane. It's okay if it is not positioned strictly horizontally. It is much more important to maintain one plane. This is necessary to avoid deformation of the boards due to heavy load.
In this state, the boards dry for months. However, this process accelerates during the summer months.
Don't forget to trim the ends of the boards. This can be done with a lime solution of a creamy consistency with some addition of wood glue. Drying oil, oil or paint can also help you when processing the ends.
The sides of the stack must be covered to avoid moisture from slanting rain. It is also necessary to protect the boards from blowing. A covered stack can handle this easily. Use spacers between the boards, spaced 1 m apart.
This method is good because it prevents cracks from appearing in the wood.
Did you know that concrete is excellent at drawing out moisture? Then you will not be surprised that the next method directly uses concrete for high-quality drying of wood. The boards are laid on a clean, dry cement floor and then turned over several times throughout the day. So, the boards will dry much faster. If you are a craftsman who knows the mechanical properties and structure of wood, then using an axe, chisels, saw and other tools you can direct the drying process at your discretion.
When drying boards at home, do not forget about the sufficient duration of this process. Do not forget to protect the boards from precipitation and direct sunlight. If you decide to dry wood indoors, ensure that it is regularly ventilated. But avoid drafts. After all, wood doesn’t like this. Then you will not be able to avoid cracks. It is also unacceptable to have any heating devices in the room. Being in close proximity to metal boards can cause them to darken.
You can safely dry small boards in your apartment. But not on the balcony or loggia! The ideal place for them is the mezzanine. They are stacked in stacks, arranged with slats and bars. Keep in mind that boards that have just been sawn darken upon contact and then begin to rot.
Raw firewood: disadvantages, measurement, proper drying
The moisture content of wood burned in a wood stove directly affects efficiency and emissions. To achieve high combustion efficiency, humidity levels should be less than 20%.
Excess moisture in wood reduces the ease and efficiency of burning. Water in wood reduces heat output because most of the energy is used to heat it up and boil it off.
Burning wet wood produces smoke containing soot, which causes carbon deposits in the chimney, increasing the likelihood of a chimney fire. The smoke is mostly unburned wood containing particulate matter, leading to increased emissions and air pollution.
Dry wood (less than 20% moisture content) produces good heat and combustion that produces little smoke. This will reduce conflicts with neighbors where smoke from wood stoves has become a serious problem.
The efficiency and emissions of wood stoves are directly related to the moisture content of the wood used.
Traditionally it is believed that harvested wood should be split, stacked, covered and dried for 6-12 months or until the internal moisture content reaches 20%. Many factors affect drying time, including local climate, time of year the wood was harvested, and species.
Unfortunately, many buyers don't know how to tell if wood is properly dried.
How to measure moisture in firewood
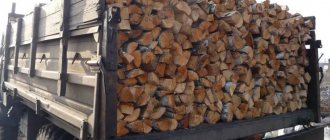
The simplest thing is to look at the strong splitting from the ends, as in the picture at the beginning of the article. If there is one, then it can be taken as an indicator of long-term drying.
However, the best way to ensure that the wood is dried correctly is to use an electronic moisture meter, which can be purchased at most home stores, wood stove retailers, or online. Such devices are quite inexpensive and cost from 1,500 rubles.
Before purchasing firewood, you should ask the seller when the firewood was split.
To make an accurate measurement with the device, split the log and check the moisture content in the middle. The middle should be close to 20%, but if it is a little higher, it will most likely dry out in the near future, provided that it is stored normally under a canopy.
When purchasing wood from a supplier who claims the wood is seasoned, split a random log and measure the moisture content BEFORE you start unloading the truckload of wood.
Otherwise, it will be difficult to make any claims after unloading. If the wood is very wet (more than 30%), it is not seasoned and it is best to refuse delivery or negotiate a lower price, understanding that the wood will take additional months to dry.
It may be worth visiting the firewood supplier's warehouse and measuring the moisture content of the firewood before arranging delivery.
American researchers conducted an experiment with freshly sawn wood, split into firewood, and aged for up to a year. Based on the results of the work, the following conclusions were made:
- The recommended drying time for producing well-seasoned firewood (20% moisture content) depends on the species, size of the wood pieces and their split.
- Actual drying time may vary by location as more northern regions or areas with high humidity require longer drying times.
- The larger the internal surface area, the faster the log will dry. Small, short wood logs dry out faster than those that have a more exposed surface and smaller interior. This is why firewood that is not split and left in logs will not dry out noticeably quickly to the point of developing large cracks.
- The denser the wood, the slower the processes of both drying and water absorption.
- The only way to determine if a firewood supply is well-seasoned is to measure the internal moisture content in the middle of a freshly split log.
- A moisture meter is important in determining the moisture content of firewood.
- The benefits of well-seasoned firewood include maximizing the heat from the wood you purchase.
- Firewood with higher humidity levels will burn poorly, causing the loss of much of its heating value as the heat is used to evaporate moisture. Accordingly, less energy remains for heating the house.
- Properly dried wood saves money and/or reduces the time it takes to prepare more wood for heating.
- Another advantage of quality firewood is that its combustion minimizes emissions from the stove. Wood smoke is harmful to people's health and can worsen relationships with neighbors.
The drying time of firewood can be reduced by following these steps:
- Trees should be cut down in late summer, autumn or winter, when the sap content in the tree decreases.
- Build a wooden shed, or at least cover the top of the wood pile so that air flow is maximized without precipitation getting on the wood and slowing down its drying.
- Place firewood on pallets or something similar to prevent water from getting into the wood from the ground.
- Place the woodshed in a location that receives sunlight all day.
- An open place will give better air circulation.
- Ideally, a tree should be cut down for firewood at least one full year before it is used.
How to dry firewood
A well-dried log has large cracks and makes a special dull sound when struck against another log.
Drying firewood in a matter of days will not be easy; the classic option of quickly drying birch firewood in the open air takes about 3 months. Firewood is stored in a woodpile located in a well-ventilated area so that it does not touch the ground. Then they are covered with a tarpaulin.
Quick drying at home near the stove is possible with the help of a homemade woodpile, where you can stack a small number of logs so that the wood is well ventilated. If there is no woodpile, the firewood can be simply stacked in the form of a square tower, stacked horizontally on top of each other and alternating rows perpendicularly.
You need to take care of drying the firewood in advance so as not to do it in a hurry. And when storing firewood near the stove, remember the fire safety rules and do not place the woodpile in close proximity to fire and heat.
Why do you need a woodpile?
Of course, initially, woodpiles served only one purpose: drying firewood in the open air. A little later, the courtyards of serfs began to shrink, and in order not to lose part of the usable space, firewood began to be stacked as compactly as possible. That is, there is also a space-saving function.
Nowadays, another interesting function has appeared - decorative. Many designers place chopped firewood near the wall of the house, completely covering its area and it looks very cool.
The woodpile is also placed in the yard in the form of a wall, thereby delimiting the space on the street.
Atmospheric drying of wood
Complete drying in this way is designed for 2-3 years. If the carpenter has little time, then this method will not work. The undeniable advantage of drying in natural conditions is its ease of execution and minimum costs.
Atmospheric drying is considered using the example of the experience of the Carpentry workshop.
Before drying, lumber is divided by grade into two packs to make it convenient to use.
Pack of quality lumber
The boards in this pack are wide, straight, without knots, and have the correct texture.
Boards with defects are placed in a separate pack.
Pack of 2 grade lumber
Choose a flat surface for drying. There should be no holes, stones or roots on it. Make a solid foundation. For this purpose, rails, pipes, and beams are used. In addition, waterproofing from roofing felt or film is installed. You can place a stack of boards on a ventilated hill, for example, on the roof of a barn.
The lumber is laid on the prepared base. For the first row, a board with wane and flaws is suitable.
A gap as thick as a board is left between the boards. The rows are separated by spacers. The gaskets are made the same size and the pitch is no more than one meter. At the extreme points of the stack, the spacers do not protrude beyond the ends of the boards.
Laying a stack of lumber
To prevent the ends of the lumber in the stack from cracking, they are painted over with paint, drying oil, PVA glue, and lime.
Ends coated with PVA glue
Roofing material, such as slate, is laid on the top layer of boards. Sediment must flow freely and not fall on the stack. Sometimes they make protection on the leeward side so that slanting rain does not wet the stack.
Stacked lumber stack
The duration of drying using this method depends on the type of wood and environmental conditions. Under good environmental conditions, up to 75% of moisture is removed from lumber with minimal deformation.
Not earlier than a year later, boards from the stack are brought into the room, and before use they are dried in a chamber to a humidity of 6-8%.
Video about the principles of natural drying of wood:
How long will it take for firewood to dry in winter?
In ideal conditions, for example, like in my terrace, the birch has time to dry out in 30-40 days. Its humidity becomes 22-25%. Despite the fact that, brought from the forest, the humidity is 50-60%.
I stack the logs dried on the terrace near my stove. There they dry to 15-18%. This approach allows you to save on chamber drying.
If you have an old shed and you have stored firewood there, then everything will depend on the frostiness of the winter. Typically, in 30-45 days the dies will dry to 25-30%. It is usually not possible to dry them in the shed any longer.
If you have placed firewood under the canopy of the woodshed. It should be of such a size that neither snow nor rain falls on them. In such conditions, up to a humidity of 30%, you can dry the firewood in 60 days.
price/practicality rating
Applying products to wood
An effective method for removing unnecessary vegetation is to apply appropriate preparations to the bark. Suitable means for this option are:
- Glyphos;
- Roundup;
- Tornado;
- Arsenal.
Advice. This technique is best suited when selective removal of a small number of trees is required.
Depending on how thick the tree’s bark is, the toxic substance is applied in different ways:
- directly to the surface of the bark;
- through the cuts made.
The first one is suitable if the tree is young, with thin bark. In this case, the drug is applied to the surface of the trunk at a level of half a meter from the ground. Lubrication is continued until the liquid is completely absorbed.
If there is thick bark, the first option will not work. Here you will need to make cuts. It is better to use an ax as a tool. With its help, deep cuts are made around the trunk. Deforested areas are watered abundantly with herbicide. Be sure to take into account that the procedure will take effect quickly in cool, dry weather. Atmospheric precipitation can wash away the toxic liquid and all the work will go down the drain.
Useful tips and tricks
Below are some helpful tips to help you remove your unwanted tree.
- The person who destroys trees with chemicals bears full responsibility for the final effect.
- Remember that the accuracy of the application can be improved by adding a coloring agent to the herbicide. Trees that have been treated this way are much easier to track, so you are less likely to miss them when re-treating them (if necessary).
- Trees can “cork” cuts and damage, thereby protecting themselves. In other words, a protective layer is formed around damaged tissues, which can reduce the effectiveness of the drug used. For this reason, when using method No. 1, the chemical must be applied immediately after making the cuts.
The cuts seem to heal. The herbicide released from the tree can be absorbed by neighboring plants. This should also not be forgotten. Some trees may have one vascular system (this is a consequence of root fusion). This often happens between members of the same species, but not always. Be that as it may, the herbicide can be transferred from the tree being destroyed to one that is not subject to destruction.
And such closure of roots in trees of the same species occurs quite often.
How to light a fireplace correctly
Firing a fireplace with wood is an enjoyable activity, provided that it is done correctly and in compliance with all fire safety measures. The fireplace is lit using easily flammable materials (paper, wood chips). Must have traction. With a burning match and an open firebox, the flame should deviate towards the chimney - the draft is in order.
The best fuel is birch firewood, which heats well and produces less carbon monoxide. Larch firewood also produces a lot of heat, but it produces much more carbon monoxide, which requires more careful monitoring of the firebox. In principle, coniferous and aspen firewood and other logs are suitable - the main thing is to use DRY FIREWOOD, and the logs themselves were the same size.
At the beginning of the kindling, wood chips, paper and several thin logs are placed on the grate. When the flame flares up, you can add larger pieces of firewood, placing them horizontally or in a pile. The main thing is not to overload the fireplace with wood, and wait for coals to form so that new portions of logs burn better.
The main thing in a sauna is the stove. If we are dealing with a Russian bathhouse, we need to take care of the firewood. In Russia, bathhouses are almost always heated with wood, birch firewood - this firewood is the most colorful and gives a good “spirit”. It is important to arrange the wood in the stove so that it burns evenly, so that the fire does not go out and hot coals are formed.
There should be no strong carbon monoxide flame on the coals. The heat in the bath should not be strong, but uniform, then the walls and ceilings will warm up evenly, and dampness and foreign odors will disappear. In order for the stove to heat well, the ratio between the volume of stones in the stove and the total volume of the steam room should be 1:50.
Well-heated stones glow with crimson light. Applying hot water to the stones increases the heat in the steam room. Steam, turning into liquid, settles on the shelves and absorbs bath odors. The temperature in the steam room is set to your desired temperature and it is very important that the steam room is dry. To determine whether the steam room is well dried, those who know the steamer apply hot water and raise their hand over the slightly open door.
If it doesn’t burn your hand, then the steam room has dried well. Close the door, time to add hot water to the stove. There are many ways to obtain useful steam. Still, there are general rules: you need to splash water on the stones carefully so as not to flood the stove; try to let the water fall on the stones like a fan, capturing as much of it as possible.
How to store fuel
The house is heated with dry logs containing up to 25% moisture. Natural damp wood is characterized by 55% moisture content.
In order for birch firewood to dry perfectly, you will have to put it in a woodpile, following several rules:
- the dies are pinned 8–11 cm in size;
- the woodpile should be placed in a sunny place, well blown by the wind;
- the ground under the woodpile has high-quality drainage and slope;
- sheets of slate, several layers of branches, etc. should be placed under the logs;
- It is better to fold the dies with the bark pointing down so that they dry out faster;
- Gaps should be left between the logs.
Logs can be stored chopped in a good woodshed for 7 years, and then the process of darkening and rotting begins. In the case of chamber drying, firewood is stored for 10 years without changing its structure.
Drying time
It all depends on when the logs were harvested. Firewood stored in winter takes 5–6 months to dry, and wood collected in summer takes up to 10 months. Timber harvested in spring or autumn takes the longest to dry.
A freshly cut tree has a moisture content of 60–80%. After the branches are removed, the trunks are dried for about a year. During this time, humidity drops to 40–50%. The material becomes lighter and is removed from the plots. At the industrial site, the wood is sawed into logs and then split.
The wood in the woodpile is blown by the wind, and the humidity drops to 35–45%. These are logs of natural moisture. They are called this because drying chambers are not used for drying.
Wood humidity
Based on moisture content, wood is divided into several categories:
- Alloy: 80% and above. This is wood that was rafted down the river or was in the water for a long time.
- Freshly sawn: 45-80%. Wood that has been recently cut and still contains natural moisture.
- Air dry: 20-45%. Wood that has been naturally dried in the open air.
- Room dry: 7 – 20%. Wood that has been kept in a warm and ventilated room for a long time or dried in a drying chamber as fuel briquettes.
- Absolutely dry: 0%. Wood that has been thermally treated at high temperatures.
The optimal moisture content of wood, which can be achieved when drying at home, is 15-20%. It is possible to dry it more strongly, but it is not advisable. The costs of forced drying and special storage conditions will be higher than the result obtained.
The lower the moisture content of the wood, the more heat it produces. This can be seen in the example of the calorific value of oak firewood: freshly cut oak with a humidity of 60% emits 2.25 times less heat than with a humidity of 20%.
| Humidity, % | Calorific value, Kcalm3 |
| 10 | 3321 |
| 20 | 2916 |
| 30 | 2511 |
| 40 | 2106 |
| 50 | 1701 |
| 60 | 1296 |
| 70 | 891 |
how to measure the moisture content of firewood? If determining the moisture content of the firewood by eye is not enough for you, you want to make sure that the firewood is dried correctly, then you can use instruments to check the moisture content of the wood. Such devices can be ordered online or purchased in specialized stores. Such devices are called “moisture meters”.
A little about the properties of wood
The humidity of a growing tree depends on the time of year: in early spring the humidity is highest, but in winter, on the contrary, it is minimal. If you harvest wood when it has a low moisture content, it will be more resistant and will crack less when dried. The more the material dries, the larger and deeper the cracks in it. “Soft” wood dries out less, but faster than hard wood.
There are three groups of rocks (according to the degree of shrinkage):
- Severely drying: birch, apple, larch, maple;
- Medium: aspen, elm, oak, ash, linden;
- Small degree (often coniferous): cedar, spruce, pine, poplar, willow.
Buy firewood in winter
You need to buy logs not in the fall, but with the arrival of persistent winter frosts. In autumn, moisture remains in the villages. With the arrival of cold weather, the juice evaporates naturally.
The best time is Epiphany frosts, when persistent cold sets in in central Russia. In 2-3 weeks, the forest, while standing, has time to dry out greatly.
What is wood moisture content
Wood moisture content is a value that reflects the amount of moisture in wood. For example: one hundred kilograms of firewood with a moisture content of 25 contain 25 kg of water and 75 kg of wood matter.
Based on moisture content, wood is divided into several categories:
- Alloy: 80% and above. This is wood that was rafted down the river or was in the water for a long time.
- Freshly sawn: 45-80%. Wood that has been recently cut and still contains natural moisture.
- Air dry: 20-45%. Wood that has been naturally dried in the open air.
- Room dry: 7 – 20%. Wood that has been kept in a warm and ventilated room for a long time or dried in a drying chamber as fuel briquettes.
- Absolutely dry: 0%. Wood that has been thermally treated at high temperatures.
The optimal moisture content of wood, which can be achieved when drying at home, is 15-20%. It is possible to dry it more strongly, but it is not advisable. The costs of forced drying and special storage conditions will be higher than the result obtained.
Furnace design and firebox calorific value
The body of a stove intended only for heating consists only of a firebox and smoke circuits.
Cookers and other types of household stoves may include stoves, hot water boilers and ovens. The firebox is the main part of the stove. Its design must meet the following requirements: contain the required amount, for example, of solid fuel, that is, firewood (at least 75% of the total fuel required for one firebox); it must also ensure a sufficient supply of air to the burning fuel and maintain a high temperature in the combustion zone.
The length of the stove firebox is taken to be 260 – 510 mm. For solid fuel, such as firewood, it is better to have a longer firebox so that the logs can be stacked and burned while lying down. This ensures more complete combustion and therefore greater efficiency. In fireboxes for firewood, both peat with normal humidity (25–30%) and coal, which burns only on a grate, burn well.
Legal side of the issue
Having calculated the required amount of wood, you are ready to start logging yourself, but a reasonable question arises: how to legally harvest firewood. To legally carry out the work yourself, you need to draw up a scaffolding lease agreement; this is required by forestry regulations. Having such an agreement in hand, you have the right to cut down and remove timber from certain territories.
Timber is transported using a variety of equipment
When obtaining permission to collect firewood in the forestry, it is necessary to clarify what nuances and subtleties exist, and what else is regulated by the law on firewood procurement. For example, you are allowed to carry out exclusively selective felling of the forest: trees felled by the wind, damaged by pests, or clear cutting, if the natural stability of the forest is lost. A fine is imposed for unauthorized collection of firewood in the forest.
What is a fuel briquette?
What types of fuel briquettes are there? You can read on a separate page about fuel briquettes and eurowood, what they are like, and what they are made from.
If you are interested in laying stoves, fireplaces, barbecues, summer kitchens, go to the contacts page and call the stove maker.
We went to Finland in 2008, where we took a photo right in the Finnish forest. Attaching photo
