The advantages of a bathhouse are difficult to overestimate. This is a good place for rest and relaxation. Bath procedures improve sleep, normalize blood pressure, and remove toxins. Neither Jacuzzis, nor showers, nor other delights of plumbing can compare with the superiority and such widespread popularity of the bathhouse. Today we will talk about the features of its internal content from the point of view of finishing and design together.
Types of interior design of baths
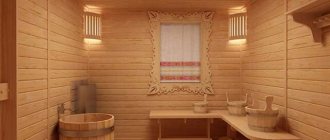
The classic layout of a bathhouse includes 3 rooms: a dressing room (dressing room), a washing room (shower room) and a steam room. True, in traditional Russian baths, the steam room and shower can be combined. All additional premises - a font (swimming pool), a games room (billiards), a kitchen, a recreation area, a toilet, a smoking room - are a matter of financial probabilities and personal preferences of the owners.
However, the decoration in the usual Russian genre is especially famous - careful, laconic, with a bulky table, benches and couches. Billiards or TV will add a touch of modernity.
The interior of a bathhouse in the old style can be supplemented with forged elements, wooden household items and utensils decorated with carvings. Walls decorated with oak, birch brooms or bundles of fragrant herbs will also look picturesque.
How to make bath furniture with your own hands
Making a bath set with your own hands is not as difficult as it might seem at first glance. Some woodworking skills will be required, as well as diagrams and drawings for the job.
Let's look at the process of making bath furniture with your own hands using a shelf as an example. Since this is the main place in the bath compartment, the shelf should be as comfortable as possible and suitable for your height and weight.
Self-production will allow you to realize all your wildest fantasies and make optimal use of the bath space.
After the necessary measurements have been made, you can begin to work. First, a frame is mounted from wooden posts (the distance between the posts is 50 cm), which are fastened together. The racks are made of wooden beams. At this stage of work, you can use metal screws, since this part of the structure will not be in contact with the body.
The frame is attached to the wall. Then boards are attached to it. When installing this part of the structure, metal parts can no longer be used. Plan the placement of the boards in such a way that there is at least 1 cm between the adjacent ones. This will allow water to flow freely and the boards will dry faster.
When making furniture with your own hands, it is important to process the parts well: round the edges, sand the surfaces until they are absolutely smooth.
The bathhouse bench is made according to a similar principle. It will require planks (for the seat), timber (for the frame), and fasteners. By the way, an important point: when making furniture for a bathhouse, a grinding machine or sandpaper must be used. Surfaces must be well treated to avoid injury later.
The bars are cut and hammered together into a frame - this is the frame. Planks are placed on the frame at a distance of 1 cm from each other. Wooden nails are used as fasteners. After the structure is ready, carefully sand all the corners and once again “walk” over the surface.
The shelf at its base may have a lattice made of wooden planks. You can also make the back of furniture from it.
The furniture set for the bathhouse is extremely laconic: bench, table, shelves. An important nuance: interior items should not only correspond to the general style, but also create coziness, promote relaxation, comfort, and pleasure.
When assembling furniture for the bathhouse, the boards should be positioned loosely against each other, leaving small gaps.
Materials for finishing the bath inside
Materials for the interior decoration of a bathhouse must meet a number of conditions:
- resistance to temperature changes, high temperatures, high humidity;
- safety – the materials used must be hypoallergenic, not cause burns upon contact with skin and not release toxins in hot weather;
- strength and durability;
- hygiene - the finishing material should be optimal in care - easy to wash, and not react with household chemicals;
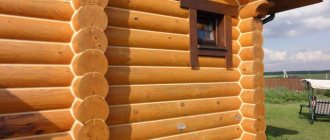
- aesthetics - beautiful interior design that does not irritate the eye - what you need to strive for when decorating the interior of a bathhouse. In this case (exclusively for Russian baths), wood is perfect. This material meets each of the above requirements, is absolutely environmentally friendly, and moreover, it has the result of aromatherapy. The main thing here is to positively choose the type of wood individually for the entire type of room.
Baths, saunas and swimming pools
0 votes
+
Vote for!
—
Vote against!
Accessories for a bath are a number of accessories without which it is impossible to call the cleansing ritual fully enjoyable and useful. Stylish and practical items create a special atmosphere of comfort and complete fusion with the tradition of the manipulations carried out. Brooms and brushes, hats and slippers, thermometers and hygrometers - this is just a small part of what falls under this definition.
The production of bath accessories has entered a new stage of its development; the products offered by companies can surprise even the seasoned buyer. But many, nevertheless, prefer devices carefully made with their own hands.
- How to prepare a bath broom
- Buckets, steamers, gangs
- Scoop and ladle
- Body brush
- DIY washcloth
- Bath towel - secrets from needlewomen
- DIY scented soap
- Headrest
- DIY bath hat
- Bath accessories as a reflection of one’s own self
How to prepare a bath broom?
The bath broom is the king of accessories and the king of the Russian bath.
But in order to be absolutely sure of its environmental purity, you can and should do it yourself. And do it right, because otherwise it will be enough for exactly one time.
The most practical and most commonly used broom is made from tree branches. You can choose almost any tree, but you should be careful, because thorns, dirt, and the risk of harmful substances escaping from the broom are clearly not what you expect from a relaxing bath. The leaders in popularity are birch and oak samples.
Interesting! If you want to get a tangible healing effect from a broom, you can prepare it from herbs, for example, nettle. And also from mint, lemon balm, wormwood.
The best branches for a broom are those that have young, small foliage (June). Oak blanks can be collected all summer long - they do not quickly lose their beneficial properties. The weather for “hunting” them should be dry and warm.
Choose thin, straight and resilient branches. Their optimal length is from forty to sixty centimeters. It will be extremely problematic to tie branches that are too short.
Important! Don't be barbarians, cut the necessary "material" from different trees!
Before you start knitting a broom, you need to clear the lower part of each branch from leaves and all kinds of knots. When collecting the “elements” into a single structure, systematically shake the “bun” so that it turns out beautiful, even, dense and curly.
The technique of knitting brooms itself is, in principle, simple. The branches are fastened with synthetic strong twine. The first tie should be placed close to the end of the handle and tightened loosely. Then the broom is divided in half and intertwined with force: the left part is “led” through the top to the right, the right part through the bottom to the left. And so on several times. As a result, the handle turns out to be dense, the rods do not stick out in different directions. Since the material for the broom is taken fresh, everything twists quite easily.
For the second tie, use the same twine, but take a longer piece and tie it as high and tight as possible. The ends of the “clamp” are not cut off; they will subsequently serve to connect the brooms into pairs. At the end of the knitting, the ends of the branches on the handle are carefully cut off with a sharp ax.
“Freshly prepared” brooms are hung in the attic to dry. When the leaves reach a state of fragility, the brooms are wrapped in paper, leaving only the handle “free.” They are preserved in this form. Ideally, in a closet or drawer, where neither light nor dampness can reach.
Buckets, steamers, gangs
These wooden bath accessories can also be designed independently if desired.
To make steamers and buckets, wood of various species is used - oak, aspen, linden. For gangs - pine, cedar. Their volume can vary at your discretion (from ten liters).
A set of well-fitted planks, a blank bottom, a metal hoop, twine, a couple of tools - and a high-quality container at your disposal. True, such amateur performances will require some skills and serious perseverance.
In order for the accessories obtained as a result of painstaking work to serve you for a long time, you should adhere to certain rules for their operation:
- wood is a living material; it can dry out, become moldy, or crack. To prevent such trouble from befalling your buckets, steamers and tubs, regularly scald them with boiling water after bath procedures. Then wipe dry and put away from the oven. Yes, yes, many accessories for a Russian bath require special treatment and high-quality care;
- If wooden containers have not been used for a long time, they, one way or another, lose their tightness. Therefore, before bathing procedures, fill them to the top with cold water for several hours. The material will swell and all microcracks will repair themselves. Then pour out the water and pour boiling water over the utensils to disinfect.
Worth knowing! When using oak brooms, do not be surprised that wooden products that come into contact with them darken - tannins give such a piquant shade to any materials.
Scoop and ladle
The very first thing that comes to mind is wooden fixtures. Wood for a bathhouse has a number of undeniable advantages, its low thermal conductivity is especially appreciated. But before you buy ladles for a bath (and if you want, make them yourself), you should decide on the type of material from which they should be made. It is optimal if it is oak, linden or aspen.
Important! To increase the service life of products, be sure to impregnate them with linseed oil or wax.
Another material widely used for the production of this type of bath utensils is metal. Products made from it have a long service life - much longer than wood.
But metal conducts heat well - and this is where its hidden danger lies: there is a risk of getting burned. That is why metal scoops and ladles must be equipped with wooden handles. It is better to choose (or make) accessories from copper, stainless steel, brass - these materials do not corrode.
It is impossible not to mention plastic buckets and scoops. There are no contraindications to their use, unless you are really building a Russian bathhouse “for the soul” - such elements will simply stand out from the overall interior.
Combined buckets can be called current - a plastic liner is inserted into a wooden base. Such samples are both visually attractive and will last longer.
You shouldn’t buy into the sophistication and style of glass products - breaking them is as easy as shelling pears, in general, it’s not practical.
Important! To avoid cuts from splinters, the use of any glass accessories in the bathhouse is not recommended.
Body brush
It is better to buy some accessories for the Russian bath, as well as many accessories for the Turkish bath, which has been especially popular lately, rather than bother making them yourself. Because the end result may not be exactly what you expected, and it will take a lot of time.
The brush is just one of them.
The main function performed by the brush is, of course, massage. Brushes for self-massage are equipped with long handles - with their help you can reach any part of the back.
These accessories are made from wood, plastic, and silicone. The bristles themselves can vary in length, as well as in the degree of stiffness. It is preferable that it be made from natural materials, because, according to experts, artificial “lint” cleanses the skin much better.
If bath procedures are a regular ritual for you, it is recommended to replace the brushes with new ones at least once every four months.
DIY washcloth
Washcloths are an indispensable bath attribute, so it is not at all surprising that the range of them in stores does not stop growing. Soft and hard, big and small, round and square, in the shape of a loop and a mitten - your eyes are wide open. You should choose based on your taste preferences, not forgetting the degree of skin sensitivity. Because the body may not accept natural and synthetic samples equally well.
If you were unable to find the best option for this accessory in the store, you can make it yourself.
Knitting washcloths is, in principle, a simple process. Choose sheep, goat or any other wool that suits your texture and stiffness, and start making your own. First, the handle for the washcloth is knitted, and then the fabric itself - until it reaches the desired length.
Note! Try to make the handle as durable as possible - otherwise it will lose its appearance after the first contact with water.
In order to rid the washcloth of its “initial” hardness, you should pour boiling water over it before the first use.
Bath towel - secrets from needlewomen
If you love and know how to sew, you can make a bath towel with your own hands without any problems. To do this you will need terry cloth and very little time.
- sew a wide elastic band on one side of the material (pre-stitched along the perimeter);
- cover this edge with decorative fabric;
- sew Velcro to “fasten” the towel;
- If desired and necessary, add pockets and other decorative elements to the product - everything is at the mercy of your imagination.
DIY scented soap
You can make the most excellent bath soap with your own hands using an opaque soap base.
Take one hundred grams of the base and melt it in a regular water bath.
Stirring thoroughly, add half a teaspoon of jojoba oil, a few drops of glycerin and two teaspoons of dried seaweed. At the very end of cooking, add five drops of eucalyptus or fir essential oil. If desired, you can add green dye to the mixture at this time. Mix your brew thoroughly again and pour it into the molds. Don't worry, once the soap dries, it will easily separate from the containers.
If you often make “soap” bath accessories, photos of various master classes on the Internet will certainly interest you. Thus, you will be able to improve your skills and create magnificent bath gifts for friends and relatives.
Headrest
A headrest for a bathhouse is a very convenient device. It helps to achieve complete relaxation when receiving procedures in a lying position.
For its manufacture, loose wood of any species is used. It is very convenient to make such accessories for a bathhouse with your own hands, since who, if not you, knows what sizes and configurations are most desirable for your bathhouse.
Pay special attention to the quality of grinding of product elements, avoid sharp edges. Make sure that there are no nails or other metal elements protruding from the headrest - this is a potential risk of local burns.
DIY bath hat
To prevent a visit to a bath or sauna from causing health problems, you should definitely protect your head with the help of bath caps. They prevent heat stroke due to the effect of a thermos.
Before making bath accessories for such an important purpose, you should carefully study the types of fabrics suitable for these purposes. First of all, the fabric should be natural, however, neither silk nor linen will definitely work here. Fabrics for bath caps are made from natural wool, famous for its excellent heat-insulating properties. Linen and cotton are used with no less success. But the most popular materials are still felt and felt.
Interesting! Both felt and felt are made from felted wool, only felt is dense and coarse, and felt is thin and light. Felt is popularly called “noble felt.”
The felt hat is about a centimeter thick, but this is not scary, because the wool breathes. Felt is made by hand by felting sheep wool. But don’t worry, in order to make a bath cap with your own hands, you don’t have to bother with felting at all - you can easily purchase it at any specialized store.
The first requirement for a bath cap is comfort. Therefore, as with any other sewing, you need to start with a pattern.
To do this you will need the following materials and tools:
- pattern paper;
- pencil;
- awl/thick needle;
- tailor's scissors;
- centimeter;
- ruler;
- thick woolen threads;
- pieces of felt.
To make a pattern, first of all, measure the head circumference of the person for whom the hat is actually intended. Based on the obtained value, calculate the size of the wedges that will make up the headdress.
The width of the wedge is a quarter of the head circumference plus one centimeter, the height is the same, only you should add not one, but two, and possibly more centimeters. It all depends on the desired height of the future hat.
Then an isosceles triangle is constructed on paper, in which:
- base - wedge width;
- height - the height of the wedge.
The corners are slightly rounded and the resulting shape is cut out. The pattern is ready.
Important! To make the pattern last as long as possible, you can stick it on cardboard.
If the felt is thick, then the wedges made by simple manipulations are sewn end to end. The thinner one is sewn with a decorative seam from the front side. It is better to take bright threads to make the hat brighter and more extraordinary.
It is worth sewing a felt loop (or any cord) into the top of the hat - the headdress will have to be hung somehow to dry. Decorating the cap is entirely in your hands - you can trim the edge of the uniform with braid, make an applique on it from felt or any other non-fading fabric, embroider an abstract pattern or a thematic design.
Men's clothing, at the request of the future owner, can be embellished with a military slogan, while women's clothing can be embroidered with beads, sequins, and beads. But in an effort to make the hat unique and inimitable, try not to overdo it - this is not an element of a carnival costume.
Interesting! You can embroider the name or initials of the owner on the cap - this way, when visiting the bathhouse with a large group, things will not get mixed up.
Bath accessories as a reflection of one’s own self
Of course, this is not all existing bath utensils, however, we have introduced you to the secrets of choosing and making many key accessories. Everyone chooses for themselves an individual list of necessary accessories - as they say, “there is no accounting for tastes.” Some people can do without unnecessary accessories and gizmos, but for others, cool bath accessories are an integral part of a fun ritual.
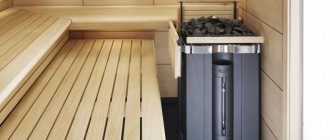
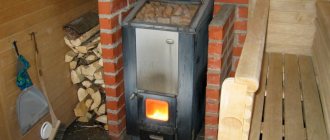
Steam room
For the interior decoration of the steam room, only deciduous wood is suitable. This type of wood does not heat up, does not emit resins, and, importantly, even with light ventilation it dries quickly, preventing dangerous fungus from developing. We list the most common types:
- linden – visually attracts attention, does not fade over time, has low density and heat capacity: it heats up quickly, but it is impossible to get burned on contact. When heated, it releases a nice, delicate scent. The linden finish is quite famous, and therefore absolutely affordable.
- aspen is a well-known material for the northern regions. The wood is strong, difficult to split or split, and has bactericidal properties;
- alder - has a beautiful appearance, is nice to the touch, resistant to cold and hot water, condensation and steam, alkaline and acidic detergents, and is simple to process.
- Abash is a tree from the tropics of Africa. Even in the hottest heat, it does not heat up and maintains a temperature close to that of the human body. Even under the influence of external factors (water, temperatures and steam) it does not fade at all.
Important! Wood cannot be coated with varnish or paint, even of the best quality. When heated, they emit an unpleasant chemical odor. During the installation process, nails (screws) must be covered at the top and set large; on the contrary, they can burn when heated. It is better to mount the lining vertically, because the drops formed by condensation will drain faster. The junction of the floor and walls must be protected with high skirting boards made of a waterproof material.
Typically, the steam room has wooden floors made of hardwood. But still, tile will be preferable. It washes well, dries quickly and is resistant to fungus. If this coating seems cold to you, you can put a removable wooden grate on top.
The furniture in the steam room is preferably round in shape, made of aspen, alder or linden wood.
Clothes and shoes
Basic rules of decency do not allow you to steam naked in a bathhouse if there is a group of steamers. In addition to ethical considerations, such a decision is fraught with serious damage to the body: massive exposure to heat requires appropriate protection.
Bath headdresses are bell-shaped caps made of felt, wool or flannel. Thanks to the specific cut and composition, it is possible to remove heat from the head. The main thing is not to make the serious mistake of novice bathhouse attendants - dipping this accessory in water before entering the steam room. The consequence of such a step may be heat stroke.
You also need to be careful when choosing shoes. Several parameters are important:
- Sole. It should be grippy enough to prevent you from falling on a slippery floor.
- Material. From the point of view of cheapness and practicality, you need to choose rubber or plastic flip-flops. However, sauna accessories must be made of felt.
- Convenience. Shoes should not restrict movement or cause discomfort.
The body in the bathhouse is covered with towels or dressing gowns. In the first case, it is better to opt for models with Velcro.
Waiting room
The room is not hot, but retains heat. Therefore, coniferous species will be a wonderful material for finishing here. Their noble aroma is not only glorious, but also incredibly useful. Phytoncides have a beneficial effect on the immune system, stimulate the body's resistance to various infections and overall improve mood. Let's look at the main types:
- Pine is a very popular material for decorating a dressing room, because it has a number of advantages: economical, durable, environmentally friendly and quite strong. May change color slightly over time, acquiring a reddish tint. Scandinavian pine with smooth pinkish wood is becoming increasingly popular. Its annual rings have an authentic decorative pattern;
- spruce – has a uniform structure, does not crack when drying, the color is slightly lighter than pine wood;
- fir - the main collations actually coincide with spruce, while approximately no resin comes out of its wood.
Birch is an excellent option for a deciduous tree for a dressing room. In any case, when finishing, the main thing is to follow the basic rule - each room should be paneled with wood of the same species.
Buckets and scoops
The best option is to buy two at once. You will need one in the steam room to splash water on the bath stones, and the other to collect water into a container. The first should be small - up to 0.5 liters, but the second can be larger.
The most popular material is wood. It is natural and has low thermal conductivity. It is undesirable to use plastic, since this material is artificial and stands out from the general style. There are also scoops and ladles made of metal, but with a wooden handle.
It is permissible to use metal products in a bathhouse, but it is better to avoid them. In high temperature conditions, the metal becomes very hot and can burn the skin. Even though the handle of the bucket is made of wood, there is a possibility of accidentally touching the metal part of the bucket to your body.
Finishing a bathhouse inside: basic rules
A bathhouse is, before everyone else, a place to relax. It’s better to exclude brilliant colors and colorful shapes here. The main rule is to create an impeccable atmosphere for a comfortable and peaceful pastime, without unnecessary details.
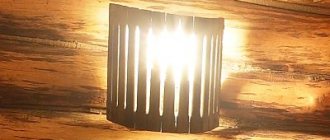
The lighting should be soft, with warm shades, conducive to a nice and peaceful holiday. This result can be obtained by using a two-tier lamp, one that diffuses light. All electrical wiring parts must be properly protected from moisture.A modern interior for a bathhouse is a manifestation of the designer’s imagination and taste. Tell us about your favorite places to rest and relax. Were there any of them that most impressed everyone with their luxurious interior?
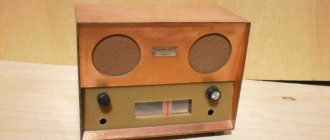
Various accessories
You can make accessories and chandeliers yourself. An interesting option is a stork’s nest instead of a chandelier. Making such a decorative element is very simple. We will need a frame for the bouquet and raffia braided with special straw. Someone manages to make a lamp from natural deer antlers. Great scope for creativity.
Candles will help create a romantic mood. But they need to be decorated in a bath theme. The same old basins or ladles come to our aid.
Basins can be used not only for their intended purpose. They make excellent shelves for towels and brooms.
Regular wicker baskets are suitable for storing bath accessories. They will fit perfectly into the overall interior. Larger baskets can even replace a coffee table.
A hanger can be made from branches or stones that will act as hooks.
How to make a wooden table for a bathhouse
Simple rectangular table with cross legs
A relaxation room would not be complete without a small table. This piece of furniture for the bathhouse must meet all the requirements regarding furniture in a wet room, since the dressing room is also subject to temperature changes, like the steam room.
- Cut the boards into 5 pieces of 2 meters each for the table top.
- From one block, make a blank 150 cm long to fasten the table legs.
The workpieces are carefully sanded with a machine or sandpaper. - Form a tabletop from the prepared boards.
- Stepping back 30 cm from the short side, attach a narrow beam with five screws. From it, retreating 35 cm, mount a similar block. Cut the ends of the bars at 45°.
- Do the same on the other side.
- The legs are made of bars 70 cm long. To give them stability, supports (4 pieces) of a trapezoidal shape are made. The angles of the trapezoids should be 45°.
Preparing the table legs - In order to assemble the legs, you need to insert pieces of timber (70 cm) between the blanks and secure the table structure.
Fastening the legs with a cross in the central part
- The table legs are inserted between two bars attached to the table top.
Make two spacers and screw them flat to the table legs according to the diagram
- All table parts must be fastened with self-tapping screws.
- Insert the previously prepared board (150 cm) between the legs and strengthen it.
- All parts must be rounded with a jigsaw.
The tabletop is lifted, turned over and laid on top of the legs, the structure is fixed with self-tapping screws