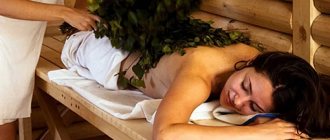
For a long time, special attention has been paid to bath brooms. The fact is that they were made for a reason. Not a single Russian person can imagine going to the bathhouse without such an accessory as a broom. As they say, “a bathhouse without a good broom is no longer a bathhouse.” We can say that bathhouse connoisseurs will lose one of their most important advantages over other types of bathhouses - the emotional and therapeutic effect. If we take a properly prepared bath broom with us, it will definitely benefit us. We will have the opportunity to improve our health and, among other things, get an unforgettable pleasure from soaring. The preparation time for this bath accessory is also important. There is a certain time in the year when you can start preparing brooms. Only in this case will it bring maximum benefit. During this period of time, almost all parts of plants contain a large amount of medicinal and beneficial substances. Also, during this period of time, the brooms are the most durable, soft and elastic; the leaves on such a bath accessory will last as long as possible.
After steaming with such a broom, the bathhouse will become the best place for you where you can get maximum healing and emotional charge, at least for the entire working week.
- 2 Period of procurement of bath brooms
- 3 How to dry bath brooms
- 4 How to store bath brooms
- 5 How to knit bath brooms (video)
Assortment of brooms
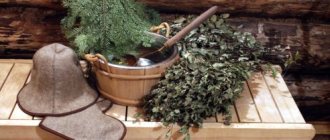
Each bath connoisseur chooses a broom for himself, depending on his favorite herbs and the desired medicinal properties. Understanding people say that absolutely every broom has its own unique healing effect. The most common bath brooms include: oak, birch, linden, eucalyptus. The king of all brooms is considered to be birch broom. Brooms made from fir, cedar and nettle, as well as young shoots of cherry, juniper, wormwood, ash, rowan, aspen and bird cherry are used a little less frequently. The so-called combined brooms are very popular. Several branches of aromatic, specific, or medicinal raw materials are added to them. Such additives include: mint, linden, fireweed, St. John's wort, lemon balm, hyssop, juniper, nettle, fir, chamomile, tansy, raspberry, currant. When such a broom is steamed, the bathhouse is filled with the delightful smells of garden and meadow plants. When a combined broom is made, the burning and thorny branches must be placed inside, but there are exceptions when the most burning poultices are needed as a healing process.
The process of preparing branches, knitting and drying in detail
Well, having learned a little about the variety of raw materials for homemade “massagers,” let’s move directly to the answer to the main question - how to properly make brooms for a bath?
The general time for collecting raw materials, regardless of the chosen type of tree (be it birch, oak, maple, linden, etc.), is when the leaf has already matured. In other words, the season for harvesting branches is from early July to mid-August. Collecting raw materials at this time is completely justified, because the leaves of the trees are already becoming large, but they still have enough essential oil glands.
The general rules for choosing a tree for collecting raw materials boil down to the fact that you need to look for young trees/shrubs with straight flexible branches, at a distance of at least 3-4 kilometers from a residential area.
Proper harvesting of birch branches
So, in this article we decided to describe how to correctly collect branches for birch brooms so that they turn out to be of high quality and as useful as possible.
Despite the fact that we will be talking about a specific type of raw material, these collection instructions, in principle, apply to other trees/shrubs:
Important! Many folk knitters recommend, on the contrary, choosing young birch trees that have never bloomed, explaining this by the fact that they have the most delicate leaves. Of course, we cannot disagree. However, you still need to look at these sheets and even try with your tongue: if the upper side is rough, then you can safely look for another tree. The leaves should be velvety on top.
Leaves are what you need!
Attention! To prevent trees from suffering, cut only a few branches from each.
Raw materials for creating bath “massagers”
Knitting brooms
How to make a bath broom correctly - where to start knitting it?
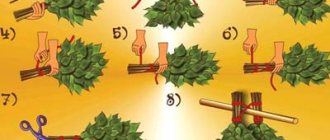
Below is a step-by-step technology for this simple, but requiring special skills and abilities:
Knitting brooms is not difficult!
Visual knitting technology
Drying and storing brooms
First of all, we warn you - you cannot dry them in the sun or use various artificial drying methods. The brooms dry out on their own, the main thing is to properly organize a place for them to do this.
It should be in the shade (for example, a barn, garage, attic, haystack, etc.) with moderate humidity. An increased concentration of moisture can cause mold to appear on the leaves, and then the brooms will have to be thrown away.
It is best when the products take the shape of a fan rather than a panicle. To achieve this result, fresh brooms are laid out on the floor and turned over every day. When they dry (not dry!) you will need to stack them on top of each other, periodically changing places - this way they will gradually flatten.
It is important not to dry them out! After drying, all the leaves on the broom should have a concentrated matte green color, and the aroma of balsam birch oil should emanate from the broom itself. After steaming the product, this pleasant smell will sharply intensify, which will have a beneficial effect on the health of the entire body.
For your information! After drying the products, the second knitting may become loose and will need to be re-tied.
After about a week, the finished brooms can be stacked tightly in a dry, dark and well-ventilated area. And to prevent them from getting dusty, you can wrap them in cellophane or paper, but not tightly, so that there is little air access.
Storage of dried products
A good option for storing bath whisks is in a haystack. In winter, you can also store simply prepared branches in the form of one sheaf, and, as necessary, knit healing “massagers” from them. In wallpaper cases, the leaves are preserved better.
Parking brooms
You also need to know how to steam a broom!
So we learned how to make bath brooms. However, there remains one more important nuance, without which the competent preparation of a “massager” for the steam room cannot be considered complete - this is its preparation directly for use.
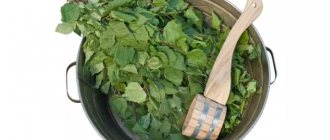
The easiest way to steam a broom is as follows: lower it into a bowl of cold water for 3-4 minutes, then into warm water for the same amount of time, and finally into a tub of hot water (not boiling water!). At the same time, it is important to cover the tub with something so that our broom “steams.” But you can tell when to take it out by its delicious aroma!
Advice! Do not throw out the remaining water from steaming - it will be useful for watering hot stones or the walls of the sauna stove, thanks to which the entire steam room will be filled with wonderful natural smells.
Procurement period for bath brooms
The best time to start preparing bath brooms is during the flowering period of the grass. At this very time, the leaves are tender, soft and fragrant. You can start preparing on Trinity Sunday - this is a national holiday and is celebrated at different times every year (counted 49 days after Easter). It mainly falls in the first ten days of June. Well, the preparation needs to be completed on August 2 - “Ilya’s Day”. After this holiday, according to popular beliefs, it is impossible to prepare brooms (with the exception of eucalyptus and oak), since they no longer have healing powers. Brooms must be prepared in dry weather.
You need to pay special attention to ensure that the leaf holds well, there are no thorns on the branches, and no resin is released from them. When preparing branches for bath brooms, you need to take into account the main point, do not use raw materials that grow:
• near the roadway;
• near industrial enterprises;
• close to a high-voltage line.
Also treat all plants with care, trim only those branches that you need. You need to choose the youngest plants (2-3 years old), whose branches bend well. Brooms made from birch, which grows near the water, are prized. This kind of birch is popularly called “weeping”. The best branches are those that grow close to the ground. They are thin, flexible, straight, hanging, long.
Some people try the leaf on their tongue: if the leaf is very rough, then it is better not to take it, but if it is velvety and tender, then this is what is needed . You need to cut off the shoots from the sides. Do this using pruning shears. When transporting, it is not recommended to put brooms in any bags or other devices. The most convenient thing is to tie them with a rope and put them in the car in which you came to pick up the brooms. When you arrive home, you need to immediately untie the ropes, otherwise the brooms may cake, and then they will not be elastic and loose. After you have prepared the raw materials, you do not need to immediately start knitting them.
Allow the branches to wither for 2–3 days in a special room where direct sunlight will not fall on them. The next procedure that needs to be done is sorting all the branches by length. Absolutely every branch must be cleared of 1/3 of its leaves. This prevents the broom from disintegrating quickly and is enough for 2-3 sessions. It is best to determine the length of the broom in relation to the height of the steamer and the size of the steam room: that is, you need to take into account the distance from half a mound to the ceiling. The most optimal length is considered to be 400 – 600 mm. The thickness should be such that the accessory is comfortable to hold in the hand of the hairdresser. Start forming the broom from the middle. Take thicker branches and attach thinner ones around them. It is necessary that all branches bend inward. Also, the matte surface of the sheet should be directed inward, and the smooth and shiny surface should look outward.
When and where is it better to prepare the material?
Harvesting time differs depending on the selected work material:
- Birch brooms are harvested in the first ten days of June, since during these days the foliage is still soft.
- It is better to start preparing eucalyptus and oak in August or September.
- You should stock up on nettles in June.
Needles are collected throughout the year. However, you should not have a large supply of coniferous material; only freshly cut branches have healing properties.
The area where the raw materials are prepared is also of no small importance. It is clear that trees located near highways or industrial enterprises are unlikely to have foliage or needles that have beneficial properties. An excellent place for harvesting is the edge of a forest or the outskirts of a thicket. For pruning, use pruning shears or a sharp knife. Young branches with branches should be cut off. In this case, the broom will look beautiful and lush. The optimal cutting length is 0.5 m.
Article on the topic: Is it possible to use metal-plastic pipes in a bathhouse?
Before making a broom for a bath, let the branches dry out indoors without sunlight for 2-3 days.
Next, the workpieces are sorted, the leaves are removed at the root level (1/3 of the total length) of the future product. It is best to form a broom from the middle, for which thicker branches are chosen. The core is surrounded by thinner material. You need to make sure that each branch bends inward. The matte side of the sheets is directed in the same way.
How to dry a bath broom correctly?
Experienced steamers know that drying products must be handled responsibly. Direct sunlight is not used for this process. The most convenient option is to place brooms in the attic of the house.
During drying, brooms should not be placed close to each other. Otherwise, they will not ventilate and dry out enough.
How to make brooms for a bath - choosing a storage location
After the broom has dried, it is important to provide favorable conditions for their storage. The optimal solution is a dark place. Typically used as storage:
- The attic of a house or barn, a hayloft with a flooring of hay (the brooms are also covered with a layer of hay on top).
- Cardboard boxes with holes.
- A rack placed in the dressing room (you can make it in another place).
The drying room must be dry and well ventilated. Medicinal plants can be placed between the brooms.
How to knit a broom correctly?
How to make a bath broom elastic and durable? To do this, it is important to tie it well. The classic method is to first divide the branches into two parts so that the first part is approximately 15 cm lower than the second. Next, the parts are firmly tied in one place. The branches should point in the same direction. It is preferable that the end of the product remains free (without dressing).
Hemp or cotton rope is suitable as a dressing material. Many “craftsmen” use wire, which is absolutely not suitable. The ends need to be trimmed to avoid scratches.
Article on the topic: What to hang on the window in the bathhouse
How to dry bath brooms
The tied brooms need to be dried very well. For this purpose, do not use direct sunlight. The most practical and convenient way to dry is to hang them in the attic of the house, on a thin pole or on thick twine. It is also necessary to pay attention that the brooms do not hang close to each other: this gives them the opportunity to better ventilate and dry.
You can also place the brooms at a short distance from each other in a cool place. After the finished brooms have been distributed for drying, they must be turned over daily. After the brooms have dried, you can put them in a pile and periodically mix (swap) them. Of course, damper brooms should be placed on top. So, well-dried brooms have a delightful appearance and retain their healing and nutritional properties.
Method number 4. Time-consuming
If you still have a long time before your bath procedures (8-10 hours), you can use this method of steaming a broom and you won’t go wrong.
To begin, take a broom and completely lower it into a deep container with cool water. After 30 minutes, you need to shake it a little, turn it over and leave it there until you attend the procedure.
Just before entering the steam room, the broom must be taken out of the water, wrapped in a wet cloth and placed on the bottom shelf for about ten minutes. Thus, its branches will remain elastic and retain all the essential oils.
How to store bath brooms
After the brooms have dried, you need to create conditions for storage for a long time until they are needed. The best option is to store it in the shade, otherwise some of the healing properties will be lost. If you store the broom in the sun, it will become short-lived.
There are several ways to store, everyone chooses the most acceptable and convenient for themselves:
1. On the roof of a house or barn, a hayloft is also a convenient option; make a flooring of hay. The finished brooms are laid out on it so that they do not touch each other tightly. Cover the top with dry hay. When needed, the broom can be easily removed from such storage.
2. Storage in cardboard boxes with holes (so that the brooms can breathe): carefully fold the broom to the broom, swapping the leaf part of the broom and the butt. There is no need to pack them tightly. If you store brooms this way, they will not dry out and will retain their fan shape well.
3. Storage of brooms - on a specially made rack in the dressing room or any other room. The most important conditions for the room: good ventilation and dryness.
The most popular method of storage in villages at present is in a utility room, or in a dressing room in a hanging position on twine or a thin pole, tied in pairs. Also, between the ready-made brooms, you can place a bouquet of medicinal herbs, which will play a double role: they can be brewed and drunk as tea, or brewed in a bathhouse for aroma. This method is good and useful, but when stored this way, the brooms very often dry out and, accordingly, the leaves begin to crumble. With this storage method it is very difficult to achieve the correct shape of the broom (the broom should be like a fan).
An interesting storage option in a haystack. Steam lovers have adapted to storing bath brooms in urban environments: in the refrigerator in a plastic bag or on the balcony. If all processes are followed well from start to finish, the shelf life of bath brooms is approximately 2 years. At the same time, all beneficial properties are completely preserved. Well, basically, all the secrets of preparing a bath accessory have been revealed. Research by professionals shows that observing all the age-old traditions and technologies of collecting and using medicinal plants, including the process of preparing bath brooms of various types, preserves the maximum amount of nutrients and medicinal substances.
Cold method
From a medical point of view, this method of steaming a bath broom is considered the most correct.
Necessary:
- Take a deep container so that the broom is completely immersed with the leafy part in the water.
- Pour cold water, it’s good if there is melted water.
- Soak the broom for 10-12 hours, leaving it in a cool room.
After 12 hours, you will have an almost freshly cut bath broom in your hands, with which you can conveniently and pleasantly spend time in the bathhouse. The leaves will resume their natural color, and the branches will regain their flexibility and elasticity.
Advantages:
- Preservation of all beneficial properties of birch leaves
- The elasticity and resilience of the branches, which does not cause unpleasant sensations when exposed to the body
- Preservation of healing essential oils that are released at high temperatures
Flaws:
- Take a lot of time
The method is not labor-intensive, but time-consuming. If you don’t have a trip to the bathhouse planned, but want to take a steam bath with a good birch broom, then the following method will do.
How much money will be required to start production?
In order to organize the production of bath brooms, a large initial capital is not required. The main costs, provided that there is a room available for drying brooms if necessary, are:
- acquisition of equipment and consumables necessary for procurement;
- transportation costs for transportation to the buyer or to the place of drying;
- salary fund.
As a rule, beginning entrepreneurs spend between 20 and 30 thousand rubles. From the second harvesting season, costs decrease - after gaining experience from the first harvesting season, you will already know where and how you can save.
We recommend reading:
- autobath on wheels
- private bath and sauna as a business idea
Staff
If you do not know the details of the process of preparing brooms very well, you can learn this from videos on YouTube. But you can go another way: hire villagers for a piece rate.
Surely among them there will be those who know how to perfectly knit brooms, know the nuances of picking and need some extra work. If you have a solid start-up capital, you can even hire several employees and put the business into high flow.
The average salary per month of knitting brooms will be 12-15 thousand rubles. But it is better to agree on work per hour or even per unit of production. For example, for each broom you can assign a reward of 30-50 rubles, and you will sell it for 150-200.
The more brooms you make, the more you will earn - the main thing is to find reliable and constant sales channels.
