Dangerous temperature
For comparison, consider a number of studies conducted by scientists in the twentieth century to monitor the effects of regular visits to a steam room heated to extreme values of 110-130 °C.
Professor H. Their in the 80s of the last century put forward an assumption about the connection between high temperatures in Finnish saunas and the occurrence of cancer, which was subsequently confirmed by the results of a large study. After considering a significant number of cases of lung cancer in those who like to steam at 110-130 ° C, it was found that staying in a steam room heated to such temperatures contributes to the formation of this disease.
The fact is that you can only be in such conditions when the air in the room is very dry, and this eliminates the hydrostatic effect of steam on the body. As a result, the blood does not supply the lungs well enough and they become burned due to their inability to adapt to the elevated temperatures to the required extent.
A number of other studies have also discovered that exposure to the dry, highly heated air of a sauna negatively affects sperm production and also leads to digestive problems in children born to mothers who frequently visited such saunas during pregnancy.
Discussion “what is the temperature of the stove in the bath
"or about the temperature around the stove in the steam room - a lot. Unfortunately, they are all carried out on an intuitive level and only a few specialists devote entire studies to this issue using pyrometers, thermometers and other equipment. How does the temperature of a sauna and steam room oven actually differ from the one that the thermometer shows us?
Bath lovers are not builders and, for the most part, coordinate the stove modes with their feelings. The other half of the steamers glance at the thermometer. I decided to find out what the difference is between our perceptions, between the data from the needle of a universal thermometer and what a digital remote temperature meter will show us.
Some temperature measurement data puzzled me, which I wrote about in the conclusions after the video.
By and large, we are not interested in the temperature of the oven, but in the conditions in the steam room. Your own skin is more expensive than the lid of a piece of iron. Therefore, I measured everything where the laser pointer of the device was shooting. I wanted to document the temperature measurements with a diagram, but decided to make a video with remarks
Attention! I used a device with a maximum measurement threshold of 330 degrees (footage in the furnace firebox)
Page not found | MIT
Skip to content ↓
- Education
- Study
- Innovation
- Reception + assistance
- student life
- News
- Graduates
- About MIT
- Read more ↓ Reception + assistance
- student life
- News
- Graduates
- About MIT
Menu ↓ Search Menu Oops, looks like we couldn't find what you were looking for!
Try looking for something else! What are you looking for? See more results Suggestions or feedback?
.
Correct temperature in the steam room
A lot can be said about the rules of classic health bath procedures, but in this article we will dwell in detail on the temperature. If we talk about the temperature in the steam room that is most suitable for health in all respects, then this indicator lies between 50 ° C and 70 ° C
. In the classical Russian bathhouse, the stoves were always built of brick and, as a rule, they had closed heaters. This design was simply not able to heat the steam room above 60 ° C and in order to get a good sweat, it would have been necessary to sit in it for too long, but a way out was found.
A ladle of water was poured onto the stones, heated red from the direct flame, which instantly turned into light, hot, finely dispersed steam, most comfortable for both the respiratory tract and the skin. A cloud of steam rose to the ceiling and a person lying on the shelf was gradually doused with small portions of this steam using brooms. With the right technique of pumping steam onto various parts of the body, the steaming process brings not only unforgettable positive sensations, but also the strongest healing effect.
When designing your own sauna, it is important to understand that in addition to the correct temperature to obtain the full range of positive effects of steaming on the body, the sauna must also have a certain humidity. The optimal indicator is within 60%
It is this combination of temperature and humidity that provides ideal conditions for healing the entire body.
It is possible to ensure that the steam room has both the specified temperature and the correct humidity at the same time only if the stove is in it with a closed heater
To obtain high-quality finely dispersed steam, it is very important that the stones in the furnace are heated to at least 300 °C. And if the heater is open, then when the stones in it are heated to such an extent, the stove itself will be so hot that the temperature of the steam room will go beyond 70 ° C
Chimney draft problem
If the chimney is designed in such a way that the draft in it is not too high, it will overheat, the chimney must make a revolution or half a revolution, in the manner of a Russian stove before exiting the firebox, so that the combustion products do not fly straight into the chimney, but remain in the stove. If necessary, if the required draft has not been provided and the draft is too small, and there are no means to increase it, in order to avoid the formation of smoke, it is necessary to provide ventilation of the chimney artificially using an exhaust hood. That is, it is impossible to avoid overheating of smoke or burning of fuel in the chimney.
Chimney materials
Before purchasing materials, you need to determine the structural features of the chimney.
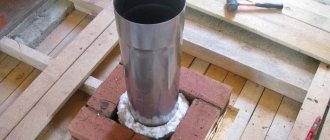
Brick system
The construction is made of heat-resistant brick using a special dry mixture or oven clay. In addition, you may need material to create a fungus over the pipe.
Metal construction
Before purchasing material for the manufacture of a metal chimney in a bathhouse, it is necessary to draw up its exact diagram with the detailed location of all corners and turns of the pipe.
You will also need 2 iron sheets with holes corresponding to the diameter of the pipe. They are fixed on the ceiling of the bathhouse and on the floor of the attic. You will also need a heat-resistant material that will be secured around the pipe at the point where it exits into the wooden attic.
To create waterproofing around the chimney on the roof, you need to prepare a sealant or a special rubber seal.
Choosing pipes: what to look for
When purchasing iron chimney pipes, you need to decide on their cross-section. Basically, it depends on the power of the stove, but for most bath options this parameter is 15-20 cm. You should not take a diameter that is too large, as it will not retain heat well. And if it’s too small, it won’t create the draft necessary for removing smoke. Whatever it is, the cross-section of the pipe should not be less than the diameter of the outlet pipe of the heating structure.
There are a number of other requirements for the elements of a chimney in a bathhouse:
- The minimum pipe height is 5 m. Neglecting this requirement may result in deterioration of traction. The exact value is calculated depending on the location of the pipe on the roof. In any case, it should rise above the ridge by at least half a meter. The ideal height from the ridge is 1.5 m, but this is not necessary;
- The minimum thickness of the metal used to create the pipe is 1 mm;
- If it is planned that the chimney system will be equipped with a hot water tank, then it must be reflected in a previously drawn up diagram. It is better if the tank is made of stainless steel.
Pipe on the roof bath temperature
A bathhouse pipe through the roof solves the important problem of removing combustion products from a sauna stove and providing draft in it. When a bathhouse pipe is installed through the ceiling and roof, specific problems arise related to operational safety. The question of how to remove the pipe of a bathhouse stove through the roof is considered an important problem that must be solved taking into account existing standards and recommendations of experts. The installation and arrangement of the pipe can be done with your own hands, but provided that all requirements are met.
The heart of the Russian bathhouse is considered to be a stove, which is traditionally heated with wood. As a result of the combustion of solid fuel, smoke containing wood combustion products is generated. If these harmful substances are not removed from the steam room, then concentrated carbon monoxide poisoning can occur within 15-25 minutes. Thus, the main purpose of the pipe, i.e. the stove chimney is a means of getting rid of carbon monoxide. In addition, for efficient combustion of fuel, an influx of oxygen is necessary, and the draft necessary for combustion is provided precisely by the pipe.
In other words, the question of how to remove a pipe in a bathhouse through the roof is related to the safety of the bathing procedure and the efficiency of using the stove. The main problem in organizing the pipe outlet through the roof of the bathhouse is the temperature of the rising flow. At maximum mode, smoke can heat up above 4500C, which creates a risk of ignition of flammable materials. This circumstance requires the adoption of fire prevention measures. In addition to safety requirements, there are certain requirements for the size of the chimney to create the necessary draft.
The chimney is a pipe connected to the stove firebox and ending at a certain height above the roof. Traction, i.e. The efficiency of the chimney depends on the size of the internal channel, the presence of obstacles in it, the length of the pipe and the cooling conditions of the exhaust smoke. Naturally, the longer the high temperature inside the channel remains, the faster the heated smoke will rise.
Taking into account the assigned tasks, the following important requirements arise:
- reliable sealing of the entire pipeline;
- absence of obstacles in the channel, which means minimizing the number of bends and joints (especially pipes of different diameters);
- maximum rise of the pipe above the roof surface;
- creation of fireproof passages through the ceiling and roof;
- maintaining safe distances to flammable materials.
Installing a pipe in a bathhouse through the roof, in principle, can be done in 2 ways: installing a vertical pipe with a passage through the ceiling and leading above the roof, and forming an external chimney, i.e.
leading the pipe from the stove through the wall to the outside and installing a vertical chimney on the outside of the bath wall. In the latter case, there is an important drawback: the presence of a significant bend in the pipe, and most importantly, a sharp cooling of the flow already at the initial movement of the smoke, which significantly reduces the draft. The vertical pipe of a bathhouse through the roof does not have these disadvantages, but poses the problem of arranging a passage through the ceiling and roof. The most common chimney option is a bathhouse pipe through the roof, i.e. vertical pipe outlet.
To build such a chimney, it is necessary, first of all, to determine the optimal location of the pipe outlet on the roof. Taking into account the increase in the height of the pipe, it is preferable to place the pipe on the ridge of the roof (maximum height of the bathhouse), but such an exit is only possible in the absence of a ridge transverse beam. Most often, the reliability of the roof is increased due to the presence of such a roofing element, and it is not recommended to violate its integrity to remove the chimney.
The exit should not be located in the valley area. The largest volume of precipitation accumulates here, which requires enhanced waterproofing. The pipe should not be placed next to a skylight or close to an adjacent structure. It is considered optimal to place the pipe on the roof slope at a distance of approximately 2-3 m, in order not to damage the ridge beam when constructing a passage through the roof.
The chimney of a sauna stove can be made of a metal or ceramic pipe using brickwork or using a sandwich pipe. The latter option is considered a modern reliable method and is increasingly used. The following elements (areas) are distinguished in the design of chimneys:
- head (pipe on the roof with a probe for extinguishing sparks);
- passage unit in the roof (master flush);
- attic chimney;
- walk-through ceiling assembly;
- indoor chimney;
- furnace outlet (iron pipe).
Valves are provided inside the chimney to regulate the flow of smoke.
The dimensions of the chimney must comply with current regulations. The diameter of the chimney channel is related to the power of the sauna stove. This is how the relationship is established for a rectangular pipe: with a furnace power of up to 3 kW, the pipe size is at least 14x14 cm; up to 5 kW - 14x20 cm, up to 7.5 kW - 14x28 cm. A round pipe is standardized as follows: with a power of 1 kW - the pipe cross-section is selected more than 80 mm2; at 15 kW – 160 mm2 (about 14 cm in diameter). When installing a chimney, one condition should be taken into account: the length of horizontal or inclined sections should not exceed 100 cm.
There are also standards for the height of the head, and it depends on the location of the outlet relative to the ridge. When the outlet is located at a distance of 1.4-1.6 m from the ridge, the sufficient height of the head is 50 cm above the ridge; at a distance of 1.6-3.2 m - 10 cm or at the level of the ridge; when removed further than 3.2 m - 10 cm below the ridge or level with it. If the roof has a flat appearance, then the height of the head is chosen to be at least 100 cm, and if a tube is installed above 1.4 m, then it is secured with guy wires.
When leading a pipe through the roof, the following problems must be solved:
- Formation of a reliable thermal barrier that protects the roofing material from heating above the permissible temperature.
- Reliable waterproofing of the pipe from precipitation and water flowing down the roof slope.
- Restoration of multi-layer sauna protection to prevent heat loss and steam escape from the steam room.
In accordance with current standards, the distance from the chimney pipe to the combustible roofing material, even taking into account the creation of a thermal barrier, must be at least 14-26 cm (depending on the materials used). Thus, in a multilayer bath protection, a sufficiently large window is created where the protective layers are removed. To restore protection, the passage area is first separated from the common roof. To do this, additional rafter supports are installed around the pipe, which are connected by jumpers. An insulated box is created, which is filled with basalt mineral wool and covered with hydro- and vapor barrier roll material. The edges of the protective films are formed in the shape of an envelope and placed on the surface of the pipe, where they are secured with staples or nails. All joint areas are reliably sealed with heat-resistant adhesives. It is best to drain the flow of water and condensate using special drainage gutters that are installed directly around the pipe.
When arranging a pass-through unit on a round sandwich pipe, it is recommended to use ready-made master flush units.
They are made of elastic waterproofing material and reliably protect the passage through the roof from moisture. The design includes a flange and an apron made of silicone polymer or rubber. The flange also has a certain elasticity, but is strengthened by metallization. Such a ready-made sealing unit is put on the pipe and covers it tightly. The edges of the apron are placed under the roofing.
When installing a pass-through unit, it is important to reliably seal all joints. For this purpose, special adhesive compositions with increased heat resistance are used. Most often, special silicone-based sealants are recommended, which remain operational at temperatures up to 350-4000C.
The sauna chimney plays an important role and is a mandatory element when using solid fuel. When installing a chimney and passing it through the roof, all fire safety standards must be observed, and all sauna protective layers must be restored.
Our bathhouse is associated with light steam and the pleasant crackling of wood in the stove, hot stones in the heater and the smell of a freshly brewed broom. But a live fire is associated with smoke, and if the chimney is not made correctly, you can get carbon monoxide poisoning in 20–30 minutes. The pipe in the bathhouse is planned before the construction of the bathhouse; it must be assembled efficiently and correctly. This is the only way the bathhouse will be safe and will not cause harm to its owners. We will tell our readers how to remove a pipe in a bathhouse with your own hands, what features and subtleties you need to know.
The pipe in the bathhouse is removed in two ways: inside and outside the structure.
Planning a chimney in a bathhouse is always associated with the choice of design. It is necessary to understand all types, know how to correctly calculate the size, display and install. Before drawing up the project, it is necessary to briefly study these aspects.
The chimney in a bathhouse can have two devices: external and internal. Each has its positive and negative sides:
- External arrangement is less fire hazardous, do-it-yourself installation and fastening is also easier. The disadvantages are that the pipe goes outside and heat loss increases.
- The interior arrangement is complex, but all the heat gets into the bathhouse. The main disadvantage is a high degree of fire hazard.
The sandwich pipe is easy to install with your own hands.
Design flaws can be prevented by using high-quality insulation. We advise you not to save on time and effort and install an internal chimney; although it is more difficult to install, it will reduce the cost of heating the steam room structure. For a small bathhouse in a summer cottage, it is easier to remove the external chimney. In any case, the choice is up to the user.
Various materials are used for the chimney: red brick, ceramics or metal. They withstand temperatures above +100 °C and are durable.
You can read reviews about using a chimney made of aluminum or asbestos, but it is not suitable for a bathhouse where temperatures are above 120 °C.
It’s easier to buy a ready-made sandwich chimney. It is easy to assemble and install, and the internal asbestos lining makes the device safe.
The design of the chimney is selected depending on the characteristics of the selected stove. The pipe package includes several components, each with its own functional features. For a bathhouse with a brick stove, you can use brick, metal, ceramics, and for a metal stove - a ceramic or metal chimney. You can use brick, but laying the pipe yourself will be difficult. You will have to hire a bricklayer - a stove maker.
The main components of the chimney (design lists start from top to bottom):
- Head (probe) - prevents sparks from hitting the roof and neighboring buildings, as well as from flooding during rain.
- Master flush.
- Chimney made of double sandwich or brick.
- PPU (Ceiling assembly where it goes through).
- Chimney made of double sandwich or brick.
- Single iron pipe.
When choosing a brick structure, you need to be prepared for complex cleaning and maintenance. A massive foundation is needed for the stove, since a brick chimney weighs a lot, and the entire load will fall on the stove.
A simpler assembly that does not require special knowledge is a ready-made structure made from sandwich pipes. It consists of a double structure between which asbestos is laid. More heat-saving and lighter. They are made up of individual elements: elbow, deflectors, tees, rain protection, adapters and gate. Fastened using brackets that are mounted with clamps.
It is necessary to remove a pipe in a bath taking into account a number of its features (material, design). The installation is influenced by sanitary and environmental standards, the material from which the bathhouse was built. Do not forget that traditionally this is a tree.
Compliance with certain rules and regulations will make the structure reliable and safe:
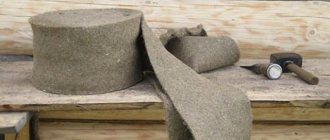
- Any one must be insulated with environmentally friendly and non-flammable material: expanded clay, asbestos, stone wool.
- Thermal insulation of the place where the chimney passes is necessary only with foil material. It is often confused with materials covered with Dacron foil, but it is highly flammable and melts at temperatures above 300 °C.
- The chimney is installed so that the structure does not touch any wooden elements: floor beams, roof, walls. To insulate the joints, they are sheathed with metal sheets. The outlet area can only be insulated with non-flammable mineral wool or expanded clay mound.
- Inside the ceilings you need to install a special iron box, into which the structure is placed and covered with expanded clay. There is no need to make a box for the sandwich.
- On top, to avoid contact with the roof, a casing of metal sheets is made around it.
- All joints and seams can be sealed with special iron foil tape or foil.
When designing a chimney in a bathhouse, you need to adhere to the standard shape and size. The best option is a cylindrical shape. The simple shape is due to the fact that any bend in the elbow will additionally create areas for the accumulation of ash and soot; the structure will have to be cleaned frequently. And cleaning a structure with numerous bends is more difficult.
The main dimensions that need to be determined are the diameter and height of the structure. They must be taken from SNiP.
The power and choice of stove are directly related to the choice of diameter and height of the chimney. Here are some values for a rectangular and square chimney in the form of a table:
One of the most important tasks when building a bathhouse is the correct exit and sealing of the chimney pipe. Moreover, two problems need to be solved at the same time: ensuring fire safety and insulating the pipe joint from the flow of precipitation and condensate.
First of all, before solving the problem of water passage, it is necessary to determine where the pipe exits on the roof. The height of the pipe must comply with certain standards. The height depends on where the pipe will exit on the pitched roof.
When installing a pipe, the following rule applies: “The closer to the ridge, the higher the pipe should be raised.”
Elevation of the chimney above the roof plane
- If the distance from the center of the chimney to the ridge of the roof does not exceed 1500 mm, the pipe must be raised above the ridge by at least 500 mm ;
- With a distance from the center of the pipe to the ridge from 1500 to 3000 mm, the top of the pipe can be at the same level as the roof ridge;
- At a distance of more than 3 meters, the top of the pipe must be no lower than a line drawn down from the ridge at an angle of 10 degrees to the horizontal.
The most convenient option for bringing the pipe through the roof is to pass it through the ridge. In this case, installation is easiest; there are rarely snow pockets on the ridge, and thanks to this arrangement, it is easy to carry out insulation work. But this method has a drawback: the rafter system should not have a ridge beam. An option with two beams that are attached in the area where the chimney passes through the roof is also suitable, but this is quite difficult to implement and is not always possible.
The most unfortunate option for placing a chimney is in a valley (a valley is a roof element made of a kind of tray, forming an internal angle between the joints of the pitched roof elements). Large masses of snow usually accumulate here; during rain, water flows down from two slopes, so even with the most careful insulation, a leak will only appear a matter of time.
The most convenient option for venting the pipe through the roof is near the ridge
Based on this, the most acceptable option for pitched roofs is not far from the ridge, but below it:
- installation is quite simple,
- There is usually little snow accumulation, which means there is no need to install snow retention,
- installation is not the most difficult,
- Due to the not very high height of the pipe, it does not need to be reinforced with braces.
If it turns out that the chimney runs close to the floor beams, or close to them (the minimum distance should be 13-25 cm depending on the type of pipe), exits in the valley or close to the slope, an additional elbow, with which you can lead the pipe to the right place.
If the roof of the bathhouse is pitched, the most reasonable solution would be to organize the pipe outlet through the roof near the top point of the roof.
Bathhouse roofs, as a rule, have solid insulation, which solves the problem of heat preservation. To ensure good heat and moisture protection properties of the roofing pie, it is necessary that the membranes and films of heat and moisture protection are continuous.
By bringing the pipe through the roof, we necessarily violate their integrity. Moreover, according to fire safety standards, the distance from the pipe to combustible materials (which are vapor barrier and waterproofing films) must be at least 13-25 cm . How to get out of this situation? The best option is to separate the area where the pipe passes through the roof. To do this, additional rafter legs are fixed at the required distance from the pipe on the right and left, and transverse beams are installed below and above at the same distance between these rafters. In this case, the pipe ends up in a separate box.
It often happens that “the pipe hits the rafters.” In this case, the rafter leg is cut, additional rafter legs are installed, as well as cross beams. This creates a box for the safe passage of the chimney through the roof
The space between the pipe and the rafter structure is filled with mineral wool. Not with fiberglass - it does not tolerate high temperatures, but with basalt wool, which tolerates temperatures normally and does not lose its heat-insulating properties when exposed to moisture.
At the same time, to ensure the tightness of the roofing pie within the box in which the pipe will be located, the materials are cut into an “envelope”, the edges are wrapped up to the beams and rafters, secured with staples or nails (counter sheathing strips can be used). To prevent moisture from entering, the areas where materials adhere to the wood must be additionally insulated using adhesive tapes or sealants.
The roofing pie at the passage site is cut into an “envelope” and secured to the sheathing and rafters
But there is another option. If the temperature of the pipe in the area where it passes through the roof does not exceed 50-60 ° C, you can simply glue the roofing cake films using the same sealants and adhesive tapes. This is possible if, for example, a tank for heating water is installed on the pipe after exiting the firebox or an additional heater is installed, etc., but it is not a sandwich that goes out onto the roof.
In any case, to drain condensate in the waterproofing layer, you will need to attach a drainage groove. You can buy it (usually it is made from stainless steel), or you can make it yourself from a film of sufficient thickness. The groove is secured around the pipe and its end is pulled out to the side. Thus, the condensate flows into this groove and is discharged onto the roof slope.
When passing through the roof, the most important thing is to remove the water flowing down the roof and the pipe itself. To protect against precipitation, protective aprons are used, the upper edge of which is placed either under the sheet of roofing material located above, or under the ridge.
The apron is placed either under the sheet of roofing material located above or under the ridge
When venting the chimney through the roof, it must be fixed, but so that it remains movable relative to the roof. Otherwise, due to thermal expansion/contraction, the integrity will be compromised and leaks will certainly appear. For example, a round pipe can be given direction by metal strips or corners.
When installing, check the verticality using a plumb line - this is important so that soot does not accumulate and there is good traction.
The pipe should not be fixed rigidly when passing through the roof.
If the chimney is brick, rectangular or square in shape, you can use the materials included with the roofing material.
When passing a brick pipe through the roof, you can use elements offered by roofing material manufacturers
If the roof is made of metal tiles, then the companies that produce it offer special tapes for sealing the joint with the pipe, on one side of which an adhesive layer is applied. These elastic bands are a complex compound containing aluminum and/or lead. One edge of such a tape is glued with the adhesive side to the base of the chimney, the other - to the roof sheathing. The upper edge is additionally fixed with a metal strip, which is attached to the brick with heat-resistant dowels.
To reduce the likelihood of water flowing along the wall, you can make a recess under the bar - a groove. Then the tape and bar will be in the recess. To completely eliminate water seepage, a heat-resistant sealant is applied to the joint.
They practically also seal the passage of a pipe through a roof made of soft tiles or roofing felt. But in this case, instead of an elastic tape, the tiles or roofing felt themselves are placed on the chimney.
When a pipe passes through a roof covered with soft tiles, its edges are placed on the chimney or apron
You can make an apron for a square or rectangular pipe yourself. Roofers usually use sheet metal for this, but sheet aluminum works well. Four separate parts are made of metal - two side, front and back.
An apron for a rectangular or square pipe is easy to make yourself
The metal strips are bent so that one part fits onto the pipe, and the second is attached to the sheathing. In a brick chimney, in the upper part of the apron, an edge is made, which is inserted into a special groove and coated with sealant. To prevent water flowing down the apron from getting onto the sheathing and insulation pie, a sheet of metal of large width is placed under the front part of the apron, with curved sides along the edges. It goes under the roofing material and is called a “tie.”
If metal tiles are used on the roof, then an apron is made from a smooth sheet of the same color, the upper edge of which is tucked under the row of roofing material located above so that water flows onto the apron and does not flow under it. If the pipe comes out close to the ridge, you can either tuck it under the ridge itself, or bend it to the other side.
There is one important nuance: if the width of the brick chimney is more than 80 cm (its size is perpendicular to the rafters), you need to make a slope - a small gable roof located higher. It removes sediment, reducing the likelihood of leakage. But such a width of chimneys in a bathhouse is the exception rather than the rule.
Modern round chimneys in bathhouses are usually a sandwich pipe. Occasionally, you can still see asbestos pipes on the roofs of bathhouses, and even more rarely - a single pipe without thermal insulation.
A simple single wall, which is discharged through the roof, carries a very high probability of a fire. Therefore, using this option is extremely undesirable.
Modern round pipes are usually sandwich pipes
The video below shows an option for sealing a pipe when installed on a metal tile roof.
If metal tiles are used as a roofing material, then manufacturers often offer roofing passages. They are made from a sheet of the same color and connected to a special cap through which the pipe passes.
Pipe passage through a metal roof
It is easy and simple to seal a round pipe on the roof if you use a factory penetration. It consists of an aluminum flange to which an elastic part made of rubber or silicone is attached.
Factory-made penetrations are the easiest option for sealing the junction of the pipe and the roof
They come in different sizes and have different slope angles. You can choose it for any diameter, roof type and installation location. The penetration flange is coated with a composition similar to the composition of the corrugated part; there are grooves along the edges into which they are filled with sealant. One of the penetrations, “Master Flash,” has 11 sizes that cover diameters from 3 to 660 millimeters.
Walkthrough "Master Flash" MASTER FLASH
When installing such a penetration, part of the corrugation is cut off in accordance with the required diameter. Then it is put on the pipe. The rubber must move with force to ensure a tight fit. Since the hole is about 20% smaller than the diameter of the pipe, you have to pull hard. To make less effort, you can lubricate both with soapy water.
How to install a factory penetration
After the corrugation is pulled to the desired location, the flange is given the required shape - the material is plastic and you can use a hammer, but you need to work carefully.
Using a hammer, give the flange the required shape
Then the grooves located on the inside are filled with sealant, the edges are pressed against the roofing material and secured (self-tapping screws are included in the kit). If the roofing material is not iron, self-tapping screws are not suitable. You need to use either long screws that will reach the sheathing, or dowels for the floor slabs.
Split model of penetration
There are quite a few options for factory-made penetrations, and there are detachable models. They are used when there are thickenings on the pipe or when they have to be mounted on an already assembled chimney of great height. In this version, the kit includes clamps that connect the parts of the passage to each other. The rest of the installation is similar.
The video shows how to seal a penetration through a regular slate roof using a MASTER FLASH corner penetration.
In order to seal the joints of different parts of the bathhouse pipe passage through the roof, you need to use not just a roofing sealant, but always a heat-resistant sealant. It is advisable to use a neutral silicone heat-resistant sealant.
If Master Flash is installed on a metal roof (metal tiles or metal profiles), then it is necessary to use silicone sealant that does not contain vinegar (non-acetic sealant). This is necessary so that it does not enter into a chemical reaction with the metal and does not destroy it.
Roofing silicone sealant retains its properties in the range from -50 ° C to +300 ° C, which is sufficient for all weather conditions and is quite suitable for sealing a chimney pipe.
Roof sealant must be neutral and heat-resistant
But you need to remember that the surface to be treated must be clean and dry. The time for complete hardening is indicated on the packaging, usually 24 hours.
MASTER FLASH made of silicone can withstand temperatures up to +300 degrees Celsius. This is quite enough to seal a sandwich pipe and, in many cases, a chimney made of asbestos-cement pipe.
The passage through the metal tile is sealed using a Master Flash penetration. Additionally used bitumen tape
As for the metal mono-pipe, in these cases it is possible to use MASTER FLASH in cases where the length of the chimney from the stove to the passage through the roof is at least 3 meters. As a rule, in this situation the temperatures will not be critical, but if not, then thermal insulation of the area that passes through the roofing pie is necessary.
Before reaching the roof, the pipe also passes through the ceiling. It’s not difficult to do the ceiling cutting correctly: there are factory-made feed-through units, but you can do without them. Read how to properly install a chimney through the ceiling here.
Functions and features of operation of a chimney in a bathhouse
The main purpose of a chimney in a steam room is high-quality and controlled removal of combustion products in order to completely eliminate the accumulation of harmful carbon dioxide and the formation of burning on surfaces. The resulting draft (with air suction into the combustion chamber) maintains a stable operation of the heat generator. By manipulating the flows, the user regulates the heating value of the furnace and fuel consumption. You can heat such a sauna stove for as long as you like, and you can steam all this time.
Features of heat distribution with different methods of connecting the heater to the chimney
The stove in the bathhouse is heated inconsistently. Accordingly, the smoke channel cools down completely between sessions, so the chimney parts experience the strongest repeated thermodynamic loads. The second important factor is operating temperature. Unlike boilers and furnaces used for heating, gases heated to 700 degrees or more are removed here. Direct-flow stoves are often used in the bathhouse; due to the lack of heating shields or water jackets that remove some of the heat, the smoke turns out to be so hot. Therefore, the problem of chimney burnout (the danger of gas contamination and fire) always remains relevant. Chimneys for bathhouse stoves are made from high-quality materials. If these are factory products, they must be approved by the manufacturer for such difficult operating conditions.
Assembly Tips
After constructing the chimney, as well as some time of use, it is important to take care of regular cleaning of the system. The most proven way to clean a chimney is to use mechanical tools.
Special brushes, weights, and in some cases a crowbar and a sledgehammer are suitable for this.
Working as a chimney sweep is a dirty job, so everything is taken out of the bathhouse in advance, the surfaces are covered with newspapers or film:
The simplest method is to use a special brush that can be used to clean the chimney. Simply insert the brush into the pipe, then gently push it upward until the resistance due to accumulated soot disappears. It should not be rotated around its axis, otherwise there is a risk that it will get stuck in the pipe and will have to be removed in parts. Another effective method of cleaning a chimney is burning aspen wood. The method will help with a small amount of soot on the surface of the pipe. When burning aspen logs, a better traction force is created, which is capable of removing soot from the chimney.
- Potato skins have similar properties. But to prepare the required amount of material, you will have to get serious about cleaning more than one kilogram of vegetables.
- Modern methods of protecting pipes from soot using chemicals have become common in use. Modern preparations include special components that, when burned, carry away soot. The components can act as a soot separator; as a result, it will fall off the pipe walls itself.
It is believed that the best time to clean a chimney is after rain. In a humid environment it is easier to maintain the pipe. Timely cleaning of pipes will be the key to high-quality combustion of firewood. This will keep the bath warm. To learn how to make the right chimney for a bathhouse, watch the video below.
First, about brick structures, which are a continuation of the furnace masonry. The passage unit, called cutting, is performed by expanding the masonry to standard dimensions, as shown in the diagram above. It turns out that when crossing the ceiling, it is necessary to maintain a wall thickness of one and a half bricks (380 mm), and a roofing thickness of 1 brick (250 mm).
Steel pipes for exhaust gases are usually assembled from sections inserted one into the other. Moreover, the chimney must be installed in such a way that the condensate inside the flue can flow down without hindrance. That is, the upper section is inserted into the lower one, this is called a “condensate” assembly. As for modular sandwiches, the inner pipe of the inserted upper section should fit into the lower one, and the outer one should wrap around the casing of the lower one from the outside. In this way, sediments are removed and quietly flow to the ground.
- Be sure to use a ceiling passage box, even if you are using a sandwich. Fill it with expanded clay, foam glass or mineral wool. Do not fill the space around the pipe with earth, especially sand. Sand tends to get very hot and retain heat for a long time.
- The most optimal chimney height is 4.5-5 meters. Try to stick to these parameters.
- The upper edge of the pipe should rise above the ridge by at least 50 centimeters. But, if the roof is flat, then the height here should be at least a meter. For large chimney heights, special guy wires are installed.
- In a steam room, if the pipe passes near a wall or partition, then a protective screen must be installed on the wall. It can be in the form of stainless steel or basalt cardboard.
- When installing a flash drive, it is recommended to use a special thermal and weather-resistant sealant. He copes well with the task assigned to him. By the way, during the assembly of a chimney sandwich, the same thermal sealant, and sometimes crimp clamps, are often used.
- If flammable roofing material is used, a spark arrestor is required. You can do it yourself by using a used KAMAZ air filter.
- Try to avoid sandwich pipe joints in the ceiling passage. At this point the smoke channel must be solid.
We invite you to familiarize yourself with: Ventilation in the bathhouse diagram and device
Wisdom Quote: If you want the world to change, be the change.
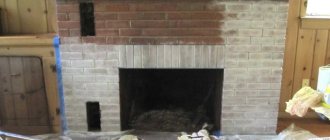
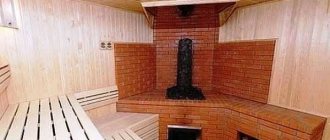
Protective thermal screens
As the main protection of the walls of the bathhouse, heat-resistant screens are used - special insulation shields to cover the side surfaces of the stove and reduce the intensity of the spread of IR radiation in the room.
Screens are divided into two categories: metal and brick.
Metal
Protective screen made of sheets of steel or cast iron. It is mounted around the perimeter of the sauna stove, while maintaining small technological gaps (3-5 cm) between the screen and the outer walls of the heating structure to ensure additional air convection.
Depending on the characteristics of the walls of the bathhouse and the type of stove, metal screens can be front and side. Some models of metal stoves are produced with an additional protective casing, which is installed when installing the firebox.
Installation of metal screens is carried out using adjustable legs and secured to the floor with bolts. In addition, the legs allow for clearance at the bottom of the structure for additional ventilation. To increase service life, the screens are coated with a fire-resistant paint layer.
Advantages:
- reduction in the intensity of IR rays;
- improvement of air convection between the oven walls and the screen;
- reduction of the overall heating temperature of the external walls of the heating structure.
Brick
A protective screen made of brick is intended for enclosing the walls of a sauna stove.
The masonry is done in ½ brick around the perimeter, maintaining technological gaps of 6 cm. The lower part of the structure is equipped with additional air ducts at a distance of 2.5 cm from each other.
To construct a brick screen for furnaces, heat-resistant fireclay bricks without voids are used. As a connecting mixture - a thick solution of cement or clay.
The finished screen walls should be 22–25 cm higher than the wall of the heating structure.
Advantages:
- low thermal conductivity of the material from which the screen is made;
- resistance to high humidity and high temperatures;
- long-term accumulation of heat in the room;
- receiving soft heat from the stove.
Regulatory requirements for the installation of chimneys
The main and only purpose of the chimney pipe is to remove waste gases from the heating boiler into the atmosphere outside the building where the stove, boiler or fireplace is installed. Moreover, the efficiency of heat-generating equipment directly depends on its correct installation.
You can install a boiler with excellent efficiency in your house, but make mistakes when installing the chimney pipe. The result is excessive fuel consumption and lack of comfortable air temperatures in the rooms. The chimney must have the correct cross-section, location, configuration and height.
If there are two boilers in the house or a stove and a fireplace in different rooms, then it is better to make separate smoke exhaust pipes for each of them. The option with one chimney is permitted by SNiPs, but only a professional stove maker can calculate it correctly.
The diameter of the chimney is selected depending on the heating equipment used. When installing the boiler, it is already specified by the manufacturer with the outlet pipe. It is prohibited to connect pipes of a smaller cross-section to it, and there is simply no need for a larger cross-section. In the second case, to increase traction, you will have to install a gearbox, which costs a lot of money.
In the case of a fireplace or Russian brick stove, everything is somewhat more complicated. Here you will have to make engineering calculations taking into account the fuel used and the size of the firebox. It is much easier to take a ready-made brick oven project that has been tested by time. Fortunately, there are many options with a clearly verified order of brickwork.
The height of the chimney pipe above the roof is determined by its distance from the roof ridge
The higher and longer the chimney, the stronger the draft. However, this can lead to overheating and destruction of its walls. Plus, a strong increase in draft is a prerequisite for the occurrence of turbulence in the chimney, which is accompanied by hum and low-frequency noise.
If the pipe is too low, the ridge can turn into an insurmountable obstacle to the smoke coming out of it. As a result, a reverse draft effect will occur with the flue gases tipping back into the firebox. How to normalize it will be discussed in this material.
During normal operation of the chimney, the horizontal wind flow, flowing around the section of the pipe above the roof, turns upward. As a result, rarefied air is formed above it, which literally “sucks” the smoke from the exhaust. However, this process can be hindered by the ridge of a pitched roof and even a tall tree in close proximity to the house.
Standards for the installation of a smoke exhaust system
Building codes require the chimney to be constructed as follows:
- Its length from the grate to the top point should be from 5 meters (an exception is possible only for buildings without attics and only in conditions of stable forced draft).
- The optimal height, taking into account all possible bends, is 5–6 m.
- The distance from the metal chimney to structures made of combustible building materials should be at least a meter.
- The horizontal outlet immediately behind the boiler should not exceed 1 m.
- When passing roofing, walls and ceilings inside the house, a channel should be constructed from non-combustible materials.
- To connect metal pipe elements, sealant should only be used that is heat-resistant with an operating temperature of 1000 °C.
- The chimney should rise at least 50 cm above the flat roof.
- If a non-brick chimney is constructed above the roof level by 1.5 meters or more, then it must be strengthened with braces and brackets.
Any slopes and horizontal sections inevitably reduce draft in the chimney pipe. If it is not possible to make it straight, then bends and displacements are best made from several inclined segments at a total angle of up to 45 degrees.
In addition to observing purely construction rules that guarantee high efficiency of the chimney and stove, it is also necessary to take care of fire safety, for which special indentations and screens are made
When installing ventilation and chimney shafts in parallel in one structure above the roof, in no case should they be covered with a common cap. The outlet from the stove must be elevated above the ventilation pipe, otherwise the draft will decrease and the smoke will begin to be sucked back into the house. The same applies to separate but adjacent hoods and chimneys.
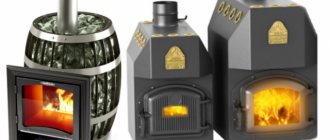
Brief description and dimensions of the metal stove
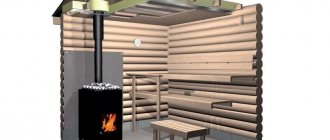
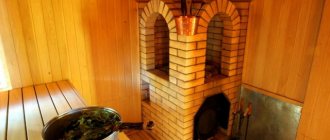
Our design will have a separate tank for heating water and a heater built into the top of the stove. The flame heats the heater from all sides, this significantly increases the efficiency of the stove. You can take arbitrary sizes, take into account the parameters of the steam room and the number of people washing at the same time. We give the dimensions of our stove as an example.
- External heater. Width 50 cm, length 50 cm, height 80 cm.
- Internal heater. Width 40 cm, length 40 cm, height 50 cm. The distance between the walls of the inner and outer heater is five centimeters around the perimeter.
- Bake. Width 50 cm, length 90 cm, height 50 cm. You can change the length of the stove, make it only for an external heater 50 cm long (then the water tank will have to be mounted on the side on stops) or increase the length to increase the volume of the tank.
- Water tank. Width 40 cm, length 50 cm, height 60 cm. The tank holds 120 liters of water, which is enough to wash three or four people. Of course, hot water needs to be diluted with cold water.
How water heaters work | HowStuffWorks
Let's take a closer look at what's going on inside the water heater tank to see how simply and elegantly it does its job.
Water heater thermostat
regulates the temperature of the water inside the tank. Typically, you can set the temperature between 120 and 180 degrees Fahrenheit (49 and 82 degrees Celsius). The water temperature setting recommended by most manufacturers is 120 to 140 degrees Fahrenheit (49 to 60 degrees Celsius). It is hot enough to be used at home, but not hot enough to cause a burn. If you have children in your home, it's wise to stay closer to the lower end of the range.
Announcement
Setting your water heater temperature lower also saves energy, and if you remember to lower the temperature when you go on vacation, you'll reap even greater energy savings. Typically the thermostat is located under a protective cover and has a knob or dial that can be turned to set the temperature.
The dip tube delivers cold water from your home's water pipes to the bottom of the tank's interior, where the water begins to heat up. The heating mechanism, either burner or element, remains on until the water reaches temperature. As the water heats up, it rises to the top of the tank. The outlet pipe is located at the top of the tank. The water coming out of the water heater at the top is always the hottest in the tank at any given moment because the nature of hot water is to rise above the denser cold water.
The secret to designing a water heater to separate cold incoming water from hot outgoing water is that it is based on the principle that heat rises to make the hardest part. The heat removal tube at the top of the tank will do the rest.
.
Normal temperature of gases leaving the furnace
In order for the water present in hot gases to evaporate better, the temperature of the latter must be increased. On well-heated pipe walls, settled drops of moisture quickly evaporate.
The normal temperature of gases leaving the furnace before exiting into the chimney is 12O...14O°C, when leaving the chimney into the atmosphere - not lower than 100°C.
If the flue gases, when exiting into the chimney, that is, at the view, reach a temperature of about 250 ° C, then condensation does not form, draft improves, the stoves heat up faster, while consuming less fuel.
The temperature of the exhaust gases can be determined using a dry splinter, which is placed across the view hole during combustion. If after 30...40 minutes you remove the splinter and scrape off the sooty surface from it with a knife, you can set the temperature of the gases. The color of the splinter does not change at temperatures up to 150°C. If the torch turns yellow (to the color of a white bread crust), it means that the temperature has reached 200°C; if it turns brown (to the color of a rye bread crust), then the temperature rises to 250°C. A blackened splinter indicates a temperature of 300°C, and when it turns into coal, it means that the temperature reaches 400°C.
Thus, when firing the furnace, the temperature of the gases must be adjusted so that at the viewer it is within 250°C.
You should know that in the summer, condensation either does not form at all or occurs in small quantities. The formation of condensation largely depends on the size of the grate, the correctly raised hearth and the design of the furnace in a Russian stove, the size of the channel, the thickness of the walls, clay and height of the chimney, the temperature of its heating, the humidity of the fuel used, the temperature of the exhaust gases from the chimney and the excess number of chimneys in the oven.
The height of the chimney must be at least 5...6 m, counting from the level of the ash chamber or the hearth of a Russian stove. The thickness of the pipe walls should be half a brick, 20 mm). Thinner pipe walls heat up quickly and cool down quickly, which leads to the formation of condensation. Such pipes must be insulated. Various cracks in the pipe and stove, through which cold air penetrates, also contribute to the cooling of gases and the formation of condensation. When the cross-section of the pipe channel (chimney) is higher than required for a given stove, the flue gases rise through it very slowly and the cold outside air cools them down pipe The smoothness of the chimney walls has a great influence on the draft force, that is, on the exit of flue gases. The smoother they are, the stronger the pull. All roughness in the pipe helps reduce draft and retain soot.
Sometimes, to improve draft in stoves, it is necessary to rearrange the pipes, reducing the size of the chimney, lowering or raising the height of the pipe on the roof. They do this until they get a satisfactory result. In places where the chimney narrows, right angles should be cut off to ensure a smoother transition of gases.
Do-it-yourself stove laying
Safety first
The temperature of the chimney in the bathhouse can rise to critical limits, so the organization of the system must comply with fire safety requirements:
- Connections of individual parts of the pipe must be strictly sealed;
- The places where the pipe passes through the ceiling are insulated from wooden elements with fireproof material (sand, asbestos, expanded clay);
- The pipe exit through the roof is treated with waterproofing designed to protect the sheathing from moisture.
The Internet is full of such photographs, where you can see sparks flying from the steel pipe of a bathhouse. But the danger of fire also exists in residential areas. The fact is that many summer residents do not realize their responsibility for fire safety and install unsuitable chimneys in the wrong way; as a result, heat leaks into the chimney “down the chimney.”
The heat flows away, but the room remains cold, then the owner of such a careless stove begins to heat it up even more until the fire in the firebox reaches the peak blue color of the flame. The result is an excess of oxygen in the stove if the valve is open too far or if there is too much wood and it burns too hot.
At the exit from the chimney, the firewood still continues to smolder. If there are trees near a bathhouse or living space heated in this way, at the height of the exhaust, a fire may occur, especially in the summer. Moreover, in steel chimneys, this heating method can cause overheating of the pipe. This point is not always taken into account when designing.
If you look closely at the heat map of chimneys during testing, you can see that the temperature at the chimney inlet is often lower than at the outlet. When designing, they take into account the power of the stove and the heat transfer at the input, but no one assumes that the wood will burn out in the chimney itself. If the chimney was designed for the inlet temperature, then the ceilings may not withstand it and may catch fire.
For the same reason, you should not stuff firewood into a metal chimney and fill the firebox right up to the chimney. By the way, the following situation is possible: in winter, snow tore off the pipe and exhaust gases, as well as burning microelements, go no higher than the level of the roof ridge, but at the level of the base of the chimney in the roof itself. This area can overheat and catch fire, so to avoid such situations, trust the installation of the chimney to professionals.
Even if your chimney does not have such heat-resistant characteristics at the outlet as required, you can organize heat removal from the chimney in the ceiling area and direct the heat to heat rooms, dressing rooms, etc. If it is not possible to utilize the heat, try to reduce the blower; if, at the same time, the remains of firewood fly out of the chimney, or the chimney continues to overheat, you should contact a stove-maker, who will inspect the chimney and reconstruct the chimney.
How to simplify the choice of chimney
What is a chimney for fireplaces? This is a set of pipes, one end of which is connected to a heating device, and the other is brought outside. Its installation is a rather complex and labor-intensive process that requires certain knowledge and professionalism. Chimneys can be made of brick, stainless steel, ceramics. Each of these types has its own advantages, disadvantages, as well as installation features. Of course, in order to make the right choice, it is better to seek advice from professionals. However, in order to have some idea about the design of chimneys, we provide below a brief description of the most common types.
External and internal smoke exhaust system
When choosing a chimney, you should consider what type of installation will be used - internal or external. Each installation method has its own advantages and disadvantages, and you also need to know about them before deciding which pipe to use for your sauna stove.
At one time, American architects came up with a way to place the smoke exhaust structure on the outer surface of the building wall. This option for installing a chimney began to be used in domestic baths due to the simplicity of the device. The pipe connected to the stove does not rise to the ceiling of the room, but is led out through the wall of the building.
The advantages of a chimney mounted in this way include increased safety and the fact that it is not necessary to make insulated transitions in the roof and attic. Laying the pipe out through the wall prevents the building from the possible flow of precipitation through the cracks and gaps formed between the roof covering and the pipe.
But the external chimney has a significant drawback - it quickly cools down, which means that condensation forms inside it. To eliminate this problem, the pipe should be thoroughly insulated.
Another negative point inherent in chimney structures placed outside is the inability to give off additional heat despite the fact that fuel consumption increases.
There are also combined chimneys. In them, a metal pipe is removed from the device, and then taken outside to the street. Then it enters a brick-lined chimney built into the wall and rising to the required height.
The metal smoke exhaust structure located inside the bathhouse is placed on top of the heater and raised to the ceiling, laid through the attic and roof to the level of the ridge located on the roof.
Such chimneys have a great advantage, since all the thermal energy received in the furnace firebox, when moving through stainless steel or steel pipes, will simultaneously heat the attic and rooms of the bathhouse building. This means that indoor air takes longer to cool, resulting in significant savings in fuel consumption.
Provided that the internal smoke exhaust structure is installed correctly and the integrity of the connection points of the elements is constantly monitored, the system can serve without repair for many years.
Such options have a drawback, which is the need to lay the pipe through the floors and roof.
Key points to consider when choosing a chimney
When choosing a chimney design, you need to pay attention to the following factors:
- The chimney exhaust material needs to be stable so that it can withstand the high temperature of the exiting products; (See also: )
- Must withstand a mixture of soot and condensation;
- The design of the chimney must fully comply with all required standards (construction, fire, technological, operational).
For a fireplace that will be fueled by gas, a chimney made of stainless steel is perfect; for coal, it is better to choose a chimney made of brick, and for firewood, a design made of ceramics, brick, and stainless steel is suitable.
Pipes and tubes - thermal expansion
Thermal expansion of pipes depends on the initial and final temperatures of the pipe, as well as on the expansion coefficient of the pipeline material at the actual temperature. The expansion formula can be expressed as:
dl = α L o dt (1)
, Where
dl = extension (m, inches)
L o = pipe length (m, inches)
dt = temperature difference ( o C, o F)
α = coefficient of linear expansion (m/m o K, in/in o F)
Note that the average coefficient of expansion may vary depending on temperature:
Formula (1) can also be used with SI units. The expansion coefficient must be adjusted to o C.
Example - thermal expansion of alloy steel pipe
100ft Alloy Steel Pipe
heats up from
o
F. The expansion coefficient is 8 10 -6 (in/in o F)
.
The expansion of the pipe can be calculated as:
dl = (8 10 -6 in/in o F) (100 ft) (12 in/ft) ((212 o F) - (32 o F))
= 1.728 inches
.
Chimney design
Each individual building and each fireplace requires a suitable chimney with individual parameters and characteristics.
Parameters by which you should select a chimney:
- Chimney material;
- The location of its structure;
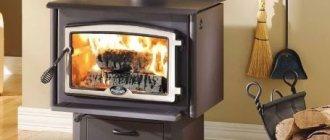
- Chimney made of steel. The steel chimney design includes pipes, insulation and an external circuit. Stainless or galvanized steel is used to make pipes. The steel chimney design is easy to install and lightweight.
Galvanized steel pipe has a lower cost, but it is less reliable than the previous model. Accordingly, the best chimneys are made of stainless steel.
- Ceramic chimney design. Installing a ceramic chimney requires certain specialist training and, very important, accuracy. Ceramics provide excellent thermal insulation. The service life of the material is approximately 30 years. The ceramic structure consists of an internal ceramic liner, lightweight concrete blocks are located on the outside and, of course, a heat-insulating gasket that must be laid between the layers. (See also: )
- Glass construction is considered the most expensive and is very difficult to install. Some installation experience is required, but the glass fits perfectly into the interior of the house and looks very impressive and irresistible. Glass is very resistant to the formation of corrosive plaque, heat from the resulting combustion products and any exposure to moisture. Undoubtedly, these advantages of the design bring it to a high level of use.
What is the BEST water heater temperature setting?
Note: This post may contain affiliate links. This means we may receive a small commission on purchases you make, at no cost to you.
Gas and electric water heater temperatures are set at the factory, but can be adjusted to your preferences with just a couple of tools. If you've already set the temperature and are telling yourself, "I don't have hot water" or not enough, there are several factors that can affect the heating. If all else fails, the heating element may be faulty and need to be replaced.
How to check the temperature of a water heater
Most water heaters do not have a temperature gauge with a readout device. Instead, the thermostat is marked with a temperature or heat range marking. To accurately determine the temperature of your water heater, you will need a cup and a thermometer.
Let the water heater sit for at least one hour without using it, and then turn on the faucet closest to the water heater. Let the water run for at least one minute to allow the water to reach its maximum temperature, then fill the cup. Insert a cooking thermometer and adjust the settings to your liking.
Recommended Temperature Settings
Water heaters are factory set to OSHA recommended levels, around 140 degrees.
On the other hand, the EPA suggests setting the thermostat to 120 to reduce energy consumption and using a booster heater to reach disinfection temperatures in selected outlets. From another perspective, lower temperatures are better for families with small children, while higher temperatures are more effective at cleaning and disinfecting.
My recommendation
Personally, I think the water heater should be set to 130 degrees in almost all cases. It's low enough to prevent burns, but hot enough to kill harmful bacteria.
How to turn on the water heater
You can adjust your water heater settings to produce more hot water if you are not happy with the recommended temperature. Water heater settings are easy to adjust, although electric heaters will require a screwdriver and perhaps a small wrench or socket wrench.
Please be aware that the thermostat is factory set to the recommended temperature and changing this setting may increase the likelihood of serious burns.
How to set the temperature on a gas water heater
Gas water heaters have a dial that can be turned to adjust the temperature. Most gas control valves have a handle with different labels on it, such as ABC. Different brands of gas water heater control valves may have different labels. In most cases, here's what each label means:
- Low (or warm) = 80-90°
- Hot (or triangle symbol) = 120°
- A = 130 °
- B = 140 °
- C = 150 °
- Very hot = 160 °
Sometimes there is a "Vacation" setting. This does not heat the water, but does keep the pilot light illuminated.
How to set the temperature on an electric water heater
Turn off the circuit breaker. Remove access panels. Locate the thermostat adjustment under the insulation. Using a straight screwdriver, set the thermostat control to the desired temperature. Replace insulation and panels, then restore power. Here's a good video demonstrating the process:
Factors affecting water temperature
Some factors that can affect the temperature of the hot water are the distance from the water heater to the outlet, how the pipes are installed, and the condition of the heating element itself.
Small diameter pipes and longer distances will take longer for hot water to reach the opening, for example, and pipes that run under or outside the home may be exposed to winter or summer conditions.
If you have a large home, you may want to consider installing a hot water recirculation system, which could mean less time spent getting hot water to every outlet in the house, as well as significant cost savings over time.
If adjusting the thermostat still does not produce the desired temperature, it may be time to replace the water heater element. If you do not notice a difference in the water temperature after adjusting the thermostat, you may have a faulty thermostat that needs to be replaced.
Related Posts:
.
Advantages and disadvantages of ceramic chimneys for fireplaces
The advantages of a ceramic pipe include the following characteristics:
- the material is very quick to install and assemble;
- is a guarantee of high efficiency;
- long service life;
- the range of blocks is large, which makes it possible to mount a chimney opening with any configuration;
- the presence of a special hole that makes it possible to clean the chimney;
- the condensate that appears drains away thanks to the hole located at the bottom of the chimney.
Among the disadvantages of block ceramic pipe systems, it is customary to highlight the following:
- relatively high price;
- Due to the fact that most of these chimneys are manufactured abroad, the delivery time is sometimes very long.
Dangerous temperature
For comparison, consider a number of studies conducted by scientists in the twentieth century to monitor the effects of regular visits to a steam room heated to extreme values of 110-130 °C.
Professor H. Their in the 80s of the last century put forward an assumption about the connection between high temperatures in Finnish saunas and the occurrence of cancer, which was subsequently confirmed by the results of a large study. After considering a significant number of cases of lung cancer in those who like to steam at 110-130 ° C, it was found that staying in a steam room heated to such temperatures contributes to the formation of this disease.
The fact is that you can only be in such conditions when the air in the room is very dry, and this eliminates the hydrostatic effect of steam on the body. As a result, the blood does not supply the lungs well enough and they become burned due to their inability to adapt to the elevated temperatures to the required extent.
A number of other studies have also discovered that exposure to the dry, highly heated air of a sauna negatively affects sperm production and also leads to digestive problems in children born to mothers who frequently visited such saunas during pregnancy.
The manufacturing technology of a sauna stove places special demands on the equipment of all its departments, including the chimney. Its design is slightly different from the chimney system of a home stove. It should ensure long-term heat conservation and safety for steam room visitors. Before organizing a chimney in a bathhouse, it is worth knowing several important nuances.
The design of sauna stoves includes 2 types of chimneys:
- Indigenous. They are organized next to the stove, using a special pipe for connection, through which the smoke goes into the main channel. One chimney can be used for 2-3 stoves. The main thing is that its internal diameter has the appropriate parameters, and the pipes from each heating device are located at different heights;
- Systems with a mounted pipe are mounted directly on the stove pipe and discharged through the roof. This chimney option is the most common for sauna stoves.
Classification of chimneys according to installation location includes 2 types:
- External. Their main part is located on the street and fixed to the wall using a bracket. They are not particularly recommended for baths, as they quickly cool down, losing precious heat.
- Internal. These are vertical structures with good traction, located inside the building.
Depending on the material used, chimneys are:
- Brick. A traditional look, characterized by labor-intensive masonry and high requirements for compliance with all parameters. They have a lot of advantages: durability, fire safety, strength, good thermal insulation and heat accumulation. Disadvantages include the roughness and angularity of the inner surface on which soot deposits accumulate;
- A metal chimney is faster to install and costs less. It has a perfectly smooth surface, but weaker heat-retaining characteristics;
- A combined version, including 2 parts: the lower one is made of brick, the upper one is made of a modern sandwich pipe. Allows you to organize neat, small passages that are easier to cover with heat-resistant material.
What are the dangers of chimney overheating?
Overheating of the chimney leads to rapid wear and destruction. And this, in turn, can lead to a fire. According to statistics, the majority of fires arise from the chimney and not only from its destruction, but also from improper installation.
What to do?
You can, of course, listen to the advice of “knowledgeable” people and visit your chimney with a bunch of different devices that reduce the temperature of the chimney. But this will not solve your problem, but will partially postpone it, just like the risks with such parameters.
It would be more correct to solve the issue with a heating device and, if it is not controllable and does not have a device for afterburning gases, then simply replace it with a more advanced device. Then the chimney will work for many years if it is made according to fire safety standards.
Source
Video installation of a sandwich chimney with your own hands
A feature of modern sauna stoves is their heating temperature, which can reach 400 degrees. An important indicator of the efficiency of the furnace is instant heating of the body and maximum heat transfer.
The entire heating process is accompanied by the release of infrared radiation, which is distributed on surfaces adjacent to the furnace. Under the influence of high temperatures, the wooden structure of the bathhouse can char or ignite.
This is why it is so important to ensure that wooden surfaces are reliably insulated from the heat of the stove. A protective screen and lining made of fire-resistant materials are suitable for this.