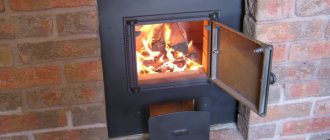
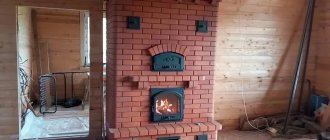
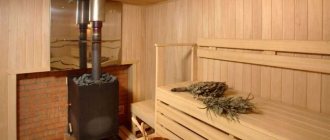
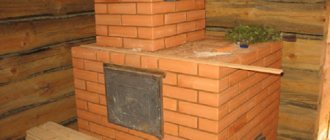
Despite the variety of wood-burning bathhouse heaters made of metal and cast iron offered on the market, the traditional design of a brick stove remains relevant and in demand. This is not surprising, because it warms up the steam room well, retains heat for a long time and provides it with dry steam. Also, in addition to the steam room, a brick stove can also heat 2-3 adjacent rooms (washing room, dressing room). In this article we will tell you how to properly build a brick sauna stove with your own hands, and share our experience in terms of preparatory work and foundation construction.
Types of stoves for baths
First of all, you need to select a suitable ready-made stove design. Experienced stove craftsmen are able to develop their own schemes in relation to masonry and operating conditions. This means that you need to take advantage of their experience and take a ready-made diagram, and for this you need to understand what kind of brick stoves for a bath there are.
It is very difficult to clearly classify heaters by type, there are too many of them, but conditionally all developments can be divided into groups according to the following criteria:
- method of transferring heat into the room;
- location of the heater;
- method of heating water.
The efficiency of heat transfer largely depends on the design and operating principle of the heater. According to this criterion, existing types of furnaces can be divided into:
- duct: the name indicates that the stove has one or many channels (gas ducts) for flue gases. The latter, passing through these channels, give off heat to the brick walls. Gas ducts can pass through the furnace body both vertically and horizontally;
- bell-type stoves by I.V. Kuznetsov: here the principle of heat transfer is different, combustion products give off heat, accumulating in the space under a specially made bell. Moreover, they can come out of there only after cooling, so the oven turns out to be very heat-intensive.
Advice. Bell furnaces are very complex to construct; a home craftsman without experience is unlikely to be able to build one. Therefore, it is better for a beginner to start mastering the laying of channel-type brick ovens.
The backfill of stones (heater) can be located either inside the stove or open. This criterion does not particularly affect the quality of work. But the method of heating water can affect the duration of heating the steam room. Here are the following technical solutions:
- a register made of steel pipes or a stainless steel tank built into the body of the furnace, or rather, into the flue;
- hob: water is heated on it in large containers.
It is necessary to take into account that a good brick stove with a hob will warm up the steam room faster, but the inconvenience with hot water in pans cannot be compared with a flow-through heat exchanger inside a flue connected to a storage tank.
Types of stones
The distribution of warm air and steam inside the steam room occurs due to the stove heater. As a rule, from 1 to 5 kg of stones per 1 m3 are laid inside a brick sauna heater.
Important criteria that determine the choice of stones are:
- heat capacity, that is, the ability to accumulate and release heat into the air;
- melting point - or the threshold to which stones can heat up - it is desirable that this indicator be as high as possible;
- weight – it is preferable that it be high;
- strength - it is important that when heated, the stones do not become brittle and do not crumble or crack.
Basically, the types of stones chosen for the heater are basalt, quartzite, granite, diabase or jadeite (more details: “How to lay stones in a sauna stove correctly, which stones are best to use”). Each of them meets the requirements to a greater or lesser extent.
Materials that should never be used for the heater:
- marble;
- shell rock and dolomite due to the presence of magnesium and calcium carbonates;
- limestone - when sharply cooled with water, it can release gas;
- silicon rocks - tend to crumble and there is a risk of getting burned;
- ores containing asbestos, sodium or sulfur;
- sedimentary rocks.
A number of professionals use cast iron for laying the heater, which meets all the criteria for the operation of the stove.
Bath stove projects
As already mentioned, there are a great many different designs of brick kilns. We will offer several standard schemes, you can use them or find something suitable in the technical literature. So, the first is a diagram of a brick sauna stove with an open heater and a built-in tank for heating water:
Note. In this diagram and in what follows, the following symbols are used:
To build this furnace you will need 415 pcs. bricks and components such as:
- firebox door 210 x 250 mm and blower door – 140 x 140 mm;
- cleaning doors 140 x 70 mm – 2 pcs.;
- stainless steel tank 200 x 300 x 490 mm;
- cast iron plate 410 x 410 mm;
- grate 175 x 255 mm;
- valve 120 x 230 mm and 2 valves 130 x 130 mm.
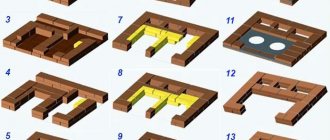
The following diagram shows the order of the sauna stove:
Video description
About the stove with a water tank in the following video:
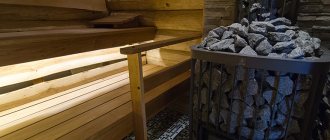
Of course, a stove with a pile of stones on top looks much more impressive and produces excellent steam. In fact, an open heater is more suitable for a Finnish sauna, with its high temperature and dry air (Finns pour little water). High temperatures and high humidity can cause heart problems in an unprepared person. The main benefit of an open heater (as well as a metal stove) is the rapid heating of the room.
Stove-heater with heating plate
This sauna heater, instead of a built-in tank, is equipped with a 2-burner stove, and the heater is located in the body of the stove, directly above the firebox. Although the design provides for the possibility of installing an internal hot water boiler, this is reflected in the corresponding diagrams for laying stoves for baths:
The construction of the heater will require 650 bricks, as well as stove fittings:
- firebox door 210 x 250 mm and blower door – 140 x 140 mm;
- cleaning doors 140 x 70 mm – 4 pcs.;
- cast iron plate 410 x 710 mm;
- grate 175 x 255 mm;
- steel circle Ø20 mm – 3 m;
- stainless steel water tank 220 x 380 x 630 mm – if necessary.
In this option, the order of the masonry for the stoves is as follows:
Installing a water heating tank
Subsequently, a steel tank for hot water is installed in the resulting niche. It can be welded into a rectangular shape or from half a thick-walled pipe, welding the bottom and one part with a steel sheet. The container is of this shape, the flat side is placed against the brick, and the semicircular side is placed in the steam room. The presence of fewer welded joints will extend the service life of such a tank by several years. The steam door is mounted in the same way as other doors, on the 19th row. A chimney is formed above and the pipe is led out beyond the roof of the bathhouse.
Sauna stove with bottom heating
This is a small brick stove, which, due to its design, requires a good foundation. In fact, it will take more time to install it than to complete the masonry itself. Here is a sectional diagram of the heater:
In addition to 260 pcs. You will still need bricks for construction:
- firebox door 210 x 250 mm and blower door – 140 x 140 mm;
- cleaning doors 140 x 140 mm – 2 pcs.;
- chamber doors for stones 210 x 250 mm – 2 pcs.;
- cast iron plate 410 x 410 mm;
- grate 175 x 255 mm;
- valves 130 x 240 mm and 130 x 130 mm.
Preparing for the construction of a furnace
Before you start building a brick stove in a bathhouse, you need to prepare the necessary tools and materials. The set of tools required for the job is shown in the figure:
As can be seen from the figure, the set should contain tools for splitting and shrinking bricks (pick, hammer), for working with mortar (trowel, grater) and various measuring devices (tape measure, level).
For reference. Modern stove makers, instead of chopping stones with a pick, often use cutting machines - machines, grinders.
In addition to the tools, some devices will help you build a stove:
- a sieve to sift sand;
- a small container for soaking bricks in;
- various scaffolds or trestles.
What brick to use for a sauna stove?
You must understand that a stove in a bathhouse will operate in more extreme conditions than a conventional stove for heating a house. This means that masonry bricks should be selected of good quality, without damage, chips and cracks, best of all - with smooth spoon edges (see figure below). For the construction of furnaces, 2 types of bricks are used: red solid ceramic and refractory (fireclay). Dimensions of a standard brick are 250 x 120 x 65 mm, approximate weight is 3.5 kg.
1 m3 of standard ceramic brick contains approximately 480 stones with a total weight of 1700 kg. However, some brick kiln designs may involve the use of non-standard size stones, as shown in the figure below:
Advice. When buying a brick, take it with some margin for rejection. The amount of reserve depends on the quality of the material, and also on the skill of the craftsman to accurately and correctly chop or cut it. An inexperienced stove maker needs more stock.
Installation of a chimney pipe
How to fold a stove with a chimney after completing the construction of brick walls? The furnace construction manual provides for the preliminary selection of a pipe, which in type and functional features must correspond to the design of the future furnace. For a lightweight design, it is recommended to choose a small pipe made of lightweight and heat-resistant material.
When choosing, you should take into account the appropriate wall thickness of the chimney pipe, which cannot be less than ½ the thickness of the brick. The diameter of the passages for the chimney pipe should be of a similar size.
The length of the upper part of the pipe, located above the roof, should not be less than 55 cm. To equip the smoke exhaust duct, a connecting mortar based on cement or lime is used. The clay-sand mixture is not suitable for such work, since under the influence of precipitation it will quickly wash out and form condensation on the inner walls of the pipe.
The chimney pipe with a minimum number of bends must have a total length of at least 5 meters. The finished design can be equipped with a special gate valve.
Masonry mortar
Kiln brick laying up to the chimney is done exclusively with clay mortar, without cement. To prepare it, you need to take the same amount of sifted sand and clay purified from impurities (that is, the proportion is 1: 1), mix and add water. A good consistency is when the solution slides off the shovel easily, but there is no excess water in it.
Advice. It is better for a novice master to purchase a ready-made building mixture for laying stoves.
You can also take clay from a nearby ravine and prepare it yourself. It will need to be soaked in a trough for 2-3 days, and then mixed thoroughly and manually pushing the mixture through a sieve, separating stones and other foreign fractions. The amount of water for soaking is taken in a ratio of 1: 1 to clay. As for laying a firebox made of fireclay bricks, you will need an equally fire-resistant mortar. To prepare it, instead of sand, chamotte chamotte is added to the clay in the same proportion.
Material selection
When purchasing material for the stove, you should carefully inspect it. The standard brick size is 125*250*65 mm. A slight deviation of 2 mm is allowed. When inspecting, you need to make sure that there are no cracks or chips; only minor grooves and thread-like cracks are allowed. When choosing a material, you should make sure that the material meets the specified parameters. Sometimes products from different manufacturers or even different batches of the same manufacturer may differ.
The stove must be perfectly level, so the bricks must be the same size, otherwise smoke will begin to leak through the cracks and over time the firebox may fall apart. It is not recommended to purchase a product with a film that resembles mica. This means that there was a defect in the manufacturing process.
When building a house, the seam between the bricks can be up to 10 mm; for stoves, such a thickness is simply unacceptable. Already with a thickness of more than 4 mm, with constant heating, the seam will begin to crumble, and smoke will begin to flow into the room.
In addition to the main material, you should prepare:
- a container where you can soak the brick;
- clay and sand for mortar;
- container where the solution will be mixed;
- sand sieve;
- a chimney pipe, which you can purchase in a store or make yourself;
- steel wire, which will be needed when installing the combustion chamber and the blower door;
- trestles for working at height;
- roofing felt, asbestos;
- construction tape, rope, level, pencil.
Let us remind you once again that it is better to choose fireclay and fire-resistant red bricks, but heat-resistant alumina and clinker bricks for the furnace may be suitable. Fireclay bricks are used to lay out the fire core; other options are used to line external walls and decorative elements.
The color of a material can indicate its quality. It should be uniform. Uneven color means that the product was fired unevenly, so the strength of the brick will vary in different areas.
It is advisable to select one brick and break it to inspect it. There should be no foreign inclusions, and the color should be free of dark spots. If there is a dark color in the middle, such a brick should not be used to build a stove or other buildings.
To make a high-quality furnace lining, you should choose a material marked with the letter “M” with numbers that indicate the permissible load per 1 square meter. cm. The optimal choice would be a brick with a grade of at least M-150.
After everything is prepared, you can proceed directly to the work itself.
Construction of a sauna stove
Any, even the simplest sauna stove requires a reliable foundation. As a rule, the foundation is the foundation, although in some cases its construction is not required; the stove is placed directly on the floor, laying a sheet of asbestos and metal. This is allowed when the total weight of the structure with the pipe does not exceed 750 kg or the foundation of the building itself is a monolithic slab. In other cases, a separate foundation is needed, located no closer than 50 (or better, 150 mm) from the foundation of the building.
Advice. Even before laying the foundation, keep in mind that all wood-burning stoves must be located at a certain distance from building structures to avoid fire, as shown in the figure:
The easiest way is to pour the same concrete slab to the size of the furnace, evenly distributing its entire load on the ground. To do this, a hole no more than 30 cm deep is dug, its bottom is compacted, and then crushed stone is poured to a height of 100 mm. Next, a concrete base up to 7 cm thick is poured from cement-sand mortar, and after it hardens, formwork and reinforcement cage are installed. Then concrete is placed into the resulting form to the remaining height. Complete hardening of concrete - 3 weeks.
Next, to lay out a brick oven, you must adhere to the following rules:
- soak each brick in a container of water before laying;
- apply the solution not to the stone, but to the previous row;
- lay the brick with its smooth side facing the smoke duct;
- First lay out each row without mortar to fit the stones;
- the remaining solution is removed, and the inner surface is washed off and wiped dry every 3-4 rows;
- horizontal and vertical checks are performed on each row.
Important! If small-sized stoves have a firebox made of refractory bricks, do not bind fireclay and ordinary masonry! A gap is left between them, filled with a solution of ground mineral wool.
After finishing the masonry, it is allowed to dry for a couple of days, after which a test kindling is done with a small amount of firewood. When the dampness is completely gone, the stove can be fully heated.
Go shopping
What building materials are needed to build a sauna stove?
- Concrete for the foundation.
- Cast iron elements - firebox and ash pan doors, grate and valve for adjusting draft.
- Solution.
- Brick.
Let us clarify: the stove in the bathhouse can be not only brick, but also stone. However, selecting and cutting the required number of stones is much more difficult than buying several hundred bricks, so masonry will remain beyond our consideration.
Let's pay attention to choosing what to buy.
Brick
Red, full-bodied. For the lining of the firebox - fireclay, made from refractory clay. Silicate disappears due to poor resistance to temperature: when overheated, it crumbles. Any hollow or porous material will also not work: cavities provide effective thermal insulation, but we, on the contrary, need maximum thermal conductivity.
Cast iron
When choosing doors and valves, you should pay attention to the absence of distortions. All moving elements must open and close without significant resistance.
Other materials
In addition to the above, for the construction of the foundation you will have to purchase:
- Cement. Ordinary Portland cement grade 400.
- Fine river sand. The grain size should not be more than one and a half millimeters. Before mixing the solution, it is sifted.
- Ruberoid. It will be needed to waterproof the foundation: the masonry should not draw water from the ground through capillaries.
