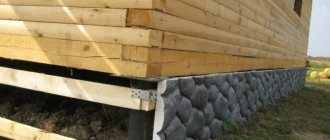
In our previous article we talked about the method of insulating the base. Today we will talk more specifically about the use of polystyrene foam and extruded polystyrene foam.
Let's figure out together what are the advantages of insulating the base with extruded polystyrene foam? Looking ahead, let's say about the disadvantage of this material - its high price. But do not make hasty conclusions and remember the proverb that the miser pays twice.
What to choose: foam plastic or penoplex?
Penoplex can lie in the ground for a long time without losing its characteristics.
There are two most common methods - insulating the base with extruded polystyrene foam and regular polystyrene foam. Each of the materials can be used for thermal insulation work, but there are still differences. Also read: “Wall insulation with foam plastic from the inside: technology for performing the work.”
As is known, both insulation materials belong to the same group of polymers, only different techniques are used for their manufacture.
As a result, these polymers have different characteristics. Insulating the base with penoplex has an advantage due to its high performance qualities. Let's make a small comparison:
- thermal conductivity - for penoplex the coefficient is 0.029-0.034 W/m*C versus 0.037-0.043 W/m*C for polystyrene foam; vapor permeability - practically absent in each of the materials being compared; fear of moisture - penoplex is not afraid of water and can lie in the ground almost forever , foam plastic is destroyed by moisture; density - penoplex has a maximum density of 45 kg/m. cube versus 35 kg/m. foam cube.
At the same time, insulating the base with penoplex will cost much more. But, knowing how important it is to make a high-quality thermal insulation layer on the base, it’s better not to think about saving, since it will most likely come out sideways. Extruded polystyrene foam is superior to conventional polystyrene in everything, so experts unanimously say that it is the one that should be used.
Modern paint for heating pipes can be applied even to hot pipes, but the thickness of the layer must be controlled.
It does not smell and dries very quickly. In each individual case, the optimal diameter of the heating pipe is slightly different. The type of heating system, the length of the circuit, the speed of the coolant, etc. are taken into account. Read more here.
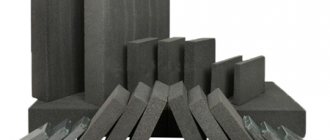
Features of extruded polystyrene foam
EPP (extruded polystyrene foam) is made from polystyrene beads and a blowing agent that are mixed under high temperature and pressure. The resulting mixture is extruded from an extruder, resulting in colored or transparent sheets. Due to the structure and homogeneity of the composition, EPP has excellent characteristics:
- safety for humans;
- resistance to water and chemicals;
- frost resistance;
- high compression performance;
- ability to transmit color;
- low thermal conductivity;
- no water absorption.
High-quality material can last up to 50 years . It is easy to install and can be stored outside at any time of the year, since it is not afraid of temperature changes.
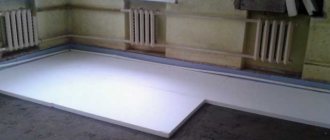
Installation of polystyrene foam on monolithic surfaces
Scheme of insulating the base with extruded polystyrene foam.
When insulating the base with penoplex, the technology does not differ from the same procedure using ordinary polystyrene foam. We have already talked about this in the article about insulating walls outside and inside with penoplex.
Therefore, we will consider the issue comprehensively.
A specific feature of working with monolithic surfaces made of concrete or blocks is the need to install waterproofing. Only after this can the base be insulated with penoplex. The technology of work is as follows:
- applying waterproofing to the surface - carried out in four stages with bitumen roll materials and in one stage with liquid rubber; gluing thermal insulation - the use of fasteners is prohibited, since holes cannot be made in the waterproofing layer; if necessary, external finishing is carried out - if the insulation rises above earth.
Insulation of the basement floor with polystyrene foam should be accompanied by finishing of the above-ground part of the thermal insulation, since the material is susceptible to the destructive effects of sunlight.
Once again we emphasize that the insulation of the base with polystyrene foam and extruded polystyrene foam is carried out only by gluing sheets of thermal insulation. To do this, use sealants (only special ones), adhesive foam or bitumen mastic.
Even if there are locks around the perimeter of the sheets, the joints still need to be sealed. To do this, you can use ordinary polyurethane foam or the glue that was used for installation. The main thing is that the end result is a monolithic layer that will not let in either heat or moisture.
Finishing when insulating the base with polystyrene foam is not always necessary; if the thermal insulation is covered with loam, then no additional manipulations are necessary. If part of the polymer rises above the ground, then it must be protected from ultraviolet rays.
Fiberglass-reinforced propylene pipes for heating are most often used for assembling circuits. They only compete with PEX pipes, but they are much more expensive. You can read about how to install heating pipes in an apartment or private house here.
Nuances of the work
The thickness of the base insulation with extruded polystyrene foam was mentioned above. If you want to make thermal insulation more effective, the layer must be more massive. The slabs can be fixed not only with polyurethane glue, but also with cold-hardening bitumen-polymer mastic. The composition must be applied over the entire surface or in separate spots. If you choose a mixture that contains a solvent among its ingredients, it can destroy the structure of polystyrene foam. Therefore, this feature of the adhesive can have a negative impact on the thermal insulation qualities and durability.
Due to the fact that mechanical fastening can compromise the integrity of the waterproofing layer and cause leakage into the basement walls, experts do not recommend fixing the slabs, relying only on the strength of the glue. You can independently insulate the base with extruded polystyrene foam; the technology is described in the article. From it you can find out that almost all models of slabs of the described insulating material made of expanded polystyrene contain a recess along the perimeter, this allows the sheets to be joined, forming a lock. If you purchase these sheets, you will rid the surfaces of cold bridges. When trimming, the joints of adjacent slabs should be coated with glue or mastic.
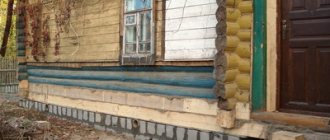
Installation of penoplex on a pile foundation
The insulation of the pile foundation is carried out using the sheathing.
For a pile foundation, do-it-yourself insulation of the base with penoplex begins with the construction of a sheathing, which can be wooden or metal. A finishing layer is attached to this sheathing from the outside:
- DSP boards; decorative panels; plastic siding.
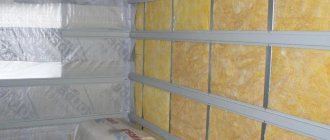
Do-it-yourself insulation of the base with polystyrene foam can be done both from the outside and from the inside onto the sheathing. In addition, you can place sheets of thermal insulation between the guides of the wooden sheathing on the inside.
The latter method is simpler to implement, but it should be taken into account that there will be wooden blocks between the foam. Their thermal conductivity is 0.12 W/m*C, which is significantly lower than that of polymers. And if the sheathing is bolted to ears welded to the piles, cold will pass through the fasteners.
Therefore, it is better to carry out insulation along the sheathing.
If polystyrene foam is installed outside, the trim is placed directly on top of it. It is attached to the sheathing through the insulation, and the thermal insulation will be securely fastened. Taking this into account, it is enough to glue the sheets of polystyrene foam with foam adhesive.
All joints and cracks are also foamed. If thermal insulation is laid from the inside, then in addition to fastening it with adhesive foam, you can additionally secure the sheets with slats. In this case, the longer the rail, the better.
Calculation rules
The size of the insulation layer will depend on the type of building (residential, non-residential, heated or not), type of foundation, climate zone, and thermal insulation system used. The calculation is carried out according to the method “Thermal protection of buildings” SP50.13330.2012.
There are many options for determining the thickness of foam plastic, but they are very complex. It is better to use the online calculator offered by construction sites. You can use the formula:
R= df/λ b +dу/λ p , where:
- df - foundation thickness;
- dу is the thickness of the insulation;
- λb is the thermal conductivity coefficient of the foundation material (concrete or others);
- λп — coefficient. thermal conductivity of the insulation (indicated on the packaging);
- R - heat transfer resistance (value from the table).
The values of R, λ p, λ b are taken from the tables, the value of df is known, it remains to determine dу by substituting all the numbers into the formula:
dу = (R - dф/λb) x λп
The result is rounded. You can independently calculate both the thickness and width by substituting data from the tables (the values are determined for each value).
By dividing the areas of insulation and slabs, determine how many pieces are needed. In this case, 10-15% is added for adjustment. To protect the basement from the inside, use polystyrene foam no thicker than 3 cm.
Is there an alternative to insulating the base with polystyrene foam?
Is there an alternative to polystyrene foam and extruded polystyrene foam? Yes, there is and it is liquid thermal insulation.
Insulating the base with polyurethane foam from the inside is much simpler to perform and does not require any additional manipulations. Polyurethane foam is in no way inferior to the above-mentioned materials in thermal conductivity, but has a slight advantage - it allows steam to pass through. For concrete structures this is not so important, but for houses made of wood this characteristic is decisive, since the floors are also insulated with liquid thermal insulation.
Polyurethane foam also has its weaknesses.
This is a soft material and is deformed even under minimal mechanical loads. Based on this, we can conclude that liquid thermal insulation cannot be an alternative to insulating the base from the outside with penoplex. Let's summarize our article today:
- extruded polystyrene foam for insulating the basement has an undeniable superiority over simple polystyrene; waterproofing is the basis of high-quality thermal insulation; internal insulation is inferior to external insulation; an alternative for internal thermal insulation is liquid insulation, such as polyurethane foam or penoizol.
To see the process with your own eyes, we present to your attention a video:
A correctly executed scheme for insulating the base and blind area with penoplex or extruded polystyrene foam will ensure not only the integrity of the base, but also the structure as a whole. In what cases is insulation necessary, and when can you do without it, how to do everything correctly and without extra costs - our article will answer these questions.
Why is it better to choose polystyrene foam?
Existing construction technologies today enable developers to use several types of insulation: liquid (foam), polystyrene foam, loose expanded clay or slag, expanded polystyrene. Why do we recommend polystyrene foam?
- Low thermal conductivity coefficient with relatively high physical strength. Production technology involves the use of special innovative additives to improve the performance characteristics of the material.
- Versatility of use. Expanded polystyrene can be used to insulate not only foundations (outside or inside), but also walls, ceilings, floors, etc. This greatly simplifies the building construction process and minimizes unproductive losses for insulation of the entire building. You can purchase the same type of insulation for all structures, including ceilings, walls and floors, and then use it based on the needs for each element of the building.
- Manufacturability. Expanded polystyrene is easy to cut and process; there is no need to purchase special tools and equipment for work. The slabs can be fixed with dowels and large caps or glued. The shelf life under proper conditions is practically unlimited. If for some reason the insulation of the foundation is postponed to a later date, the quality of the material will not deteriorate.
- Low price and long service life. In terms of the totality of these characteristics, polystyrene foam has no equal among all insulation materials.
XPS TECHNONICOL CARBON ECO
Unfortunately, there are also disadvantages: flammability, risks of damage by rodents and insufficient environmental performance. But these shortcomings can be easily eliminated by simple construction operations.
Insulation Penoplex Foundation®
We will describe how this is done below.
Penoplex prices
Penoplex
Why and when do you need to insulate?
The blind area performs 4 functions:
- Removal of atmospheric precipitation from the base of the house; Acts as thermal insulation in case of insulation, protecting the soil from freezing; Serves as a decorative element; Provides more comfortable movement around the site.
If it is carried out according to all the rules, then it will drain water from the foundation even without insulation, but it will not protect against soil heaving, which is observed during seasonal temperature changes. When, during severe frosts, soil water becomes ice, the volume of soil increases and begins to put pressure on the blind area and foundation.
These structural elements are subject to destruction, manifested in the form of cracks.
This happens especially quickly with the blind area due to its small thickness. When it is insulated, the soil under it and near the foundation does not freeze. It is important to provide high-quality drainage in parallel with insulation.
Advantages of an insulated blind area
Each owner must decide for himself the issue of insulating the basement and blind area, but experts strongly recommend doing this in cases where the house where they live permanently stands on heaving soil on one of the following types of foundation:
- Shallow; Pile; Columnar; Slab.
It is better to insulate the blind area even when there is a basement floor, and if the foundation, located below the zero level, was not insulated during construction.
The feasibility of performing work on insulating the blind area is determined by the purpose of the structure. If people live in the house permanently, then thermal insulation is necessary, but if it is a dacha where people come only in warm weather, then there is little point in investing a lot of money in it. It is enough to simply make a good drainage system from the foundation.
Many developers carry out the blind area after the construction of the house is completed, and this is their main mistake. Ideally, everything should be done in 2 stages. The first is the installation of a rough blind area after vertical insulation of the foundation and before the final finishing of the base.
It includes excavation, preparatory work, concreting, and digging a trench to drain water from the house. All this does not exclude the possibility of installing an insulated structure around the building in use.
The second stage - the installation of a finishing blind area - begins after finishing the finishing work of the facade and basement. Advantages of this approach:
- The appearance of the base does not suffer; Such a phenomenon as winter heaving of the soil is excluded; Reliable support for scaffolding is provided.
There are many recommendations regarding the width of the blind area. Many consider it an axiom that it should protrude at least 20 cm in relation to the roof overhang. But one can argue with this, because the drainage system removes water from the roof, and it practically does not fall onto the blind area, so the minimum width of the blind area should be 80 cm.
Insulation scheme for the blind area
The width of the structure plays a huge role on subsidence soils. The value recommended by the standards is from 1.5 to 2 m.
Such a wide blind area can cost the owner more than the building itself, but one cannot ignore the subsidence of the soil, because
because the integrity of the structure depends on this. But there is a way out - a combination of the open part of the structure with a hidden blind area.
Preparation for insulation of foundations located on waterlogged soils
Builders use polystyrene foam boards to relieve the thrust loads of the soil during its freezing/unfreezing. But after this, the polystyrene foam receives significant damage, which reduces its heat-shielding properties. In our case, it is necessary to take special measures to ensure that the slabs fulfill their main task - to serve as reliable and effective insulation. This can be achieved by removing excess moisture; the lower the relative humidity of the earth, the lower the coefficient of its expansion during freezing. Accordingly, the less compression force on the plates.
The task of the preparatory work is to drain groundwater. How to do it?
Foundation drainage diagram
Foundation drainage device
Step 1 . Dig a trench around the perimeter of the house to the depth of the foundation. Width ranges from 40–50 centimeters.
Important. Never undermine the ground under the foundation strip, dig very carefully. If the ground is numb and has insufficient load-bearing properties, then let the depth of the trench be 5–10 cm less than the depth of the foundation.
Ditch for drainage system
One more tip. Are there concerns about the strength of the foundation? Do the work in stages, each wall separately. You can dig a second trench only after the previous one has been filled. This complicates the whole process, but it is not worth risking the stability of the building. The use of earth-moving equipment is not recommended. It may be more difficult and difficult to do by hand, but the risk of damage to the house’s structures is completely eliminated. It’s hard to dig on your own - invite neighbors or friends to help. If this is not possible, use the services of construction crews. Just don’t forget to control the quality of their work; there are often outright hacks. Especially in such low-skilled jobs.
Step 2. Consider a method for draining groundwater. They can be taken directly outside the site or into special containers. It all depends on the terrain and the depth of the drainage pipes. Please keep in mind that the angle of inclination of the drainage system should be within 2–3 mm per linear meter. Immediately dig a trench to lay the pipe that drains water away from the house. If possible, do drainage throughout the entire area, and not just near the house. It's expensive, but it greatly improves the comfort of living in a country house.
Compacting gravel at the bottom of a ditch
Step 3. Lay drainage pipes around the perimeter of the foundation, making sure that they have the required slope in all places. Drainage pipes have holes for receiving water, do not allow them to become clogged. Cover the pipes with geotextiles and pour sand 20–25 cm thick on top. Then the water is drained using ordinary plastic ones.
Laying pipes and connecting drainage wells
Drainage well
Pipes are covered with rubble
Step 4. Compact the sand well and fill the remaining space with soil. Remove large stones, they can damage the pipes.
Wrapping the ends of the geotextile and backfilling the soil
Practical advice. In order to further reduce the lateral soil pressure on polystyrene foam, it is recommended to make a sand layer up to 30 cm thick between the material and the ground. If the house is located on a hill and there is no groundwater problem, then insulation is done faster and easier.
Prices for impact-ramming machine models
Impact ramming machine
Insulation of the blind area
Insulation of the blind area is carried out according to the following scheme:
Penoplex is the best option for insulation
- The soil around the foundation is selected to a width of about a meter to a depth of 0.45 m with a slight slope - from 3 to 5%; Lay a leveling sand layer and thoroughly compact it, after which the thickness of the layer should be at least 150 mm; Lay polystyrene foam or extruded polystyrene foam as tightly as possible ;Spread geotextiles in the trench with a minimum density of 150 mm and a width of 2 m; Take a drainage pipe, lay it on geotextiles along the edge of the trench with an outlet into the drainage ditch; Fill crushed stone over the pipe and into the space between it and the edge of the insulation; Wrap the drainage pipe in geotextiles together with crushed stone, first placing the edge lying on the insulation, and then covering it with the second edge; Fill the slabs and pipe with coarse sand to a height of 300 mm and level, and then compact the surface using a tamper. Make markings for curbs, for which a thread is pulled level at a distance of 70 cm from the foundation; Install storm drains by installing a receiving plastic tray under the drainpipe and connecting to it a sewer pipe for external use with access to the gutter; Install and concrete curbs on both sides ;Fill the internal space with the required amount of sand and compact it again;Paving is done with paving slabs, concrete stone or other material. The height of this layer is 600 mm; Add soil along the outer perimeter of the curb.
Creating thermal insulation for the blind area
Is it possible to install slabs in two layers?
Some experts are still deciding whether it is possible to fix polystyrene foam boards in two layers to achieve the desired thickness. Some claim that the high adhesion of glue and mastic makes it possible to obtain a monolithic double layer. To prevent the formation of cold bridges, it is necessary to ensure that the seams do not overlap during installation. Others argue that with vertical displacements of the soil, the thermal insulation may delaminate. As a result, moisture penetrates between the layers, which causes increased heat loss.
The bottom row must be mounted, focusing on the base. The best option would be the existing foundation overhang, which is formed at the pouring stage. But quite often, thermal insulation is installed on a gravel backfill where the foundation is installed. Wild stone, brick, tiles or decorative plaster, as well as facade paint are laid on top of the insulation. Each of these materials can become a decorative finish. But sand-lime brick or decorative tiles cannot be called the best choice, since at sub-zero temperatures chips may form on the edges of these materials.
Base insulation
It is best to insulate the base with penoplex or extruded polystyrene foam when laying the foundation, but if this moment is missed, then you can do this during the operation of the house.
Base insulation scheme
Let's consider the option when the base and walls of the house are in the same plane. Warming is carried out in 10 consecutive steps:
- Make horizontal markings along the entire perimeter, taking into account that the insulation should protrude a few centimeters beyond the waterproofing layer; Cut the heat-insulating material, focusing on the markings; Clean the walls from dirt and dust, prime them; Apply a layer of special glue to the base using a notched trowel , choosing a corner as the starting point; Apply glue to the slabs and attach them to the surface of the base, seal the joints; Drill holes for dowels using a hammer drill, hammer in the fasteners; Attach a metal corner around the perimeter of the wall, using the same glue as for the slabs; Apply layer of soil on the slabs; Cut the reinforcing mesh according to the dimensions of the slabs, coat it with glue and glue it to the heat insulator; Putty or veneer the base, install flashings.
Cost of work per m² and material
Installation of expanded polystyrene by professional builders will cost 250–700 rubles/m² (depending on the type of fastening, brand and thickness of the EPS).
If you need to apply a reinforcing or waterproofing layer, apply decorative plaster or paint surfaces, the cost of the work will increase (from 400 rubles per 1 m² and more).
In addition to paying for the services of the craftsmen, you need to take into account the price of the material. Penoplex and TechnoNIKOL (10 cm) cost 1300-1700 rubles per package (4 slabs, 2.7 m²) or 450-600 rubles. for 1 m². There are cheaper options - from 250 rubles. Together with all materials, installation of 1 m² can cost 1,800 rubles or more.
Insulation under paving slabs
If paving slabs are used as the final finishing of the blind area, then it is enough to ensure a slope of 3%. Place it on a layer of cement-sand mixture, spread in a layer of 2 to 3 cm.
Final finishing with paving slabs
During the laying process, the tiles are knocked down with a rubber hammer to level the surface in a plane. Upon completion of the work, the tiles are scattered over the surface, then passed over with a broom, sweeping away the excess. Next, pour water so that the mixture located below and caught in the seams between the tiles sets.
As you can see, only work done correctly will give a positive result.
Insulating the foundation base allows you to save on the foundation construction process. After all, the wall thickness, determined by the bearing capacity of the foundation, will be much less than the same parameter determined by the heat resistance of the building material.
For example, a sufficiently high load-bearing capacity of reinforced concrete makes it possible to reduce the thickness of the foundation wall to 40-60 centimeters.
But the high heat resistance of the same material requires increasing this parameter to 90-120 centimeters. So is it necessary to insulate the base of the foundation? The answer is obvious: of course yes! After all, pouring a 40-centimeter base will cost three times less than a foundation 120 centimeters wide.
Moreover, replacing the material will give almost the same result. So, an uninsulated brick foundation will cost 2-3 times more than an insulated version of the foundation. And pile foundations will have to be insulated without fail: after all, such a structure simply does not have its own base.
↑
Well, now that the need for insulation is obvious, it’s time to talk about technologies that can increase the heat resistance of the foundation.
In modern construction, there are only three ways to insulate foundations: external, internal and combined. Let's look at their advantages and disadvantages.
External insulation
The first option - external insulation - is based on the installation of a hinged insulation panel fixed on top of the base wall. Moreover, in this case a material with high strength and moisture resistance is used as insulation. After all, a panel soaked in water demonstrates insufficient heat resistance, and a fragile material that has lost its integrity will not be able to protect the foundation from frost.
The only drawback of this option is the insufficient mechanical strength of any external insulation. As a result, a special protector is laid on top of the heat-insulating layer, protecting the soft insulation from unwanted mechanical contacts.
Internal insulation
The second option - internal insulation - is based on filling granular or finely dispersed insulation into the sinuses of the foundation. The moisture resistance and strength of the insulating material in this case are unimportant. Since this material is protected from unwanted contacts (including moisture) by the foundation walls.
Therefore, “internal” insulation is the cheapest option for increasing the heat resistance of foundation walls. But the foundation wall, in this case, will definitely freeze. After all, using this option, we, in fact, protect from the cold not the base itself, but the internal space and the basement floor.
Combined insulation
The third option - combined insulation - involves installing heat-resistant panels on both the inside and outside of the foundation wall. Moreover, as a rule, moisture-resistant and durable insulation is installed on the outside, and ordinary material with moderate hydrophobicity is installed on the inside.
As a result, the base wall turns into a kind of sandwich consisting of three layers: insulation-foundation-insulation.
This design demonstrates maximum efficiency. Moreover, with the help of such a sandwich, both waterproofing and thermal insulation of the base are realized. After all, moisture-resistant external insulation will cut off both cold and moisture from the foundation wall.
But enough theory - let's move on to practice, and consider the processes of external, internal and combined insulation using specific examples.
↑
This operation can be performed in two ways, namely:
- Solid polystyrene foam (panels) can be strengthened on the surface of the foundation with heat-resistant dowels (umbrellas). Liquid polystyrene foam (aerosol) can be applied to the base using a spray gun.
Moreover, both methods guarantee the same efficiency because the thermal conductivity of polystyrene foam is a constant value. It does not depend on the state of the material itself.
True, the option with panels will be cheaper, because to spray the polymer on the walls of the foundation you will have to purchase (rent) a set of expensive equipment.
Well, the process itself looks like this:
- Before insulating the base, the foundation wall is covered with a layer of waterproofing mastic. Moreover, it will not only save the foundation from contact with unwanted moisture, but will also help fix the positions of the insulation boards. After fixing, a hole is drilled in the panels - one in the center and four at the edges (possibly between the joints of adjacent elements). Next, an umbrella is inserted into the drilled holes, which fixed with a plastic wedge driven into the center of the T-shaped fastening. The tip of the wedge expands the diameter of the umbrella tube and the fastener gets stuck in the wall forever.
After this, you can start processing the seams between the panels. For these purposes, ordinary polyurethane foam is used to seal the gap between the thermal insulation boards. Finally, a layer of external plaster is laid on top of the insulation boards or panels made of natural or artificial stone are mounted.
↑
This operation is performed only in one way: before installing the basement floor, the internal cavities of the foundation (up to the grillage) are filled with expanded clay - a granular material with high heat resistance.
The step-by-step insulation process is as follows:
- The inner walls of the base are primed with moisture-resistant material. Ideally, it would be a good idea to apply a layer of liquid rubber to the foundation walls. After the waterproofing layer has dried, expanded clay is poured into the sinuses, distributed from the center to the foundation walls.
If desired, a ventilated layer can be left between the basement floor and the expanded clay layer, which is used to remove water vapor from the internal space of the foundation. However, for this it is necessary to build a supply and exhaust circulation system, which increases the price of this method of insulating foundations.
↑
The construction of insulation-foundation-insulation sandwiches will cost more than standard methods of increasing heat resistance.
Therefore, this technology is used in only two cases, namely:
- When a home (or commercial real estate) is built in an area with severe climatic conditions. When the building has a usable basement (ground floor or residential basement).
In other cases, a combined insulation system is simply unjustified from an economic point of view.
The construction process itself takes place in two stages: first, the outer layer of insulation is laid, after which they begin installing the inner layer. Moreover, the already discussed technology of wall insulation with expanded polystyrene panels is used as the outer layer. But the inner layer can be formed from mineral wool.
And it's done like this:
- The wall is covered with a layer of vapor barrier - an ordinary membrane film is spread over it. Guides are mounted on the film - U-shaped profiles made of galvanized steel, placed in increments equal to the width of the insulation roll. The insulation is rolled out between the guides, separating the excess part from the roll with an ordinary knife. On top of the insulation, sheets of plasterboard are mounted directly onto the guides, which are plastered with the starting mixture.
Thus, upon completion of the work, you can get not only a warm, but also an already finished (roughly) wall of the living space in the basement of the house.
To preserve the foundation of the house, as well as save on heating the entire building, the owners insulate the basement with various materials. After all, the ground floor is also above ground. Therefore, it is susceptible not only to soil heaving, but also to external climate influences.
Many owners think that after insulating the basement of the house above the ground, all problems with cold floors will be solved. This is a common misconception among novice builders.
After all, the base is not just a separate element of the structure.
It is part of the foundation. Therefore, every owner of his home should know how to insulate the basement of a building from the very bottom. This action will save heat in the house.
Are there differences for different types of bases?
When installing a slab version of the USHP type construction, thermal insulation is laid under the foundation in 2-3 layers of 100 mm each (you can learn about the construction technology of installing a slab foundation with your own hands here). The formwork is also assembled from extruded PPS slabs. USHP is suitable for houses made of timber, aerated concrete and frame structures.
The better way to insulate the basement
Before thermal insulation of the underground and above-ground parts of the foundation is created, it is worth deciding how to insulate the base of the building. After all, a wide selection of thermal insulation materials allows you to carry out insulation in different ways.
There are several types of materials used to insulate the basement, basements and foundation:
- expanded clay - is cheap, but it is better to use it to insulate houses that are occupied during the warmer months; mineral wool - the cost is average, the protection is also average, but is unsafe for the health of people doing the insulation; polystyrene foam - prices are low, the thickness of the layers varies, but it is bad can be cut and is very fragile; expanded polystyrene - average cost, no toxicity, easy to cut into the required parts, great durability; polyurethane foam - high price, excellent quality, but spraying must be done with special equipment, observing safety precautions.
Professional developers recommend choosing modern materials that are easy to use, have sufficient durability and are not susceptible to chemical influences. Therefore, the best option would be to insulate the basement floor with extruded polystyrene foam. True, compliance with the technology of polystyrene foam insulation and further operations, such as finishing or cladding, is mandatory.
Types of internal foundation insulation
In general, methods for insulating a foundation from the inside are similar to external insulation of a foundation. The most commonly used methods are:
- Filling the basement with expanded clay. Allows you to reduce cooling of the ground floor floor. Not an effective method, suitable for temporary country houses;
- Insulation of basement walls with slabs - polystyrene foam, polystyrene or penoplex, with their subsequent finishing. A very popular method of thermal insulation, most often used in combination with external thermal insulation of the foundation for buildings with basements used.
- Insulation of the foundation from the inside with polyurethane foam. A very effective way of additional or independent thermal insulation of the foundation, allowing you to create a seamless coating with excellent adhesion, but performing this work requires the involvement of professionals with special installation.
How to insulate a base with polystyrene
In order for the insulation of the base to give maximum effect, it is worth knowing the order of priority of the actions performed. To work with extruded polystyrene foam it will look like this:
- Digging a trench along the foundation along the entire perimeter. Cleaning the basement floor of debris and old cladding layer. Priming the cleaned surface with waterproofing mastics. Insulating the basement, starting from the corners of the building. Completely covering the basement floor with polystyrene slabs. Additional strengthening of the slabs on the base. Further finishing with cladding materials.
The first step is to remove the soil from the very foundation of the building. To do this, a trench is dug if the foundation of the house is of a strip or monolithic type.
The depth of the trench should be the same as the foundation of the building itself. But the width can be adjusted, but make it so that it is convenient to work with insulation boards.
It is worth remembering that for columnar or pile foundations of houses, insulation can only be done externally.
It is imperative to clean the entire surface of the foundation before further work. This will not only remove the old worn-out layer, but will also help the insulation lie flat without large seams.
Before insulating the base of any building, it is worth thoroughly priming it. To do this, you can use liquid mastics, which are evenly applied to the surface and dry quickly, creating an excellent protective film.
After this, you can begin to insulate the base from the outside. You need to start such actions from the corners of the building, since they take the most load from the external influences of the atmosphere.
Scheme for strip foundation
Insulation of the foundation base from the outside is a one-time and comprehensive insulation of the foundation as a whole. That is, thermal insulation operations are never carried out separately for the recessed part and separately for the outer part.
So the basic scheme is:
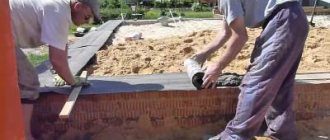
- First of all, the outer plane of the foundation is waterproofed, for which it is simply treated with bitumen mastic.
- Then they begin to lay polystyrene foam boards, which are panels with a groove-tenon locking connection. They are attached to the foundation with the same bitumen mastic. That is, the second layer of waterproofing is applied to the first in sections under each laid Penoplex slab.
- The insulation for the foundation plinth can be placed in any order. The main task when working is not to leave gaps and cracks between them. Even if there are some left, they can be filled with polyurethane foam.
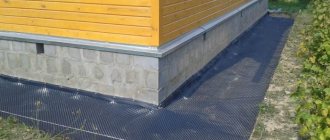
- As soon as the entire foundation is covered with slabs, you can backfill it with soil, leaving space for the construction of a blind area. And this is a trench around the house, approximately 50 cm deep and 1 m wide.
It should be noted that the use of bitumen mastic is not always appropriate, especially when the house is built on an area with a high groundwater level. Therefore, it is recommended to lay a bitumen-polymer roll hydro-insulator on top of it, which is applied using a gas burner. This process is not easy, so treat it with full responsibility, or better yet, invite experts. By the way, horizontal waterproofing is also made with the same roll material. That is, an overlap is made on the horizontal surface of the base part.
And one last thing. Projects of houses with basements are an additional building structure in the form of a slab, which is poured between the walls of the tape. Is it necessary to insulate the foundation slab? Everything will depend on the depth at which it is laid. If it is below the soil freezing level, then it is not necessary. But is it necessary to insulate the basement if there is no basement? This must be done regardless of whether there is a basement or not.
Thermal insulation of the basement floor with polystyrene foam
To properly insulate the base from the corners, you should simply cover the corner part with polystyrene foam of greater thickness than the rest of the surface of the base.
For regions with a temperate climate, where winters are not very long and precipitation is average, polystyrene 5-6 mm thick can be used to insulate the surface. And for corners, 10 mm material is optimal.
Thermal insulation of the basement part of the foundation is carried out according to the following scheme:
- dilute the adhesive mass in the proportions indicated on the container; let the mass sit for a certain time; prepare slabs of material by cutting them into parts convenient for work; apply the adhesive composition to the slab and let it spread a little over the surface; attach the slab to the surface of the foundation and press tightly; strengthen the rest slabs on the foundation wall, joining them using grooves; treat the resulting seams with mounting foams; apply a protective fiberglass mesh to the finished insulation; cover the mesh with an adhesive solution.
After the insulated foundation has dried, the underground part of the foundation is backfilled with soil. And on the above-ground part of the foundation, finishing is done with plaster or facing with brick, stone or ventilation material.
Features of slab installation and subsequent finishing
If, after purchasing polystyrene foam boards, you find that their thickness is not enough to provide normal thermal insulation, then the insulation can be fixed in two layers so that the required thickness is achieved. Many experts say that with good adhesion, the double layer of polystyrene foam boards will actually be one whole. To prevent the formation of cold bridges, it is necessary to ensure that the installation of two layers of slabs overlaps at the seams. However, with vertical displacements of the soil, the insulation layers delaminate, causing serious heat loss.
Options for fastening dowels.
The question of whether to install insulation in two layers is very controversial, therefore, if there is such an opportunity, it is worth returning the unused material back to the store, and purchasing slabs of the required thickness to replace it. As a rule, stores now accept goods back without problems for some time.
The insulation of the basement is carried out on the outside of the house. Expanded polystyrene boards are glued to the surface of the base using any suitable adhesive composition that does not contain solvents that can potentially destroy the material.
The bottom row of polystyrene foam boards must be laid with emphasis on the base. It's great if you have a small foundation overhang that was made during construction. Despite this, very often polystyrene is laid on a gravel backfill where the foundation was built. Polystyrene foam can also be installed over gravel backfill, although many experts caution against such steps. If there is no protrusion, it is convenient to insulate with penoplex.
As a decorative finish, tiles, bricks, natural stone, facade paint, and plaster are laid on top of the insulation. It is recommended not to use decorative tiles or sand-lime bricks, which at sub-zero temperatures lose many of their characteristics and chips begin to form at the edges of the material.
Cladding work after insulating the basement
After the insulation of the base from the outside is finished, it is worth covering it. This will not only give the above-ground part of the foundation additional beauty and well-groomed appearance, but will also protect the insulation from external influences of the sun and precipitation. And it will maintain a stable temperature in the basement and eliminate dampness.
Before you start covering the basement floor, it is worth protecting the polystyrene slabs from physical influences. And at the same time, further strengthen them on the surface.
Special plastic dowels with wide heads must be driven into the joints between polystyrene foam.
To do this, use a drill to drill holes 1-1.5 cm longer than the dowel itself. After this, a dowel is inserted into the holes, and a nail is driven into it. This structure is carefully driven into the wall with insulation.
It is important to remember that fastenings with dowels should be made 4 pieces for each sheet of insulation. This will protect the material from premature deterioration.
Now you can begin leveling the surface of the basement. To do this, you can plaster with mortar or putty the base wall with plaster.
Upon completion of the work, any finishing will be placed on such a surface without any problems. This can be laying with facing bricks or decorative stone, painting, spraying with finishing materials.
Instructions for compliance with thermal insulation rules
It is good to use decorative plaster as a finishing material.
- Sometimes owners try to insulate only the walls outside the building, neglecting the base. This is fundamentally wrong, since an uninsulated base leads to significant heat loss.
- When choosing insulation, you should be guided by the climatic conditions of your region of residence. For the middle zone of the CIS, insulation is made with polystyrene foam slabs with a thickness of at least 5 cm. At the corners, the slabs should have a thickness of 6 to 10 cm. Expanded polystyrene slabs with a thickness of 3 to 12 cm are available for sale.
- When building a house, it is better to plan a sinking base in order to hide all layers of thermal and waterproofing. Insulation of the base is of great importance; the microclimate inside the room depends on it, as well as the ability of the structure to withstand the destructive factors of atmospheric influence.
- The insulation process is carried out along the wall outside the house. In this case, you should choose a non-aggressive adhesive without solvents. Adhesive containing solvents can destroy the structure of polystyrene and lead to its premature destruction.
- The technology of construction work requires that it be carried out at temperatures above 5 degrees Celsius. This will ensure that with the onset of frost, cracks will not appear on the surface of the wall.
- Thermal insulation boards are attached with an overlap, this significantly reduces heat loss.
- Installation of thermal insulation boards is carried out using a drill using a metal mesh, connecting the slab, mesh and base into one whole.
- The slabs are installed using bitumen mastic, either spotwise or over the entire surface.
- Most slab models have a special recess for joining using the locking method without the formation of cold bridges.
- Fastening slabs in 2 layers to obtain the required thickness of thermal insulation is not always considered justified. Some experts consider this a mistake, because soil displacements can delaminate the insulating layer, allowing water to penetrate into the structure.
- Facade paint, brick, tiles, wild stone or decorative plaster are used as finishing on top of the insulation. But practice has shown that sand-lime bricks and tiles are unsuitable materials. They can become chipped when exposed to cold.
All these measures will stabilize the temperature in the home, regardless of external fluctuations, protect against drafts and dampness, and protect the foundation from destruction.
Recommendations for insulating the basement yourself
In order for the work on thermal insulation of the foundation to bring the desired result, it is worth listening to the advice of professional builders. And they recommend adhering to the following rules:
- Insulation should be carried out only in dry weather - the material will lose many of its qualities when damp. You need to choose the thickness of the slabs taking into account the materials from which the building is built - the colder the base, the thicker the insulation should be. It is worth storing polystyrene in a place where it is not exposed to will be exposed to direct rays of the sun - it is destroyed by ultraviolet radiation. The adhesive compositions that will be applied to the slabs must be water-based - the solvent will destroy the structure of polystyrene.
By following these recommendations, you can make high-quality insulation yourself, no worse than specialists.
Sources:
- utepleniedoma.com
- udobnovdome.ru
- opalubok.ru
- rufundament.ru
There are no similar posts, but there are more interesting ones.
Material characteristics
The foundation, along with other structures of the house, needs to be insulated. It is important to choose the right insulator, taking into account the structure of not only the base, but also the house. Materials for thermal insulation of the base:
- Expanded clay. Frost-resistant material made from baked clay. It is used as bulk insulation around the perimeter of the base. Strong, durable, has high thermal insulation properties, does not burn or rot. Environmentally friendly and inexpensive. Disadvantages of expanded clay: additional preparation is required when working, high material consumption.
- Mineral wool (stone, slag, glass wool, ceramic wool). Used to insulate the base from the inside. Doesn't burn, holds heat well, absorbs noise. Does not rot, does not deform, does not shrink. Mineral wool is resistant to chemicals, is easier to install, and has a reasonable price. Disadvantages include vapor permeability and the need to use special protective materials. Cotton wool crumbles and can cause irritation to the skin and respiratory tract when working with it.
Mineral wool is fire-resistant, does not rot, and has excellent thermal insulation properties. - Warm plaster. A viscous mixture, which may include polystyrene, vermiculite, and sawdust. Advantages of the material: allows you to create an even layer without seams, has an acceptable cost. The work can be carried out independently, in a short time. Plaster cladding has several disadvantages. The coating is heavy and creates a load on the foundation. If you apply a layer of more than 5 cm, the plaster will begin to crumble over time. Absorbs moisture, so waterproofing is required. This insulation cannot be left without finishing; it is primed and facing materials for the foundation (stone, panels) are used.
- Styrofoam. The material is cheap, durable, easy to process. Retains heat well and allows for sheathing work to be carried out in a short time. It has some disadvantages: fragile, able to absorb moisture, smells unpleasant when burning, freezes at too low a temperature, is damaged by rodents, loses its properties when exposed to ultraviolet radiation.
- Polystyrene, penoplex. Foam material. This type of insulation has many advantages. It has good thermal insulation qualities, is not afraid of temperature changes, and almost does not absorb moisture. The material is dense, durable, and can withstand mechanical loads. With proper installation, the service life is more than 25 years. Inexpensive and lightweight penoplex is easy to transport and install (it is easy to cut into pieces of the desired size). The material has significant drawbacks. It is vapor permeable, so additional protection is required. Fire hazardous; when ignited, it emits a pungent odor.
Penoplex - heat-resistant and moisture-resistant, but vapor-permeable material - Foamed polyurethane (polyurethane foam). Lightweight, durable, resistant to temperature changes, exposure to oils, solvents and acids, does not mold. The service life of polyurethane is more than 40 years. It is easy to install and does not require careful surface preparation. Disadvantages of polyurethane foam: flammable, melts, produces unpleasant smoke.
- Thermal panels. Multilayer material with insulation inside, usually in the form of slabs. Consists of polyurethane foam with a special protective coating. On the outside, the decorative layer can imitate any facing material. When installing, you need to coat the material well with adhesive and additionally secure it with dowels. If the foundation is uneven, you need to make a sheathing. Thermal panels are an expensive facing material.
For independent work, polystyrene foam is most often chosen.
Foundation insulation with expanded clay
The simplest and most affordable way to insulate the foundation from the outside with your own hands is to use expanded clay. Not so long ago, this option was the most common.
Today, due to the emergence of a wide range of innovative materials, thermal insulation with expanded clay is gradually fading into the background.
Preparatory activities
The procedure for insulating the outer side of the foundation with expanded clay is in many ways similar to using polystyrene foam. First, a trench of the required size is dug. Next, the insulation is prepared, which will be laid on the substrate and pressed with soil to the outer surface of the foundation.
Metal profile installation technology
- secure the base profile with dowels or with an adhesive solution;
- on the corner sections of the building, install a special profile (support), leaving a small gap of three millimeters. Secure the parts with connecting elements;
- use pads to level the structure - this advice is relevant for significant uneven walls;
- Fill the gap between the guides and the wall surface with mounting foam.
Recommendations
- fasten the metal rail “conscientiously”, the quality of the work performed and the durability of the structure depend on this. If you fix the guide at only two points, then over time, under the influence of temperature, it will begin to deform, and corrosion of the material will occur;
- The slats must be fixed using special dowels. Spacer fasteners are installed in the longitudinal holes of the guide;
- control the horizontalness of the installed rail using a building level;
- When installing corner slats, the material is cut at a certain angle so that a gap remains at the joints. The gap will eliminate the possibility of deformation of the rack structure.
Having installed a reliable metal structure, you can proceed directly to insulating the base.
First of all, the insulated surface is cleaned of construction dust and dirt, and then it is disinfected. The walls should not have significant differences, otherwise it will affect the quality of the work performed. To improve adhesion, the surface is treated with a primer. When the walls are dry, you can begin laying foam boards.
When choosing an adhesive for fixing insulation, pay attention to the instructions - the instructions should indicate what materials it is intended for. The work is simplified by the fact that you have already installed the metal profile and now you do not have to adjust the slabs and align them horizontally
Laying the insulation accordingly begins from the bottom batten
The work is simplified by the fact that you have already installed the metal profile and now you do not have to adjust the slabs and align them horizontally. The installation of insulation accordingly begins from the bottom batten.
For extra reliability, it is recommended to use additional fasteners in conjunction with the polymer adhesive. They, in turn, are fixed directly to the wall surface through insulating material. The material is fixed at five points - in the corners and in the center. Plastic fasteners are inserted into pre-drilled holes with a hammer drill. At the same stage, reinforcement of the layer is performed. For these purposes, you can use a mesh made of metal, plastic, or fiberglass. The first option, according to builders, is preferable. The mesh is buried in an adhesive solution previously applied to the penoplex.
https://youtube.com/watch?v=tbLUX4OCRq0
Before proceeding to the next step, you need to make sure that the glue has dried well and strengthened. Then the wall surface is primed. The composition will ensure better adhesion of subsequent materials.
The next layer is plaster. Before facing work, the insulated wall is re-primed.