Every little thing requires a separate place allotted to it, otherwise it tends to disappear somewhere at the right time. This rule also applies to bath trifles - you need shelves in the bath for bath accessories, and for small items in the hallway or rest room. However, in this material we will talk exclusively about shelves in the bathhouse for the washing room . We will tell you what they are like, what they can be made of, and describe their designs and coating options.
Bath furniture drawings
You can make simple wooden furniture for a bathhouse with your own hands, buy more serious products in a store, you can find the manufacturer’s contacts and buy from him at a lower price (although not a fact) or order a set made to your taste.
Wooden furniture from the manufacturer is, of course, good, but if you built a bathhouse yourself, then you can make furniture: the models are not the most complex, there are many available diagrams and drawings. The most important thing is to carefully process the workpieces: the edges must be rounded, all parts must be carefully sanded, first with a grinding machine, then with fine sandpaper by hand until a perfectly smooth surface without the slightest chips, burrs or other flaws.
Bath bench. DIY drawing
The parts are fastened either the old fashioned way using oak wedges, for which the corresponding grooves are cut out (a complex option that requires experience and time), or using self-tapping screws (nails are less reliable). When assembling bath furniture with your own hands using screws, “recess” the caps to a depth of 5-6 mm. Then fill the resulting holes with wood putty of the appropriate color. With this you kill two birds with one stone: the putty protects the iron from oxidation and dark spots and streaks will not appear on the furniture; moreover, if the items are used for the steam room, the metal parts will not burn the skin.
Do-it-yourself wooden bath table: drawing and dimensions (can be changed proportionally)
The table must be in the rest room. At least small. You need to drink a lot in the sauna. You will need to display teas, infusions and cups/thermoses/saucers. So without a table - nowhere. A drawing of a table that is stable and easy to manufacture is shown in the figure above. There shouldn't be any difficulties. The main connections are self-tapping. Their length is 3/4 of the total thickness of the parts being connected (so that they do not stick out from the tabletop). The diameters are all there, where to screw in is marked. Give it a try. It will work out for sure.
There is one little secret that will make the putty almost invisible: add a little dust to it, which is obtained during sanding. If you have successfully chosen the color, then after this additive the marks after sanding are barely noticeable.
Wooden bench. Can be used for a washroom or rest room in a bathhouse. Easy to make yourself
When assembling shelves for the steam room, benches, tables or other bath furniture, place the boards not closely, but with a small gap. This, firstly, will solve the problem of water drainage - it will flow into the cracks, secondly, the wood will be better ventilated, and thirdly, wood tends to expand/contract with changes in temperature and humidity, and such cracks provide the wood with this opportunity.
Watch this video on YouTube
Conclusions: furniture for baths and saunas should be made of wood. What furniture to buy for a bath is your choice, which depends on taste, habits and capabilities. You can buy a ready-made set, you can order production from a master, or you can try to make it yourself. Any option has its positive and negative aspects, but the most inexpensive furniture for a bathhouse is obtained if you make it yourself. The only thing that can be used with restrictions in the bathhouse is upholstered furniture. In this case, you need an ideal ventilation system that will effectively remove excess moisture from the air.
Watch this video on YouTube
Some interesting ideas that may be useful to you
This set of furniture when folded does not take up any space at all, but looks like a wall panel
On the open terrace near the bathhouse you can make stools like this. Original, just like the tree trunk solution
Scheme
It's time to get down to specifics. So, what exactly does any shelf consist of? There are two main structural elements in it: the frame and the flooring.
Above it was said about the fundamental difference between the width of the shelves and the number of tiers for the Russian and Finnish steam baths, so we will give diagrams of the regiments in the bathhouse for each case. Since the only difference is in the frame, we will describe the flooring separately - it is the same for both types.
An important point about any frame: among experienced bathhouse attendants there is still debate about whether the frame can be attached directly to the wall or must it be free-standing?
The main argument of those who are in favor of a free-standing frame is that when mounted on a wall, the joint soon begins to rot.
However, we know of a compromise option in which the mounting on the wall is done with a gap - you install bushings, for example, ceramic ones, which are used for the same separation of thermal insulation slabs from the wall.
Frame in a Finnish sauna
The frame of the regiments in the Finnish bathhouse looks something like this:
As you can see, in this case it is proposed to start from the specific height of the ceiling in the steam room, because the countdown is carried out precisely from it. At the same time, it is precisely this height that suggests a very common mixed form - this is when both steam is generated and the temperature is high, as in a dry-air bath.
CAREFULLY! The combination of high temperature and humidity is difficult for the human cardiovascular system!
In general, the layout of shelves in a bathhouse can be easily distinguished precisely by their height and width. The height of the step, if it is intended for sitting, will be about 45 cm. And for the approach of the steamer, 70-90 cm are needed. Therefore, either one of the steps will be narrow/folding/portable, or this is a sauna option, not intended for one person was lying, and the other was floating.
Another characteristic feature of a sauna shelf in a bathhouse is that the frame is covered in height with clapboard. This is done because the Finns do not need to leave space for the soaring person to freely position his legs - his feet with their toes go slightly inside, under the shelves, while achieving the very correct vertical position of the soaring body.
BY THE WAY! It is a common belief that if you cover the height of the shelves with clapboard, this will significantly reduce the volume of the steam room that the stove heats (and accordingly, increase its power). There is truth in this, but only in the case of hermetically sealing the space under the shelves. And this is bad - how to ventilate? And if you ventilate, then there will be no “volume reduction”.
Frame
Here there is one interesting point: two-tier Russian shelves can look like three-tier ones! This is due to the deceptive footstool that is placed near the high shelf. This bench can be mobile or stationary. But it’s still better to have a mobile one.
An ordinary two-tier shelf consists of an upper shelf, intended for hovering, and a lower one, on which the hovering person stands with his feet. At other times, the lower one can be used as a seat.
Below we present several more options for shelves in the bathhouse, showing their possible location (having one stationary shelf and two sliding ones, or all three sliding ones, we get the following options):
Flooring
Let's talk briefly about flooring. Despite the fact that the most common option is a processed strip laid along or across the long side of the seat with a smoothed edge and a gap of 1 to 5 cm between the elements, you can find options without gaps at all or made from boards with irregular geometry (unedged sanded board or croaker).
A log shelf looks exotic, but how long will it take to dry?
ADVICE! Whatever guides you when choosing a flooring design, take into account the fact that you need to dry it after each procedure. And the gaps are made not for the sake of beauty, but for the sake of ventilation and speeding up the drying process.
Railing
A useful, although not obligatory, element for regiments. In general, the railings in the steam room are used in two cases: as a fence for the stove - so that visitors do not accidentally approach it at a dangerous distance and touch it. This applies to steam rooms with metal stoves without brick or stone lining.
The second use of railings is to equip shelves. They create additional convenience for steamers when ascending and descending, and also make staying on the top shelf safer. And also, if they are placed parallel to the shelf, then while sitting on the shelf you can put your feet on them, this adds convenience and your feet receive more warm air and steam.
Such railings look something like this:
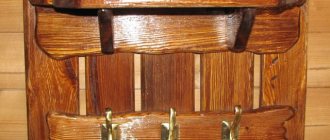
Wooden block hanger
Hangers are also made from maple or oak logs, always with knots. To create such a hanger, just find a photo of the finished product, and then use it as a visual aid. The procedure is simple, so if you correctly follow all the steps described below, you can make such a hanger without experience or special skills.
Cute wood hanger
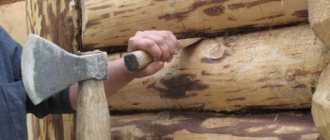
- Choose a small log with branches that will resemble the hooks of a future hanger. The shape and dimensions of the sample can be arbitrary.
- Carefully cut the log into two parts so that knots remain on one half.
- Using a plane, process the surface of the workpiece, making it as smooth and even as possible. In other words, give the product a noble look.
- Make several of these hangers and coat each of them with varnish. The number of hangers that can be installed in the bathhouse is unlimited.
- Attach the hangers to the wall of the bathhouse with nails, although it is better to do this with self-tapping screws.
Use oak or maple logs
Each of the small hangers should be original and not similar to other products. Of course, you don’t need to take huge blanks to make them, because they will take up a lot of space in a cramped room.
DIY folding sofa
To make a folding sofa with your own hands, you should learn in more detail what transformation mechanisms are available. This will allow you to choose an option for the bedroom, taking into account its dimensions and the location of other interior items.
Let's look at the main types of folding sofas.
The book is the most common and popular model. The product turns into a wide berth by raising the seat to a vertical position. In this case, the backrest moves to the lying position, the device lock is activated (accompanied by a click). After this, the seat returns to its original position.
Click-klyak (book) is an excellent model for relaxation and sleep. A unique mechanism allows you to bring the sofa into a “half-sitting” position. This is very convenient for those who like to sit for a long time reading or watching TV. When you need the bed, you need to apply a little force and bring both parts into a horizontal position.
Eurobook is a modern, improved interpretation of the book sofa. The seat is raised above the floor by 1-2 cm and moved forward. The back rests on the base of the sofa.
The accordion is lightweight and easy to use. To transform into a sleeping place, you just need to pull the loop at the bottom of the seat. When it starts to move forward, both parts of the backrest follow.
The retractable (roll-out) mechanism is similar in principle to an “accordion”. Using a special hinge, the seat, equipped with wheels, rolls forward, setting in motion a kind of platform hidden under it. Then the folding part of the seat cushion is placed on it.
Sofa bed. In order to convert such a sofa into a bed, you need to remove the seat. Then remove it from the box and unfold the hidden structure. Such models are not suitable for daily sleep.
Having chosen the transformation option, you can begin to create a sofa according to your own measurements. The principle of manufacturing any frame model is taken as a basis.
Methods for fastening boards
Proper fastening of bathhouse shelf boards and other external elements guarantees pleasant use of the shelves and their long service life. To do this, measures should be taken to avoid contact of the human body with the metal of screws or nails.
Most often, when installing shelves for a bathhouse with your own hands, the following fastening methods are used:
- The simplest and most effective fastening option is when the screws are screwed in all the way until the head is sunk into the thickness of the wood.
- Self-tapping screws can be screwed into wood from the back.
- To ensure the maximum level of safety, oak wedges are most often used. Special holes are made for them and hammered in. Although this method of fastening boards is environmentally friendly, it is quite labor-intensive.
- Some owners install a backrest on the wall where the shelves are fixed. It can be made from three boards placed on a vertical stand made of bars. The backrest provides even greater comfort for those sitting on the shelf. Then a person does not have to worry about burning his back when touching the heated lining of the steam room. For safety reasons, the backrest must be made of the same material as the shelves. The boards must be secured with gaps for ventilation.
DIY sofa bed
As a rule, such models are chosen in studio rooms or when it is not possible to fit a double bed in the bedroom. Comfortable, healthy sleep can only be ensured by a product that has orthopedic properties. Therefore, it is better to buy ready-made mattresses for a homemade sofa bed.
The choice of method for transforming a model into a full-fledged sleeping place depends solely on the wishes of its creator. Using the example of making a sofa with the easiest-to-use “Eurobook” mechanism, you can study the main stages of work.
For this you will need the following materials:
- two mattresses;
- beam;
- Chipboard, fibreboard, plywood;
- thin foam rubber, synthetic winterizer;
- legs;
- agrotextiles;
- upholstery fabric;
- glue;
- fasteners, nails, screws;
- folding mechanism (2 pcs.)
- tools.
First you need to assemble a rectangular base box from fiberboard. Attach the legs and timber guides to the inside of the sidewalls, close to each other. Install a fiberboard spacer in the center of the box and cover the bottom with plywood.
Next, the frame of the retractable part is made from timber, the surface of which is covered with a sheet of plywood. Support bars are attached to the structure, and legs are attached to them. At the corners of the inner part of the frame there are small bars up to 10 cm long that prevent it from jumping off the base. A mattress is placed on the frame, its edging is connected to the surface using a furniture stapler. The seat is ready.
Then the upper parts of the folding mechanisms are screwed onto strips of fiberboard measuring approximately 15x30 cm with self-tapping screws. Four through holes are drilled in the corners of the boards.
To attach the resulting parts to the back, you need to “open” the mattress upholstery from the sides, gaining access to its spring blocks. Using a strong wire, the fiberboard is connected to the internal elements of the mattress. Now the lower parts of the mechanisms can be secured to the base.
At the final stage, the wooden parts are covered with foam rubber and synthetic padding. Next comes upholstery with sealing and decorative fabric. A seat is placed on the base. That's it, the sofa bed is ready. For convenience, the model is equipped with large pillows and armrest bolsters.
Shape of shelves for bath accessories
In this case, we mean by “shape” design features. Inside the quadrangular room, shelves in the bathhouse for shampoos can be placed either along the wall or in the very corner. In addition, they can vary in support or fastening, because they can not only be screwed to the wall, but hung from the ceiling or made into a floor version (although this is already a bookcase).
Wall mounted soap
Wall-mounted options differ in the presence or absence of a support that evenly distributes the load across the entire width of the shelf. Typically, the support is a bracket - a triangle, one side of which is attached to the wall, the other supports the shelf, and the third transfers the load from the shelf to the wall and imparts rigidity to the structure.
Shelf for shampoos in the bathhouse on brackets
This is a reliable, time-tested option, but for our case it is not so important, because we are talking about shelves in the bathhouse for soap and shampoo, and they have little weight, so the bracket can be omitted, or made decorative.
ON A NOTE! Shelves on brackets are optimal if the shelf itself or the objects standing on it are heavy.
In addition to brackets, various fasteners are used to hang a wall shelf. They can be visible or hidden. You can learn more about fastenings from this article.
Corner
Since the corners of the rooms are usually not used, it is most convenient to hang a shelf there. Depending on the number of objects that need to be placed, as well as their height, the number of “floors” and the height of each “floor” vary.
Corner shelf in a Karelian bathhouse
BY THE WAY! For any shelves, hooks located under the bottom of them can be an additional convenience. You can hang washcloths, rags, etc. on them.
Corner structures are fastened to both walls, which increases the “endurance” of the shelves. You can hang it through regular “ears” on dowels.
Usually the outer edge of such a shelf is rounded, which slightly increases the area of the shelf (if it were not a sector of a circle, but a triangle, there would be significantly less space on it).
ADVICE! When choosing a suitable model, take into account the fact that sides for shelves in the sink are still preferable.
How to combine with style
Let's not think too much about this. It is clear that a glass shelf will not be appropriate against the background of a wooden frame, and not every wooden shelf will fit into an interior with mosaic tiles, for example. Therefore, we must proceed from elementary ideas about compatibility . In another material devoted to the independent production of such items, we talked about the fact that most baths will be either in an ethno-style , or without a style a high-tech style , which is more typical of saunas .
Glass shelf Raiber – R50113
ADVICE! The less ethnic your bathhouse is, the more preference you should give to simple forms and correct geometry. The more ethnic, the more fantasy the interior elements can be - the decor is richer, there is more asymmetry, bends, etc.
By the way, do not forget that even the most beautiful object should not be “alone” in the interior - it must be supported by some kind of “rhymes” - other elements in which something is repeated from it, perhaps color or shape . If you approach it this way, the eye will not perceive it as something foreign.
Multi-stage bath shelves: is it worth making them?
The feasibility of organizing a structure that includes two or three tiers is primarily determined by physical laws. When the room warms up, the hot air rises, and in the floor area the temperature rises, but not so much. In the case of installing a multi-stage structure, it becomes possible to select the required temperature regime.
Making a shelf in a bathhouse with your own hands is not so difficult, but constructing a multi-stage canopy takes more time. Of course, everyone independently determines the need for a two-tier or three-tier structure. If the bathhouse will be used only by household members, then you can make simple one-story curtains, supplementing them with benches.
In small baths that suffer from a lack of usable space, the lower floor may be located slightly above floor level. But in this case there are some advantages. For example, this design is well ventilated, which helps the boards dry quickly.
Arranging shelves one above the other allows sauna visitors to independently select the most suitable temperature for them.
Experts recommend that when drawing up a drawing of a bathhouse shelf, you should take into account that the upper floor should be wider than the lower tier. If the dimensions are properly distributed, it becomes possible to use the second floor as a bed.
Preliminary planning and calculations
Calculations and a basic design are prerequisites for a successful result. Draw a preliminary small plan of the room, put down dimensions, mark the location of equipment, window and door openings.
Scheme and principles of placement of regiments
Therefore, owners of steam rooms with windows who decide to independently manufacture comfortable shelves for a bath have a limited choice. They will be able to draw a plan for a future multi-stage structure only along walls without windows and without glazed ventilation vents. Otherwise, the placement schemes are the same for everyone. Shelves can be arranged:
- a single linear object along one wall in one, two or three rows;
- G-shaped design with numerous variations in the number of steps. Two or three along each wall, or the upper and lower benches along the long wall, and the middle one along the adjacent short one, etc.;
- two parallel structures, symmetrical or asymmetrical, installed at opposite walls of the steam room, as in a railway compartment. Or how in the same compartment there are two equal tiers of shelves.
Draw out several options from which you can choose the best. Only for competent planning and calculation of costs for the purchase of lumber, you will also need the exact dimensions of multi-stage or single-stage shelves for a bathhouse.
Dimensions of bath seats or beds
To begin with, we list the traditional sizes of places for receiving bath procedures in a lying and sitting position:
- 1.5 m of length is needed in order to lie on a shelf with legs bent at the knees;
- 1.8 m in length will allow the average majority not to bend their legs when lying down. But according to this parameter, everything is purely individual, sometimes 2.00 m is not enough;
- 0.4 m is the minimum width of the shelf, most often the lower one, used primarily as a stand under the feet of a bathhouse attendant wielding a broom. It will be quite comfortable to stand on such a step, and you can also sit down to refresh yourself and cool down;
- 0.6 m is the most common size for the width of a sauna bench, although not very conducive to lying down;
- The 0.9 m width will allow you to sit across the shelf with your legs tucked in, and people with any physiological characteristics will be able to lie down.
Variations are acceptable, but bath attendants do not recommend doing less than the minimum limits.
Let's figure out the height of bath furniture
In terms of height, the principles of arranging shelves in a bathhouse are radically different from standard designs. All calculations begin with determining the height of the upper bench. In order to be able to sit on it and, when waving a broom, treat the back of a lying person, and not the bath floor, the plane of the upper shelf is located at a distance of 1.10 - 1.20 m from the ceiling. There is another reference point - the level of the steam door of the heating equipment. It is up to the owner to decide whether to adhere to it.
The height of the sauna benches varies from 0.4 m to 0.6 m. A “run-up” of 20 cm will allow you to slightly raise or lower the lines of the benches in the drawing so that the steam room has the required number of steps. The main thing is that the lower tier is at least 0.3 m above the floor surface.
Wood
The constituent elements of any standard canopy are:
- frame - support post made of beams;
- the surface of sun loungers, seats made of boards;
- backrest for sitting on the top bunk.
All parts of the canopy must be from the same type of wood.
It is not advisable to use material made from coniferous trees, since with constant heating they begin to release resins that will stick to the bodies of vacationers. The minimum resin content of such popular hardwood species in our country:
- Linden - healing properties, homogeneous structure, darkens over time under the influence of steam and humidity.
- Aspen is relatively inexpensive, has a healing effect, is resistant to moisture, and never rots.
- Alder is a dense wood with healing properties.
- Poplar has a uniform texture; after drying, the wood becomes hard.
The wood of these trees tolerates high humidity, frequent temperature changes, and has a low level of thermal conductivity. Despite all these wonderful properties, they are additionally treated with special natural oils to protect against mold. Under no circumstances should it be impregnated with any chemicals or varnished.
Cabinets
If you want to place towels below, you should take a closer look at the cabinet. All that remains is to choose it correctly. A bedside table without doors is useful when you want to make towels a decorative element. But if splashes constantly fly onto the cabinet, it is better for it to have a closed façade. For example, glass. They are not afraid of water. And if the room is small, you should take a closer look at bedside tables with shutter doors. These doors do not swing open, which saves a lot of space.
What material to choose for a bath hanger
It doesn’t matter whether you buy a ready-made hanger or make it yourself, the main question is what material it should be made of. A bathhouse is a place where furniture and interior items are tested for strength by humidity and high temperature
The product must withstand such conditions without deteriorating or losing its color and aesthetic properties.
Wooden hanger without hooks with slats. Photo: parnaya.by
The most popular material for a bathhouse is wood. The metal may not withstand high temperature conditions and humidity and will soon become covered with rust. There are several criteria for choosing a future hanger:
- Wood must have low thermal conductivity. This will prevent you from getting burned on it in the bathhouse or in the dressing room. Deciduous tree species, especially linden, are suitable for maximum temperatures.
- The material must be sanded and processed. There should be no uneven sharp edges or burrs left on the surface. The treatment will not only improve the appearance, but also prevent cuts or other damage from the surface of the hanger.
- Coniferous trees are not suitable for baths. They release resin that can stain clothing.
Bath hanger with metal hooks. Photo: womanadvice.ru
Varnishes and paints should be selected based on their strength. Regular varnish is not suitable for use in a bath or sauna. It contains artificial substances that have specific characteristics and an unpleasant odor. When a room is heated, harmful and toxic substances can be released and cause damage to health. Because of this, manufacturers advise choosing acrylic-based varnishes and paints. This applies to processing not only the hanger as a whole, but also the design on it.
Painted hanger. Photo: banyaukg.kz
Coating
The starting material of the shelf can be coated with various compositions. Some of them will have a decorative function, others will protect the material from the effects of the environment.
What paint to paint
Well, alkyd enamels , because the film they form does not have the ability to allow air and moisture to pass through. The wood from which your shelf is made has a certain moisture content and during operation will “breathe” - change not only the humidity, but also its own volume. Changes in volume will affect the coating, which will crack and eventually peel off unevenly.
Acrylic paints look much more attractive. They do not smell, dry quickly, as they are water-based. But this very water base is the reason that the coating turns out to be finely porous, that is, the wood will “breathe,” but excess humidity in the washing room will lead to the fact that it may begin to deteriorate.
IMPORTANT! To avoid this kind of problem, start painting with an antiseptic treatment. All antiseptics are poisonous to one degree or another, but you should not be afraid of harm to your health, because after that you will cover everything with a layer of dye.
Varnish
The main difference between varnish and paint is its transparency. Of course, with the help of varnish you can tint (change the shade) the surface, but the structure of the wood, nevertheless, will remain visible.
Example: NEOMID Sauna - acrylic-based wood protective varnish
Varnishes are in some ways preferable to paints , especially those designed for rooms with high humidity. Of course, they are expensive, and you can use the remainder on shelves if you have already purchased such varnish for other purposes.
Water-based varnishes have the property of being well absorbed into wood, while slightly raising the relief of its structure. This means that it will be difficult to limit yourself to one layer, and most likely there will be more than three, only in this case will it be possible to get rid of surface roughness.
Alternatively, you can first treat the surface with a primer, then sand it to the desired smoothness, only then proceed to varnish. By the way, the primer is also an antiseptic. We recommend using a deep penetration primer.
Oil and wax impregnations
All coatings have their own service life , at the end of which varnishes and paints look unattractive. You can protect the surface of the shelf without resorting to painting or varnishing - just saturate the wood with special oil or oil wax. The same compositions that we recommended to you in the section on bath shelves will do. Take a look, for example, at this article. If there are residues after processing the steam room, use them for items in the washing room.
Rules for constructing shelves for a steam room
The recommendations below, which explain how to properly install shelves in a bathhouse with a steam room, will ensure the comfort of steaming, guarantee safety and extend the service life of the finishing and bath furniture:
- There should be a ventilation gap of 10 cm between the walls of the steam room and the shelves. When the steps are permanently attached to the walls, this gap is ensured by installing pieces of timber. More precisely, first a beam cut into pieces is attached to the wall, then the frame elements are screwed to it with self-tapping screws with heads recessed into the array.
- The recommended dimensions of the timber for constructing the frame are 50 × 70 mm. The thickness of the board should be four times less than its width so that the wood can dry completely.
- The number of supports is determined by the thickness of the planks. If the thickness of the board is 22 cm, then there should be at least 0.6 m between the supports.
- To ensure stability, it is advisable to tie the frame supports with a board both at the top and bottom along the entire length.
- Rubber pads must be nailed to the bottom surface of the legs of all stationary steps and portable benches.
- Instead of self-tapping screws, it is recommended to use wooden pins, driven into holes drilled for them, or wooden nails as fasteners for flooring boards. If you can’t find anything other than self-tapping screws, it is better to fasten it from the back so that the metal parts do not burn users. Metal heats up much stronger and faster than wood. If there is no way out and you have to fasten it from the outside, be sure to bury the metal caps in a secret place.
- There should be a gap of at least 1 cm between the planks of all elements of the flooring of the bench seats.
The sides of steam room shelves, made in accordance with Finnish sauna rules, are made with ventilation gaps by analogy with the technology for constructing the entire flooring. However, in Russian bathhouses the sides were sewn up tightly with boards to reduce the cubic meters of space heated by wasted steam. Of course, a steam room reduced by this method will heat up faster, but the wood of the floor and wall decoration hidden under the furniture will also dry out worse. The owner will choose what is more practical.
There are no special tricks in how to make a bathhouse bench or shelves for a bathhouse. The shop will be the same in Africa. The main thing is not to forget about the peculiarities of constructing a multi-stage bath structure and get down to business responsibly.
Step-by-step recommendations for making your own wooden bath shelf
Before you get started, there are a few key points to consider:
- What kind of things is it intended for storing?
- How important is it to use a certain type of wood, such as oak or linden;
- What is the maximum load-bearing capacity it should provide? The strength of the structure and, by the way, its weight will directly depend on its “carrying capacity”;
- Where in the space of the bathhouse it will be located;
- The characteristic features of the interior are determined with which it must be consistent or, as newfangled high-flying designers like to say, “rhyme.”
In defiance of newfangled designers of different heights, we present the “Lyra” bathhouse shelf, which will allow the owner of a bathhouse with such an accessory to be known among his neighbors as a great expert in the field of chamber symphonic music and, possibly, foreign rock. As part of the variation of the same “Horseshoe” shelf, you can constantly adhere to the tradition of preserving valuable bath items under the constant protection of this well-deserved Slavic amulet.
What is necessary:
- Board 500 mm wide, 750 mm long and 25 mm thick for the frame;
- Three strips 750 mm long, 60 mm wide and 25 mm thick, for decorating the internal set;
- Two boards 15 mm thick, 200 wide, and 400 long for use as the load-bearing plane of the shelf in horizontal projection;
- Copper busbar 35 mm high and 1 mm thick for edging;
- A set of hanging fasteners for installation at three points and standard wood screws for fastening elements together, 25 and 35 mm long.
- Jigsaw with blade for curved cutting;
- Compass, ruler, bubble level for marking and assembly;
- A screwdriver or screwdriver with a working part for the specific self-tapping screw used.
The main sequence of work is as follows:
- Using marking tools, the outline of a lyre or horseshoe is drawn along the outer dimensions of 500x750 mm.
- Using a jigsaw, the outline is cut out from the rear sight.
- An internal vertical set is being recruited.
- The horizontal set is outlined by a copper busbar.
- A horizontal set is mounted.
- If the shelf is made in the “Lyra” version, the outer contour is sanded and coated with transparent polyurethane varnish. In this case, tinting a quarter or half a tone darker than the original color of the wood is allowed. In the “Horseshoe” version, the outer contour is painted with decorative acrylic water-soluble paint in the color of natural metal. On the surface of the product you can imitate defects and fasteners in the form of nail heads forged by a village blacksmith.
- Seats for fasteners are marked on the wall, and hanging elements are fixed to the counter parts of the shelf. The product is mounted on a wall with horizontal control using a bubble level.
Features of care
To keep your racks clean and extend their service life, you must:
- Serious stains and dirt should be removed with a brush.
- For easy regular dust cleaning, use laundry soap.
- The use of any chemical detergents or washing powder is not allowed.
- After each visit to the steam room, thoroughly dry the benches and the entire room, and monitor the proper functioning of the ventilation.
You can make benches in the steam room yourself, following the instructions of the masters
It is important to take a responsible approach to choosing the type of wood, carefully consider the shape, size, location and treatment of the shelves so that being in the steam room is comfortable and safe for health.