Commissioning
The chimney must be inspected, paying special attention to the quality and tightness of the joints.
The inside of the structure is cleaned with a dry cloth. All unnecessary objects are removed from the pipe and firebox. Test ignition is carried out using a small amount of fuel. At this stage, the efficiency of draft, the presence of smoke at the joints, and its drawing into the room are determined.
After testing, after a few hours the oven is fully heated. You should not cram the combustible materials used into the firebox to capacity; this can lead to failure of the chimney and a fire. All flammable elements and partitions near the pipe must be insulated, the distance between them and the exhaust structure must be at least half a meter. Visual inspection and preventive cleaning are carried out once every six months.
About the installation of fire-fighting fluff in the following video:
How to install a chimney in a bathhouse with your own hands
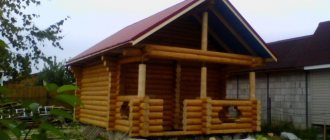
In the old days in Rus', the construction of a bathhouse lasted for more than a year, but now you won’t surprise anyone with ready-made bathhouses, which are brought directly to the site and assembled in a few hours. However, after the builders leave, you are left with a log box that is not equipped with a heating device. Therefore, the installation of a chimney in a bathhouse and installation of a stove falls on the shoulders of the householder. To do this correctly with your own hands requires knowledge and experience, because a frivolous attitude to this problem promises increased costs for maintaining the required temperature, the risk of fires and the danger of carbon monoxide poisoning.
Laying a simplified chimney
We hope that you have carefully read our tips and already have an idea about laying a traditional chimney. In this case, the simplified version will not create big problems. Let us dwell on its differences and technological features.
Video - Simplified chimney
The chimney has no fluff and no otter. The fluff serves as a fixation element; since it is missing, the structure needs to be secured in a different way. We recommend making a frame around the perimeter of the chimney from a corner and using threaded connections to attach the frame to the chimney at ceiling level. Next, it needs to be fixed to the ceiling beams. It can be fixed with metal plates or building reinforcement, it doesn’t matter. The main thing is that the chimney does not wobble.
The otter was needed to seal the chimney outlet above the roofing. It does not wall up - do the sealing yourself. Use metal sheets for this; the specific sealing technology depends on the type of roof. We will indicate only the main general points.
Laying a simple brick chimney
Brick chimney passage through the ceiling
Pipe outlet through the roof
- Protective aprons must be bent and inserted into a groove cut on the planes of the chimney.
- To completely prevent moisture from entering, it is highly advisable to treat all contact areas with any sealant.
- There is an opportunity - when installing the roofing, purchase factory-made chimney outlet sealing systems.
If the brick used to lay the chimney has already been used, then it is necessary to plaster the internal channel as well. Special angles and straightness should not be observed; the main thing is that the surfaces are as smooth as possible.
Do-it-yourself chimney for a bathhouse is simple and cheap
Almost all bathhouses built at home use solid household fuel. During its combustion, waste products are formed, both solid and gaseous. To remove them and ensure high-quality drainage to the outside, it is necessary to install a chimney for the bathhouse.
One of the main conditions for the manufacture of this unit is maximum fire safety. It is especially important to observe this in the following areas: when exiting through a wall and when installing through a roof. It is not enough to make through cavities and put pipes there. You will need to reliably seal the surrounding area with safe materials and ensure good traction. How to do this correctly and what insulators to use are in our article.
- Types of modern chimneys
- Use of different materials
- Connection with stationary stoves
- Brick oven
- A simple chimney option
- How often to clean the chimney in a bathhouse
Popular installation schemes
Basic requirements for brick chimneys for baths
According to SNIP, brick chimneys must comply with accepted standards and rules for all types of smoke exhaust ducts:
- The total length of the chimney must be at least 5 meters from the base of the stove pipe to the head of the smoke duct
- The height above the roof level must be of certain dimensions depending on the roof structure and the location of the chimney relative to the ridge
- Mandatory installation of a special spark arrester in the presence of a roof made of fire hazardous materials
- The horizontal section of the chimney should not exceed a length of more than 1 m
- Mandatory preventive measures and procedures for cleaning smoke ducts, scheduled inspections at least once a year
Special requirements for internal brick chimneys include the use of a special clay mortar during their construction. The clay mortar does not contain various (including cement) additives that have a negative impact on human health during operation.
One of the requirements for the operation of a chimney is to maintain the cleanliness of the smoke channel
Video description
An example of how to line a stove in a bathhouse with brick is shown in the video:
You can finish the masonry at the level of the heater, bringing it only to the top of the heating unit body. Or you can extend it to the ceiling, also lining the chimney. It depends on the design of the stove, its location and the desires of the owner. You just need to remember to promptly remove the protective film from the structure.
If old bricks were used in the work, the heat shield can subsequently be lined with porcelain stoneware or tiles. If you purchase new material for the work, you can choose a stone of a different color or with a decorative surface, and immediately carry out the masonry with jointing.
Another option for decorative cladding using brick-like clinker tiles Source giropark.ru
Preparation for use
Before using the bathhouse in operating mode, the masonry should be allowed to dry under natural conditions for several days. But even after this, you cannot immediately heat the stove at full power. It is better to use it 2-3 times in test mode, burning one load of firewood, so as not to raise the temperature to the maximum.
Thanks to this, the solution dries well and evenly and adapts to operating conditions.
General rules for the construction of chimneys
For all types of brick chimneys, there are several general provisions that must be followed.
Exit to the roof of a classic chimney
Height above roof covering. It is regulated taking into account the angle of inclination of the slopes, must ensure fire safety and prevent the draft from being blown out by air turbulence from the ridge. If the roof covering is made of non-combustible materials, then the fire height requirements can be ignored, but the chimney should be protected from turbulence. Recommended heights can be seen in the photograph.
Chimney height
Fire safety requirements
Material of manufacture. For most chimneys you can use ordinary red brick. If you want, buy a fireproof one, but it costs much more, and you shouldn’t expect a big positive effect from its use.
Red brick chimney masonry
We recommend using refractory bricks only for laying the top pipe; this is where the gas temperature is highest. The fact is that red brick can withstand temperatures up to +800°C without problems, and the temperature of the gases in the chimney is much lower. It is strictly forbidden to use sand-lime bricks - when heated, they release toxic chemical compounds into the air. This brick can only be used for external wall decoration.
It is prohibited to use sand-lime brick
Prices for fire bricks
fire brick
Masonry mortar. There are two options. Some stove makers use only clay mortar, others add a little cement to it. We are supporters of the second option; cement significantly increases the strength of the structure. But it’s your choice; both types of solutions do their job well.
Ready-made clay mortar for laying a stove
How to wrap a metal chimney
How to wrap a metal chimney pipe is not difficult to decide. The building materials market offers many products for this.
IMPORTANT! The most important thing you need to know when performing insulation is that you cannot use a coating that contains flammable substances.
It is better to insulate with a good quality product that complies with fire and building regulations. This will create additional security conditions.
The most commonly used options are:
- Fibrous building material;
- Mineral wool;
- Glass wool.
What does a chimney consist of?
Before we begin installing a chimney for a bathhouse, let's figure out what this structure consists of and what are the principles of its operation.
Based on their location, chimney systems can be divided into internal and external.
An internal chimney is very easy to install, but the proximity of the hot surface of such a pipe to the wooden elements of the bathhouse seriously increases the level of fire danger.
The external chimney loses heat faster, which can negatively affect the draft level in the sauna stove. You will add additional fuel to the stove to create a normal temperature in the sauna.
Thus, both installation options have their drawbacks, but all of them can be compensated for by reliable insulation of the chimney. But creating an internal chimney system, from a technology point of view, is much simpler.
Material used for the construction of a chimney for a bath
There are three main methods for constructing an internal chimney from different materials:
- Metal pipes. This material is quite affordable, but has very high heat transfer. As a result, it requires very good thermal insulation. More than one or two fires arose due to a burnt-out pipe.
- Ceramic pipes. The most reasonable option would be to use an asbestos-cement pipe. Asbestos cement has excellent heat-insulating properties and the construction of chimneys from it will not require a lot of additional work.
- Brickwork pipes. This is the traditional construction method for Russian stoves. Brick gains heat slowly and releases it slowly - this is a smart choice.
Fire safety
When installing a chimney in a bathhouse with your own hands, it is important to strictly comply with fire safety rules. The main task of any chimney is to remove combustion products from the interior of the room where the stove is installed. This process will be facilitated by the draft that must be provided inside the pipe. It is the draft force that will remove waste vapors and guarantee the flow of oxygen into the combustion chamber, which will support the combustion process.
If you install a chimney in a bathhouse with your own hands, then you should know its advantages. So, the main advantages of a brick chimney exhaust are that in any weather the draft of such a structure will be excellent, the appearance remains excellent, but the lifespan will be significantly longer compared to that of a steel pipe. Before starting work, it is necessary to decide what technology will be used to carry out the work.
Brick and metal chimney maintenance
There are many different ways to clean a chimney. Perhaps the most popular of them is cleaning the pipe in winter using snow, which must be thrown from above. However, the effectiveness of this method is low. It is better to use one of the methods that bring much more noticeable results.
Chimney cleaning - photo
| Way | Description |
| Cleaning with a brush | Cleaning with a brush is an old and proven method that has been used since time immemorial. It allows you to achieve an excellent effect, but for this you will have to work hard. In addition, be prepared for the fact that a lot of soot will get on you - this work is very dirty. |
| Chimney cleaning with weights on a cable | Cleaning the chimney with a cable weight is another mechanical cleaning method. Like cleaning a pipe with a pipe cleaner, it’s effective, but it means you’ll have to tinker with it and get pretty dirty with soot along the way. |
| Using a fan | You can also install a fan at the top of the pipe that will work for suction. It will pull soot out of the chimney, but you need to prepare for the fact that the space around the bathhouse will then be contaminated with it. |
| Aspen firewood | There is an easier way - you need to throw aspen firewood into the stove. As a result, a powerful draft will arise, and the soot will be knocked upward. In the dry and intense heat that aspen creates, the resinous substances that settle in the pipe quickly burn out if you heat the bathhouse with coniferous wood. |
| Chimney cleaner | Cleaning with chemicals. There are different options here, for example, you can throw special preparations into the sauna stove along with firewood that enhance cravings. A significant advantage of this method over cleaning with aspen firewood is that the compositions used contain special substances that additionally loosen the soot. As a result, it easily moves away from the inner surface of the chimney. |
| Washing and heating the furnace | Another option is to pour several liters of water into the pipe, then heat the stove for a long time. |
To extend the service life of the chimney, it is necessary to periodically inspect all joints and check the general condition of the structure in order to notice problems that may appear in the early stages. As noted above, if you install a metal chimney in your bathhouse, its lower pipe will need to be changed periodically, since it heats up much more and therefore becomes unusable faster.
If you strictly follow the technology, a home-made brick or metal chimney will remove smoke well and retain heat well. In this case, the risk of fire is reduced to almost zero. Both metal and brick structures are very durable, so it will not be long before you feel the need to build or install a new chimney in your bathhouse.
Cleaning the chimney
It is best to do this after it has rained. Chimney cleaning is an important process that should never be avoided or ignored. Experts advise resorting to a time-tested mechanical method for this using a brush, special weights, and sometimes a sledgehammer and a crowbar.
It is recommended to remove all things from the bathhouse and cover the floor, walls and ceiling, for example, with newspapers. This work is very dirty!
It is most convenient to use a brush to clean the pipe. It is inserted into the pipe and gently pushed upward until the resistance of the soot accumulated on the walls becomes less. The main thing is not to twist the brush, otherwise it can break. If this happens, then it will be possible to get it only in parts.
If you find small growths in the chimney, heat the stove with aspen wood.
Chimney cleaning
When burning, they create excellent draft and remove ash from the chimney. Aspen firewood is characterized by dry and intense heat. If the stove was previously heated with pine wood, then, most likely, resin substances remained on the walls, evaporating from the pine needles during the fire. Aspen will perfectly eliminate them too. Instead of aspen, it is permissible to use potato peelings, which cope with the same problems no worse. The only problem is collecting them in the required quantity.
In addition to the mechanical method of cleaning pipes, there are also more modern ones. They are rapidly gaining popularity. Cleaning occurs with the help of chemicals, which contain special substances that, during combustion, remove soot from the chimney or make it loose, due to which it falls off on its own.
Cleaning and care
The main job is to clean the internal surfaces from soot. When the draft level decreases for the first time, you will need to immediately clean the channels from adhering soot. Such preventative work is carried out at least once every 30 days.
The work is not difficult. To clean, we pass a cable or wire through the top. At the bottom we tie a metal pipe cleaner along the diameter of the pipe and stretch it along the entire length. You can tie a weight to a cable and clean the soot from above, lowering a heavy blank. After the work, a general cleaning of the steam room will be required, so it is better to cover the shelves with polyethylene and take out light items.
People use several other cleaning methods. In winter, having rolled a snowball along the internal size of the pipe, it is lowered into the pipe and, as it descends, it will clean off the soot from the walls. The simplest and most effective way is to burn a stack of aspen firewood in the stove. Aspen releases moisture, which settles on the soot layer and causes it to collapse.
You can install a powerful fan and direct the air flow into the pipe. Just don't forget to warn your neighbors about your operation. Otherwise, you are guaranteed to get into trouble and wash your neighbor's clothes.
Expert advice
When making a chimney into a bathhouse with your own hands, you must leave holes for cleaning the structure. The walls of the chimney should be smooth, while the corners should be set so that they are straight. The internal base of the structure should be finished with plaster, which will ensure smoothness. This need is due to the fact that the uneven surface will prevent the penetration of gases, in addition, soot will begin to settle. This will reduce traction and the interior may eventually catch fire, increasing the danger. Plaster must be applied correctly. Experts believe that the chimney must also be bleached from above, this will allow analyzing the seepage of soot through existing cracks.
Basic materials for the chimney
Modern technologies allow the use of materials with different properties.
Metal
Ferrous metal is considered a cheap but unsuitable material for a stove pipe.
Products quickly heat up to unacceptable temperatures, which leads to fires. The material is heavy and difficult to install. The appearance of condensation during combustion contributes to corrosion.
The rules allow the use of multilayer stainless steel structures.
The only benefit from using single-wall metal pipes is low cost. A chimney from such products is built only in cases of austerity.
Brick
Brick is the correct (permitted) material for a chimney.
The set of rules allows the use of ceramic and refractory bricks for the construction of chimneys, but the material has disadvantages for external systems:
- To install a brick chimney through a wall in a bathhouse, you need the skills of a stove maker.
- An additional foundation will be required.
- Difficulties with maintenance and soot removal.
- The release of heat into the atmosphere is an irrational use of energy resources.
- Accelerated destruction due to alternating heating-cooling cycles during the cold season.
However, if desired, you can get a unique appearance of the bathhouse.
Ceramics
The benefits of ceramic chimney pipes are widely discussed on the Internet.
The material is durable, easy to maintain, collects little condensation and accumulates heat well.
However, ceramic pipes do not allow the assembly of a full-fledged structure, but serve only as an inner layer for brick structures. Alternatively, you can use an outer layer of foam blocks.
Asbestos cement
It is problematic to bring an asbestos-cement pipe through the wall in a bathhouse - the industry produces only couplings for asbestos pipes. Turns need to be made in other ways, which is difficult for novice builders.
Asbestos-cement pipes are used for the outer part of the pipe, after the pipe has been brought out to the street.
In the case of insulation, we get a multi-layer cake, the cost of which is close to that of sandwich pipes.
Polymer
The big name polymer chimney actually means a pipe liner made of polymer. The product can withstand high temperatures and can be bent at any angle. This allows you to easily remove the chimney through the wall, but you cannot connect the product directly to the stove. The maximum temperature for the liner is 250°C.
It is better to use the polymer in hoods, fireplaces, geysers or through a section of metal pipe for sauna stoves.
Installation technology
It is better for an inexperienced master to opt for an internal chimney made of metal pipes, exiting through the roof and ceiling of the bathhouse. DIY installation looks like this:
- Purchase pipes, bends of suitable diameter, clamps, umbrella, rubber seal for waterproofing, fire-resistant asbestos, and expanded clay.
- Before installing the stove, the surface behind it is protected with two layers of fire-resistant asbestos.
Installation of stove and chimney
After installing the stove, the first segment of the pipe, equipped with a gate valve, is mounted on the pipe located above the heater. Using a gate, the traction force is controlled during kindling and after its completion. When the damper is partially closed, the air flow through the chimney is reduced, keeping the heat in the bath longer.
Metal chimney damper for a bathhouse
To correctly connect the sections of the chimney, you need to take into account the flow of the smoke, that is, the upper pipe is put on top of the lower one. For sandwich pipes, one should also keep in mind the movement of condensate, so the inner pipe is connected “through smoke”, and the outer pipe “through condensate”, that is, the upper segment is inserted into the lower one.
- The ceiling is cut through to lead the pipe into the attic. A successful way to insert a pipe through ceilings is to install a metal box. It is attached to the ceiling so that it is level with the attic floor. A chimney is passed through a hole in the box, and the box is tightly covered with expanded clay or mineral wool. The ceiling is protected from fire with asbestos boards.
- A hole is made in the roofing material for the pipe to exit. To fit between the rafter legs, they use bends that allow you to make a hole in a convenient place. If the roofing material is flammable, it is protected with a metal sheet or asbestos, the pipe is brought out into the hole, an elastic rubber seal is put on it and glued with a fire-resistant sealant.
Rubber seal for the chimney Install the chimney segments so that it reaches the required length. A metal umbrella is placed on the top to protect the chimney from debris, branches, and rain.
It is important to ensure that the joints between pipe segments do not fall on the ceilings in order to seal and tighten them with wide metal clamps.
A well-installed chimney for a bathhouse is a sign of a real Russian bathhouse, which is warm even 6-7 hours after the fire is completed.
Elements of the chimney system
Standard kits include:
- cylindrical pipes or panels;
- adapters;
- tees;
- fastening elements (brackets and clamps);
- pipes;
- end elements of various shapes;
- tap-off elements.
In some cases, additional components are applicable
When assembling any chimney, it is important to be guided by building regulations and fire safety requirements. All components of the pipe that come into contact with flames or escaping gases must be made of sheet steel with fire-resistant characteristics
Equivalent similar materials are acceptable for use.
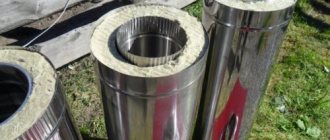
In production, chimney design elements are usually divided into two groups. The first of them includes double pipes, sandwich panels. The elements include an outer and an inner pipe with different diameters. They are insulated from each other with thermal insulation with non-flammable characteristics. This design provides faster and better heating. This causes the temperature to rise above the dew point in a short time, which reduces the amount of condensation that often causes corrosion.
Elements of the first group are used in the construction of ventilation and smoke ducts that pass through the unheated parts of the bathhouse (for example, through the attic). This design is applicable for the external arrangement of the chimney. Second-order verticals that do not come into contact with flames and gases are acceptable from a galvanized base or stainless steel. The second group of chimney elements is usually single-circuit, it has a diameter from 80 to 400 mm.
Typically, stainless steel is acceptable for chimney installations in the absence of insulation. It has a smooth surface to the touch.
Special elements allow you to assemble structures that are unlimited in height, location and method of installation, these include:
- wall supports;
- installation sites;
- gates;
- bends;
- telescopic brackets;
- clamps, spark arrestor, heat exchanger.
The initial part installed on the outlet of the stove should be a single pipe with an allowable length of up to a meter and a metal thickness of 1.0 mm. An exception may be a stove with a water tank. To transition from one type of element to another, start sandwiches are used.
Making boxes
Many people are afraid to make a metal box for the chimney pipe themselves. But it doesn't contain much complexity.
When making a box you need the following tools:
- Metal scissors.
- Galvanized sheet.
- Self-tapping screws.
- Compass.
- Drill.
Further sequence of actions:
- The hole is being prepared. Its edges need to be secured with support beams. They will create support for the box.
- A couple of parts are cut from a galvanized sheet. Along their edges, at a distance of five centimeters, a 90-degree bend is made. These U-shaped parts are fastened with self-tapping screws to prepared holes in the ceiling covering.
- Two more U-shaped blanks are prepared in the same way, and they are overlapped onto the existing sheets. The result is a solid frame for the exit made in the ceiling covering.
- The next part of the action is the bottom for the box. An element is cut out from the same galvanized sheet, the dimensions corresponding to the opening made. In its center, draw a circle with a compass for the entrance of the smoke exhaust billet.
- From the central part of the bottom of the box, 4 fasteners are placed (each of them has a two-centimeter width). Next, they are cut out and bent at an angle of 90 degrees. As a result, a base is formed with a hole and 4 strips for fastening.
- The bottom is attached to the walls. A chimney is inserted through the exit and secured with a clamp. The empty space is filled with an insulating layer.
Using the suggested instructions, making a box is not difficult. If you follow everything exactly, the work will not be difficult even for an inexperienced layman.
How to make a brick structure
Brick chimneys can be root or mounted. The first option is located next to the stove and is ideal for bathhouse stoves.
If the stove is initially made of bricks, then the chimney is added to the overall structure. If you have a metal stove, then the brick chimney is connected to it using a metal pipe.
Connecting the chimney to the sauna stove with a metal pipe
Nuances
- A smoke damper is installed near the ceiling in the chimney, which is responsible for the draft in the stove. It also determines how intensely the fuel will burn and how long the stove will retain heat.
- To pass the pipe through the attic ceiling, it is necessary to fluff the chimney.
Diagram of a brick chimneyFluffing (cutting) is the thickening of the walls of the chimney part of the stove while maintaining the internal cross-section. Thus, the ceiling is insulated from exposure to high temperatures.
- A riser is built above the fluff. It crosses the entire attic space and has a straight and even shape.
- In the place where the chimney intersects with the roof, an “otter” is built, which has the same functions as the fluff. But in addition to the function of protecting roofing materials from temperatures, the “otter” covers the gaps that form between the roof and the chimney.
- The next element of the pipe is the neck. After expansion, it returns to its original form.
- After the neck comes the head. Its bricks protrude outwards and provide additional protection against moisture penetration.
- To prevent precipitation, dirt and dust from getting into the pipe, a metal cap is put on it.
Step by step construction
From the fundamental part, the chimney is laid using one ordering scheme.
Chimney well
The building must be level, without protrusions and windows. The exception is the ledge where the metal pipe from the stove is embedded. The chimney is a square column with a well-shaped section inside. The size of this section, depending on the power of the sauna stove, is 13x13 centimeters (0.5 bricks), 13x26 centimeters (1 brick) or 26x26 centimeters (2 bricks).
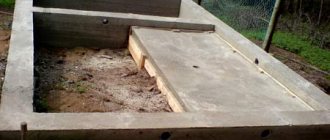
- The foundation is the basis of the chimney. Its thickness is the same as that of a sauna stove. They are one.
- The chimney rises to the point where the damper is installed.
Then the chimney is placed in order. The order of the chimney and fluff - Row No. 1 completes the neck of the chimney.
- From the 2nd row, the construction of the fluff begins. In this case, the bricks must be moved 1/3 outward. At this stage, whole bricks and parts are used. Parts of the required sizes are made using a pickaxe.
- The internal cross-section of the chimney remains unchanged throughout the entire masonry. The fluff shifts only outward. If you break this rule, you can greatly reduce the draft of the furnace.
- The fluff moves from rows 3 to 5.
- The 6th row is placed in the same way as the 5th, without shifting.
- Rows No. 7 and 8 are the same as row No. 1.
Stages of finished fluff - Once the cutting is laid out, construction of the “otter” begins.
Otter orderIts construction is not an easy task. Each row should protrude 1/3 above the previous one. Its lower row is the same shape and size as the upper cutting row. From the second row of the “otter”, the laying of steps begins, expanding the chimney outward by 1/3 of the brick. The arrangement diagram clearly shows how many rows need to be made to build an otter like.
- After the “otter”, the neck of the chimney is laid out in accordance with the diagram.
- Then comes the header. It consists of 2 rows, and the bottom one should protrude slightly outward.
- The last step is installing the cap.
Waterproofing
Of course, fluff and “otter” protect the floors from high temperatures. But no one canceled the waterproofing on the roof. A brick chimney must be waterproofed before roofing material is laid on the roof. Typically, roofing felt and mastic are used for this. First, apply mastic to the bottom of the chimney, heat it with a burner and glue the roofing material to it, pressing it firmly.
Then you can lay the roofing material, which should fit tightly to the pipe. After this, a decorative finish (apron) is placed on top of the roof. All cracks must be carefully filled with sealant. Otherwise, moisture may seep through them.
Sealing gaps
List of materials for metal structure
Elements of a metal chimney
- To understand exactly what materials you need to purchase, you first need to draw up a detailed drawing, which will indicate all the angles and turns of the pipe. In this diagram, indicate the exact angles so that the knees are chosen correctly for you. Pipe sizes are also very important. It needs to be enough for the entire height of the building.
- Buy a couple of sheets of metal the same diameter as the pipe. They will need to be fixed to the ceiling of the bath room and to the floor of the attic.
- It is necessary to take care of heat-resistant materials that will be laid on the ceilings and protect the bath structure from the high temperatures of the chimney pipe.
- On the roof, the pipe must be waterproofed. To do this, you can use glue, sealant or a special rubber seal.
Rubber seal for waterproofing
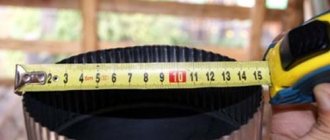
- When purchasing chimney pipes, pay attention to their internal cross-section. Depending on the power of the furnace, you need to choose the one you need. For a bathhouse, work with a diameter of 15–20 centimeters is usually used. By installing a pipe with a larger diameter than you need, the oven will lose heat too quickly. And if the pipe has a cross-section that is too small, the draft will be insufficient.
- The height of the chimney pipe must be at least 500 centimeters. The quality of traction directly depends on this.
- To ensure that the pipe lasts as long as possible, choose the metal from which it is made, with a thickness of at least 1 millimeter.
- If you plan to install a heating water tank, consider this too. Indicate its location on the diagram and calculate what you need to purchase to install it.
Layout of furnace elements with a heating tank
Installation of an internal chimney
The internal chimney is similar to its external counterpart. All connections are made using clamps and sealant. Installation differences include:
The insulation sheet is placed in its place immediately, and the stove is placed on it. A pipe with one wall or an economizer is connected to the branch pipe. A damper, water heating tank, smoke damper, and mesh heater are connected to the direct element. The parts are mounted with the corrugated part down so that the internal element overlaps the wall of the lower compartment
This will protect the insulation from condensation drops. An important stage of installing a chimney is the correct arrangement of passages through the ceilings and roof.
Main stages of work
Installation sequence of the internal chimney:
- A diagram of the future chimney is marked on the ceiling.
- The passage is constructed in accordance with the standards and requirements of SNiP.
- A square hole is made.
- A special dividing box is placed on the straight part.
- About 20 millimeters of free space is left between the vertical walls and the sawn nest.
- The chimney is expanded with an additional vertical segment.
- The box is applied to the ceiling cladding and fixed.
- In the attic, basalt cardboard is laid around the dividing part, and expanded clay or mineral wool is laid in the inside.
Exiting the chimney through the attic to the roof Source uteplovdome.ru
Find out how to insulate a metal chimney
The metal option, and in particular its insulation, deserves special attention. The dilemma of how to insulate a metal chimney pipe must be resolved when drawing up a construction project.
It is not always possible to isolate an already created scheme without rebuilding the roof structure.
If you are building a modern structure, you can use ready-made sandwich pipes. Such designs are completed quickly, with little expense for specialists.
But, they are not cheap. However, this cost is justified by the long service life and ease of design.
Features of a brick stove for a bath
A brick stove will ensure the safety, comfort of the procedure and the quality of steam.
Brick is a fire-resistant environmentally friendly material, which makes it suitable both for the construction of the bathhouse itself and for the construction of the stove. It is durable and resistant to wear, does not rot and is not damaged by moisture.
The brick does not heat up very quickly, but it retains and releases heat for a long time, so there is no need to fire the stove often. This feature allows you to take long bath procedures and serve a larger number of people.
A stone sauna stove requires a solid foundation: this is due to the large mass of the structure.
Types of fireboxes
The firebox can be open (usually for small stoves) or closed. Its design affects the operating features and characteristics of the resulting steam.
The black stove is distinguished by the absence of a chimney - the smoke settles in the room
Firebox types:
- In black terms - a structure without a chimney. This is the oldest version of the firebox. Its name is associated with the settling of soot and soot on the walls of the room. The air becomes smoky. The only plus is lower wood consumption than other options.
- In gray – the chimney is present, but due to its configuration, some of the soot still remains on the inner walls of the tube. This creates a risk of fire with subsequent spread of fire to the building itself. Because of this, you need to monitor the stove until the wood burns out.
- In white - the configuration of the pipe contributes to the complete removal of smoke to the outside. The stones in these structures are closed with a metal door, which is opened only after the firewood has completely burned out.
The black option has a high level of fire hazard. It is definitely not worth giving preference to him. Smoky air significantly reduces the healing effect of bath procedures.
Advantages and disadvantages
Being progress for their time, brick stoves for baths, of course, had significant advantages, but this does not mean that they were completely devoid of disadvantages.
Among the latter is chipping of the solution . This is an inevitability that can only be cured by jointing and filling the seams with new mortar . The owner needs to constantly monitor the condition of his stove.
Skillful , unhurried ignition will eliminate cracks on the chimney , which are the result of sudden temperature changes in winter.
Another concern for the owner will be monitoring the amount of soot in the chimney. But similar responsibilities cannot be avoided by the owner of an iron stove. There is one “but”: iron ones have practically no smoke circulation, and if there is, it is purely nominal. And brick ones are often made with one form or another of smoke circulation . And it also needs to be cleaned. For this purpose, special cleaning doors are provided.
However, the majority still considers the main disadvantage After all, 4-5 hours is the average time required to prepare a bath . So for day visitors this may not be an option.
Firewood consumption should also be taken into account. In winter, you will have to spend about four dozen firewood for one heating, in summer - three. Some customers prefer to choose electric furnaces so as not to have to worry about calculating and purchasing fuel.
By the way! Just in case, we remind you that a newly built stove must first be dried - this is done by repeated fires with a small amount of firewood. That is, they don’t immediately heat a new stove at full capacity - it will deteriorate and crack. First, moisture is removed from the entire massif.
As for the advantages , they are obvious: the comfortable atmosphere of a Russian bath is a low temperature (60 degrees) and high humidity created by steam obtained from the overheated stones of a closed heater. Brick sauna stoves do the best job of maintaining the desired temperature inside and outside the stove.
