Having your own plot of land and not building a bathhouse is bad manners. Even in small garden plots, where due to greenhouses and beds there was no place to place a full-fledged house, our man always found a place for a Russian bath. What can we say about full-size land plots of the individual housing construction category.
3x4 bath layout showing all sizes
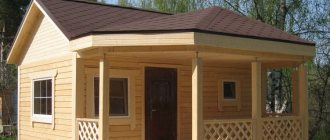
Where space does not allow building a large bathhouse, a log house with dimensions of 3 * 4 is erected, and if there are no restrictions on area, then you can aim at a two-story large house. Moreover, any bathhouse layout will include the most basic things - a steam room, a wash room and a dressing room in various variations. The remaining rooms are optional.
Floor design in a frame bath
Compliance with all recommendations and instructions for installing the floor will increase the service life of the bathhouse.
A well-made floor will protect against heat loss and rotting of floor boards. In bathhouses where there is direct contact with water, the floor is poured. The most important thing in pouring floors is to ensure rapid flow of water into the sewer.
Step-by-step instructions for installing the floor:
- Laying lags. If the distance between the supports is large – more than 3 m – additional support pillars are needed. Use roofing felt for waterproofing in several layers at the junction of the joists with the foundation and supports.
- For clay soil, a tray is made under the structure to direct water into the drainage pit.
- Installation of boards on joists. The gap for pouring flooring between the boards is about 4 mm. A gap of 2 cm should be left between the flooring and the wall of the bathhouse.
In other rooms of the bathhouse, the floor is non-leakage. To arrange it, 5x5 cm bars are mounted on the logs, and a subfloor is laid on top of them.
Scheme of floor insulation in a frame bath. A waterproofing layer is laid on the subfloor, then mineral insulation is laid on top of which a vapor barrier is laid
After the vapor barrier layer, you can begin installing the finished floor.
Additional rooms in the bathhouse
The bathhouse today has ceased to be just a room for taking water procedures. Today it is a place of relaxation, meeting with friends, a guest house or a country house-bath. Depending on the purpose and size of the building, the number of additional rooms can be completely different.
Bathhouse with relaxation room
If the rest room during the construction of a bathhouse is provided as a separate room, then it performs an independent function without duplicating the duties of a dressing room, locker room or wash room.
An example of a 5x5 bathhouse layout with a relaxation room
This is a very spacious room that can occupy up to 1/2 of the area of the entire bathhouse. Here, as a rule, there is a large table, comfortable benches or sun loungers; with good ventilation, you can even put special upholstered furniture that is not afraid of moisture and temperature changes. This is important, since in winter the bathhouse will not be heated constantly, and the temperature inside will drop from +25-30 to minus.
Some bathhouse designs involve placing a small kitchen area and a pool table in the recreation room. And installing a special sauna stove with a fireplace module allows you to make this room more comfortable and homely.
Bathhouse with swimming pool
The classic Russian bathhouse does not provide such luxury, but today a swimming pool in a bathhouse is not such a rarity. Some projects boast a full-fledged swimming pool, gym and winter garden. But placing a small swimming pool under the same roof with a steam room is quite a common occurrence.
Preparation for construction: project drawings
Creating a drawing requires certain skills. If they are not there, then it is better to entrust this work to a specialist or use a ready-made drawing.
Before drawing up a diagram, it is important to decide on the following points:
Location of the building on the site
It is important to consider sewer and water drainage. Quite often, the main factor when choosing a location is the laying of communications.
Soil at the construction site
If you plan to make a swimming pool in a bathhouse, then groundwater should not be located near the surface of the territory. The type of foundation to be built will also depend on the type of soil. Bathhouse construction plan and number of floors. If you plan to make a two-story building, it is important to take into account the additional load on the frame structure and foundation. At this stage, you should think in advance about the placement of the stove and what material it will be made of. This will allow you to understand where and which chimney to install, as well as the ventilation passages in the room. Laying communications. It is important to take care of ventilation, electrical wiring, vapor barrier and thermal insulation. It is worth considering the features of water drainage. An important element of any building is the roof. The service life of the structure will depend on it. You should take into account the material of manufacture, as well as its shape. This will allow you to calculate the power of the floors.
You need to include all the information received in the drawing, as well as supplement the project with the necessary details. The more detailed the diagram, the easier it is to build a bathhouse.
The more detailed the project, the easier it is to make a frame bathhouse yourself
It is recommended to draw up a separate plan for communications. If you have little experience, you should not create a complex project. You can use a ready-made diagram, slightly supplementing it based on your own needs.
A standard bath includes a corridor, a dressing room, a washing room and a steam room.
A standard frame bath consists of a dressing room, steam room, shower and rest room
Quite often a separate room for recreation is provided. It is recommended to mark the installation location of the stove on the diagram. If this is a steam room, then it is best to place the stove in the corner closest to the door. The stove can be stone or brick.
It is recommended to determine in advance the dimensions of each room and indicate them in the drawing. The standard dimensions of the steam room are 200x240 cm. The optimal ceiling height is 220 cm. This design can accommodate 2-3 people at the same time.
In the drawing you can see a bathhouse for a suburban area with a balcony measuring 1.5x4 m. The overall dimensions of the building are 4x6 m. The project is suitable for organizing gatherings in an open area in the summer.
A frame bath can be equipped with a terrace for gatherings in the warm season
This bathhouse consists of 3 rooms:
- steam room;
- washing and shower;
- rest room.
The corridor is shown separately in the diagram. There is no room for a locker room. There is a small changing area in the washing room. The terrace connects to the living room.
The optimal wall thickness of a frame structure is 100 mm or more. The wood that is used in the process of making a bath must be treated with an antiseptic. It is recommended to use dried, calibrated lumber.
It is mandatory to perform a vapor barrier of the insulating material on the internal base. In the steam room you need to use foil vapor barrier. The reflective layer can increase the temperature inside the steam room.
Supply and exhaust ventilation is required in all rooms. Floors in the sink should be made with a slight slope or along a screed. The top and bottom floors need to be insulated in the same way as the walls.
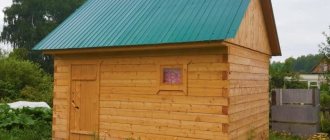
The minimum size of a frame bath is 3x4 m.
The minimum size of a bathhouse for a comfortable stay of several people is 3x4 m
The budget version of the frame is made in this way: the racks are sheathed on the inside and outside with boards up to 25 mm, basalt insulation or ecowool is laid inside the frame structure.
If you plan to use ecowool inside the walls, it should be carefully compacted and horizontal platforms for unloading should be installed. The frame must be sheathed inside and outside. To do this you will need to make a sheathing. On the outside, the insulation material is covered with a membrane to protect it from the wind. In the horizontal plane, the use of ecowool is a more economical option compared to basalt insulation.
The outside of the frame structure can be covered with any facing material. The inside of the building is covered with clapboard, plasterboard sheets with tiles or imitation timber.
Bathhouse 4 x 2
The layout of a 4x2 meter bath assumes the presence of two rooms: a steam room and a washing room. Also, when drawing the plan of the bathhouse, pay attention to the fact that the log frame is 4 meters long, and the space inside the room will seem smaller. From the internal size you will have to subtract:
- if you cut logs in a cup, then a section of 250 mm will be added to the thickness of the log;
- only the thickness of the log, if the logs are cut in the paw.
So, for example, a log house in a bowl made of 4-meter logs with a thickness of 240 mm will have an internal size of 3 meters. This makes the interior space of the bathhouse much smaller, so this must be taken into account in advance. The layout of the bathhouse may vary depending on a variety of initial data.
The entrance to the bathhouse from the street can be on two different sides . The choice of location of the door directly depends on the order of the bathhouse in relation to the boundaries of neighboring buildings and the entire site.
Depending on where the main entrance to the bathhouse is located and where the furnace firebox will be installed, the remaining rooms will be located accordingly: the entrance to the steam room should go from the washing room. On the one hand, the doors should have the shortest distance between them, on the other hand, the room should have blank walls to which you can place all the necessary bath equipment.
View information on the interior decoration of the bathhouse
The washing room and steam room can be swapped, but you should take into account the flow of water from the bathhouse itself towards the location of the sewer well or ditch. It is best to remove the sewer pipe from the washing room. Therefore, if there is such a possibility, then the washing room should be adjacent to the side that goes to the well or gutter.
An extremely important factor when planning such a small bath is the correct arrangement of bath equipment and furniture. For example, in a steam room, shelves can be placed in such a way that steam from the oven door does not burn the person lying on the shelf.
DIY bath shelves Wooden bath furniture
The area of the premises should be calculated depending on the number of people and personal preferences. For example, a steam room can be larger than a washing room. If in a washing room it is enough to install a shower stall measuring 1x1 meter to make it convenient to wash, then in a steam room there is not enough space for the relative position of the stove and shelves - this is a matter of personal safety.
Also, when constructing a 4x2 meter bathhouse, additional structures are possible: a terrace or porch.
Construction of a foundation for a country frame-panel bathhouse
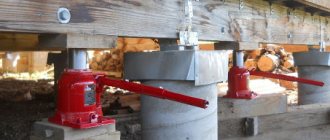
The usual construction of a strip foundation for a building requires 1/3 of the total financial costs for construction and the same amount of time. Due to the fact that our construction will be lightweight, the foundation can be carried out according to a simplified scheme, but a strip or pile structure would lead to an unreasonable increase in the cost of the entire construction. We will make the supporting part of the frame from “bald” car tires filled with crushed stone. After construction is completed, the tires should be protected from sunlight. This will prevent them from breaking. Features of constructing a foundation for a bathhouse in the country:
- After breaking down the perimeter of our bathhouse, the plant layer of fertile soil is cut off from its inside and carefully moved to the garden. As a result of this procedure, you should get a mini-pit 3.5x5 m with a depth of 0.15 m.
- Its bottom is compacted by rolling a heavy steel barrel over it. Then the entire area needs to be covered with fine crushed stone and also “rolled”. As a result, we received a dense crushed stone cushion for the bathhouse in the country, which in the future will evenly distribute the entire load from the structure.
- It is necessary to hammer one peg into the places where the tires will be installed.
- Then the tires are laid throughout the area so that the center of each of them coincides with the peg. The future foundation must be leveled in a horizontal plane. For this, a flat board 4 m long and a building level are used.
- After all the tires are leveled, a pad of any waterproofing material is placed inside each of them to prevent rubble from spilling out when working with the tires. All tires are covered with crushed stone in layers, with each of them compacted.
- Backfilling must be stopped before reaching the edge of the inner rim 5 cm. The crushed stone inside the tire is moistened, and its entire internal cavity is filled with Knauf cement mixture with the addition of filler. Thus, all lying tires should be filled to the very top at the same level.
- After polymerization of the concrete mixture, we obtain a durable layer in the rubber “formwork” that transfers the load to the crushed stone cushion. The rubber of tire beads serves as a compensator for periodic freezing and thawing of the soil.
As a result, when constructing such a foundation, we almost avoid excavation work and have a small consumption of materials: car tires d = 70 cm - 10 pcs., crushed stone - 3 m3, KNAUF mixture - 75 kg, roofing felt - 1 roll. The beam of the lower trim of the frame is installed on supports made of tires.
Bathhouse made of timber 100x150 step by step guide
1. We draw up a project and calculate the necessary materials
Whatever we build, the first thing we do is draw a detailed plan. Without it, you will not be able to start construction and calculate the amount of material needed. Therefore, use a special program or use the old method: a piece of paper and a pencil. The project needs to indicate:
- Distance of load-bearing walls;
- number of premises and their size;
- where the windows and doors will be located, and most importantly the heating unit.
As soon as a clear plan is drawn up, you can immediately begin to calculate the necessary material. You can calculate the amount of timber either yourself or use the services of the companies where you will purchase building materials.
A bathhouse made of 100x150 timber is the best option, which is suitable for both the southern and northern regions of the country. Of course, if in your region the temperature drops below 40 degrees, then it is better to use 180x180 timber.
2. We purchase timber, what you should pay attention to
The choice of timber must be approached with special responsibility. After all, the quality of the bath will directly depend on this. Therefore, inspect the wood carefully and take into account the following nuances:
- There should be no wide longitudinal cracks. After all, this is an excellent place for moisture to accumulate;
- the appearance of blue spots or blackening indicates the beginning of the wood rotting process;
- the presence of insect holes indicates that the wood is of low quality.
The ideal option is timber that has a smooth surface with a natural color and smell.
If we talk about the type of wood, it is better to use a combined option. This is when the lower ones (from 1 to 3 rows) are made of larch, and the rest are made of softer types of wood.
Why is this the best option?
Larch has a dense structure that, under the influence of moisture, only becomes stronger and more stable. Therefore, it is usually placed on the lower rows, where there is a large amount of moisture. The cost of larch is several times higher than that of ordinary conifers, which makes complete construction difficult financially.
Fir or pine is a cheap option; in addition, they have good moisture resistance. This makes it possible to use it in the construction of the middle and upper rows of bathhouse walls. Also, when heated, coniferous wood releases resin, which gives a pleasant and healthy smell.
Timber with natural humidity and forced drying. Main differences.
The first option is not expensive, since shrinkage is required after construction of the structure. Having chosen this type, you need to immediately begin construction without allowing the timber to dry. Otherwise, during the natural drying process, moisture will evaporate only from the top layer, while the core will remain damp, and this will lead to deformation of the material.
Timber after forced drying costs an order of magnitude more, but after its use the structure does not require shrinkage.
3.Construction of the foundation
In order for the bathhouse to serve for many years, it is necessary to prepare a reliable foundation. Here you can consider several types of suitable foundations.
Columnar, made from pillars made of brick and installed along the entire perimeter of the future building. The supports are placed strictly at the corners of the structure in places where partition elements pass, as well as at points where heavy loads are present. The pillars are erected no more than two meters from each other. The weight of the structure also affects the number of supports; the larger it is, the more often they will have to be installed.
The only significant drawback of this option is the inability to use it on moving soils.
Tape is considered the most commonly used base in construction. This is due to its high reliability and ease of construction. If calculated correctly, it can support a two-story building.
But in order to fill such a foundation, you will need to spend a lot of time and perform the following actions:
- First of all, it is necessary to fill the cushion with a sand-gravel mixture. This is necessary if the soil where the bathhouse will be built has weak bearing capacity;
- Carefully compact the prepared area and install the formwork. The box must rise above the ground at least 50 cm;
- prepare and pour cement mortar into the installed frame. It should take about two weeks for the structure to dry completely.
Also, when building a foundation, it is necessary to perform reinforcement using reinforcement. This necessary element will give it additional strength and stability. Reinforcement with reinforcement must be performed for all types of foundations.
4.Laying waterproofing between the foundation beams
A concrete product and wood material have different properties. Therefore, their direct contact leads to further destruction of the tree in the form of rot. The beauty of the lower rows of the log house arises for the following reason: moisture from the ground will be actively absorbed into the timber through the concrete.
This undesirable process can be prevented by installing a layer of waterproofing between the foundation and the lower crown in a timber wall. To do this, it will be enough to apply a layer of bitumen to the surface of the foundation and lay roofing felt on it. Such a waterproofing barrier will protect the tree from rotting.
Construction of a log bathhouse from timber
In order for the structure to be even and strictly level, it is necessary to take a responsible approach to laying the initial row. To do this, it is important to use only perfectly flat material and a building level.
Flaws
In addition to many advantages, when constructing a frame building there are also some disadvantages:
- The construction of the building itself requires little money compared to other buildings, but it requires considerable cash injections for finishing and insulation (insulation may be inexpensive, but membrane films also cost money;
- The process of closing the insulated frame should be completed within 1.5 - 2 weeks (or even faster, until the insulation gets wet and is not torn by the wind);
- The impossibility of using inexpensive cotton wool and polystyrene foam for insulation (this is a plus about environmental friendliness);
- Finishing with slabs is not recommended in most cases; a ventilated façade is needed.
High cost of finishing
As described earlier, despite the seemingly cheap construction of a bathhouse at first glance, its finishing requires significant costs. Finishing, both external and internal, is the most expensive of the entire process of building a frame bath.
Requirements for the quality of insulation
The disadvantage of the “frame” is the impossibility of using cheap materials as insulation. Only high-quality and therefore more expensive insulation options are suitable.
We also recommend reading the following materials:
- Insulation of the walls of a frame bath;
- Insulation for the walls from the inside and what kind for the steam room;
- Which insulation is better, and also about foil and foil.
Speed Requirements
The construction takes a little time from the developer, but requires proper treatment (the insulation must be closed, otherwise it will get wet - as a result, you will have to buy it a second time, since it can be easier to throw it away than to dry it).
Ventilation requirements
Ventilation is simply necessary for frame construction. Ventilation maintains the necessary microclimate in the building at any time of the year. Unlike hygroscopic wooden walls, frame walls with their vapor barrier create the effect of a “plastic bag” in the bathhouse, similar to a greenhouse or greenhouse. It quickly becomes hot, but at the same time stuffy, you can simply suffocate if there is no ventilation.
We recommend reading about ventilation: in the steam room, diagrams and design, how to do it correctly.
Vapor barrier requirements
The bathhouse requires masterful work with membrane film. If the insulation is carried out with breaks or the joints are poorly sealed, the insulation will get wet and simply stop working.
Shrinkage
The insulated frame must be “closed” within two weeks. The actual shrinkage of raw lumber or “natural moisture” may take a slightly longer period. When the frame boards dry out, construction defects may appear: cracks, film breaks, and cold bridges may appear.
Weakness to wind and snow loads
Despite the fact that the frame is resistant to seismic activity, it is weak against snow and wind loads. The consequence is that the frame should be built in certain areas of the country where these weather conditions are least likely to manifest themselves or allowances should be made for them, which will increase the cost
This disadvantage should definitely be taken into account by everyone who wants to build a frame building.
Fast cooling
Despite the fact that the frame warms up faster, it cools down no slower than its “brothers” (stone, wood), but rather even faster. The reason is the same low heat capacity. The beam, log, stone must first be heated, while the “plastic bag” of the frame does not heat up, but only the air in it heats up. But even when the furnace stops, this air cools down quickly (after all, we will do ventilation, where without it, see above), and massive traditional materials can release the accumulated heat for a long time.
When choosing, you should take this fact into account.
Construction stages
Do-it-yourself construction of a frame bath includes several stages:
Making the foundation
For construction, a columnar foundation is quite suitable. It is easy to make it based on asbestos pipes.
Making the foundation:
- we dig holes one and a half meters deep and twenty centimeters wide;
- we insert asbestos pipes into the pits;
- mix concrete;
- Fill the holes and the middle of the pipes with the solution.
After pouring, the foundation must stand for at least a day.
Making the floor
Designing a floor in a bathhouse with your own hands is not a difficult task, but it has its own nuances.
Manufacturing process:
- Determine the location of the water outlet. We connect the sewer pipe. We install waterproofing. We place wooden beams on top of the insulation. We attach the logs to the beams and fix the cross beams on them.
- We apply sheets of facing material, preferably OSB, to the bottom of the resulting structure. We make a hole for the sewer pipe. And we fix the material with self-tapping screws.
- We lay a layer of waterproofing. It is necessary that it completely covers the floor area; we fix the joints with tape. Next, we lay the insulation. Sew up with sheet material.
- We insulate sewer drains. You will need film and sealant. Where the washing area will be located, it is better to equip the floor with tiles, and in the rest area - with clapboard.
Having made such a floor in a frame bathhouse with your own hands, you can relax even in winter. If you plan to use the building in warm weather, it is enough to lay and secure the beams to the foundation, attach the cross beam, and sheathe the surface with boards.
Harness
After the poured mortar has dried and the floor has been constructed, you can begin tying the structure. To do this kind of work, we will need slats with a section of ten by five centimeters. Before starting work, the slats need to be treated with an antiseptic. While the treated material dries, we need to mark the position of the walls.
Strapping scheme
Do-it-yourself frame bath step-by-step instructions for making a harness:
- After marking, we place the prepared slats on the outside. We fix them with nails.
- We are tying the base. To do this we use supports.
- We make the lower and upper trim from boards. During this work, you need to separate the bases a little so that the roofing material can fit.
- Checking horizontality. To do this, use a level.
- We install intermediate racks. We treat the strapping with an anti-rotting compound.
To make the structure stronger, it is recommended to fasten it using metal plates.
Walls
The walls of a turnkey frame bath are made of boards with a cross-section of 5 by 10 centimeters. Works:
- We mark the locations of the racks. Using the markings, we install racks in all corners, check the level, and temporarily fix them with slats.
- We install racks. For fastening, it is advisable to use metal corners and self-aligning screws.
- We carry out installation of intermediate parts. The step between them should be no more than a meter.
- We make the top trim. We attach all the elements of the upper part to the corner posts. To prevent the boards from bending, it is advisable to install temporary supports.
- We lay the timber between the supports in a horizontal position. After making the frame, we proceed to covering the outside of the frame. We lay insulating material in the middle and fix it. We attach insulation on top of the insulation, lay and fix another layer of insulation, and sheathe the walls with the selected material.
We have the walls, all that remains is to make the roof.
Roof construction
To make it convenient for you to make a gable roof, it is recommended to first make a drawing that will indicate the location of the rafters. Roof design process:
- We take a beam with a cross-section of 15 by 15 centimeters, lay it at the top of the racks and fix them with nails; you can also fix them using wire and self-tapping screws. It is important at this stage to carry out the work strictly to the level.
- Next, we cut out grooves in the beams for the upcoming laying of the rafters. This is done at a certain distance.
- Now you need to assemble the rafter structure on a flat piece of land. A similar design is presented in the form of triangles, consisting of timber. For additional strengthening, a transverse strut is fixed between each such triangle. A crossbar is installed at the top of the structure.
- Having collected the required number of rafters, we install them in the cut grooves. After clarifying the level, we fix the elements with screws and nails.
- Next, between the installed rafters, we attach the transverse strips. We also fix them with nails or self-tapping screws.
- Now we sheathe the roof with sheet material. Plywood is often used for this. We attach roofing felt on top of the plywood. And finally we cover the roof with metal tiles.
- All that remains is to sheathe the pediment. It is covered with OSB. To do this, elements are cut to the size of the side walls of the roof, and the material is attached to the racks with self-tapping screws. If it is necessary to organize a door to the attic, then the roof structure includes additional racks made of timber, into which a small door is installed.
The roof is installed. If you need an attic space, then it is not necessary to insulate the roof; it is enough to simply sheathe the rafters with boards. But when the attic is not needed, it is necessary to lay waterproofing, then fix the insulation to the ceiling, and sheathe the structure with the selected sheet material. If you decide to move forward and improve your construction, you can build a stove yourself.
Having studied the material we have presented, rest assured that even a beginner can build a frame bathhouse with his own hands. The main task is to adhere to all requirements and choose the right materials. And near the bathhouse, you can build a wooden gazebo and lay paths near it according to the instructions in our articles.
Selecting a frame bath project
On long winter evenings, we outlined the plan for our future bathhouse.
Photo of the frame bathhouse project we settled on.
Before choosing the material for building the bathhouse, we consulted with the builders for a long time. On their advice, we chose a standard design for a frame bathhouse installed on a pile foundation. This choice is due to the fact that groundwater in our area comes very close to the soil surface, and heaving soil can cause walls to crack if we use brick as a building material. Even if we use a strip foundation reinforced with piles, we still cannot get a 100% guarantee that it will withstand seasonal ground fluctuations.
Roof arrangement
The roof of the bathhouse is made of the same boards with a cross-section of 150×50 mm. In this case, you can assemble the rafter system on the ground and install it ready-made on the top frame. But first, you will need to install and secure a special beam (mauerlat) over the frame, which is used as the load-bearing base of the roof being built.
Types of sheathing
After you install the rafter system, you can proceed to arranging the sheathing, made from boards 20 cm thick. Upon completion of laying the sheathing (which is usually carried out starting from the ridge), you can proceed to laying the roofing covering you have chosen.
Additional services
- Replacement of timber 150x100 mm with timber 150x150 mm 18,000 rub.
- Replacing timber 150x100 mm with timber 150x200 mm RUB 36,000.
- Wood-burning stove Ermak from RUB 52,000. (more details)
- Increase the height of the bathhouse by one crown (+15 cm) RUB 16,000.
- Construction of partitions from timber (150x100 mm) RUB 22,000.
- Coating of joists and subfloor (as a gift: promotion until December 31) 400 rub/m²
- Replacing a 27 mm floorboard with a tongue and groove board 36 mm thick 380 RUR/m²
- Metal entrance door (China) 7,000 rub.
- Bathroom insulation up to 100 mm 350 RUR/m²
- Warm corner (as a gift: promotion until December 31) RUB 24,000.
- Assembling a bathhouse on wooden dowels RUB 24,000.
- Cladding the stove with bricks (as a gift: promotion until December 31) RUB 8,000.
- Construction shed 3x2 m. 19,000 rub. (more details)
- Roofing (metal tiles) 990 RUR/m²
- Finishing the gables of a block house RUB 1,200/m²
- Generator rental (customer’s gasoline) RUB 9,000.
Straight to the point: don’t confuse technologies!
If you think that a frame-panel bathhouse is the same as a frame bathhouse, just a more detailed and longer name, then carefully read the following sentences. A frame-panel building is built from ready-made panels, which are purchased from companies that professionally deal with them. A frame building can be built by any home craftsman with minimal construction skills and tools. The frame is erected, filled with insulation, sheathed and finishing work carried out. If you need such a frame bath, then go to the appropriate section. If you are still sure that you need information on panel buildings, then read on.
Photo: VIVA HAUS company
Material calculations
A frame bathhouse of different sizes is being built with your own hands. We will consider a standard option that is suitable for construction by novice craftsmen.
The finishing of the bathhouse inside and out is often carried out with lining made from coniferous wood. The roof is equipped with a gable roof, and metal tiles are used for the roofing.
Starting from dimensions of 5 by 4 meters, to make the foundation we will need:
- two cubes of concrete;
- 0.3 cubes of edged boards;
- 80 linear meters of fittings.
A turnkey frame bathhouse requires large financial investments specifically for the construction of the frame. To make a frame you will need:
- 5.3 cubic meters of timber, section 12 by 12 centimeters;
- 36 square meters, mineral wool, 10 centimeters thick;
- about forty squares of vapor barrier material;
- 75 squares of wooden lining;
- 40 squares of waterproofing material.
If you need to save money, the timber can be replaced with a board. Floor installation is also an important point. To make a floor in a bathhouse with your own hands you will need:
- 0.2 cubes of boards 150 by 50;
- twenty linear meters of plinth;
- twenty squares of mineral wool and 20 squares of lining.
If you want to save money on the construction of a frame bath, then it is on the construction of the roof that you can do it. You can purchase the cheapest insulation and cover it with unedged boards.
But since our bathhouse will have a gable roof, the attic space can be used to store various tools and unnecessary items. To build a roof you need:
- one set of drainage;
- 0.2 cubes of slats for rafters;
- 0.1 cube of planks for sheathing;
- 0.1 cube of cornice slats;
- twenty squares of metal tiles.
In addition to the materials listed, you will need:
- asbestos pipes;
- screws and nails;
- staples;
- cement, sand and gravel.
If you are building a frame bathhouse with your own hands using step-by-step instructions, you need:
- level, square and tape measure;
- hammer, screwdrivers and pliers;
- electric drill;
- concrete mixer;
- container for dosing bulk materials;
- screwdriver;
- hand saw or electric saw.
Having made the necessary measurements and selected materials based on them, we begin to design the future premises.
Stage III. We lay and insulate floors
In short, to make floors in a frame bath, you need to nail bars with a section of 5x5 cm to the bottom of their logs in the relaxation room, the steam room, and the dressing room, and lay subfloor boards on top of them, then roofing felt, and finally - mineral wool 10 cm thick or expanded polystyrene. And already under the boards of the finished floor you should lay glassine for vapor barrier:
In the washing room, the floor needs to be done differently:
- Step 1. So, in order for it to always be warm in cold times and dry quickly, you need to make a separate foundation along its entire perimeter.
- Step 2. Next, remove a layer of soil by half a meter, and fill the resulting pit with gravel and sand to a 10 cm layer. If water gets into such a drainage well, it will go into the ground, and there will be no need to make a pit.
- Step 3. For the logs of such a floor, it is best to use asbestos-cement pipes with a diameter of 10 cm, which are placed directly on the foundation and filled with concrete so that it keeps them from moving.
- Step 4. Then, in the washing room, a 4-5 cm thick edged round board is laid over the pipes, but with a gap of 6-7 millimeters with rubber gaskets, which are nailed.
- Step 5. After all this, the floor can be pressed down with baseboards.
More details in the video:
Mandatory premises in a Russian bath
It is better to split even the smallest bathhouse into rooms with internal partitions than to leave one large room.
An example of the layout of a small bathhouse measuring 6×2.3
A well-thought-out internal layout of the bathhouse is the key to successful operation. Only by dividing an already small room with walls, you can achieve high-quality heating of a steam room from which no steam will escape, a well-heated washroom with access to hot water, and a dressing room protected from steam and moisture.
As a rule, a rest room and other rooms are not built in a very small bathhouse, preferring to move them outside the building.
This allows you not only to save and optimize the internal space, but also to organize the recreation area more comfortably and thoughtfully, using alternative options.
Waiting room in a Russian bath
It is absolutely necessary, as in any capital building. This is a small, most often unheated, although there are exceptions, room. Its main task is to prevent direct entry of cold air into the interior of the bathhouse - the washing room and steam room.
Design and layout of a bathhouse with a waiting room size 3x5
Drawings of the most modest-sized baths represent a dressing room in the form of a small nook with two doors - one leads to the street, the second leads inside the bathhouse, directly to the washing room. Sometimes the vestibule is equipped with several hooks and a narrow bench where you can leave clothes.
Some 6x6 bathhouse designs suggest combining a vestibule with a relaxation room. In this case, the front door from the street leads directly into the bathhouse.
Layout of a small bath 6x4
Cold air enters the room, where there is a small table with benches or sun loungers, and a full-fledged locker room is equipped. It is assumed that the rest room is heated so well from the sauna stove that cold air from the street will not change the comfortable microclimate.
Where the size of the plot allows, the vestibule can be combined with a terrace or veranda. In this case, during the warm season, the relaxation room is equipped outside, in the fresh air, and the interior spaces are used for their intended purpose - for a steam room and a sink.
Layout of a bathhouse with a relaxation room measuring 7x5
Wash room in a Russian bath
The Russian bathhouse traditionally separated the steam room from the room where the water splashed. Firstly, it is much more difficult to warm up and make a large room vapor-tight than a space of a couple of square meters. Secondly, with high humidity it is very difficult to tolerate high air temperatures. Although baths with a sink and a steam room are 2 in 1 and are not at all uncommon.
Even small buildings with dimensions of 3*4 allow you to divide the internal space into a steam room and a washing room. Depending on the needs of the owners, the size of each room will depend. If a Russian bathhouse is built for frequent meetings with friends exclusively in male company, then half a square meter will be enough for a washroom - a shower in one of the corners of the bathhouse. And the rest of the room can be occupied by a steam room or a steam room with a relaxation room.
Bathroom layout option 4x5 with toilet and shower
If the bathhouse is being built for a family with children, or is not only a place of relaxation, but is also used for laundry and other household and household needs, then the washing room should be larger.
Features of frame baths
Frame baths are built according to the usual rules for this technique, which makes it possible to do without the use of special equipment or “wet” sand-cement mortars. The important point is the ability to do everything yourself, at a time convenient for you. The main task is the need to understand the principle of creating frame buildings. An important measure will be the interior decoration, which ensures heat conservation and ventilation of the premises.
Design
The basis of the structure is a lightweight frame made of wooden blocks, forming external fences that perform load-bearing functions. It consists of vertical posts installed at intervals of about 60 cm (standard insulation width), reinforced with cross members. Inside and outside, the frame lattice is sheathed with sheet materials (OSB, plywood), and the cavities formed between the slats are filled with insulation. The result is a wall consisting of several layers - the so-called “pie”. In terms of heat conservation, the building is ahead of stone or wooden baths, and its weight is an order of magnitude lower. This makes it possible to do without creating a powerful foundation, eliminate labor-intensive excavation work, and reduce the amount of building materials, which ultimately reduces the cost of the process.
The load-bearing capacity of the frame is large enough to build a two-story bathhouse with several compartments and rest rooms that can accommodate large groups. Floors are also made from wooden parts so as not to create unnecessary load on the walls. The entire frame is assembled from such elements - they are easy to process, adjust and assemble, which speeds up the process and allows you to work alone.
Advantages and disadvantages
Advantages of a frame bath:
- simplicity, high speed of construction;
- work can be carried out on a well-maintained site without causing any damage to existing landscaping elements;
- can be built at any time of the year;
- Finishing and use of the building is permitted immediately after completion of work; there is no need to allow time for shrinkage;
- construction costs are much lower than when using other materials or technologies;
- the ability to do everything yourself;
- no need for complex excavation work or the use of cement mortars;
- the degree of heat conservation of walls and ceilings is much higher than that of brick, log or timber buildings;
- requires less time and fuel to heat up.
However, there are disadvantages:
- the building is very unreliable in terms of fire safety;
- the load-bearing capacity of walls and ceilings is limited, which must be taken into account when creating a project, exterior decoration or subsequent reconstructions;
- wood as a material is not resistant to moisture, which requires increased attention to waterproofing and processing;
- the design of the walls complicates the installation of attachments or furniture;
- External cladding with moisture-proof material is required.
Drain arrangement
The arrangement of drainage from existing water intakes must be taken care of at an early stage of construction of the bathhouse.
Drain arrangement
Firstly, it is necessary to lay a sewer pipe with a slope of 1 meter 3–5 cm. Such a pipe should come from the shower and from the water drain tap from the pipeline system. It is located at the lowest point of the pipeline. Such a tap is needed to drain water from the system and preserve the bathhouse for a long period, for example, throughout the winter. It is better if the drain pipe does not have branches or turns. A straight pipe is a way to avoid blockages. The diagram shows how best to connect two water intakes into one system.
Making a gasket for a sewer pipe
Pipe system
Draining
It is better to connect the sewer pipe to the septic tank so that the drain water does not go into the ground.
Calculation of materials
Since we will be building a frame bathhouse measuring 4x4 meters, we will need a certain amount of materials and tools.
Materials
- Cement – Grade 400.
- Sand - sifted coarse.
- Beam - 150x150 mm.
- Beam - 50x150 mm.
- Beam - 40–50 mm.
- Unedged board.
- Boards for formwork.
- Fittings.
- Blockhouse for exterior decoration.
- Thermal insulation material (mats or rolls).
- Foil film for vapor barrier.
- Polyethylene waterproofing film.
- Pipes for sewerage and drainage installations.
- Tap for draining water.
- Ruberoid.
- Antiseptics.
- Metal entrance doors.
- Window metal-plastic blocks.
- Lining for interior decoration.
- Anchors and screws.
- Slate.
- Galvanized chimney pipe.
- Heater stove and water tank for 70 and 120 l.
- Water supply pump.
Tools
Basic equipment
| Foundation: | Columnar support made of 200x400x200mm blocks, 4 blocks in each cabinet. The number of cabinets depends on the size of the bath. You can order a pile-screw foundation. Its cost is calculated separately upon request. |
| Harness: | Beam 100x150 mm per edge. |
| Bath walls: | Made from profiled timber 150x100mm. Wall thickness: 10 cm. Inter-crown insulation - jute. You can order construction from 150x150 mm or 200x150 mm timber, as well as a bathhouse from chamber-drying timber. |
| Partitions: | Frame-panel. |
| Height: | First floor from floor to ceiling - 215 cm. Ridge height - 150 cm. |
| Insulation: | Floor and ceiling (1st floor) - Knauf 50 mm insulation with steam and waterproofing. |
| Floors: | Double: rough - edged board 20 mm, finishing - tongue and groove board 27 mm, with steam and waterproofing. |
| Window: | Window 600x600 mm - 1 pc. |
| Doors: | Bathrooms – 2 pcs. |
| Ceilings: | The ceilings are lined with dry clapboard. |
| Roof: | Rafters made of 50x100 mm timber are installed at a distance of 1 meter from each other, the sheathing is made of unedged boards 20 mm. |
| Roof: | Ondulin. Color at customer's choice. |
| Wash room: | A shower tray with drainage is installed. |
| Pair compartment: | The steam room is lined with aspen paneling with a foil gasket. |
| Shelves: | Two-tier aspen canopies. |
| Bake: | We offer Ermak stoves. You can order installation of your furnace. |
| Bath corners: | They are sealed with a wooden plinth 6 cm wide. |
| Outside corners: | Sew up with dry clapboard. |
| Assembly: | Included in the price. |
Stage II. Building the foundation
Building the simplest frame bathhouse with your own hands usually does not require preliminary preparation of the foundation due to its lightness. But, if you don’t want the walls to become damp, then you still have to make a foundation.
Wooden lumber: for a mini-bath
If your bathhouse is at most 3x4, and the walls and roof are planned to be light, then you can put a simple wooden foundation, securing it with stakes on the sides:
This foundation is especially good for capricious clay soils that do not suffer from excess moisture, but are seasonally mobile.
Columnar: for high groundwater
But for construction on uneven and heterogeneous soil, where groundwater is located quite close, a columnar foundation is more suitable:
To build such a foundation, you will not need either equipment or an additional construction team. It is enough to arm yourself with a drill, asbestos or plastic pipes, and know how to mix cement. Then we move on to the following steps:
- Step 1. Level the area.
- Step 2. Mark the location of future pillars.
- Step 3. We drill holes and make waterproofing at the bottom of each of them.
- Step 4. Gradually pour concrete and carefully lift the pipe.
- Step 5. At the 20-30 cm mark, we fix the pipe, waiting for the concrete to harden, and reinforce it.
- Step 6. As soon as the base hardens, fill the pipe with concrete to the end.
- Step 7. We form a grillage - using a regular strong beam.
Economical and simple, which is what you need for a frame bath. And here’s what further construction looks like on such a foundation:
Block foundation: for a light bath
For a bathhouse of medium architecture, where there will be a heavy stove and more than one person walking, a strong foundation made of blocks is well suited:
But building such a foundation is allowed only on soil where the freezing depth does not exceed one meter.
Pile-screw: for difficult soils
You cannot do without this type of foundation if you are building a solid frame bathhouse (or even a bathhouse-house), and the freezing depth of the soil is low. Then you will have to get to a more solid base using modern piles. This is a fairly simple technology, and usually you can get by with a workforce of four people:
- Step 1. Mark the locations of future piles.
- Step 2. We drill holes of the required length, which we calculate based on the data obtained about the soil.
- Step 3. Place the piles and gradually screw them into the ground.
- Step 4. Assemble and secure the harness.
Belt: for reliable soils
If the soil on the site is heaving, then it is better to opt for a simple strip base. In order to build such a foundation, you need to do the following:
- Step 1. A leveling is carried out at the selected location, and a trench is dug along it - about 40 cm wide and 50 cm deep.
- Step 2. The trench must be filled with sand to ground level and compacted layer by layer, constantly watering it with water for better shrinkage.
- Step 3. Place the formwork – 50 cm high and 30 cm wide.
- Step 4. The base of the formwork must be reinforced with metal pipes and rods for strength.
- Step 5. Now you can pour concrete - either in one go, or in layers, but without allowing the previous layer to dry.
- Step 6. You need to put roofing felt on top of everything - to waterproof the frame walls.
Look at the photo of how this is done:
And here’s what the construction of a small frame bathhouse on such a foundation looks like:
You will have to think about a prefabricated strip foundation if you are planning to build a large enough frame bathhouse:
The essence of such a foundation is to create the most reliable support on any type of soil, except for floating ones.
Preparation for construction
Any construction, including a turnkey frame bathhouse, begins with drawing up a project. To create a project, you need to have skills; if you do not have skills in this area, then it is better to entrust this stage to the masters. You can use ready-made diagrams.
When a project is created independently, then before starting work you need to decide on some important criteria. Important points:
- Location of the bathhouse on the territory. When determining the location on your site, consider drainage and sewerage. This is necessary in order to provide communications to the bathhouse.
- Soil at the construction site. When you plan to build such a building with a swimming pool, it is important to choose a place where groundwater will not wash away the structure. The choice of foundation type depends on this factor. We have discussed in detail the options for constructing a foundation in a separate article at the link.
- Construction drawing and height. If you are building a frame bathhouse with your own hands on several floors, it is necessary to take into account the increased load on the frame. Even at this stage, you need to pre-select the location of the sauna stove, as well as its design. The criterion will help determine the location and height of the chimney.
- Communications. When drawing up a project, you need to determine the location of ventilation, wiring, water drainage and insulation.
- The roof is an important element of any building; the lifespan of the structure depends on it. Therefore, when drawing up a drawing, it is worth taking into account the shape and choosing the appropriate material. After this, you can calculate the power of the overlap.
When drawing up a drawing, it is necessary to enter all the specified criteria and supplement it with the missing elements. Note that the more detailed the project is, the easier the construction.
As for the location of communications, it is advisable to draw up a project separately, or use a ready-made project, just add your own parts to it, based on your needs.
Floor
We insulated the floors in the bathhouse. The steam room and shower have tiled flooring, and the dressing room has laminate flooring. First, I’ll tell you about the steam room and shower; there are many more important nuances there.
Laying tiles
The tiles were purchased with a matte finish and rough so that they would not slip. We decided that tiles are much better than wooden floors - they don’t rot and are easy to clean. The glue was purchased with the best moisture resistance characteristics.
Waterproofing was laid on the subfloor, overlapping the walls. On top of the waterproofing, insulation was laid - EPPS (thickness 30 mm). For better adhesion of EPS to the waterproofing, assembly adhesive was used.
A screed was poured over the insulation along the beacons with a slope towards the drain funnel. Before pouring the solution, a reinforcing mesh and a set of beacons were laid. The photo shows that we attached the beacons not to the floor, but to an asbestos solution - we laid out piles and pressed profiles into them. The solution (cement with sand) was mixed in a rented concrete mixer, because
It was important to fill the entire floor in one day. The solution was laid out from the bucket with a trowel onto the grid between the beacons and leveled with a wooden plank - the rule
The floor was finally leveled with a wide trowel and grout.
The tiles were laid away from the drain gutter to make it easier to maintain the slope. Each one was pre-soaked in water. The glue was applied with a notched trowel onto the dried and primed screed. In this case, glue was not applied to the entire surface of the floor at once, but only to the space for laying 1-2 tiles. The glue hardens quickly and should not be used to cover a large area of the floor at once. The thickness of the adhesive layer was kept approximately equal to the thickness of the tile. I collected the excess glue around the laid elements with a simple narrow spatula.
First, all rows of whole tiles were laid out, then parts along the walls. We cut the tiles with a manual tile cutter. By the way, for precision masonry we pulled the fishing line and used crosses for the seams. And for better contact of the tile surface with the binder, immediately after laying, I lightly tapped each square of tile with a rubber mallet.
Laminate
The laminate flooring was installed very quickly. We covered the floor with film over the insulation, nailed down moisture-resistant plywood, and rolled out the backing.
I unpacked the package with a knife. He took out the first panel and laid it down, turning it with a small protrusion towards the wall. I inserted 2 plastic wedges between the wall and the board. I took the second strip and snapped it into the end groove of the first. I leveled it and placed the wedges again. When I reached the opposite wall, I used a circular saw to cut off the extra piece of the laminate panel. The next row began from the segment. The second row was assembled in the same way as the first, after which I lifted the entire floorboard at an angle of 45 degrees and carefully connected it to the latch of the first row, and then hammered it through the block with a mallet. The last row had to be sawed lengthwise, precisely measuring the cutting line.
Finishing
Finishing the premises inside and outside the walls can begin after covering the roof frame with a roof and installing subfloors.
Internal
The inside of the bathhouses should be decorated with clapboard. The most important thing is not to stuff it too tightly. The tree needs distance to dry out freely.
The lining must first be coated with special antiseptics, which will protect the wood from the destructive effects of moisture.
External
For exterior decoration you can use different materials:
- block house;
- metal or plastic siding;
- different types of plaster;
- clinker tiles;
- decorative brick.
The choice of decorative material depends on the wishes of the bathhouse owner and his financial capabilities.
Frame buildings are present in every modern cottage cooperative. This is due to the increasing popularity of this technology. To build a high-quality frame bathhouse, you need to understand how to build it correctly and prepare the necessary set of materials and tools.
Differences and features of technologies
Frame
- The supporting structure is a wooden frame on which all building elements are attached. The bathhouse is installed on the site without the use of equipment. This is 100% handmade. It is possible without the involvement of specialists.
- When designing a frame bath, any customer requests are taken into account. The only restrictions are regulations.
- Quick commissioning of the facility.
- Frame baths, including mobile ones, have the most affordable price. The cost can increase: a) increasing the size of the bath; b) type of foundation; c) expensive materials for interior and exterior decoration; d) type of insulation; there are recommendations for insulating the roof, walls, floor and ceiling of the bathhouse; e) independent work or with the involvement of specialists; f) engineering additions...
- They are strong and reliable. A large number of stiffening ribs prevent the structure from deforming.
Frame-panel
1) The production of frame-panel baths is a complex, expensive process. The main structural element is SIP.
The design of SIP (structural insulated panel) is similar to a sandwich. Between two sheets of wood-based material there is a thermal insulation layer.
There is a wide variety of SIPs on the market. But, since you are interested in a bathhouse, then look for a sandwich where the outside is oriented strand boards with the abbreviation OSB, and the inside is polystyrene foam.
The middle layer binds the entire structure together using a special high-pressure adhesive (cold pressing). The wood leaves are strictly parallel. Waterproof treatment of slabs is carried out during their manufacture.
Individual design is not possible. Always a ready-made standard design solution.
2) This bathhouse is assembled quickly (2-3 days). All blocks and elements are clearly adjusted to each other in the factory.3) The cost of frame-panel technology increases due to:
- expensive production;
- attraction of lifting equipment;
- possible increase in the number of construction crews.
4) The panels are attached to each other using a wooden beam, the selection of which requires special attention, according to the “tongue and groove” principle.
The joints are sealed with polyurethane foam. Vertical and horizontal bars provide additional rigidity and stability.
5) Panels can last more than 50 years.
Advantages and disadvantages
To appreciate this technology, let’s watch a video from a well-known channel, and then look at its pros and cons.
pros
- Fire resistance: the panel is capable of holding back fire for an hour, the ANTI-FIRE treatment is effective.
- The panel material is non-toxic and safe for humans.
- The panels can withstand heavy loads: everything can be mounted on them, even heavy hanging furniture.
- SIP walls are thin, but retain heat well.
- Smooth walls inside and out: any finishing materials.
- Resistant to temperature changes. Build baths all year round!
- SIPs are excellent sound absorbers.
- Thermal losses of sandwich structures are minimal.
- Moisture resistance: SIPs do not rot, mold does not form on them.
- Seismic resistance: buildings can withstand vibrations of more than 5 points.
For your information! A frame-panel bathhouse is more expensive than a frame one, but half the price of a log house.
Choose frame-panel baths to suit any budget:
Turnkey (cladding of facades and internal walls is carried out at the sandwich panel manufacturing plant); Rough finishing (decoration either inside or outside - at the customer’s choice); Without finishing (the customer carries out internal and external finishing on his own).
Photo of the company ProSIP (St. Petersburg)
Minuses
The service life is limited to 50 years. When heated above 125 degrees, the thermal insulation layer burns and deforms. External uniformity and unattractiveness of objects without finishing. Violation of technology leads to loss of strength.
VERY IMPORTANT! Lay the electrical wiring correctly, paying special attention to the areas where sockets and switches are attached. A spark may cause the inner layer of the sandwich to ignite. For the same reasons, use non-combustible materials for finishing.
ATTENTION: seal all cracks and gaps, otherwise all the thermal insulation will be damaged by rodents.
Design and layout of a bathhouse with a terrace of 50 sq. m
This is a small, but at the same time cozy bathhouse project. Such a building can be considered part of the estate or used as a separate element as an independent house necessary for relaxation.
The entrance is preceded by a terrace measuring 9.8 square meters. m. Then there is a vestibule of 2.3 sq. m. m.
Next there is a passage to the rest room (15.9 sq. m).
Bathhouse layout 50 sq.m.
From the rest room, a passage leads to the wash room (7.8 sq. m.), and then to the steam room (7.8 sq. m.). All rooms are located in such a way that only a minimal amount of heat leaves the last room.
Much attention is paid to the heating and lighting systems. The windows are located in the billiard room, the recreation room, and the smallest one in the locker room. Consequently, even during the daytime there will be a lack of lighting. This problem will be solved by using lighting in the lower part of the ceiling.
Layout features
In order to get comfortable conditions for relaxing in the bathhouse, you will need to take into account certain features.
- Under no circumstances should there be drafts in the bathhouse. In this project, this problem is solved with the construction of a vestibule. For greater efficiency, it is worth positioning the doors perpendicular to each other.
- The door to the bathhouse must be low and narrow. This will help maintain heat in the steam room, even during severe frosts in winter.
- The size of permissible windows in a bathhouse can be 40x60 or 70x80.
- In the washroom, it is worth taking care of the window above the level of the head of a standing person.
- If, in addition to the stove, it is not planned to use heating in the bathhouse, then it should be installed in such a way that it can heat several rooms at once.
- It is best to locate the bathhouse on a slight elevation so that dirty water flows out of the building by gravity.
- All materials that will be intended for construction must first be dried in the sun so that the humidity level does not fall below 8%.
- The clarity and quality of the ventilation system is necessary.
Billiards in the bathhouse
Main characteristics of a wooden bath:
- Construction: the bathhouse is made from rounded logs;
- Foundation material: monolithic reinforced concrete;
- Material for external walls: rounded logs;
- Floor material: wooden beams;
- Roof material: wood;
- Roofing material: metal tiles.
Fire safety requirements for a bathhouse
- The space that is located below floor level must be covered with a screen made of metal or brick. This is necessary if a hot ember or spark of flame gets there.
- Under the metal stove, the floor should be insulated with several rows of bricks. It must be laid on asbestos cardboard or double felt, which must first be impregnated with a clay mixture.
Even our ancestors believed that the bathhouse was a source of health and long life. And even in the modern world, people still do not refuse a bath. It is for this reason that the bath plan remains one of the most popular projects, along with simple residential buildings. A well-built bathhouse can completely change the entire appearance of the site.
Important features when constructing a frame bath
A frame bath requires high-quality thermal insulation. Mineral wool or basalt is suitable as a thermal insulation material; fiberglass insulation is also suitable.
An important point is vapor barrier. In rainy weather, and in winter during snow, moisture enters the bathhouse through cracks, forming condensation inside the frame, as well as on the walls and ceiling. To cope with this problem, hydro- and vapor barriers are used.
Wood for a bath should be selected well dried, because when the wood dries out, it decreases in volume and cracks appear. The best option for a bathhouse is larch, aspen or linden.
Why is a log sauna so popular?
First of all this:
- Environmentally friendly material that has a positive effect on human health. After all, it contains no harmful components, and the natural aroma of wood will delight you for a long time;
- simple construction technology. A person with basic knowledge in the field of construction can cope with this task;
- saving time. After all, building a bathhouse from timber is a rather short process, unlike other types of material;
- high level of thermal insulation. The timber retains heat well inside the room, so you don’t have to spend money on additional wall insulation;
- affordable price for the material. Compared to other materials, a bathhouse made of timber will cost much less than one made of brick or gun carriage;
- there is no need to build a complex reinforced foundation. An ordinary strip foundation on solid ground will be sufficient.
Having become familiar with the advantages of this structure, we smoothly move on to the actual construction.