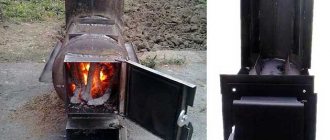
Despite the widespread use of modern heating boilers, traditional stoves do not lose their relevance. However, their effectiveness sometimes leaves much to be desired. Installing a heat exchanger for the stove will make it truly versatile. Not only the surrounding air will warm up, but also the coolant circulating through the system. Buying a new full-fledged boiler is not always advisable. Especially if a zealous owner has the desire, opportunity and guidance for action.
Choosing material
The coil is traditionally made from a pipe, the length and diameter of which are determined by the desired level of heat transfer. The efficiency of the structure will depend on the thermal conductivity of the material used. The most commonly used pipes are:
- copper with a thermal conductivity coefficient of 380;
- steel with a thermal conductivity coefficient of 50;
- metal-plastic with a thermal conductivity coefficient of 0.3.
Copper or metal-plastic?
With the same level of heat transfer and equal transverse dimensions, the length of metal-plastic pipes will be 11, and steel pipes will be 7 times longer than copper ones.
That is why it is best to use annealed copper pipe to make the coil.
Such a material is characterized by sufficient plasticity, and therefore it can easily be given the desired shape, for example, by bending. The fitting is easily connected to the copper pipe with a thread.
We are looking for improvised means
Considering the high cost of materials, it would be appropriate to consider the possibility of using products that have already served their purpose, but have not yet fully exhausted their service life. This will not only reduce the cost of manufacturing the heat exchanger, but will reduce the time for installation work. As a rule, preference is given to:
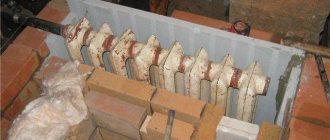
- any heating radiators that do not leak;
- heated towel rails;
- radiators from cars and other products of similar design;
- instantaneous water heaters.
System design
So, the purpose of the device is to transfer temperature from one environment to another. Heat sources and coolants can be various liquids, gases and steam. Unstable media are separated by a material that has a suitable thermal conductivity for this purpose. The simplest example of a heat exchanger is an ordinary room radiator. The heat source is heating water. The heated medium is the air in the room. And the separating material is the metal from which the radiator is made.
A big role in which intermediate material to use is its degree of thermal conductivity. The leaders in this indicator are silver and copper. But for obvious reasons, copper is most often used.
Copper is 7.5 times better at transferring heat than steel, and plastic is 200 times worse than steel. It turns out that, other things being equal, 1.7 meters of copper, 12 meters of steel and 2000 meters of plastic pipe will transfer the same amount of heat.
According to their purpose, heat exchangers are divided into:
The former contain cold gas or liquid. Contacting it, the heated coolant cools down.
Heaters, on the contrary, contain a heated gas (liquid), which shares heat with a circulating cold liquid (gas).
Surface heat exchanger design
Both “heaters” and “coolers” can differ in design:
- Surface (the case when the media come into contact through an intermediate surface).
- Regenerative (alternate supply of cold and hot media to a special nozzle, which, by heating and cooling, regulates the temperature of the media).
- Mixing (supplying one medium directly into another and mixing them).
It must be said that surface heat exchangers are used most often. They differ significantly in shape. There are three types here:
- Lamellar (many plates assembled into cassettes through the labyrinths of which liquid passes).
- Coils (thin tube twisted into a spiral).
- Pipe in pipe.
Dual fuel heating can be very convenient, especially when one heating source fails. Combination heating boilers have two combustion chambers and are produced in different designs: gas - electricity, gas - coal and so on. We will consider the design of the system and installation methods below.
We will consider the features of choosing a thermostat for a heating radiator here.
Conventional heating methods may prove inconvenient in some situations. Heating without gas and wood can be a good alternative. Here https://microklimat.pro/sistemy-otopleniya/bez-gaza-i-drov.html we will look at ways to organize heating of a room without the use of firewood and gas.
Design features
Most often, a metal tank with a capacity of up to 5 liters with built-in pipes acts as a heat exchanger. There is no direct contact with fire. The device allows you to heat cold water, which then flows into radiators or a removable tank of larger capacity located in the same or an adjacent room.
As a result, by heating the stove in one room, it will be possible to heat another. According to its design, the heat exchanger for a furnace can be external or internal.
External
This type is very similar to a tank filled with coolant. Inside the container there is a part of the pipe used to remove combustion products. In terms of its design, the external heat exchanger is more complex than the internal one, as it places increased demands on welding work.
However, its maintenance is much easier. If necessary, the tank can be dismantled to remove scale or eliminate leaks.
Interior
Mounted above the firebox directly inside the stove. It is easy to install, but if maintenance is necessary, certain difficulties may arise. Especially if the stove is made of brick.
To avoid this, at the time of design development it is worth taking care of the maintainability of the future heat exchanger.
What to do with the power regulator?
A small, inexpensive device will significantly save money and help set the heat exchanger to the desired temperature.
To install it on the heat exchanger tube, you need to connect the thermostat with terminals, and then the power wires.
You can avoid unnecessary work by purchasing a regulator with a built-in heating device. There will be no noticeable difference in price.
A heat exchanger can be a great addition to your furnace and will improve its efficiency. It can be installed on ventilation openings and heat the air passing into the house, provide the house with hot water, make a conventional furnace give off more heat, and much more.
A stove in a dacha is not a superfluous design, since in the off-season the weather can be unpredictable. Do-it-yourself brick stove for a summer residence: types of stoves, correct choice of location, recommendations for work.
To learn how to correctly calculate the power of a heating boiler, read this article.
Choosing the design of the device
When choosing a suitable heat exchanger for a furnace, you should strive to ensure that the total surface area of the finished product is as large as possible. This will ensure the most efficient heating of the room.
Coil
The most widespread are registers (coils). Such heat exchangers are made from smooth-walled pipes with a diameter of 40 - 50 mm. Outwardly, they resemble a characteristic L-shaped grille. For their manufacture, you can use not only round, but also profile pipes with a similar cross-sectional area.
The return and hot water outlet can be located either on one side of the register or on different sides.
The output option is determined by the design features of the furnace itself and the piping layout of the heating system.
Tank
The next most popular are rectangular or cylindrical tanks, inside of which there is a pipe or coil. The length of such a heat exchanger depends on the parameters of the furnace firebox. The heat exchanger installed on the chimney usually has a cylindrical shape. There is a pipe running inside it, the diameter of which is equal to the diameter of the chimney. The pipes are welded from below. Can be used both for heating a room and for heating water.
This design requires special attention. Due to the rapid cooling of combustion products, the draft in the chimney itself is significantly reduced. This helps slow down fuel combustion.
Installing the product on a heating and cooking stove requires special attention. Care must be taken to ensure that hot gases pass over the top shelf and enter the chimney at the front of the firebox.
In this case, the cooking plate can be located directly above the heat exchanger. It is also possible to manufacture a register without a top shelf. The so-called shelf consists of lower and side parts connected to each other by pipes.
Working principle and functions of the heat exchanger
The coolant in the heat exchanger can be water or antifreeze.
A liquid heat exchange device is a container, part of the furnace structure, equipped for connection to a pipeline. The tank heats up in contact with the products of fuel combustion and transfers this energy to water. Water, moving through the system, gives off heat to heating devices - radiators, from which the air is heated by convection. Heating of the container can be direct or indirect, and the circulation of the coolant can be natural or forced.
Coolant
Instead of water, antifreezes based on ethylene glycol, propylene glycol, alcohol or oil are often used. Their main advantage is their low freezing point, ranging from -30 to -70°C. The exact numbers depend on the chemical composition and concentration of the liquid. The use of such chemistry provides a number of advantages:
- protection of system elements from damage due to defrosting;
- anti-corrosion protection due to appropriate additives;
- absence of abrasives, salts and other impurities that destroy (clog) the pipeline or fittings.
Some heat exchangers, for example for a bath, serve not only heating devices, but also a shower or a separate tank. That's why water is used here. To avoid defrosting, the device is designed so that filling water does not take much time. If the bathhouse or sauna is heated frequently, and the enclosing structures are well insulated, the problem is eliminated.
Propylene glycol is expensive, alcohol and oil are fire hazards, and ethylene glycol is a highly toxic coolant.
Heat exchanger functions
The function of the heat exchange tank, as part of the furnace structure, is to receive and transfer heat to the coolant from combustion products. But as an element of a wider system (heating, water supply), it solves several problems.
- Distribute heat evenly and economically throughout heated rooms.
- Provide your home (cottage, cottage, bathhouse, apartment, etc.) with hot water.
- Accumulate thermal energy for use when the stove is not working.
A heat accumulator connected to a heat exchanger for a wood stove stores energy thanks to the thermal capacity of the storage agent. Therefore, it can be made by insulating any container. A barrel covered with polyurethane foam and partially filled with crushed stone or sand is already a heat accumulator. If you equip it with four pipes and connect it correctly, the unit will become a functional element of the system.
Cooling by 1°C, water heats 1 m3 of still ambient air by 4°C. The successful use of water heat accumulators is associated with this.
Design Rules
When developing a design, it is important to ensure that the following conditions are met:
- internal voids in the heat exchanger must be greater than 5 mm. With a smaller width, water may boil;
- to avoid burning of the material, pipes with a wall thickness of more than 3 mm should be used;
- It is necessary to provide a gap of 10 - 15 mm between the firebox wall and the heat exchanger to compensate for the expansion of the metal when heated.
Flaws
Despite many advantages, the installation of a heating element on a chimney pipe also has disadvantages . One of them, the most important, is a sharp decrease in the smoke temperature at the installation site of the heat exchanger. This can lead to deterioration of traction and the formation of condensation, increased soot deposition inside the pipe.
In addition, when connecting a heating system, for example, a garage, you need to calculate the volume of coolant to avoid boiling water and bursting pipes . Welds must be completely sealed.
Any heat exchanger design significantly increases the efficiency of the furnace . For trouble-free operation of the system, it is necessary to carry out a visual inspection of all its elements at least twice a year , and, if necessary, timely repairs, descaling, replacement of gaskets and other necessary maintenance work. In this case, water heating and heating systems will operate flawlessly for a long time.
>
Let's start installation
The sequence of work depends on the design features of the heat exchanger.
Installation of a device with a register
When installing in an old furnace, you will have to dismantle part of the masonry. The sequence of work is as follows:
- We prepare the foundation for the coil right in the firebox cavity.
- We install the coil.
- We lay the disassembled row of bricks, leaving space for the inlet and outlet parts of the pipes.
- We connect the heat exchanger to the heating system.
Before use, the tank must be checked for leaks. You can make sure there are no leaks by filling it with water, preferably under pressure.
Installation of a device with a container
The best option for a stove or fireplace. Made from a metal tank and two copper tubes. The tank volume is usually about 20 liters. In the absence of a finished product, a tank of sufficient volume is made by hand by welding sheet steel.
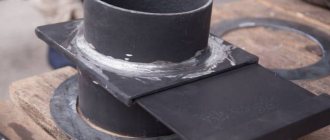
For the manufacture of the heat exchanger, a material thicker than 2.5 mm should be used. Welding should be done in such a way that the thickness of the formed seam is minimal.
The tank must be installed 1 meter above the floor level, but no further than 3 meters from the stove. Two holes are made in the tank: one near the bottom, the second at the highest point on the opposite side. The efficiency of heat transfer depends on the location of the lines.
It is necessary to strive to ensure that the minimum deviation of the lower outlet in the direction of the floor is 2 degrees. The top one should be connected at a 20 degree angle in the opposite direction.
The drain valve is being installed in the storage tank. There is another tap designed to drain the entire system, which is installed at the lowest point. After checking the tightness, the system is ready for operation. The efficiency of such a stove with a heat exchanger can be appreciated in the cold season.
Kinds
Types of heat exchangers are divided by design, location and material of manufacture. For each specific case, you can select a combination of these types.
By combining the design and material, and placing it correctly, you can significantly increase the efficiency of a brick kiln. It’s worth considering how to make a heat exchanger for a furnace without extra costs. By analyzing the types of existing structures, you can select the most optimal heat exchanger for a particular layout.
- Coil. It is created from a pipe, coiled in the form of a spiral, several meters long. Such a water heat exchanger for a furnace is installed in a container with a liquid coolant. The ends of the pipe are expanded into the walls, allowing the coolant to circulate inside, simultaneously heating the water in the tank. With the correctly calculated length of the coil, the material it is made of, and the number of rings, you can speed up the heating of the water. Also, the part of the coil that remains in the air increases the rate of heating of the room.
- Heat exchanger with container. The tank and heat exchanger pipe for the furnace are installed directly next to the combustion chamber. It is necessary to strictly observe the degree of inclination of the supplied pipes in order to achieve natural circulation. In some cases, it is necessary to install an electric pump for these purposes. This solution has its advantages - the water is heated directly by passing through a pipe that goes around the firebox. This solution increases the heating rate. Typically used for heating circuits.
- Pipe board. It consists of two completely sealed containers and a large number of small pipes. The main pipe-containers are located in different parts, near the combustion space and are connected by pipes. Heat exchange occurs at the joints. This design is used for heating large spaces, up to high-rise buildings. The operation of such a heat exchanger is complicated because precautions must be taken. The chemical composition of the water is important here; due to the formation of scale, wall breakthroughs are possible.
- Water jacket. This heat exchanger is the most difficult to create with your own hands. Its design consists of two sealed tanks located one inside the other. Efficient and easy to use - a heat exchanger for a stove made of pipes. It allows heat exchange to occur quickly, but is difficult to manufacture and requires professional skills.
What should you keep in mind?
With natural circulation of the coolant, the heat exchanger should be placed above the furnace at a distance of 1.5 - 2.5 m. Due to the constant change in geometric parameters, the pipes cannot be fastened to the wall tightly enough. It is necessary to provide a small gap.
It is important to remember that if the stove is used not only to heat the house, but also to heat water, a maximum of 10% of the total amount of heat generated should go to the heat exchanger. When using a structure with an expansion tank for heating, the volume of the latter should be selected so that the water in it can heat up to the required temperature in two hours.
The return pipes should have a smaller diameter than the coolant supply pipes. The material intended for sealing threaded connections is selected with a sufficient level of heat resistance.
If the house is not intended for permanent residence, but is used only from time to time, then it is better to refuse water heating. It is advisable to fill in special antifreeze instead of water if you plan to heat a stove with a heat exchanger in the cold season. This will prevent pipes from bursting. Remember that adding coolant when the furnace is fully heated is unacceptable.
Air tank
You can improve an ordinary potbelly stove or sauna stove with a direct chimney by installing it on an air heat exchanger on the chimney .
It is a cylindrical body through which several hollow pipes pass. Air is sucked in from below, heated in the pipe, it leaves the heat exchanger, increasing the efficiency of the furnace by 15-20%. The air ducts can be routed to an adjacent room, thus heating several rooms or sections of the garage from one furnace. Video: how to make an air heat exchanger for a chimney
Another original design of a stove with an air heat exchanger on a chimney for heating a garage is shown in the video. With the help of such a stove you can heat not only a garage, but also any utility room, including agricultural buildings and greenhouses.
From corrugated pipe
A cheap and simple way to install an air heat exchanger is to use corrugated ventilation pipes for this purpose . They are wrapped around the uninsulated part of the chimney, as a result the air in the corrugation warms up and, due to thermal convection, enters the neighboring rooms. To make the corrugated pipe heat up more efficiently, you can wrap it together with the chimney in several layers of foil.
A system with a corrugated pipe is convenient for heating a garage in which a simple potbelly stove made of rough metal is installed. Such a stove quickly heats the air, but it rises to the ceiling, which is why the temperature at floor level remains low. If you move the air ducts closer to the floor, you can create natural circulation of heated air, and the temperature throughout the garage will become approximately the same.
Bell-type heat exchanger
Heat exchangers in the form of a bell are usually used for heating the attic or second floor . The principle of its operation is that the air heated from the chimney rises to the ceiling, where it is retained by the hood and, gradually cooling, falls down into the room.
The cap can be made of either galvanized metal or fire-resistant plasterboard and lead the air ducts to the desired location. Sometimes the cap is decorated with stones, which, when heated, serve as an additional heat accumulator.
Furnace laying
Construction of the furnace begins from the foundation. First of all, dig a pit and place a “cushion” of crushed stone or broken brick in it. After this, lay the brick in two or three rows using cement mortar and, after the latter has cooled, lay roofing material on top of the base for waterproofing. It is important that the foundation protrudes a few centimeters above the floor surface.
Particular attention should be paid to preparing the sand-clay solution. This process consists of several stages and takes more than one day.
Step 1. Prepare clay, preferably blue. A few days before starting work, soak it in water in the following ratio:
- 1:1 if the material is wet;
- 1:2 if dry.
Stir the solution regularly and add water if necessary.
Stage 2. Prepare sand, ideally mountain, crystalline, but you can also take river sand. First, clean the sand - place it in water and let it sit for at least two days. Drain the cloudy water from time to time until it becomes clear.
Stage 3. Next, equip a kind of bed of sand and dry cement on the striker, shovel it until a homogeneous mixture is formed. Then pour it into a previously prepared container and fill it with the solution so that in the end it (the mixture) is like thick sour cream. To increase density, add salt (1 kg per 10 liters of water).
Stage 4. All that remains is to check the quality of the solution and its plasticity. To check, you can scoop up the solution with a trowel and place it on the brick. And if the solution sticks to the instrument, then add more sand and water. And if the solution does not fit well, then add clay.
You can learn more about the laying procedure and ordering by reading the article mentioned above.
