Visiting a bathhouse is a useful pastime that many people enjoy. What could be more pleasant than a good steam bath and then enjoying hot tea in nature? Everyone wants to have a bathhouse on their plot, but many are faced with a problem - the territory of their plot of land is too small, which is why they cannot afford to build a building.
Even if you cannot boast of a spacious area, there is no need to deny yourself the pleasure of having your own bathhouse. The best option for areas with a small area is a 3x4 bathhouse project.
Construction features and advantages of a 3x4 bathhouse
Many homeowners prefer to build small bathhouses on their property because of the obvious benefits:
- the construction of a building requires less building materials;
- mini-baths can be built independently, without hiring specialists;
- It takes 2-3 weeks to construct the building.
It is beneficial to use electric heaters for heating. Utility costs will not be ruinous. The small steam room warms up quickly.
Construction Features:
- The correct layout of a 3 by 4 bath takes into account the number of people living in the house. A steam room for a large family should measure 2 by 3 meters.
- If there are gatherings with friends, a relaxation room is allocated. The plan is created taking into account the capabilities and wishes of the homeowner.
The function of a rest room can be performed by a dressing room Source p0.zoon.ru
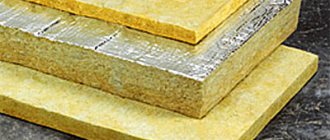
Important ! During construction, it is necessary to provide thermal insulation for the steam room and shower. For this purpose, fiberglass and mineral wool are used.
Basic rules for placing a bathhouse
- It is recommended to build the building away from a residential building. There should be more than 10 meters from the building to the roadway.
- To avoid a major fire, wooden sheds, garages, and fences should not be built near the bathhouse. It is advisable to plant a hedge around it.
- Such buildings are not placed on swampy soils. If the structure is being built on soils with close groundwater, a foundation and drainage ditches will have to be made.
- They determine in advance the type of ventilation system, think about how to install water and electricity.
- A good option for building with an attic. The second floor is used as a recreation room. Such a bathhouse must have an internal staircase. The slope of the structure, width, and height of the steps should be calculated.
Wooden building with an attic Source modernplace.ru
Types of baths
You need to immediately decide what type of construction the planned building will be. Traditionally in Russia they build:
- Russian classic baths. The building is made of wood and consists of 3 rooms. The building is heated by a brick stove.
- Finnish saunas . There is only one room in the premises. Heating occurs due to hot steam.
Classic rustic Russian bath Source stroy-podskazka.ru
Sauna in a Finnish village Source turproezdka.ru
The number of compartments and the position of the partitions depend on the type of structure and type of heating. It is difficult to build a Russian stove yourself without experience and knowledge. In the modern version, it is replaced by a boiler or an electric fireplace.
Important ! It will not be possible to set up a Turkish hammam or a Roman bath in a small area. The Japanese Ofuro (hot water barrel) is not understandable to a Russian.
The Japanese bathe in barrels of hot water, incense, and medicinal herbs Source riyas.ru
Materials for construction and finishing of baths
The best sauna for a personal plot is made from logs. The layout of a bathhouse with dimensions of 3 by 4 made of timber is carried out according to the general rules, which will be discussed below.
The log house must be made by a master. Without experience and knowledge, it is difficult to build a wooden structure. A building made of logs does not need decorative finishing.
Wood is the best option for building a bathhouse Source www.bsdhouse.ru
The building material is chosen depending on the region of residence and financial capabilities. For residents of Siberia and the Urals, it is more profitable to order wood through the local forestry enterprise than to buy bricks. The population living in the Caucasus has access to wild stone, which is abundant along the banks of mountain rivers. In the south you can use:
- foam blocks;
- adobe;
- gas silicate modules.
Brick is fine if you have the money to hire experienced masons.
Traditionally, natural materials are used for finishing rooms with high humidity and temperature: wood, stone Source mainavi.ru
See also: Catalog of bathhouse projects with an area of up to 12 sq.m.
Materials for interior finishing
Traditionally, the internal lining of the steam room is made of lining and ceramics. These natural materials are moisture resistant. Pine gives off a special aroma, but is only suitable for utility rooms.
The walls of the steam room cannot be lined with synthetics. Plastic does not tolerate high temperatures well and emits fumes that are harmful to humans.
Modern fashion trends (loft) allow the use of unedged boards for finishing. Suitable wood types:
- oak;
- alder;
- cedar;
- Linden;
- larch;
- birch;
- aspen;
- ash.
Natural wood is suitable for wall cladding and flooring. Wood-based materials are not suitable for wet rooms; they contain synthetic glue and do not tolerate water well.
Cladding finishing Source vsyavagonka.ru
Exterior finishing materials
When the frame is erected and the roof is installed, the exterior decoration of the building begins. The design and type of building material depends on the financial capabilities of the owner. Often used to decorate walls:
- ceramic tiles;
- decorative plaster;
- siding;
- eurolining;
- wooden boards.
Decorative finishing Source vosaduly.ru
Optimal room dimensions for a small bathhouse
From the very beginning, the height of the room is determined. This parameter depends on the tastes of the owner. For a tall man, add 1 meter to his height. It is not recommended to erect a structure below 2.3 meters.
The shelves should comfortably accommodate an adult. Usually they make beds from one wall to the other opposite. A small steam room, designed for one person, is made in the form of a cabin with dimensions of 0.85x1.20 cm, 1x1.5 m.
Steam room for a small family Source www.orlovstroy.ru
In a one and a half meter steam room you will have to sit or bend your legs. This is a bad option. It is impossible for two people to fit in such a room. The oven must be compact and located so that people cannot get burned.
Minimum possible dimensions for other rooms:
- dressing room 1 by 1.2 m;
- shower room 1 x 1 m;
- recreation room 2 by 3 m.
The dimensions of structures attached to the main building (terraces, verandas) are calculated individually.
The nuances of building a small bathhouse
The idea begins with the choice of heating option. A brick oven retains heat for a long time, but there are practically no craftsmen left who can build it. Therefore, if you cannot pay for the work of a specialist, it is better to buy a boiler or electric heater.
The doors in the Russian bathhouse are low, steam accumulates under the ceiling. A heater is installed inside the steam room. To get light steam, cool water is poured onto the hot stones.
Often the door to the steam room is made of heat-resistant thick-walled glass. They fit well into any interior and allow you to see how a person feels inside the sauna.
Glass doors allow you to visually enlarge the space Source floatech.ru
See also: Catalog of companies that specialize in baths and sauna vats.
The shower can be replaced with a font or a wooden barrel. The terrace attached to the building must be equipped with a barbecue.
Foundation options for different soils
Increased strength from the base is not needed due to the light weight of the frame structure. But the foundation must be of high quality and match the type of soil underneath it.
You cannot make a shallow foundation on soft soil - this will lead to inevitable shrinkage. Therefore, it is important to choose the right type of base.
Wooden or timber type
Solid soil and a light bathhouse design measuring 3x4 allow the construction of a structure on a wooden foundation. This type is ideal for clay soil, which does not suffer from excess moisture, but has seasonal mobility.
For the foundation, hard wood is used, preferably oak. It is treated with an antiseptic or covered with dust and moisture-proof materials: resin or oil with wax.
The wood should be as dry as possible before installation. After installation, the beams are secured on the sides with stakes.
Light sauna on a block foundation
A small bathhouse, when installed inside a heavy stove, can be placed on a base made of blocks. But this type of foundation is effective only with a shallow layer of soil freezing in winter.
To form the foundation, you need to install gas silicate blocks around the perimeter of the walls and secure them with soil. In this case, the blocks are set strictly according to level. Deviations are excluded.
Columnar option
Suitable for soil with an uneven structure and high groundwater levels, where a foundation of increased depth is being built. For reliable fastening, pipes are driven into the ground, on which the building is placed. No equipment is needed for the work. The tools you will need are: mound, cement, plastic or asbestos pipes.
Construction order:
- Level the ground and mark the installation points for the pillars.
- Drill holes up to 50 cm deep. Waterproof the bottom with polyethylene.
- Pour concrete and install the pipe at a depth of about 30 cm.
- Wait until it hardens and fill the pipe with concrete to the end.
A grillage is formed on top of pillars made of hard wood or metal. An economical and effective option for a frame bath on soft soil.
Pile-screw frame
When building a frame bathhouse with your own hands, its massive structure when built on deeply frozen soil requires the formation of a pile-screw foundation. Piles are driven below the freezing depth - to solid ground. The tying of the piles, as with the columnar type, is done with wood or metal.
Tape base
The heaving and reliable soil allows you to form a strip foundation for construction. It's easy and quick to build. The main thing is to complete the entire pouring of concrete at once to form a monolith.
Procedure:
- Forming a trench with a perimeter the size of the walls, 40 cm wide and 50 cm deep.
- Fill the bottom of the trench with 15-20 cm of soil. For better compaction, moisten it with water.
- Install formwork 50 cm high and 30 cm wide.
- Reinforce the foundation base. The reinforcement is tied together rather than welded together.
- Pour concrete.
To prevent concrete from deteriorating under the influence of moisture, it must be protected. Waterproofing is done with roofing felt or thick film. But it’s better to first add a waterproofing agent to the solution - it’s more reliable.
Bathhouse size 3 by 4: internal layout
It’s easy to imagine the arrangement of rooms and furniture in a room with dimensions of 10 by 10 m. When designing a small structure, every little detail is thought through. The internal space will have to be divided into 3 rooms:
- a dressing room, which plays the role of an entrance, a locker room, and storage of solid fuel;
- washing room, also known as shower room;
- steam room
Option for delimiting the internal space into three rooms Source i1.wp.com
To properly use the free space, you will need multifunctional furniture. Benches and beds should be comfortable, but not too bulky.
It is important to think about how communication systems will be laid out. Designate a place:
- for shower, toilet;
- heating device.
For a family of 3 people, a 3x4 bathhouse is convenient, the layout inside of which is made taking into account the recommended dimensions:
- a dressing room, which simultaneously serves as a locker room - 2 by 3 meters;
- steam room - 2 by 2 meters;
- shower (bathroom) - 1 by 1 meter.
Where wood stoves and gas boilers are located, there should be a small window for ventilation. You should immediately decide in which corner the heating system will be installed. Without this, the building cannot be used.
Wood-burning stove for a bath Source tmfpechi.ru
Floor installation
The floor is formed with 5x5 bars, which are secured to the joists with self-tapping screws. Subfloor boards are laid on top. Then install waterproofing in the form of a film or roofing material and insulation - mineral wool. The thickness of the thermal insulation is at least 10 cm. Waterproofing in the form of glassine is also placed under the final finishing so as not to spoil the mineral wool.
Features of installing the floor in the washing room:
- Remove soil around the perimeter of the floor to a depth of 50 cm.
- Fill the pit with sand and gravel 10 cm thick. This will avoid creating a pit.
- The logs are formed from asbestos pipes, which are filled with concrete when forming the foundation. This prevents possible movement of the joists.
- Form a subfloor. A gap of 5-7 mm is left between the boards to install rubber gaskets.
- Next, hydro- and thermal insulation with the formation of a fine finish after installing the walls.
Construction according to this option allows the floor in the washing room to dry faster. This extends the life of the wood.
Baths 3 by 4: photos, projects, interior
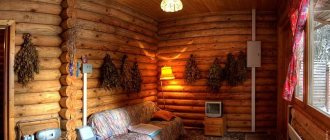
The interior decoration and arrangement can be designed in a certain style. The design of a small room is developed in detail.
The furniture in the front passage room can be multifunctional.
A sofa with a folding seat and a built-in drawer is used for storing utensils, brooms, and herbs.
Bathhouse in traditional Russian style Source i9.photo.2gis.com
Making walls
Before installing walls, you need to decide on the location of doors and windows. In a small bathhouse, racks are formed at the corners of the building. On the front and rear walls, which are longer, additional racks are installed in the middle. But they can be displaced due to the way windows and doors are installed.
Step-by-step procedure for constructing walls:
- Install corner posts. In a vertical position, they are first fixed temporarily with slats, but strictly according to the level.
- Place vertical racks on the sides. The lower parts of the side posts are secured with metal corners. Then this is the procedure for the front and back walls.
- Additional reinforcing elements are installed in the form of beams. Boxes for windows and doors are formed according to size. There is only one door. There are one or two windows for the locker room. Small in size to prevent heat loss. The purpose of windows is ventilation.
- All connections are reinforced with metal corners. It is recommended to use self-tapping screws instead of nails - it’s more reliable.
- In the same way, the bases of the walls inside the bathhouse are formed according to their availability.
- After the frame of the walls is formed, they are sheathed. Lining or OSB boards are suitable as cladding.
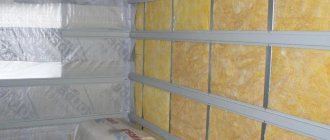
After covering the external walls, insulation is installed. To form the frame, a 10x10 cm beam is usually used, so the insulation should not be thinner. How to build a frame bathhouse with good insulation is to use mineral wool. Inexpensive material that is easy to seal cracks. They must be carefully closed; there should be no gaps. If you miss some connection without insulation, this will lead to a rapid loss of temperature inside the bath.
The vapor barrier is made of foil. The minimum thickness is 40 microns. The foil joints are connected with tape. The order of installation is from top to bottom in stripes. A stapler is used to secure it to the wood, but glue can also be used.
The template will make it easier to install the rafters. It is made of light boards and placed next to the installation site of each rafter. It is easy to avoid mistakes with such a system.
Instructions for forming the roof:
- Assembly is carried out on the ground for ease of operation and manufacturing accuracy. Then the finished structure is raised.
- Each part is installed in its own place above the central beam. Places must be marked in advance with a bright pencil.
- The roof must have ventilation holes. A sheathing is installed between the rafters and the counter-batten.
- It is easier to cover the gables with OSB boards - this will form a solid element.
Slate is the best roof covering. Roofing felt is not recommended because it tears quickly and easily. You can use metal tiles, it’s more aesthetically pleasing. But when it rains, metallic tapping will be heard.
Briefly about the main thing
3x4 baths are economically profitable to build, they are erected in 2-3 weeks and do not require large construction costs. The bathhouse building is being erected away from residential buildings and in accordance with building codes.
Usually they are built from a wooden frame, but there are also options made of adobe, brick, and aerated concrete. For interior decoration, oak, alder, linden, and other hardwood are chosen.
The dimensions of the steam room should be such that people feel comfortable staying in it, that is, at least 0.85 x 1.20 m or 1 x 1.5 m per person.
The dimensions of the remaining rooms are selected based on existing needs.
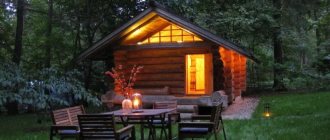
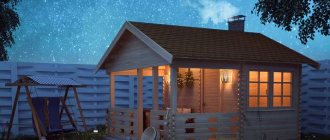
The bathhouse project can be:
- simple and provide for the presence of only two rooms: a steam room and a locker room;
- traditional - with a steam room, shower and dressing room;
- with a terrace where it plays the role of a dressing room and rest room.
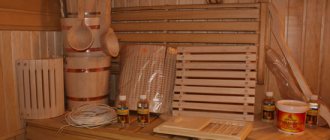
The interior of a 3x4 bathhouse is often planned in the Russian style with wooden basins, brooms, a bucket for dousing and decor in the best folk traditions.
Ratings 0
Materials
I recommend taking the following materials:
- frame – profiled or glued wooden beam 10×15, 15×15 cm;
- the floor in the bathhouse is best cut from larch, but oak or aspen can be used;
- walls - edged boards made of aspen or linden;
- thermal insulation, vapor barrier - mineral wool with a layer of foil, glassine, isospan, polyethylene, foil-coated PPE;
- roofing - soft or metal tiles;
- internal lining - lining.
Construction of a log house
Construction of the first crown
- Before laying the first crown, the foundation is waterproofed with several layers of roofing material using bitumen mastic.
- It is important that the surface of the first crown is perfectly flat horizontally.
Construction process
- To prevent dampness and rotting of the lower rows of beams, the laying of the frame crown begins with the placement of wooden antiseptic slats 15 mm thick along the perimeter of the foundation base at a distance of 25-30 cm from each other.
- The space between the slats can be filled with insulation or polyurethane foam.
Beam connection
The most convenient way to fasten timber to each other is using metal pins or wooden dowels.
Beam connection
- To do this, initially the crowns are laid, leveled and fastened to each other with wooden dowels or metal pins.
- They must be hammered into pre-made holes, the diameter of which is equal to the diameter of the pins (dowels).
- The distance between the holes should be a meter to one and a half, and the drill should completely go through the upper beam and half of the lower one.
- Then the top beam is temporarily removed, pins (pins) are driven into the holes, and a layer of insulation for the bathhouse is laid. Afterwards the top beam is laid in place.
- There is no need to fasten the two upper crowns, because at the last stage of construction they will have to be temporarily removed to install the ceiling beams.
Splicing timber along the length
Most often, builders use the following splicing methods:
- “end butt with ridge”;
- "oblique butt";
- "oblique overlay";
- "straight overlay";
- “overlay with an oblique cut.”
Timber splicing
Advice: If it is necessary to splice beams, the “butt” method is not recommended.
End connection of beams
To avoid drafts in corner joints, there are several methods for making locking joints. The picture below shows some of the options for the end connection of beams.
End connections of timber.
Openings
There are two options for organizing openings:
- The window and door frames of the bathhouse are installed after the construction of the log house is completed. To do this, during the construction process it is necessary to leave a small gap in the crowns in the place where the window or door is planned to be placed, and after the log house shrinks, openings are made in these places using a chainsaw.
Note! The advantages of this option are that over time the log house will shrink, but the doors and windows will not be warped.
Arranging a doorway using the first method
- Space for door and window openings is left during the construction of the log house. This option is more time-consuming. To complete it, you will need grooves for a window or door frame and beams with end notches.
Installing a window opening using the second method
How to calculate the area of a room?
The internal layout of classic timber baths does not include any frills and includes three required rooms:
- dressing room;
- soap dish-washer;
- steam room
In the last room, a heater must be built , which provides steam.
The process of installing a heater with your own hands is quite complex and therefore must be performed by a qualified stove maker. It must be positioned in such a way that one of the sides is in contact with the wall of the dressing room, while simultaneously acting as a heating element for the adjacent room. For the heater, it is recommended to choose a place in the corner behind the door entering the compartment. Some buyers can install an additional heat source in the dressing room - a metal potbelly stove. In both cases, wood fuel is used to heat the stoves.
According to the accepted rules, shelves are installed in the steam room, choosing an installation height for them so that you can lie on them at full height , and when standing up, you will not hit the ceiling with your head. Most often, the main shelf is made in a non-removable form. The platform is stationary and is installed with a slight indentation relative to the upper level of the stones that form the heater. Therefore, when calculating the ceiling height, it is necessary to take into account the level of the shelves.
The layout of some baths may include wide benches on which you can comfortably place your feet. Usually there are two benches - low and high. When calculating the optimal area of the steam room, it is based on creating comfortable conditions for people receiving bath procedures. In other words, the main guideline for calculating this indicator is the number of people who will be in the steam room at the same time.