Inexpensive methods to help remove gaps between boards
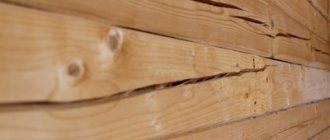
Often, before carrying out repairs, owners discover unwanted defects in the form of gaps between the boards. This usually happens at the most inopportune moment, when funds in the budget are severely limited and there is nothing to allocate for major repairs. In this section we offer several low-cost and very effective options for eliminating defects.
Large gaps between boards are best sealed with products with good viscosity Source phonoteka.org
Installation of rack wedges
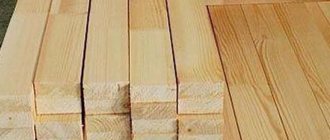
You can always turn slats yourself from leftover timber or fresher boards that you have on the farm. They need to be planed so as to obtain a wedge-shaped shape, and the width of the slats should be 0.5 mm larger than the size of the gap between the boards.
Before placing the wooden piece, the gap is thoroughly cleaned, and dust and debris are removed using a vacuum cleaner. Then apply wood glue to the wedge of the slats (PVA will also work). It is also injected into the gap in a small amount. Next, use a rubber mallet to hammer the batten in so that it fits as tightly as possible between the boards. You can use a hammer to hammer in, but you need to put a rubber or thin block under it so as not to make even more holes in the floor.
Review of methods for eliminating flooring defects
As you know, wood not only changes its linear dimensions as a result of changes in temperature and humidity, but also dries out over time. In addition, rodents can contribute to the appearance of cracks and holes in the floor. In any case, repairs are required:
How to seal cracks in a wooden floor? The most common method is to fill the seams using special ready-made compounds:
demolition of the Berlin Wall date
Mixing homemade putty composition.
Instead of construction chemicals, you can prepare homemade mixtures for sealing gaps in the floor. As a rule, the composition consists of two components - a binder (glue, paint) and a filler (sawdust, gypsum).
The next method is a little more labor-intensive - eliminating wide gaps between the boards, as well as between the covering and the wall using compaction. In this case, strips of wood, foam plastic, special caulking cords, etc. are used. Effective and practical, but in some cases requires additional adjustment and subsequent varnishing or painting.
The last method, the most expensive and costly, is to replace the floorboard with cracks and other damage with a new one that is suitable in size and tone.
The exact method for eliminating defects is selected based on the width of the seams, the nature of the damage, etc. Let's take a closer look.
Video description
How to seal cracks in a wooden floor
The composition is left for a while and the cracks are prepared in the standard way (small debris and dust are removed). Afterwards, apply the mixture with glue onto a rubber spatula and evenly fill the spaces between the boards. It must be well leveled so that there are no tubercles. The filled cracks are left for two to three days. This time will be enough for quality hardening.
PVA glue and sawdust for preparing a mixture for sealing cracks in a wooden floor Source vodakanazer.ru
On a note! While the adhesive mass is setting in the cracks, it is better not to use the floor, since when walking on it, the boards will inevitably move, which will cause premature ejection of the filling material.
Paint combined with sawdust
In this case, they try to use exactly the paint that will subsequently be used to paint the entire surface of the floor. To prepare the mixture when sealing cracks, use one part paint and one part wood varnish. Four parts of fine sawdust are added to them.
All components are thoroughly mixed together, and then the cracks are sealed with this mixture. One pass will be enough to fill small crevices, but larger defects will have to be filled several times in a row.
Cement with broken glass
This mixture is an excellent protector against rodents that will not be able to penetrate from the underground into the home. To prepare a mixture for eliminating cracks, you will need to do the following:
- Take an unnecessary piece of glass, put it in an old pillowcase (which will no longer be useful. You can additionally cover it with several more layers of thin fabric.
- Then, using a hammer, thoroughly crush the glass into crumbs, then pour the prepared material into a separate, preferably metal container.
- Prepare a cement mortar in water in a bucket and bring it to a uniform consistency. Next add the broken glass and mix thoroughly.
- For a small number of holes between the boards, two tablespoons of cement and half a liter of water, plus 100 grams of broken glass, will be enough.
If it is not possible to use glass chips, then you can replace it with finely chopped wire. An alternative to regular wire will be small fragments of a kitchen scraper.
Preparation of cement mortar with the addition of broken glass to seal cracks in the floor Source egocolor.ru
Preparation for repair
Regardless of what material is used to seal cracks, it will only hold if preparatory procedures are carried out, namely:
- Removing dirt from crevices - you need to take a stiff brush with long bristles and walk along the crevice several times. This will help remove the damaged layer of wood, dust, dirt and bacteria that are present there. A vacuum cleaner, which is convenient for handling even the smallest cracks, will help remove fine dust.
- Disinfection - it is important that bacteria do not grow in the crevice, which will subsequently cause rotting of the wood. For this purpose, the floor at the site where the material is applied is treated with any antiseptic. Chlorhexidine and copper sulfate have proven themselves well. After treatment, you need to allow several hours to dry completely.
- Expanding the gap - if, when removing dirt, the wood begins to crumble, it is necessary to remove the entire loose layer until strong and durable fibers appear. Otherwise, the material will not have the necessary adhesion to the wood, and cracks will appear again.
During work, it is recommended to ensure that the floor has a minimum load and maximum evenness of the surface being treated. All heavy furnishings should be removed from the room during the renovation.
Expert opinion
Levin Dmitry Konstantinovich
If the cracks are large and holes are formed during their processing, the option of replacing individual boards with new ones is considered. Worn wood not only fails to perform its basic functions, but is also difficult to repair.
Video description
Securely level old floorboards
Construction foam
This material is most often used to seal joints between the wall and wooden boards on the floor. This option is also suitable for sealing large cracks and damage in the floor. Before using such a product, the surfaces of the gaps are moistened with water so that the liquid foam adheres better to the wood.
It is recommended to apply polyurethane foam in small quantities, as it tends to expand and subsequently the boards may begin to deform, which will negatively affect the plane of the floor.
Acrylic sealant
Sold in special tubes equipped with a syringe. Ideal for filling gaps between laminate and parquet joints, and eliminating spaces between dry boards.
After applying the composition, the boards will stop moving, the creaking will disappear, and it will be comfortable to move on the floor. The acrylic sealant on top can be painted with enamel or special paint for wooden floors.
Acrylic sealant for sealing cracks in wooden floors Source materik-m.ru
Putty made from paste and newspapers
With the advent of modern adhesive solutions, paste is used less and less in repairs, although it copes with the problem of sealing cracks quickly and reliably.
- Shredded newspapers are poured with boiling water and left until completely soaked.
- A dry mixture for the future paste is prepared from a glass of flour and two glasses of starch.
- The resulting mass is poured with water and boiled in a water bath for 20-30 minutes.
- The thickened mixture is added to pre-wrung newspapers, stirring until smooth.
Although the method is considered “old-fashioned”, it allows you to cope with cracks at minimal cost.
Factors influencing the appearance of cracks
And finally, to prevent cracks from appearing, you need to know the reasons for their formation. Such knowledge will also help eliminate their consequences. So, the appearance of cracks can occur due to:
- low-quality raw materials (for example, if the boards are damp and laid on the floor, over time they will begin to dry out, forming spaces);
- increased dryness in the room and the prevalence of high temperatures. Optimal indicators: humidity 45-65%, and temperature - no higher than 25 degrees;
- unsuitable material that was used for laying the floor. Ideal raw materials are species of coniferous and tropical trees, as well as oak boards;
- rodent settlements. Only in this case the cracks will be equal and uneven. The best way to eliminate such problems is to completely replace them with a new board.
There are many other reasons why cracks may appear in boards. In any case, it is better to eliminate them while they are small in size.
The main reasons for the formation of cracks in the floor
If cracks appear after laying the wooden covering, it means that the work technology was violated, during which the material dried out and a gap formed.
The formation of cracks is also promoted by:
- Activity of rodents and insects that dig holes through the wood . This reason is the most common, since in order to save money, many people ignore the need to seal the underground space. The cracks in the concrete are open gates, which pests will definitely take advantage of and turn the wooden floor into dust.
- Increased humidity and improper care of the floor - if the ventilation system in the room is broken and high levels of humidity remain, the wood will certainly absorb it. Swelling of the fibers inevitably leads to the development of microscopic bacteria that will destroy the floor.
- Lack of protective coating - when the floor is not exposed to paint and varnish products, the wood wears out faster, and any temperature changes or mechanical damage can cause cracks and large holes to form.
The sooner the problem is identified and action taken, the greater the chance of maintaining the integrity of the wooden floor. Where there are cracks, there will always be insects, mice, rats and other parasites, the proximity of which is unacceptable for humans.
Semi-liquid filling compounds for sealing cracks
Any series of construction chemicals from a Russian or foreign manufacturer includes products for woodworking. They are great for eliminating minor defects. Including:
Pigmented silicone sealants
Used for gaps up to 1 cm wide, they have good adhesion to wood. After application, the composition must be leveled with a plastic or rubber spatula. As a result of polymerization, an elastic, non-shrinking seam is formed that is resistant to water and household chemicals. A particular advantage is the durability of the plastic composition, which does not crumble or fall out due to seasonal expansion and drying of the floorboards.
Silicone sealants for wood.
The color indicated on the label may not match the real one, so ask the store for a display stand of colors. These are samples of finished products made by the manufacturer.
Acrylic sealants, paintable
A good analogue of the previous product, but with a slight difference. After application, the white paste polymerizes for 1 hour, then it can be painted. A very convenient way to repair floors coated with alkyd or oil enamel.
Tinted gypsum putties
Water- or oil-based compositions familiar to customers for gaps up to 1-2 cm wide. Apply with a spatula and compact thoroughly. The material shrinks, so re-application and subsequent leveling may be required. The putty dry surface must be sanded with sandpaper.
After drying, the finished putty becomes lighter by 1-2 tones, so when purchasing you need to choose a darker composition.
The downside of this product is its fragility. After a year, maximum two, the seam begins to crack, crumble, and absorb dirt. The material is in steady demand mainly due to price. The cost of a small package from VGT or Novbytkhim is only 50-60 rubles.
Epoxy putties
Semi-liquid, quick-hardening compositions based on polymer resin. As a rule, these are two-component compounds that, after drying, form a very strong (non-elastic) seam. The adhesion coefficient of this material to wood is unusually high, and, unlike conventional putties, the hardened mass does not crumble. Accordingly, next year you won’t have to look for something to cover up the floor defect again.
Epoxy grouts are used for narrow gaps no more than 3-7 mm wide, applied with a spatula. The shrinkage rate is low, so there is no need for re-processing.
Polyester pastes, colorless or white
Quick-hardening polymer grouts, one- or two-component, for filling gaps between boards no more than 5 mm wide.
The mixture is suitable for old floor coverings as it forms a strong, rigid joint. After application, the surface is leveled with a flexible spatula; painting in the same color as the main floor is allowed. We have listed ready-made compositions. In search of how to fill cracks in a wooden floor, craftsmen often use such means as;
There are many options for homemade putties for filling gaps; they are formed according to the “what’s at hand” principle. The most reliable and proven, according to experienced craftsmen, is a mixture of wood flour and PVA. A thick paste is prepared from these components, which is applied with a spatula and carefully leveled. After drying and sanding, the surface can be coated with a protective varnish.
