It is necessary to perform several basic tasks regarding a level and durable floor laid on joists. This means precise alignment of the logs in one horizontal plane, their reliable fastening to the base, treatment with protective compounds, plus waterproofing of the entire structure. Before you align the logs under the wooden floor, you need to select them correctly according to their cross-section. Because this indicator affects the reliability and strength of the entire structure. If the house is undergoing renovations and the joists have already been installed, it is recommended to open the floors and check the beams for their quality condition. If necessary, some of them are replaced with new ones.
The appearance on the market of new floor coverings, which required a very flat surface when laying, was supplanted by the technology of constructing floors using joists. They were replaced by screeds filled with cement-based mortars. This simplified the process of leveling the base for finishing, but this technology also had several disadvantages. One of them was that we had to wait a long time for the screed to dry. And this could take several days.
Modern technologies for the production of lumber have brought back the method of constructing a floor using joists due to the correct geometry of the products produced, through the use of dry wood. They were helped by protective impregnations that penetrated the wood, increasing its service life and preventing deformation under load. Manufacturers, using new technologies, began to produce improved, inexpensive materials for flooring joists. This is not only plywood, I would like to mention OSB boards. With the help of durable and smooth sheet and panel materials, it became possible to lay laminate, linoleum, and ceramic tiles on the floor along joists.
We must also pay tribute to the fact that wooden construction has again become fashionable. Increasingly, customers give their preference to the construction of wooden houses. And in such houses, wooden floors look harmonious. Although floor logs are used not only in wooden structures. Today they are also used in city apartments, especially on the ground floor, when the task is to insulate the floors.
But this design also has its drawbacks.
- Even wood floors treated with fire retardants are still flammable structures.
- It is not possible to install a heated floor heating system in them.
- When installing joists in apartments, be prepared for the fact that the ceiling height will decrease.
Briefly about lags
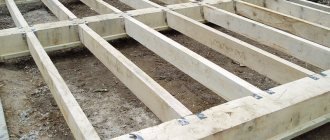
Logs are transverse or longitudinal beams laid on concrete. Floorboards are attached to them, resulting in a floor that is level on a horizontal plane, which can differ only in the way the beams are fixed.
Laying joists on a concrete floor allows you to:
- create a flat surface for a wooden floor.
- transfer the load evenly to the load-bearing elements of the building (walls or foundation).
- leave a void between the base and the floor covering. Thanks to this, it is possible to well insulate the floor, protect the room from noise and lay various communications in the floor.
What material is used for joists?
Logs are made from a variety of materials (reinforced concrete, iron, plastic), but the most popular of them for many centuries has been wood. Iron channels and reinforced concrete elements are rarely used. High-strength logs can significantly increase the load-bearing capacity of the floor. More often, such elements are installed in industrial buildings. Wooden logs are the most common, so you need to disassemble them in detail.
They come in the form:
- square or rectangular beams;
- stacked and tied boards;
- adjustable lags.
What should the cross section of the log be?
The strength of this part of the floor depends on the material of manufacture and the accuracy of load calculations. When choosing the size of the timber, the maximum permissible load on the floor is taken as a basis. For living rooms, this figure is 300 kg per 1 m2. For non-residential premises it is individual in each specific case, so before purchasing the material you need to calculate this indicator.
Basically, timber with a profile aspect ratio of 1.5 x 2 is laid under the floorboard.
The height of the beams must also be selected taking into account the thickness of the insulation. If iron and concrete elements are installed, their cross-section may be smaller. This is due to the fact that these materials are able to withstand high loads for a long time.
Step width between joists
The pitch between the joists is selected taking into account the thickness of the floorboard. The thicker it is, the larger the step between the bars is allowed. In addition, a thick board sag less under loads.
The table below allows you to quickly select the distances between the bars.
You can also resort to the following rule: when the width of the logs increases by 5 mm, their pitch increases by 10 cm.
When installing plywood, the cross-section of the joist is calculated differently. This is due to the fact that it has great bending strength. With a thickness of sheet material of 1.5-1.8 cm, it is fashionable to place logs against each other at a distance of up to 40 cm. It is necessary to install the beams so that the sheets are fixed at the edges and in the middle. Moreover, the edges of the sheets should fit half the width of the beam.
Tools
To install the beams, the following tools are required:
- electric drill or hammer drill;
- screwdrivers or screwdriver;
- electric circular saw or simple hacksaw for wood;
- plane;
- hammer;
- tape measure and level;
- fasteners.
Other tools may be required.
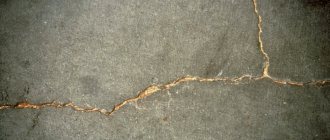
Base made of concrete and reinforced concrete (laying on an uneven base)
Before installing the logs, the uneven concrete floor is leveled with a cement screed. This technology allows you to make a smooth and reliable base for parquet, laminate or floor tiles, as well as well insulate the floor and protect the room from external noise.
For most floor coverings, a spacing between joists of 60 cm is suitable, but floor tiles require cells measuring 30x30 cm because they are very fragile.
Reinforcing mesh in the screed and spacers between the beams increase the rigidity of the floor. Thermal insulation material can be placed in the resulting cells.
What is the problem
The words “level a wooden floor” can have different meanings. Here's what they might mean:
When people talk about wooden floors, they imagine something like this:
- bring to a level a coating that generally has some slope;
- straighten bent boards, preparing the floor for painting or varnishing;
- prepare the base for laying the flooring.
The real picture often looks something like this.
Sometimes the task is multi-purpose. When you need to do everything described at once. Sometimes the goal is to solve individual problems. We will describe several solution options for each case, and determine a comprehensive solution for yourself.
Fixation methods
Basically, four fastening methods are used to fix joists on a concrete floor. Therefore, if you do not know how to attach joists to a concrete floor, then after studying all these methods you will understand this issue.
Fixation with self-tapping screws
This method is considered simple, but it is not suitable for all cases.
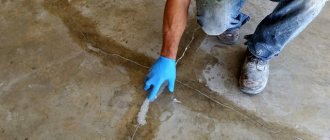
- First you need to prepare the concrete surface. To do this, it is cleared of debris (it is allowed to use a vacuum cleaner). Then they repair cracks, chips and other defects with cement mortar or polyurethane foam.
- Next, in the logs (treated with antiseptics) you need to drill holes with a drill to install plastic dowels. Then you need to drill counter holes in the concrete using a hammer drill.
- Then the dowels are driven into the concrete with hammer blows, and then self-tapping screws are screwed into them with a screwdriver. Moreover, the head of the screw is driven into the hole 2-3 cm.
Fixation with anchors
Anchors securely fix the beams to the concrete, so this method is the most reliable. In addition, such fasteners help to restrain the deformation of wooden logs if they are not dried well. But the boards laid on them can sag, so it is necessary to install spacers more often.
- First, you also need to prepare the concrete floor (remove debris from it and repair all defects with mortar).
- After which it is necessary to make through holes in the timber (treated with antiseptics) with an electric drill.
- Next, you need to drill holes in the concrete opposite each hole with a hammer drill.
- Then the anchors are mounted on a concrete base and tightened with keys. The main thing here is not to overtighten the bolt, because this will cause the beam to bend. This is especially true for those places where there is a gap.
Before installing the anchors, trenches (small recesses) are made in the joists to hide the bolt heads.
Anchors need to be installed every 600-1000 mm. This distance is selected taking into account the partial immersion of the anchors in concrete (approximately 60 mm). Many people fix the beams to the concrete with 4-5 anchors ⌀ 10 mm.
Reviews
Nikolai Petrovich, 58 years old, Krasnoyarsk I was thinking about how to build floors on wooden blocks in an extension.
Our climate is humid, so it is hardly possible to get by without an underground that would not operate here. I made holes in the brick foundation for vents - this is a ventilation system.
But here I encountered a difficulty. The bricks were laid so-so unevenly, so the laid wood blocks even visually stood crooked on it. I didn’t know how to carry out the leveling, so I went my own way.
I laid a 50 mm thick board along the entire foundation perimeter. I fastened them all together with metal plates with holes.
There are two plates for all joints. And so I tried to level these boards by placing pieces of cut boards of small thickness under them. It turned out to be problematic, but after suffering for 2 whole days, I solved the problem.
And then I easily installed wood blocks on the boards. Surely it would be necessary to level the wood blocks themselves as you described.
I would have done it faster. Ivan, 31 years old, Podolsk
We leveled the beams. Logs were used as them.
This process cannot be carried out alone without assistants. The logs are heavy; two assistants had to lift each end. And since we lifted each end a couple of times, we got tired quickly.
of the transverse beams themselves
. Especially for this we used 70x50 timber. They were simply attached to the beams with self-drilling screws.
Tatyana, 40 years old, Perm Leveling the floor joists turned out to be very difficult.
The husband made the floors in the summer kitchen himself. I was tormented myself; I was constantly being torn away from my work.
Either give it to him, then hold it, then pick it up. In the end, the padded floor turned out to be uneven. I read your article and showed it to my husband, it turns out he was aligning the wood blocks alternately, laying one next to the other.
But it turns out that it was necessary to first align the two walls located opposite each other. In other words, a small difference between the first two resulted in a strong difference at the very end.
Fixation with iron corners
It is difficult to work with high logs (100 mm and above), so they are fixed to the concrete with iron corners. One shelf is attached to the beams with self-tapping screws, and the other is fixed to the concrete with dowels and nails. The main thing is that the entire load goes to the spacers, and not to the corners, since their main function is to fix the position of the beam.
- First, screw the corner to the joists with self-tapping screws, which need to be deepened into the wood by 3 cm.
- Next, it should be fixed in concrete with dowels.
Adjustable joists
This fastening of the joists to the concrete floor involves the installation of rectangular supports under the beams, which are secured to the base with the help of four dowels. In the center of this fastener there is a pin that secures the joist to the concrete. The nuts placed under the beams allow you to accurately set the height of the logs, and the nuts located on top allow you to reliably fix their position. The pitch of supports installed under the beams depends on the size of the profile of the beams, but experts advise not to make it longer than 1 m. This type of floor sheathing fastening is not in demand due to its high cost.
Methods for leveling wooden floors in apartments and private houses
After determining the nature and size of the defects, you can begin to correct them. For local unevenness the following are used:
- sharpening or sanding protruding parts of boards using tools;
- putty with ready-made or homemade mixtures intended for wooden surfaces;
- laying sheets of plywood, OSB on top;
- self-leveling polymer floors.
To level out the general slope or very large fluctuations in the height of the boards, the following are used:
- dry prefabricated screed without opening the floor;
- wet screed using a waterproofing layer
- complete replacement of the structure including joists.
The last option is the most radical. It is recommended if the boards have dried out, rotted, and worn-out joists can no longer withstand the loads.
Fixation to concrete pillars
This method involves fixing beams to concrete pillars, using similar fasteners, but designed specifically for pillars.
- The pillars must be covered in advance with a waterproofing layer (bitumen or mastic is used). Their upper part can be protected from moisture with roofing felt. You need to pre-drill holes in the posts and beams.
- Next, you need to drive dowels or anchor spacers into them.
- Then the beam is attached to the post with self-tapping screws 2-3 times longer than the width of the spacer.
- The timber is attached to the posts using iron plates with screws. They are fixed to the posts with dowels-nails, and to the beams with screws.
Thanks to the study of all these fastening methods, the question of how to install joists on a concrete floor disappears by itself.
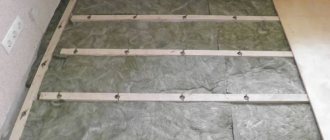
How to measure unevenness
Differences in the floor covering are determined during an external inspection. The most commonly used building rule is a wide aluminum strip with a perfectly straight edge. It is enough to install the device on the surface - and you can see the cracks and measure their height.
Using the rule, it is impossible to determine the collapse of the floor when, despite visual evenness, the zero marks in different parts of the room do not coincide. This defect appears if the logs are not positioned strictly horizontally.
You can determine the blockage using a bubble level, but the most accurate result is given by a laser plane builder. It projects the horizontal line onto the walls using laser beams, and you can immediately find the difference between the heights of all points on the surface.
Installation process and features
Properly selected building materials are the key to successful floor installation. Logs are mainly made from wood of various species, with a moisture content of no more than 18%. After purchasing the bars, you need to let them acclimatize to room temperature for several days. The logs bent during this time are rejected. Before laying, they are treated with an antiseptic composition to prevent mold and pests from appearing on them.
- Preparing the concrete base. It is cleared of debris, cracks are sealed and irregularities are removed.
- The tree must be protected from moisture. Therefore, the beams are covered with rolled waterproofing materials, mastics and treated with impregnating compounds.
- It is necessary to prepare all the fasteners and substrates required for installation of the joists on the concrete floor. They must have high rigidity so that they do not sag under loads and gaps do not appear between the joists and the base. Thin boards, plywood and plastic substrates, which are sold in specialized stores, are suitable for this. They are slipped under the joists and securely fixed.
- The logs must be placed across the light coming from the windows. Wood often becomes deformed due to temperature changes, but thanks to this installation it heats up evenly. In rooms without windows, the bars must be placed across the direction of movement.
- The pitch of the beams is selected based on the thickness of the floorboard. In this case, the rule is used: the thicker the board, the larger the step between the lags can be chosen. On average, it varies in the range of 40-50 cm. The logs located near the walls are installed 20-30 mm from the wall, and the rest, taking into account the dimensions of the room.
- After assembling the grating under the floor, it must be accurately installed horizontally. The support for the floor must be perfectly level, so many experts level the floor with a screed if the height of the room is sufficient for this. The underlay for the joists also allows you to level the floor.
- For good shock absorption and increased protection from moisture, logs are placed on roofing felt and other similar materials. These materials should not be soft, because they will sag under the influence of loads, which will lead to the formation of gaps. As a result, the floor will creak while walking.
Leveling with mixtures
Filling wooden bases with liquid compositions based on gypsum or cement is not often used. Such mixtures take a long time to dry, are prone to cracking, and also weigh quite a lot. If the floors are worn out, high loads can cause them to quickly deteriorate.
It is recommended to use only mixtures intended for working with wood, chipboard, and plywood. They contain substances that prevent fibers from swelling and rotting. If the instructions do not contain appropriate instructions, the composition can only be used in conjunction with waterproofing measures.
If cement-sand mixtures are used, the layer thickness should not exceed 7 cm. Before starting work, you need to calculate the load and determine whether the supporting structures will withstand them. The weight of 1 sq.m of wet screed 1 cm thick is 18 kg. And although it will decrease as it dries, this will not happen immediately, so the maximum load value is used for the calculation.
The base for laying wet mixtures is pre-prepared:
- cleared;
- fragile elements are removed and replaced with new ones;
- large gaps are filled with putty;
- treated with a primer with antiseptic components.
The next stage is waterproofing. A dense film with a thickness of at least 150 microns is laid on the surface, extending onto the walls. If there are joints, they need to be sealed with tape. Damper tape is glued to the walls around the perimeter of the room.
Waterproofing agents and wood impregnating agents can also be used as waterproofing. The main requirement is that after treatment the surface must be clean, without oil or bitumen stains.
Filling is carried out according to the manufacturer's instructions. The mixtures are mixed with water in the specified proportion and distributed evenly over the surface. Self-leveling compounds must be rolled with a needle roller to remove air bubbles. For uniform drying, it is recommended to cover the entire area with film. The period for complete hardening of various levelers is from 7 to 28 days, but foot traffic is allowed after 1-3 days.
Homemade mixtures
Do-it-yourself compounds are often used to fill cracks at home. They are flexible, hold up well, and the components are inexpensive.
The first recipe is classic, used not only for floors, but also for furniture. PVA glue is added to wood dust or sawdust until it reaches the consistency of soft dough. The resulting mixture fills cracks and crevices. After hardening, which lasts from 3 to 12 hours, the surface is sanded. If large defects need to be leveled, sawdust is used. For small imperfections, wood dust is better.
The second composition is used to completely level the wooden floor. Dry gypsum putty is used as a basis, but it is sealed not with water, but with drying oil. The mixture is applied in an even layer to the surface, and after drying, the entire area is sanded.
Insulation and sound insulation
Soundproofing and insulating floors on beams is quite simple. For example, you can cut TECHNONICOL into strips and lay it between the beams. In this case, the self-adhesive side section that overlaps the beam must be rolled with a roller. For additional insulation of the floor, you can place mineral wool on top of the TECHNONICOL. This sound insulation allows you to protect your living space from noisy neighbors downstairs.
The height should not exceed the bars. In those places where it is higher than the log, its thickness must be reduced. To do this, the cotton wool needs to be cut lengthwise with a knife. If the result is rags, this will not affect the properties of the material.
Further floor arrangement
Further installation of the floor along the joists involves two more stages of work.
The first stage is laying the finished floor
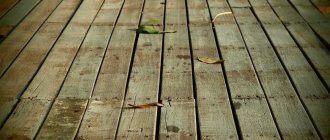
After installing the logs, thermal insulation, waterproofing and sound insulation, the finished floor is laid. They begin to lay it from the corner of the room. The first row of boards is placed tongue-and-groove against the wall, with a gap of 10 mm between the wall and the boards. This will compensate for the deformation of wood that appears from temperature changes and changes in humidity levels.
The next row is placed offset to the previous one by approximately 2 lags. To lay the boards tightly, apply a piece of wood to the ends of the board being attached and hit it with a hammer.
The boards are fastened to the joists with screws, the heads of which are driven into the boards.
After laying the boards, the expansion joints are covered with plinths.
Expert advice:
- lay the floor on a concrete base after leveling all the joists along the horizontal plane;
- boards must be attached to all beams;
- their size is chosen so that the joints between them are in the middle of the lag.
- To prevent them from cracking, it is necessary to make small-diameter holes in them for self-tapping screws. For the screw head it is necessary to make a countersunk hole, for drilling which you need to use a drill of a larger diameter.
- Instead of a plinth, you can install profiled strips - fillets.
- holes for pipes need to be made 8-10 mm larger.
To increase the accuracy of installation, experts advise that before fastening the boards, tighten them together with the staples of a construction stapler.
The second stage is the final finishing of the floor
This is the most critical stage of work on arranging a floor on a concrete base on joists. The appearance of the floor and room depends on the choice of finishing material. Listed below are the main types of final floor finishing.
Parquet
Parquet consists of solid wooden planks from which the floor covering is laid. It makes the floor very attractive. This flooring has a long service life - more than 30 years. In addition, part of the parquet can be replaced at any time.
Laying parquet requires a lot of experience, so it is difficult for an ordinary person to lay it falsely, since the technology for laying parquet is complex and labor-intensive. In addition, this coating is expensive. During operation, parquet requires careful handling, as it is scratched and afraid of moisture. To keep this floor always beautiful, it must be regularly polished and varnished.
Linoleum
This floor finish is very popular today. This is due to the low cost, practicality and ease of installation of this flooring material. You can lay linoleum indoors yourself, because this does not require special knowledge and skills. A floor covered with linoleum is resistant to moisture and aggressive liquids, while it looks beautiful.
Linoleum is easy to clean and sweep. Thanks to the wide variety of textures and colors, it can be matched to almost any color of furniture and wallpaper.
Linoleum can be laid on top of boards, plywood or concrete. Thick linoleum with a base of more than 3 mm can hide small unevenness in the floor and seams of sheet materials.
The disadvantage of linoleum is its low maintainability. If a hole appears on it, then it will not be possible to seal it and make this place invisible.
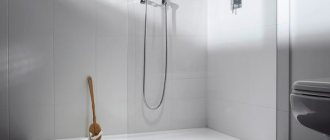
Laminate
This flooring is quite expensive. In appearance and performance characteristics, this material is similar to parquet. It is easy to install and does not require special care. The choice of laminate on the finishing materials market is quite extensive, so everyone can choose the option that suits them.
Laminate is very susceptible to moisture. In terms of price, it is comparable to the cost of high-quality linoleum, but it can be 3 to 7 times more expensive. Laminate floors look elegant.
Fiberboard
Fiberboard is rarely used today for finishing floors. This material is mainly used to level the floor for the installation of other floor coverings. The sheets are secured to the floor with small nails or self-tapping screws. After fixing, the fiberboard is painted in 2–3 layers. This material is also afraid of moisture, because it swells under its influence.
Carpet
This floor covering looks beautiful and additionally insulates the floor. At the same time, carpet quickly loses its attractiveness (the pile wears out and gets worn out), which is why it is used only in bedrooms and children's rooms, where people rarely walk.
It is difficult to clean and quickly absorbs moisture. Drying the carpet without dismantling it is extremely difficult. In terms of installation, the material is convenient; it is simply rolled out on the floor and trimmed where needed.
How to level a wooden floor without tearing it down: do-it-yourself dry screed
When additional thermal insulation is needed, the best solution is to install a dry screed, or “floating floor”:
- Insulation is laid on old boards, and damper tape is placed along the walls.
- Rack beacons are installed.
- A layer of loose insulation (expanded clay, vermiculite, etc.) is poured.
- The backfill is leveled between the beacons.
- 1-2 layers of sheet materials are placed on top, which are fastened together with self-tapping screws with the joints in the rows offset by 1/3-1/2 the width.
Laminate, linoleum and other flooring can be laid over a “floating” screed. Its advantages are good sound insulation, which is ensured by the absence of contact between the floor and walls. Impact noise transmitted between structures is almost completely damped.