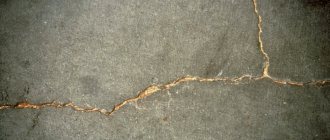
When carrying out a major overhaul of a long-used home with concrete floors, one very often encounters the need to restore the integrity of these seemingly “indestructible” coatings. Unfortunately, they are also subject to aging and gradual destruction. Over a long period of its service, a screed once poured over a floor slab can, under the influence of deforming forces (associated, for example, with building shrinkage, seismic points, operational static and dynamic loads), become covered with a network of cracks and begin to crumble. Concrete can lose its strength over time, especially if used in unfavorable conditions where there are opportunities for increased erosion.
DIY concrete floor repair
Bringing dilapidated concrete floors into “working” condition can be done in different ways, depending on the degree and nature of the damage. And we must immediately note that this is not such a simple task as it might seem at first glance. There are even situations when it is much easier to completely dismantle the old screed and pour in a new one rather than bother with restoration attempts.
So, let’s figure out how to repair concrete floors with your own hands: from the main reasons for the coating to become unusable to possible technologies for its restoration at home.
Repairing cracks and potholes in concrete floors
When replacing the floor covering, apartment owners often have to deal with the need to repair the concrete floor, which can be either a concrete screed or the interfloor floor slab itself. Despite the fact that concrete is a durable and reliable material, under the influence of various factors, potholes and cracks can appear on it. To prevent further destruction, timely measures are necessary, because the service life of the finished floor depends on the condition of the concrete base. Let's find out how to repair a concrete floor using special mixtures for repairing concrete floors.
Causes of defects in concrete
Defects on a concrete floor can form for various reasons, which are primarily associated with violations in the process of its arrangement.
Cracks often appear due to the absence, untimely cutting or incorrect calculation of the thickness of joints in concrete floors, designed to prevent stress on the concrete during thermal expansion and shrinkage. A correctly made temperature-shrinkable seam will avoid many problems.
Other reasons for the appearance of cracks include:
Defects can occur even with quality work done. Any coating is subject to natural wear and tear and is negatively affected by excess moisture. Potholes are caused by physical forces. The influence of external factors on the concrete floor cannot be ruled out. The weak point is the junction of the wall and the floor; cracks often appear there.
It is necessary to determine the type of damage. This will allow you to draw up a work plan and select the right material. The following types are often encountered:
Repairs should not be delayed for a long time. The size of the defects may gradually increase, the concrete will begin to crumble and come off in pieces, which will complicate the repair of problem areas.
Application practice
Concrete structures are destroyed if the proportions of substances are not observed, manufacturing technology is violated, due to mechanical deformations, or exposure to the external environment.
The use of special compounds is required in the following cases:
- chips;
- recesses;
- holes exposing reinforcement;
- cracks larger than 0.5 mm;
- intensive dust formation;
- corrosion process in the foundation (deep or surface);
- defects larger than 0.3 mm.
Selecting a mixture for repairing a concrete surface
Before you start repairing the floor in an apartment with your own hands, you need to prepare a mixture for restoring concrete surfaces and structures. They are presented in large quantities in construction stores. In order to choose the right brand of mixture, you need to determine the degree of damage to the concrete surface:
The purpose of the repair mixture must be indicated on the packaging. Such manufacturers of mixtures for restoring concrete surfaces as Emaco, Birss, Ceresit, and Bars deserve attention.
You can use universal repair mixtures, such as Ivsil Render.
Since the price of special thixotropic compositions containing reinforcing microfibers and polymers is quite high, for a small amount of work the mixture can be prepared independently. To do this, take 1 part PVA glue and mix it with 4 parts water. Using this solution, using a construction mixer or a special attachment on a drill, mix the sand-cement mixture in a ratio of 1:3.
Procedure for repair work
Repairing damage found in structures that have been in use for a long time is carried out according to the following scheme:
- determine the width, depth and nature of the gap, select the appropriate composition for repairing and protecting concrete;
- open the gap, remove crumbled parts of the material, dust, and, if necessary, clean the reinforcement from corrosion;
- the cavity is cleaned with an aqueous solution and a brush (sponge, syringe), followed by removal of excess moisture;
- “expand” small cracks until they can be filled, prepare large ones for strengthening. To do this, grooves are made for laying reinforcing wire (diameter of at least 4 mm) across the gap;
- the reinforcement protruding after cleaning the cavity is treated with a special compound to prevent further corrosion;
- coating the surface to be repaired with a primer to improve the adhesion of the repair mixture to the existing composition;
- direct sealing. For extensive and deep damage, it is performed in several stages. If gradual restoration is not possible, standard measures are used to prevent premature drying of the repair composition. How to protect concrete outdoors from destruction to create the required curing conditions is decided depending on the scope of work and weather conditions.
Additionally, you can use a protective coating for concrete to prevent its further destruction and the formation of new damage. As a main function, such coatings provide waterproofing.
There are different types of coatings.
Rubber coating for concrete is one of the most difficult in terms of preparing the solution and using special equipment and equipment for application, but it has excellent performance characteristics and a high degree of waterproofing. Restoration work with rubber coating is especially appropriate for structures that are constantly exposed to atmospheric and ground moisture, including foundations.
Filling potholes in a concrete floor
Repairing concrete floors begins with widening and deepening the pothole around the perimeter. It is better to use a grinder with a diamond blade for this.
The depth of the pothole matters. If it is more than 5–6 cm, then the composition is poured in several layers. The maximum layer thickness is 2 cm.
It is recommended to carry out work wearing a respirator, safety glasses and gloves. Windows must be open during renovation. The floor can be coated with concrete paint, which will provide additional protection. It is selected specifically for residential premises. A floor repaired in this way will last a long time.
How to choose?
When selecting products, the following parameters must be taken into account:
- type of repair required;
- extent of damage;
- permissible loads on the base;
- location (indoor or outdoor);
- safety, no toxic particles;
- thickness of the mass laying layer;
- volume of raw materials;
- level of protection against ultraviolet radiation;
- shrinkage characteristics;
- resistance to chemicals and sub-zero temperatures.
When choosing the type of product, it is important to consider the following recommendations from experts:
- it is better to strengthen panels located vertically with thixtotropic mixtures, since the products have a thick consistency and hold securely during operation;
- compositions for leveling the surface must have a high adhesion rate;
- The setting period of the mass should be short.
Rules for repairing cracks
The process for sealing cracks in a concrete floor varies depending on their size.
In cases where cutting is accompanied by heavy dusting, which indicates that the concrete is weakened, it is necessary to use only special thixotropic compounds.
Repairing cracks in concrete floors should not be put off for too long. If they are deformable, then they need to be treated with special attention. You can determine their type using strips of paper. Several months before repairs, they are glued to cracks in the concrete floor. With shrinkage cracks, the paper will remain intact; with deformation cracks, the strips will break, which indicates their expansion.
Markers are thin, smooth metal rods. You can make them yourself from spokes from a bicycle wheel.
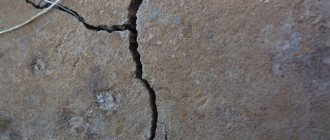
Some people notice small cobweb-like cracks on the floor, as in the next photo. Over time they may become wider. When the concrete weakens in this part, they are cleaned and covered with soil. To seal, you can prepare your own composition or use a store-bought one.
In order for the furniture to stand level after repairing the concrete floor in the apartment, it is necessary to use a building level throughout the entire process.
Finishing the wall after repairing the damage
Excess foam should be removed so that a small depression remains at the seam site. It will be filled with a small layer of putty or plaster using a spatula and brought to the same level as the wall. After the layer of mortar has dried, not a trace will remain of the gap. The top of the wall can be finished in all sorts of ways - attaching a plinth, painting, adding wallpaper, finishing with tiles, plastic, wood, and so on.
vote
Article rating
How to repair cracks in a concrete floor - just about the sore point
Concrete surfaces have gained popularity due to their great strength, which is why concrete is used in many areas of construction. However, even such a durable material can crack and split if not properly maintained and other factors occur.
How to repair cracks in a concrete floor, and how to prevent their occurrence, let’s take a closer look at this pressing issue from all sides.
Causes of cracks in the floor
Even if the concrete surface laying technique has been followed, cracks and chips may appear on it over time. The depth of such defects may indicate errors made during curing of the decked mortar. Thus, small cracks between two tiles most often appear due to temperature changes.
When, in addition to a crack, there is a difference in levels between the slabs, the problem is hidden in the “frame” of the floor, namely, incorrectly laid reinforcement. If a crack along its length is accompanied by changes in level, restoration of the damaged area may be more difficult than if the cracks occurred as a result of a sharp change in temperature in the room.
A clear classification of the causes of cracks in the floor will help you understand this issue in more detail.
Error in recipe when pouring
The reason that most often leads to the appearance of unevenness on a concrete surface is a violation of the ratio of the number of components included in the concrete solution. Namely, excess water content.
Yes, the mixture became more plastic, but during hydration, the evaporation of excess moisture caused defects. Typically, such cracks are shallow and have a capillary nature.
Note! Cracks in a concrete floor can, of course, be sealed, but it is worth keeping in mind that the brand of mortar will not correspond to the planned one.
Inaccuracies during concrete formwork can also lead to unevenness and chipping. We must not forget about the characteristics of the soil that covers your area: incorrect calculations of this factor also lead to a violation of the integrity of the floor. Pouring mortar without precise calculation can lead to a difference in surface height.
Incorrect location of reinforcing elements
It is necessary to correctly carry out calculations for laying concrete in a certain area. When making calculations, rely on SNiP standards. Excessive load on the coating and the lack of reinforcement that underlies it also have a detrimental effect on this solution.
When the reinforcement in a concrete solution rusts, the volume of metal components increases, as a result of which they break through the floor surface. This in turn leads to the formation of deep cracks.
Violation of concrete curing technology
Concrete, like any other substance, needs the right curing conditions. This helps maintain the normal consistency of the solution. Thus, laying the mixture in very hot weather is fraught with negative consequences for the floor, because the remaining moisture on its surface evaporates too quickly.
This leads to overdrying of the coating, the appearance of defects and excess dust, characteristic of an excessive increase in room temperature. Therefore, it is recommended to water the freshly laid base with plenty of water every day for 5-7 days from the moment of pouring.
If the concrete was in conditions of high humidity, or waterproofing was not done, the material may also become covered with cracks and begin to “dust.”
Causes
First, let's find out where a hole in the floor can come from.
Agree that the situation when the surface suddenly collapses under your feet is quite unlikely.
- Falling heavy objects . This is a very real situation for weightlifting halls and industrial premises with wooden flooring (which, however, is rather an exception).
Note: platforms in gyms are usually assembled from timber, secured with staples. The platform is laid directly on the screed and covered with a sheet of hard rubber. In general, if a fallen barbell breaks through the floor, this indicates either a gross violation of building codes, or poor discipline of athletes training with heavy weights outside the platform.
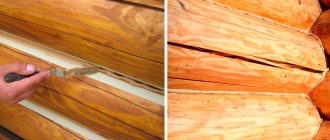
- Rotten boards . The picture is typical for houses built more than half a century ago. Harmless antiseptics were not yet available at that time, and creosote and impregnations based on petroleum products were not used in residential premises.
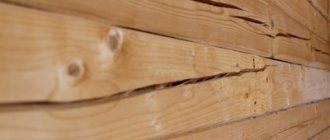
- Dried boards . Actually, in this case, what we have in front of us is not a hole in the floor, but a gap.
Cracks in concrete - leave or repair?
Filling potholes in concrete floors, and even small cracks, requires additional labor and financial costs. It’s especially unfortunate to waste time on such work when deadlines are tight. And such a period in construction, even if it is done on its own, rarely passes.
Therefore, a reasonable question arises: is it generally necessary to seal holes in a concrete floor? This is not a finishing layer, but just a rough one, which will still be covered with several layers of coating.
Important: Moisture is the worst enemy of any material, and especially concrete. It “kills” it slowly but surely, penetrating into every crack and corroding the reinforcement. Even if these changes are not noticeable in a year or two, in the future you can pay heavily for the days saved during construction.
Therefore, any normal master will not only advise you to get rid of any defects on the base, but will also tell you how to repair a crack in a concrete floor of any complexity with your own hands.
Preparation of repair mixture for cement screed
Today, the construction market has a huge selection of mixtures designed for restoring cement screeds.
These compounds can have a variety of bases, including polyurethane and synthetic resins. Many of them are used to repair industrial floors. But in an ordinary apartment, the use of such mixtures is not always rational, given their cost. For simple screed repairs at home, a mixture that you can make yourself from available and inexpensive materials is quite suitable. It consists of PVA glue, water, sand and cement. To prepare a repair mortar, you must first dilute PVA glue in water in a ratio of 1:3, and then add a dry mixture of cement and sand 3:1 to the resulting emulsion.
The composition should be mixed at minimum speed for 5 minutes using an electric drill with a mixer attachment. After completing the process, it is recommended to immediately immerse the mixer in water poured into a bucket and rinse thoroughly during the operating mode of the instrument.
If the cracks in the screed are deep, this composition will not work. To repair it in this case, you will have to buy a special thixotropic liquid for concrete. Store-bought ready-made mixtures are mainly mixed with water, while home-made compositions are mixed with an adhesive suspension. Ready-made mixtures can be replaced with tile adhesive.
How to repair cracks in a concrete floor
To correct uneven floors, there are methods that are used most often in the household and separately in industrial use. These methods differ from each other in the surface area on which a certain mixture is applied, the composition of this mixture and other characteristics.
Despite this, sealing cracks in concrete floors with different compositions follows the same technology, and the differences are insignificant. Let us list the main characteristics of methods for correcting floor damage.
Industrial method
You can not only repair defects in the foundation yourself, but also hire specialists who will competently carry out all the work. Of course, the price for their services will be considerable. They are usually used for large damages in significant areas - shopping centers, industrial facilities.
It can be produced in several ways:
Note: Injection is most often carried out in cases where it is necessary to correct recesses on the surface of the wall.
The repair composition involves treating the defective surface with a mixture that includes cement, sand and polymer additions. After the applied layer has dried, an additional polyurethane sealant is applied on top.
Of course, thinking about how to repair potholes in a concrete floor using shotcrete yourself is not a fruitful pastime. Such work is carried out with special expensive equipment, and the process itself requires the knowledge of a specialist in this field.
Home repair methods
If the foundation is damaged on a small scale, it is not necessary to call a team of concrete workers; you can deal with this problem yourself using different compounds:
How to fill holes in a concrete floor? It is best to use pieces of reinforcement for filling, or to make real concrete by adding crushed stone to the cement-sand composition. This will only strengthen the “patch”, preventing it from cracking.
Technology for repairing holes in concrete ceilings
A small hole in the ceiling does not interfere with the installation of a suspended or suspended ceiling structure. But even when installing such coverings, holes and cracks in the base must be sealed, because through them the room loses heat. If a tension fabric is installed, air is forced through the holes into the ceiling space, which causes the tension surface to bulge.
When choosing a mixture for filling holes, take into account the size of the defect, its depth and location. Usually these defects are eliminated with a cement-sand mixture, polyurethane foam or starting putty. The latter solution is used most often.
All putties are divided into the following types according to their composition:
- Cement compositions are suitable for repairing defects in concrete floors from the inside or outside. These putties are very durable and can withstand moisture, but they have a long drying period. The repaired area often cracks due to the low ductility of the mortar. Therefore, after applying cement putty, the area is covered with a finishing mixture.
- If you don’t know how to repair a large hole in the ceiling, then a gypsum compound is suitable for this. It is characterized by plasticity, so it does not crack even when applied in a layer of considerable thickness. However, this composition can only be used in a room with heating and a normal microclimate.
- Acrylic putties can withstand high humidity conditions and provide a smooth and even finish. They are not suitable for filling deep holes because they are applied only in a thin layer and are used for finishing leveling.
Important! Minor defects are eliminated with acrylic putty mixtures, and deep holes are repaired with compositions based on cement and gypsum.
Through holes are sealed with polyurethane foam, because putty will not provide the required tightness. You can use either one- or two-component foam, but the latter is used only in conjunction with a mixing gun. The foam gives good adhesion to the concrete base, expands greatly, and therefore seals all holes and cracks well. Polyurethane foam is suitable for filling deep and narrow holes because it is supplied from a pressurized container. However, over time it shrinks.
A mixture of cement and sand is also suitable for repairing concrete ceilings. The solution is suitable for use in unheated areas, it is very strong, durable and does not shrink. If you add antiseptic substances to such a solution, the surface will be reliably protected from mold.
What tools and materials will be needed
For work you will need the following devices, tools and materials:
- silicone sealant;
- ladder;
- brush;
- paint brush;
- primer;
- serpyanka;
- a small piece of cotton fabric;
- polyethylene film;
- vacuum cleaner;
- sandpaper;
- sander;
- screwdriver;
- kitchen knife or nail;
- deep penetrating primer.
Depending on the size of the defect and location, select the necessary tools and materials from the list above. Now let's talk about how to cover up a hole in the ceiling.
Joint of two surfaces
If there are voids at the junction of the ceiling and walls, they are eliminated with plaster or cement-based mortar. But even after repairs, cracks will form because the mortar slowly breaks down and spills out of the seam.
Holes at the junction of two surfaces are sealed as follows:
- Using a screwdriver, a kitchen knife or a long nail, we widen the seam where the defect appears. Its width should be within 0.5-1 cm.
- We clean the seam from dust using a brush with stiff bristles or a vacuum cleaner.
- Using a paint brush with a flat working surface, we treat the walls in the hole with a deep penetration solution, for example, the Betonkontakt category.
- Depending on the depth of the gap, we fill it with acrylic or gypsum putty. Next, the serpyanka is pressed into the uncured mortar so that an even joint between the wall and the ceiling is formed. Another thin layer of mortar is laid on top of the reinforcing tape.
- After the putty mixture has dried, the repair area is sanded with sandpaper.
Areas with fallen plaster
To repair a section of ceiling with fallen plaster, use the following technology:
- Often the plaster peels off due to mold damage to the base, so first the adjacent areas of the plaster that have been affected by mold must also be knocked down. Since the fungus does not immediately grow on the surface, but is present in the structure of the material for some time, areas of clean plaster are removed within a radius of 15 cm around the affected area.
- After this, the concrete ceiling is impregnated two or three times with an antiseptic solution. You can use chlorine bleach instead.
- Then the defect site and adjacent areas are covered with a primer. It will strengthen the structure of the material and provide better adhesion to the solution.
- The hole in the plaster layer is filled with putty layer by layer. In this case, the previous layer must dry before applying the next one.
- After the putty mixture has dried, the area is sanded and treated twice with a strengthening solution.
Crack between floor panels
On any concrete ceiling, cracks and holes appear at the seams between the floor slabs sooner or later.
This area is repaired as follows:
- Using a spatula and hammer, knock out the cement composition from the seam. It is easily removed piece by piece after grinding.
- Using a stiff brush or a regular vacuum cleaner, the recess is cleaned of debris and dust. Then this place is treated with a primer in two layers. To apply the solution, use a flat brush.
- The gap is filled with a gypsum or cement based solution. The sickle is pressed into it from above and covered with another thin layer of putty. The surface is leveled with a spatula.
- After the solution has dried, the area is sanded and treated with a suitable impregnation.
If there are small gaps between the slabs, then the plaster in this place is simply knocked off. The recess is treated with a solution of the Betonkontakt type. It should cover adjacent areas to a width of 15 cm. After this, the prepared surface is puttied, covered with reinforcing tape and puttyed again. When the solution sets and dries, the ceiling is sanded and coated with impregnation.
Holes near risers
Before you repair a hole in the ceiling near the pipe, you need to understand the reasons for its appearance and eliminate them. Otherwise, after repair the hole will appear again. More often, the cause of this defect is a fistula in the pipe or condensation settling in this area due to temperature changes. Holes will appear in any case after replacing the risers.
Blind and shallow holes (up to 5 mm) are sealed with silicone. This plastic material is suitable because it does not interfere with the cyclic expansion and contraction of pipes. Silicone sealants can be used near hot water risers because they can easily withstand high temperatures.
Information on how to foam a hole in the ceiling with foam will be needed if the size of the defect is significant.
In such a situation, adhere to the following sequence of work:
- First, the large hole needs to be reinforced. To do this, use wooden planks or metal mesh.
- After this, foam is blown into the hole. This needs to be done in several approaches to give the foam time to expand. This way all the voids will be filled tightly and hermetically.
- When the foam dries, cut off the excess with a utility knife. Moreover, the surface of the foamed area should be buried 5 mm relative to the entire plane of the ceiling.
- After this, the resulting depression is puttied. For living rooms, gypsum putty is used, and for wet rooms in the bathroom and kitchen - acrylic.
- When the solution dries, this part of the ceiling is sanded and primed.
In addition to this method, you can use a method using cotton fabric to seal holes. To do this, a small piece of fabric is moistened in a solution of sand and cement and compacted tightly into the hole. When the canvas dries, the recess with irregularities is puttied. Then the repaired area of the base is sanded with fine sandpaper, cleaned of dust and coated with 2 layers of primer.
Self-sealing cracks in concrete floors
In order to bridge cracks in concrete surfaces, prepare the following necessary tools:
Please note: Whatever the composition, the technology of the sealing process is identical - only the materials change.
Sealing cracks with cement and lime
A few instructions to help you deal with sealing cracks:
In the case when you want to know how to repair a hole in a large concrete floor, the answer is simple - distribute the layers gradually one after another, periodically moistening them with water between applying a new layer.
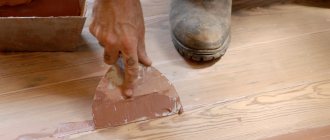
When laying the mortar, you need to know the following rule: the layer that you apply on top of the damage should be slightly higher than the floor level, which is why you should not overuse “trimming” the surface.
The fact is that when the solution dries, it settles a little and becomes flush with the rest of the surface. Using a sanding machine will help you adjust the floor more accurately.
After completing the floor preparation, you can begin laying the laminate. This can be done 24 hours after completion of work, however, laying ceramic tiles usually requires more drying time for the composition. The video in this article will tell you in more detail about the reproduction of crack sealing work.
Elastic sealant for sealing surface defects
To seal cracks that have appeared on the surface, special sealants (most often silicone) are often used. Such devices correct defects of very different lengths and depths.
The process of working with silicone sealants is similar to the algorithm for working with classic mixtures: you need to clean out the cracks, make them a little larger and pour the prepared liquid into them.
While spreading the layer, it is necessary to thoroughly wet the floor with water. The advantage of using sealant is its ability to dry faster compared to the previous option.
Did you find out how to repair cracks in a concrete floor quickly, effectively and relatively cheaply? So why not start this process right now, saving valuable time in the construction process.
Source
Filling other types of holes
When installing gaps, cracks and chips, it is important to pay attention to their location. For example, when renovating a bathroom or toilet, you must choose a repair mixture that can withstand high humidity; when renovating a balcony on the street, it must be able to withstand temperature changes; it must also not allow cold air to pass through.
Depending on the location, installation features will be as follows:
- Cracks at the joint. They are removed in the same way as usual, but it is necessary to widen the gap to 1 cm along the entire length.
- Holes when laying pipes. Small holes are sealed with silicone, large ones with polyurethane foam.
- Peeling plaster on the ceiling. It is necessary to apply a special mixture for vertical application, prime and apply several layers of plaster. It is important that each layer dries well - only then can a new one be applied to it.
- In the bathroom, chips can be quickly removed using mastics and polymer-based putties that do not leak.
- Crack in a brick wall. It can be repaired in the same way as concrete.
Separately, it is worth noting the cracks that appear on drywall. There may be several reasons for this:
- The layer of plaster is too thick. The cracks are usually small and form a “web”. Repair consists of carefully removing the plaster and applying new plaster. The layer thickness should be no more than 2 mm.
- There is no reinforcing tape or the metal frame is weakened. Cracks can be horizontal or vertical, they are deeper. You will need to expand them and fill them with plaster, put reinforcing tape on top and plaster them.
It’s not difficult to figure out how to cover up a hole in the wall. The choice depends on the size of the damage, the material of the wall itself and the location. Small cracks are easy to fix on your own; wide and dangerous ones are best left to specialists.
Do-it-yourself repair of cracks in the plaster of internal walls
How to repair concrete floors: cracks in floors, impregnated screeds, how to fill potholes
Repairing concrete floors is not an easy task, as it requires certain knowledge, skills, tools and materials. However, with proper preparation and minimal costs, it is quite possible to eliminate various defects with your own hands. When performing a task, it is important not just to cover up a pothole or crack with something, but to correctly determine the type of defect, find the most effective way to eliminate it, while maintaining the strength and reliability of the coating.
The need to repair a concrete floor can arise in a variety of situations, because even the highest quality coating involves changes in physical and chemical characteristics over time: the structure, strength, shrinkage rate, and often the coefficient of thermal expansion change. In addition, various unfavorable factors can affect the quality of the coating.
If any of these defects are present, full use of the floor is impossible, and things will continue to get worse. The sooner the concrete screed is repaired, the less extensive the deformations will be, the less material and labor will be spent on the task. Timely elimination of all problems will allow you to significantly save on repairs.
Thixotropy and rheology
Before considering floor screed repair methods, it is worth learning some important concepts. One of them is thixotropy - the ability of a medium to be easily influenced, to reduce viscosity under constant influence. A striking example of a thixotropic substance is ordinary construction bitumen: if you press on it, a hollow appears on the material.
We also need to mention rheology here - this is superfluidity. A phenomenon that not only physicists encounter, but all people in everyday life. As an example, we can take sunflower oil, which is not nearly as fluid as liquid helium, for example, but still gives an idea of this property.
Under construction conditions, thixotropy and rheology are quite strongly related. It is important to know about these concepts when repairing concrete screeds. Thanks to rheology, during the repair process the solution fills all the smallest irregularities, and thixotropy makes it possible for the old and new concrete mass to interact for maximum strength of the coating.
On the modern building materials market you can find many thixotropic-rheological mixtures intended for repairing defects in concrete floors. They are produced on the basis of polyurethane and epoxy resin, but for repairing a concrete floor in a house/apartment (where stable conditions are provided and there are no significant loads), you can make an inexpensive thixotropic composition with your own hands.
Protection and prevention during concreting, means and methods
To prevent concrete from cracking, the hardening mixture must be protected from external influences until it is completely cured and reaches brand strength. For this, experts recommend:
- make plastic shrinkage of the mixture minimal;
- ensure the absence of impacts that reduce the strength and durability of the composition.
At the same time, according to regulatory documents, acceptable dates for starting work on concrete objects are those at which 100% brand strength is achieved, and removal of the formwork is expected after reaching 70% readiness of the composition.
- careful selection of the percentage composition of the mixture, taking into account operating conditions;
- vibration compaction, including repeated compaction if necessary. Preference should be given to the machine version, since manual does not provide the necessary guarantee of the absence of cavities and the correct distribution of volume throughout the formwork space.
To avoid the problem of “concrete cracking as it dries,” it is also important to take care of the mixture during the curing process.
- Protection of concrete outdoors from excessive dryness and wind, daily and long-term temperature changes. To do this, depending on the air temperature, measures such as covering with film, moistening the concrete and formwork, maintaining a thin layer of water on top of the poured mixture, and thermal insulation of the mass are used.
- Protection of concrete from destruction (mechanical and chemical damage) until it reaches its design strength. For this purpose, the formwork can be covered on top with shields over film or thermal insulation.
Polymer coatings for concrete during the curing process (film) are laid, whenever possible, as a single piece or with pieces overlapping at least 30 cm and the seams are taped.
Mixer and rule
Regardless of how cracks in concrete floors are repaired, almost all compositions require mixing. Homemade ones are mixed with PVA suspensions, while store-bought ones are mixed with water. It is almost impossible to stir the solution manually - given the fact that little water is added to it, the viscous mixture is difficult to handle manually: it will take a very long time to mix, during which there is a high probability that the solution will begin to set.
The solution must be mixed for 3-5 minutes before it can be used to seal the defect, performing circular movements with the tool (if the kneading is carried out in a bucket) or zigzag transverse movements (if in a trough). It is advisable to have a container with water nearby, since after kneading the mixer must be immediately rinsed thoroughly by immersing it in water and setting high speed.
To carry out floor repairs, you may also need a rule - this is a special tool, like a spatula, only about a meter wide. As a rule, it is better to buy a factory-made one so that the concrete does not “eat up” the rubbing part of the tool.
Classification of concrete damage
As a result of various internal and external influences (see Table 1), concrete can crack. This applies to large and small objects stressed by external loads or under tension from their own weight. To understand why concrete cracks after pouring, you first need to know the classification of cracks.
Spalling and cracks in concrete vary:
- by nature – through and superficial (deep and shallow). To determine the depth, various types of probes and ultrasonic devices are used;
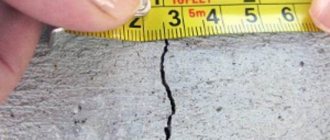
- in width – microscopic (hair-like), medium (over 1 mm), wide, massive (more than 10 mm). To determine the width of cracks, measuring instruments of varying accuracy and nature are used;
- by exposure of reinforcing elements - promoting corrosion (up to the reinforcement, with its complete or partial exposure) and passing between the reinforcement elements (along the edges, in the spaces);
- by time of formation - primary (during the process of hydration, shrinkage of the concrete mixture) and secondary (during the operation of the structure);
- by location - at the corners and edges of a concrete object, over the entire surface, throughout the entire volume, local (for example, in the area of applied stress or periodic mechanical influences);
- according to the degree of impact on the structure - reducing strength (5...50%), destroying (reduction in strength over 50%).
Important: if the expected concreting and operating conditions are violated, the occurrence of cracks is inevitable, therefore a margin of 10...30% is included in the design conditions.
Preparing the premises
Before repairing a concrete screed, it is necessary to properly prepare the room and the coating itself. First, all furniture, interior items, equipment, etc. are removed from the room, leaving it completely empty. If there is a floor covering on the screed, it must be removed.
Next, remove debris and dust, paying special attention to all damaged areas, where the largest volume of pieces of concrete, peeling elements, etc. most often accumulates. Layers of old primer, various coatings and paints, and chipped concrete parts are removed with a wire brush.
After everything is thoroughly cleaned, notches are made in the repaired area to increase adhesion between the old and new concrete. Dust and chips that appear during the process are carefully swept away with a broom. It is better to use a construction vacuum cleaner if you have one. Next, the surface is carefully treated with a primer or degreasing impregnation.
Preparatory stage
The basic preparatory process for all methods is as follows. The first step is to dismantle the floor covering. It is advisable to dry the floor for a day or several days before carrying out repair work, and then carefully remove all debris.
Rust, mold and old primer are removed with a wire brush. Grease stains and paint are removed with chemicals. The better the surface is prepared, the better the repair will be done. If the reinforcement is “exposed,” it is cleaned and anti-corrosion treatment is carried out. The further repair process depends on the damage.
Repair procedure
Before repairing a crack or pothole in a concrete floor, you need to decide on the sequence of actions. First of all, the floor is carefully inspected and its condition is assessed, and the extent of the defects is determined. This stage can be carried out only after removing all debris and dust, which may interfere with adequately assessing the required degree of repair work.
Minor pothole repair
The simplest option, which involves a minimum of costs and actions.
The branded repair composition must be mixed with pre-sifted quartz sand; the proportions are indicated in the instructions on the package. Sometimes thixotropic mixtures in small volumes are supplied with a package of sand in the required volume.
Repair of small cracks
Defects of this type are first sawed along the entire length with a grinder to a depth of 2-5 centimeters and a width of 1-2 centimeters. The minimum/maximum values for the width/depth of the cut are determined based on the condition of the floor. The cut is thoroughly blown and dust is removed.
To seal cracks in dense floors, you can use homemade repair solutions, but if the concrete is dusty and easy to cut, it is better to choose a branded thixotrope and primer. Small cracks are sealed by applying a primer and filling with a thixotropic compound. More serious cracks need to be repaired like gaping cracks.
To check the depth and danger of cracks, you can do this: if possible, 2-6 months before repair work, stick paper strips on the cracks every 50 centimeters. If the paper is not torn by the time of repair, this crack can be considered a shrinkage crack and should be filled as a small one; if the paper is torn anywhere, the crack is deformation and must be treated as if it were a gaping crack.
Repairing gaping cracks
A gaping crack is one whose width is more than 2 millimeters. Although, in this case, it is not the size that is more important, but the dynamics of the defect - whether the crack goes further or stands still. To determine the degree of destruction of the floor and the entire building, it is better to invite professionals. If everything is fine with the building and the problem is only a crack in the floor, everything can be fixed.
Thin metal rods act as markers; bicycle spokes are good for this role. Before installation, it is advisable to coat the markers with grease to make them easier to remove later.
Overhaul of screed
A major repair of a screed is not just a reconstruction, but an almost complete replacement of the coating. This measure is considered extreme and involves a lot of labor, time and money. Major repairs are done when it is planned to install a new finished floor or underfloor heating system, and the moisture test gave a negative result.
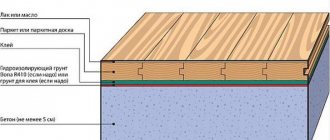
Calculation of screed thickness
If minor repairs are not urgent and a new screed needs to be poured, then the calculations must be carried out accurately. When carrying out repairs that are carried out in a room adjacent to other living rooms, you need to make sure that it is at the same level and make sure that the final coating does not exceed the height of the door threshold. Calculate the screed from the bottom up, leaving a margin on the larger side.
The result is 66 millimeters - which means you can add a thicker layer of expanded clay or opt for more durable plywood.
Markers for screeds
The screed is leveled using plaster or pin rack markers. Both types are lined with a small volume of cement-sand mixture: prepared pins along the walls in increments of 50 centimeters and in the corners, plaster markers along the parallel of the short wall (the first at a distance of 30 centimeters from it, then in increments of half the width of the rule).
The height on the pins is marked with a bubble level and a tightly stretched cord, starting from the corner closest to the door in the diagonal plane. Then a second diagonal is made along the primary cord, the cords are pulled along the perimeter, and marks are made on the wall markers. To speed up the elevation, you can use a laser level.
The procedure for overhauling the screed
Before making major repairs to the screed, you need to carefully study all stages of the work. To do this, they use certain tools and materials, which also need to be taken care of in advance.
Dust removal
If everything is in order with the floor, but due to surface wear it is dusty, you can quickly and efficiently eliminate the defect with special impregnations. If we are talking about a subfloor or coating in various types of outbuildings, then any domestic impregnation will be useful - Elakor-PU, Neomer-LP, also imported Ashford formula, etc., which provide a layer of 150 microns.
It is better to impregnate concrete finished floors in living rooms, workshops, and garages with the following substances: Elakor-ED, GruntElast-PU, Retroplate. Here a layer of 250 microns is created.
Repairing a concrete floor is a difficult task, but it can be done, especially when it comes to minor defects. When it is necessary to eliminate serious deformations, it is better to contact specialists who can assess the extent of damage and choose the most cost-effective and labor-intensive method of eliminating the problems.
Source
Manufacturers
The list of popular repair compounds includes products from the following manufacturers:
- Ceresite;
- Penetron;
- Basf;
- Birss;
- Consolidated Bars;
- Siltek;
- Knauf;
- Industry;
- Mapei.
Ceresit
The manufacturer Ceresit produces different types of building mixtures for concrete foundations. The Ceresit CX5 mixture is a restorative mixture, suitable for repairing concrete structures at high humidity. The product does not shrink significantly when hardened and used, and can withstand changes in temperature conditions. The coating is resistant to high humidity and reliably hides defects. The cost of the composition is high - about 2500-3000 per package of 25 kg.
The composition of Ceresit CN 88 is intended for leveling floor coverings and is durable. The product is laid out in a layer of 5-50 mm and can be used indoors and outdoors. The mass is quickly leveled, the surface can be used 6 hours after restoration. The product is wear-resistant, suitable for mechanized spraying, and environmentally friendly in composition.
The product is suitable for leveling screeds and restoring foundations that can withstand high loads. The mass is suitable for manual application to the coating.
The minimum layer thickness is no less than 35 mm; on the sound and heat insulating layers, the product is laid out with a thickness of no less than 45 mm. Can be used as a base for laying finishing material.
Penetron m500 bond mixture
Concrete repair compositions from the Penetron brand are dry mixes. The formula contains processed quartz sand, fine-grained Portland cement, polymer compounds to improve the elasticity of the product, and mineralized fiber fibers. The mixture must be diluted in the proportions of 170 g of water per 1 kg of powder. Laying the mass is carried out at a temperature of at least +5°C. The surface must be washed with clean water.
The product is laid out in a thickness of 5-35 mm, consumption is carried out in proportions of 1.8 kg per 1 m². The composition can be laid out in several layers, the second coating is applied after 4 hours. It takes 120-150 minutes for the layer to harden. After 28 days, the patch increases water resistance to W14, the strength category is 50 MPa, the adhesion level is up to 1.3 MPa.
Blend Parade
Parad brand compositions are intended for urgent repairs of concrete structures; the coating thickness can reach 60 mm. Laying can be done at a temperature not lower than +5°C. The advantage of the product is the rapid setting of the composition and the high strength of the patch.
After 1 day, the strength of the layer reaches 20 MPa; after 1 month, the coating acquires a strength parameter of 70 MPa, the frost resistance level is F200.
The product is universal, suitable for different types of structures (anchors, foundations, joints, road slabs, hydraulic structures, drinking water tanks).
Emaco
Repair mortar for concrete floors Emaco brand Basf is used for structures of various levels of complexity. Emako N 5100 is suitable for minor deformations (cracks, chips). Products N 900 and N 5200 are suitable for eliminating defects of medium complexity (cracks, collapsed areas).
Products S 5400, S 488 are used to eliminate damage due to the corrosion process, closing cracks up to 40 mm. The company also offers compositions for damaged concrete surfaces with exposed reinforcement bars and large chips.
The manufacturer has developed frost-resistant, non-shrinking, anti-corrosion compounds. The price in Moscow is 850-1800 rubles. for 1 package.
Birss Russia
The concrete repair mixture from the Birss brand is universal and can be used for surfaces of different levels of complexity. Products 28, 29, 30, 30N are applied to eliminate cracks and deformed coatings. Special products (30С1, 59С2 and 58С1) are intended for medium wear surfaces; mixtures 59S3, 59Ts, RSM, RBM, 600VRS are used in case of major damage to structures.
The compositions have frost-resistant characteristics, are used at sub-zero temperatures, have high strength of bonding of elements, have water-resistant characteristics, high density, and plasticity.
Consolid Bars
Products for surface restoration Consolit Bars are suitable for panels located vertically and on floor coverings; the mass quickly holds surfaces together, does not shrink, and has high adhesion. The product line includes self-leveling, thixotropic (for restoration of wall panels), finishing, waterproof and reinforcing mixtures. The cost of production is 800-1500 rubles. per package 30 kg.
Knauf
Products for concrete repair from the Knauf brand are environmentally friendly, do not contain toxic substances, are durable, provide surface waterproofing, and have water- and vapor-proof characteristics. The mixtures are sold in compact packages (5-6 kg). The products are universal and are used for external and internal repair work. The cost of packaging (5 kg) is 350-500 rubles.
Industry
Indastro products are universal and are used for repairs, restoration of structures on foundations, restoration of road surfaces, etc. The composition ensures strong joining of elements, is durable, wear-resistant, does not have strong shrinkage, is water-resistant, and frost-resistant.
Mapei (Italy)
The mixture from the Mapei brand ensures that restoration work can be completed in a short time, does not shrink during hardening, does not deform, and prevents abrasion of surfaces. The special SW series is suitable for reinforced concrete structures and is resistant to temperature changes, precipitation and moisture. After hardening, the coating layer acquires anti-corrosion properties and is suitable for waterproofing work.
The manufacturer's range also includes mixtures:
- epoxy;
- with the addition of resins;
- with high plasticity;
- for repairing cracks;
- for restoration of ceilings;
- for repairing airfield ceilings, tunnels, production workshops, highways.
The product price is about 850-1500 rubles.
Mount Crystal
Mountain Crystal products are intended for the reconstruction of concrete floor surfaces, reinforced concrete floors, walls lined with foam concrete and aerated concrete blocks. The mass is used to seal cracks and placed in areas of chips, holes, voids and traces of erosion. The product is suitable for restoring walls, floor coverings, and ceilings.
Siltek
The manufacturer Siltek offers a composition for repairing defects in surfaces and finishing seams between panels. The materials are frost- and water-resistant, quickly harden, durable, and wear-resistant. Reinforced microfibers are included in the formulas of some products. Products are certified.
The particle size in the mass reaches 2.5 mm, the thickness of the coating reaches 30 mm, after 3 days the strength of the layer reaches 15 MPa, after 28 days - 35 MPa. The product is suitable for use within 30 minutes after dissolving in water.
Frost resistance parameters reach at least 200 cycles, shrinkage does not exceed 1.2 mm/m, abrasion characteristics do not exceed 0.5 g/cm2.
The permissible operating temperature is -30…+70°С. After 3 days, the bending strength parameters reach 3 MPa, after 28 days - no less than 5 MPa. The strength of bonding to the surface is not less than 2.0 MPa.