A material such as wood has always been in demand, since it is a natural material and no newfangled plastics can compete with it in the ability to create an atmosphere of comfort and warmth in a room. But, like any other material, wooden products require protection and care.
For these purposes, special stains and varnishes are used. Treating wood with such means not only protects it from excessive exposure to light, moisture, scratches, and dirt, but also gives it nobility and sophistication.
Kinds
Today in construction stores you can find the following types of stains:
- water based;
- oil based;
- wax and acrylic;
- alcohol
Water
This is the type of stain that is used most often. This impregnation is available either in the form of a powder, which must be diluted with water, or in a ready-to-use form.
Aqueous solutions are characterized by a wide palette of shades, but shades of red still predominate (from the darkest, most saturated to light). The surface treated with this impregnation is resistant to abrasion. In addition, water impregnations are the most environmentally friendly.
However, water-based stains also have some disadvantages: they are mainly suitable for indoor use; promote swelling of wood making it more susceptible to moisture. To avoid excessive saturation of the wood with liquid, it is recommended to coat the surface with varnish before staining with water stains.
Oily
Using oil-based stains, you can highlight the wood grain well. The palette is extensive and allows you to choose the most suitable color for the interior.
Oil solutions are an excellent means of protecting wood from rotting. They apply easily, dry quickly and do not lift wood fibers. This product does not fill the wood with moisture and lies evenly on the surface. Another advantage is that the surface coated with oil stain does not fade when exposed to sunlight.
Among the disadvantages of oil-based stains, it is worth highlighting their low toxicity and long drying time compared to water stains.
Alcohol
Just like water-based types of stains, alcohol stains are produced either in finished form or in powder form for dilution in denatured alcohol. This product dries quite quickly. For this reason, working with an alcohol solution is quite difficult; it requires experience and certain skills.
Due to the speed of drying, the product is often used for exterior decoration. Treating wood with alcohol stain protects against moisture and ultraviolet radiation.
The main disadvantage of alcohol stains is the pungent odor. When working with the material indoors, it is necessary to ensure effective ventilation.
Acrylic and wax stains
Acrylic (or nitro stain) and wax were developed not so long ago, but are in demand among modern owners of houses and apartments making renovations. These are two completely different types of stains, but their properties are very similar.
First of all, it is worth highlighting the excellent protection against moisture when treating wood with such a stain. This is explained by the fact that when the product is applied to the surface, a thin film is formed. Also, when choosing a wax or nitro stain, you can be sure of the uniformity of the shade of the treated area. The structure of the tree becomes clearly defined.
The disadvantages of these types are: the inability of wood to “breathe” and the difficulty of working with the material due to its rapid drying.
Making an antique effect
An interesting effect of aged boards can be achieved by using, for example, white water stain as the main tone. After drying this layer, apply a layer of gray or black thick wax stain, which will emphasize the texture of the wood. In this way you can combine stains of different colors.
The appearance of worn, erased boards is achieved by applying a water-based stain to the surface as a background. Without letting it dry, you need to wipe off part of the stain in the right places, imitating abrasion. After complete drying, cover the surface of the product with a second layer.
The stained surface of the wood is lightly burned with a gas burner to reveal the texture. Firing can be done only after the stain has dried. Next, the surface is cleaned with a shoe brush.
A beautiful effect with a pronounced wood structure is obtained by applying the first layer of white water-based stain. After drying, an oil stain with the addition of melted wax is applied to the main background.
Not all stains have antiseptic properties and can protect wood from the influence of the external environment, so it is better to varnish the treated wood to extend its service life.
rmnt.ru
20.04.16
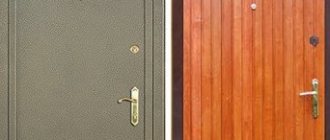
Antique doors highlight the design solutions in the room. To update the interior of the house in this way, an “antique” wooden door is created. Several technologies are used for this:
- Brushing is a simple technique that is used by many craftsmen. The work is done with an iron brush, with which the top layer of wood is removed (until the annual rings appear). But this technique of giving the door an antique look requires a large amount of varnish;
When brushing, the top layer is removed with a metal brush. Patina is a special paint that is often used to create the effect in question. The technology for applying the mixture consists of choosing the desired color and applying 1 main layer, which is subsequently covered with paints or varnishes, but of a lighter shade.
Patching gives the wood the effect of multiple paintings
- aging with wax - to perform this technology, you will need to follow a certain sequence: applying wax - painting in a lighter tone. After complete drying, the paraffin is removed. A spatula is used for this. Then the base is sanded. Varnish or stain is applied. The door is treated with wax. It is this technology that allows you to create a “antique” appearance that is as close to the truth as possible.
If you have old doors, then it’s easier to update or restore them a little.
Features of the composition for painting
Whether you need to repair old doors or give new ones a different look, choosing the right paint product is very important. The quality and service life of a wooden door depends on it. Let's look at the most common means.
Varnishes – colored, glossy or matte. Their main property is that the structure of the wood will definitely be visible under the layer of substance. If you have completely restored the door, then varnishing is unlikely to be suitable, since all the defects and subtleties of processing will be visible. There are several varnish options:
- oil based;
- alcohol varnish;
- polyurethane;
- solvent-based nitrovarnish.
The latter type is not suitable for use on wood: the composition of this varnish has a bad effect on wood. But polyurethane varnish is durable and resistant to mechanical damage, so it is perfect for our task, although it is quite expensive.
The choice of varnish or paint depends on the type of door and its location in the room
If painting with varnish is not suitable for you, turn to paints. Their choice on the modern market is huge both in color and composition, and it will not be difficult for you to give the door any look. Paints can be matte, glossy or emphasizing the wood structure
The main thing is to pay attention to what base the product is made of - oil or alcohol. Nitro paint is also suitable
There are also oils containing wax intended for painting wooden surfaces. This product can be transparent or colored; it will give the wood a soft silky feel. The disadvantage of this material is its high cost.
Compositions for different types of doors
When choosing a paint product, pay attention to the condition of the door leaf. As already mentioned, for an old door that had to be restored, a varnish coating under which the entire surface is visible is absolutely not suitable
In this case, it is better to use paint. The varnish will look good on the new door.
The modern market offers a large selection of paints and varnishes for wooden doors
There are 2 types of paints and varnishes most often used in such work.
- Acrylic compositions on a water-dispersion basis. They are easy to apply and adhere well, as if covering the surface with a thin layer of plastic. There is no pungent odor when drying.
- Alkyd paints and solvent-based varnishes. When painting, they penetrate deep into the wood structure and dry quickly. They withstand temperature fluctuations and have a water-repellent effect. The disadvantages include a strong odor when drying.
Taking these points into account, we can conclude that acrylic compositions are well suited for interior doors and dry rooms. Alkyd paints are best used on entrance doors or in damp rooms
If you plan to paint the door one color, then the choice of coloring material will be based on the above criteria
But if you have a door leaf with a design, take into account the following:
- matching the color of the floor, wall cladding, furniture;
- antique decor or a certain style - high-tech, country, etc.;
- contrast of individual parts (relevant for paneled models);
- wood structure;
- applied drawing. This diagram will help you choose the type of wood by color
Please note: paints must be applied to a completely dry surface. Otherwise, the paint layer on damp wood will begin to peel and flake off.
Dealing with defects
When applying stain, it is very important to avoid smudges, which are quickly absorbed into the wood and significantly worsen the appearance of the finish. A small amount of stain on the brush and a thin layer of coating can avoid this defect.
You can remove unwanted stains from stain using sandpaper, or in more difficult cases, with a plane. You will have to act carefully, gradually removing the darkened area of the wood and smoothing out sharp transitions.
For porous wood species in which the coating is absorbed unevenly, it is better to use wax-based stains or gel stains. They cover the surface with a thin layer and do not penetrate deep into the wood structure. You can also treat the surface of the wood with a special conditioner compound, which will prevent the active absorption of the stain.
The “apple-colored” defect occurs when pigment thinners are of poor quality or there is a lack of skill in spraying stain. Stains form on the surface covered with stain.
When applying stain with a spray gun, in order to avoid coating defects, it is necessary to adjust the material supply torch. It should be oval in shape and the spray angle should be approximately 90°.
Coating defects can arise from poor-quality sanding of the wood surface. In this case, it is necessary to remove the layer and sand it again. Then cover the surface with stain.
Remaining stains of grease and dirt due to poor cleaning will appear when applying stain. Here, too, it is necessary to remove the poor-quality layer by grinding, clean and degrease the surface. Apply a new coat of coating to clean, dry wood.
It happens that the stain is applied to the surface incorrectly. Here are the main ways to eliminate defects:
- For numbness. Immediately after tinting the wood, you need to cover the area with varnish, which will dissolve the stain. Then clean the treated area with a rag. When the drip has already dried, it will have to be softened with white spirit or ground off with sandpaper.
- For stains. If we are talking about plywood, you will have to remove all the veneer using a plane. Solid wood is also processed with this tool, removing the thin top layer.
How can I remove stain?
Since stains have the property of deep penetration of the dyes in their composition (often these are natural materials such as manganese, tea, nuts, etc.), it is quite difficult to remove it from surfaces.
If we talk about aqueous solutions, then from the name it is clear that they can be washed with water. But it is worth noting that only the top layer can be washed off. Dyes that have penetrated into the surface texture are quite difficult to remove.
If the skin of your hands gets dirty during work, then you can clean it by following simple advice: you just need to wash something by hand (the same clothes, for example, also stained with stain).
It will not be possible to completely remove stains from clothing. But its condition can be improved by using oxygen bleaches. To do this, apply bleach mixed with water to a pasty consistency onto the stain and leave for at least 20 minutes. After that, wash in the washing machine.
If stain gets on linoleum, stains can be removed with acetone or white spirit. However, when working with them you need to be careful and not overuse, so as not to spoil the color of the linoleum even more.
Domestos is also a fairly effective remedy for removing stains from wood stains.
What is wood stain updated: December 27, 2017 by: RR
A material such as wood has always been in demand, since it is a natural material and no newfangled plastics can compete with it in the ability to create an atmosphere of comfort and warmth in a room. But, like any other material, wooden products require protection and care.
For these purposes, special stains and varnishes are used. Treating wood with such means not only protects it from excessive exposure to light, moisture, scratches, and dirt, but also gives it nobility and sophistication.
To better protect the wood flooring and extend its service life, it is recommended to treat it with stain. This impregnation penetrates deeply into the pores of the wood and enters into a chemical reaction with tannins located in the growth rings, giving the wood a light- and water-resistant color.
In addition, stain protects the wood
from borer beetles, mold fungi and other infections and pests. Modern liquid stains come in the following types:
- oil;
- alcohol;
- aquatic.
Let us consider their characteristic properties in more detail.
Water stain
This impregnation comes in two types: in the form of ready-made solutions that can be used immediately, and in powder form. A solution should be prepared from it. Water stain does not require drying oil
, white spirit and other solvents.
However, it has one significant drawback: when the impregnation penetrates into the wood, it lifts its fibers
, as a result of which the tree remains unprotected from excess moisture.
But, on the other hand, with the help of such wood processing, its structure is emphasized and highlighted. Therefore, today this type of stain is considered the most common.
Alcohol stain
This impregnation is a solution of aniline dye in ethyl alcohol. It is used for decorative and antiseptic painting.
wood products. With the help of alcohol stain, pile lifting is reduced and wood swelling does not occur.
Using this type of stain, it is quite difficult to achieve uniform coloring, because the composition dries very quickly and stains can form
. This impregnation is best suited for tinting small products, but it will not be suitable for painting parquet.
Oil stain
This impregnation is a dye dissolved in flax oil. It is the most convenient to work with and can be applied in different ways. Oil stain does not lift fibers and is evenly distributed over the entire wooden surface. Products processed in this way can always be easily repainted and restored.
.
Coloring technologies in detail
Having processed the door leaf, you can start painting. When carrying out work, several rules must be taken into account:
- apply paint in 3 layers;
- Apply each new layer after the previous one has dried;
- paint doors with panels with a brush, immediately removing excess;
- roll panel wooden doors;
- Place the initial layer from the upper left to the lower right, the second from top to bottom, the final layer from right to left;
- Before work, rub and fluff the paint brush so that loose bristles come out.
Alkyd enamel
If the door is on hinges, then paint from top to bottom, moving the brush left and right: this way the drops will not flow onto the painted part of the surface. If the door is removed from its hinges and lies on a horizontal stand, then you can start painting from any edge.
Apply enamel in 2 layers: apply the second after the first has dried. Paint consumption – 50-80 g per 1 m2. How long it takes for a layer of paint to dry depends on the component composition, ambient temperature, and percentage of moisture. A water-based composition usually dries in half an hour, while paints based on alkyd resins take more than a day to dry. If the wooden door is paneled, then first paint the panels, then the recesses and protrusions, and finally go over the wooden panel with a roller.
To create the effect of wenge wood, it is necessary to paint the wooden surface with an appropriate decorative impregnation based on oils. It should be applied in at least seven layers after applying the main coloring composition.
Stain
To prevent the wood from absorbing excess moisture and to ensure that the composition lies evenly, the door leaf must be slightly moistened. Apply stain to the wooden surface first along the grain, then transversely. The final layer is also longitudinal.
Cover the side surfaces and wooden elements from bottom to top so as not to drip onto unpaved areas. Proceed in this order if the final layer is planned to be an opaque composition. After processing, the wood will absorb moisture, its fibers will swell, so you will need to sand it with sandpaper and repeat the steps.
After painting, a dried wooden door looks lighter. Therefore, it takes so many coats to achieve the desired shade. If you want to get the job done faster, use alcohol stain. Then the treated surface does not need to be sanded again. Although water-based stains are more popular because they are safe and do not emit a pungent odor.
Impregnations
Stir the impregnation thoroughly to prevent stains from forming on the coated wooden door. Work using a brush, sponge, or spray bottle. Apply the composition to a wooden canvas, spread evenly with a brush, roll out with a roller. Leave to dry for a day, after this time apply a second coat.
Wood imitation
To create the visual effect of wood on metal or any other door material:
- Paint the door white, beige, pale yellow or gray-yellow. Leave to dry.
- Take liquid soap. Use a brush to cover the desired area.
- Apply dark paint.
- Remove the soap coating.
Painting laminated doors
If the door has no noticeable defects, then after sanding and priming, use stain or tinting varnish to restore it.
To properly paint a laminated door, use the same algorithm as when painting a regular wooden surface:
- Prepare the surface. Clean, sand.
- Apply putty to the dried surface and sand it with sandpaper. Repeat the steps.
- Thin the paint with solvent to the optimal consistency. Apply in 3 layers.
- If desired, seal the final coat with clear varnish.
DIY varnish coating
It is preferable to paint with a spray gun, but you can also paint with a brush. Fill the spray bottle with either diluted or heated to 60 ° C composition. Solvent and white spirit gasoline solvent are suitable for diluting oil varnish. Dissolve the remaining varnishes with construction (646, 647) or auto-thinners (649, 650).
After the first application of varnish, wood fibers may rise. Remove them with fine-grained sandpaper. Sand carefully so as not to remove the protective coating, exposing the wood. Wipe the canvas with a soft, clean cloth and apply a second layer of varnish. If necessary, repeat the steps again. Apply each new layer of varnish when the previous one has dried well.
Application methods
There are four main ways to apply stain:
- Rubbing painting. The composition is applied to the surface, after which it is rubbed over the entire area. Recommended for use when processing porous wood species.
- Spraying. When staining wood by spraying, a manual or automatic sprayer is used as a tool for applying stain.
- Processing with a foam roller. This method avoids the formation of streaks and helps to distribute the mixture evenly over the entire surface.
- Processing wood with a paint brush. The method allows you to obtain a deeper and richer color of wood, but is not suitable for all types of impregnation.
Next, we will consider in detail how to stain wood. To obtain a high-quality and good coating, you must follow the basic rules for treating surfaces with stain:
- Before painting a surface with stain, it is necessary to remove old coatings from it, and then degrease it better.
- The surface made of coniferous species (for example, pine) must be deresined.
- It is necessary to paint wood with stain and remove excess only in the direction of the wood structure.
- It is recommended to cover the surface with 2-3 layers, while for the first layer a small volume of the mixture should be used.
- After the first layer has dried, the surface must be sanded and the raised lint removed, and then, if necessary, apply subsequent layers (each subsequent layer is applied only after the previous one has completely dried).
The approximate drying time for oil-based impregnations is about three days, and for water-based and solvent impregnations - 2-3 hours (depending on how many layers were applied). It is recommended to divide large areas of the surface to be treated into small areas and paint them in stages. To avoid the possibility of defects forming on the surface, the composition must be diluted. A solvent is used for this.
Plywood stains perform a purely decorative function. Therefore, if you are in doubt about whether to choose stain or varnish, it is recommended to use them in combination. Before covering the surface of the plywood, it must be moistened, and it is recommended to heat the mixture itself.
After covering the wood with stain, it should be treated with varnish (layers should be very thin to avoid the possibility of smudges). The tool you can use is a brush, roller or sponge. Wood varnish will enhance the protective properties of the impregnation. By following these recommendations, you can easily stain wood at home.
How to varnish wood after staining
After the wooden surface has been treated with stain, it is coated with varnish in several layers, using a paint brush or roller . If you need to treat hard-to-reach places, use a foam sponge.
Recently, spray varnish in cans has been gaining popularity, the application of which does not require any tools. But such varnish is consumed several times more than traditional one.
The technique of applying varnish is similar to the technique of treating wood with stain. A wooden surface should be painted with varnish in 2-3 layers , and they should be very thin, otherwise smudges will be very noticeable on such a coating.
Thus, in order to treat a wooden surface with stain and varnish it, you do not need any special knowledge. Anyone can do this . The main thing is to have patience and perseverance. Only in this case will the tree in the house please the eye with its appearance.
Selection of materials
Varnishing wood requires the use of high-quality materials and tools. Depending on the purpose of the wooden product and the conditions of its operation, it is necessary to use varnishes that have suitable characteristics.
There are several types of varnishing material:
- Oil varnishes are made on the basis of synthetic or natural oils, to which special components are added that increase the strength of the coating. Most often, oil varnishes are used indoors to treat walls and floors. The finished coating is transparent, but has a yellowish tint;
- alcohol formulations are made by dissolving natural or synthetic resins in alcohol. Alcohol varnishes create a thin coating that is unable to provide high-quality mechanical protection for wood, but at the same time they make its top layer more moisture resistant. Very often such products are used for priming wooden surfaces;
- Nitrocellulose products are prepared by dissolving nitrocellulose in organic solvents. Special additives are added to the composition to increase the strength of the varnish coating. Nitrocellulose varnishes are applied, usually in several layers;
- acrylic varnishes are made on the basis of polymer acrylic resins. They can be used to create not only transparent, but also painted surfaces. These materials are very durable and environmentally friendly, but they can only be used indoors;
- alkyd varnish materials are made from synthetic resins based on inorganic solvents. The surfaces obtained using these varnishes are highly durable and resistant to moisture. All this makes it possible to use such varnishes to cover the facades of buildings and wooden elements located on the street;
- polyurethane compositions based on polymers make it possible to obtain a thin coating that is resistant to mechanical stress. Very often, such varnishes are used for processing musical instruments.
Surfaces located outdoors or indoors can be varnished. Modern means make it possible to protect even wood submerged in water. If there is no varnish, then it is replaced with drying oil or wax mastic, after which the wooden surface becomes slightly velvety to the touch.
Varnish for coating wooden surfaces
Varnishes that are used to coat wood come in several types:
- Alkyd.
- Polyurethane.
- Acrylic.
- Nitrovarnishes.
- Alcohol.
- Oily.
- Parquet with acid hardener.
Alkyd varnishes must be diluted with a solvent . The surface treated with this product is protected from fire and water and does not fade in the sun. Thanks to acrylic varnish, a film is formed that does not allow the wood to wear off and slows down the aging of wood.
Nitrovarnishes, although they dry much faster, however, are not able to withstand the negative effects of ultraviolet radiation and moisture for too long. Polyurethane varnishes are characterized by increased wear resistance and form a durable film on the wooden surface that dries very quickly.
Relatively recently, oil-based varnishes were very popular, but nowadays they are used most often for treating floors. Their main advantage is their low price. Such varnishes must be diluted with drying oil, and they take a very long time to dry. Such a new product as acrylic varnish, which is universal and easy to use .
It is used for both external and internal work. This varnish should be diluted with water, and it does not have a strong odor. With its protective qualities it resembles alkyd varnishes, but is much more economical to use . But alcohol varnishes are used only for the restoration of antique furniture.
Preparing the wooden surface
It is recommended to apply stain and varnish only to smooth and sanded surfaces. Regardless of whether the coating should be painted - new or old, it must be carefully inspected. All detected cracks, seams and knots should be processed and eliminated .
If gaps are also found between the joints and seams, they are sealed with special putty . As soon as it dries, to remove possible unevenness, the putty areas are sanded again using fine sandpaper.
One should take into account the fact that it makes no sense to putty on raw or under-dried wood, much less treat it with stain or varnish it. Such wood begins to deform and the applied layer always becomes unusable.
Photo of stain
Stains are applied to the surface of unfinished wood floors to change the color of the wood. Colored stains can also be applied to previously stained and coated floors to create a layered effect. Buy a water-based stain that is made for easy application and won't leave marks or streaks. If the manufacturer recommends, use a wood filler conditioner/primer before staining.
Filler primer conditioners will help prevent streaking and warping due to fiber swelling when water-based stains are used. There are a wide variety of stains available in natural wood tones. You can also choose a colored stain, such as green for a rustic decoration, or white for a modern look. You can also stain wood to create an overlay effect using diluted latex paint. The overlay solution will be significantly lighter in color than the original paint color. To make this solution, use a recipe and experiment with small amounts of paint until you achieve the color you want. Before staining the entire floor, apply the stain or blending solution to an inconspicuous area, such as a closet or closet, to evaluate the application method and the resulting color. Protect your stained floor with three coats of a clear matte, semi-matte or gloss finish. Choose a finish that will not leave brush marks.
Tools and materials
- Latex gloves
- Synthetic brush, sponge applicator or lint-free rag - for applying stain
- Filling conditioner-primer for wooden products (at the buyer’s request)
- Wiping cloth
- Lint-free cotton cloth - for wiping off stain
- Water-based stain or latex paint in the desired color
- High gloss and semi-matt clear coat, such as acrylic or polyurethane, to protect stained floors
- Sponge applicator or paint pad and extension handle - for applying clear
- finishing coating
- Electric sander, fine-grit sandpaper
Sand the floor surface using fine sandpaper, sanding in the direction of the grain of the wood. Use a vacuum cleaner to remove dust resulting from stripping, then wipe the floor with a wiping cloth.
Wear rubber gloves when working with stains. the stain thoroughly
or solution to create an overlay effect.
Using a synthetic brush or sponge applicator, apply the stain or solution to the floor
. At any given time, work is performed on small areas of the floor. Keep the edge of the brush or applicator wet, and try not to overlap brush strokes.
Immediately or after waiting a certain time set by the manufacturer, wipe off excess stain with a dry, lint-free cloth: first across the wood grain, and then along. Continue applying (and wiping off) the stain until the entire floor is covered. Let the stain dry. Lightly sand the floor with fine sandpaper, then remove any sanding dust with a wiping cloth. For deeper color, apply a second coat of stain and let it dry completely. Using a sponge or paint pad applicator on an extension handle, apply a high-gloss clear coat to the stained floor. Let the coating dry. Lightly sand the floor with fine sandpaper, then remove any sanding dust with a wiping cloth. Apply two coats of semi-gloss clear topcoat.
SOLUTION FOR OVERLAYING EFFECT ON THE FLOOR
Mix the following ingredients: 1 part latex paint 4 parts water
Dark wood tones are good for ordinary rooms. Applying white grout over previously applied dark stain softens the formal look.
For modern rooms, pale, neutral-colored stains are often used. Overlaying blue can make a pale floor stand out more.
Moderate, warm wood tones have a casual appearance. Layering white over moderate wood tones gives an antique look.
Work technology
The method of applying it depends on the type of stain. Typically, a brush, spray, swab, or sponge are used for painting work. It is better to treat unsmooth and large-sized bases with a spray gun (in the first case, do not use a brush so that there are no fallen bristles left on the wood). To use a sprayer, choose a lighter shade of stain: the layer will be thicker, making it appear darker.
Before the main stage of work, a test painting is always carried out to clarify the required number of layers to obtain the desired shade. The procedure is as follows:
- take a board of the same type as the base material and polish it;
- cover the product with impregnation;
- leave until dry;
- apply another layer to 2/3 of the board;
- after drying, treat another 1/3 of the workpiece with a third layer;
- As it dries completely, evaluate the appearance of all three areas and select the optimal shade.
General information about stains
Stain is a liquid composition, often dark in color, which can give wood various translucent shades, which allows you to radically change the appearance of the product, as well as protect the material from external destructive influences. Therefore, this means of processing wooden parts can be called multifunctional.
Stain can give wood different shades, radically changing the appearance of products
So, with the help of similar protective and decorative compositions, the following operations can be performed to change the appearance and characteristics of wood:
- It becomes possible to tint while preserving the textured pattern of the wood.
- A special-purpose stain is capable of bleaching wood - this is a necessary process during restoration work, when changing the color to a lighter shade, or when preparing the surface for applying varnish.
- Imitation of shades of elite expensive wood species is widely practiced.
- The stain has the property of deep penetration into the structure of the material, and its antiseptic qualities of the composition protect the wood from putrefactive processes and the destructive effects of wood-boring insects.
- The action of the stain is accompanied by strengthening the structure of the wood.
- An important quality is to give the material water-repellent properties.
- Any type of stain significantly extends the life of wooden products.
Using different shades of stain allows you to add visual volume to the wood grain.
- The stain is suitable for both interior and exterior work.
- The quite affordable cost of the material is also attractive - the price of stain is two, two and a half times lower than paint and varnish compositions similar in the created effect.
Different types of stain interact with wood differently, depending on the basis of their manufacture. Some of them penetrate deep into its structure, others create a protective film on the surface.
How to treat a wooden door?
Wood has a big disadvantage - it absorbs moisture. An expanded sash cannot be closed or opened normally. To prevent a wooden door from swelling from dampness, before painting it must be treated with a protective impregnation and preparatory measures must be carried out.
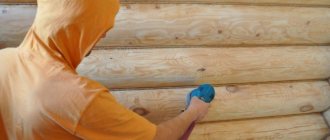
- The process begins with removing the sash from its hinges and dismantling the protruding fittings. The canvas is laid on a horizontal surface, sanded and thoroughly cleaned from dust.
- When using paint, the clean surface of the wooden door is impregnated with a primer. The first layer is allowed to dry and the second treatment is performed.
- The panel door is painted with a roller, and the panel door with a brush. Depending on the structure of the material, 2 to 4 layers of enamel are applied.
- If stain is used instead of paint, the surface of the wooden door is not primed. The door leaf is simply sanded and cleaned of dust. The stain itself is a protective impregnation that penetrates deeply into the wood.
A wooden entrance door needs to be treated especially well, since outdoors the door is constantly exposed to moisture and temperature changes.
Types of stains
Basically, stains are divided into types depending on the solvent used in its manufacture. So, they distinguish:
- Water stains. From the name of this material it is clear that its basis is water. They have the heaviest weight on the market. A wide range of colors of water-based stains allows you to give wood almost any texture and shade. Such dyes are sold either in finished form or in powder form, which you can dilute yourself with warm water. The most important advantage of water-based stains is the absence of odor, which makes it possible to work with wood in residential areas. However, when applying a water-based stain, the wood pile rises, which requires sanding its surface after drying. With drying, things are even more complicated. Water-soluble stain can take more than 14 hours to dry, which significantly slows down the work process. A separate group of such materials are acrylic stains. They are more resistant to moisture and sunlight, which increases the time between repairs. The basis of these materials are acrylic resins. When used, acrylic stains do not raise the wood pile. However, their cost is much higher than water ones.
- Alcohol stains. These solutions are prepared based on denatured alcohol. The main feature of this stain is that it dries quite quickly. The process of complete drying of the surface takes from 15 to 30 minutes, so you need to work with it carefully and quickly so that no streaks remain. When working with alcohol stains, you should not leave them open; the alcohol will quickly evaporate and the material will become unusable. The most optimal way to apply the material to the surface of wood is spraying with a spray gun.
- Nitromordants. Manufactured from various solvents. The properties of nitro stains are similar to alcohol stains: they dry quickly and penetrate deep into the structure of the wood.
- Oil stains. Prepared on the basis of oil. In the vast majority of cases, linseed oil is used to impregnate wood with your own hands. When such a stain is applied to the surface, the wood fibers remain in their normal state and do not rise. One of the most important advantages of oil stains is their resistance to ultraviolet radiation. The coloring pigments in this material are not subject to destruction by sunlight, due to which the surface retains its original color for a long time. Oil stains can be applied either with a spray gun or with a brush. Drying time for the treated surface is approximately 3-4 hours.
Selection and technique of applying varnish to wooden doors
Each surface has its own characteristics and risks of damage.
To protect the tree and preserve its beauty, you need to carefully choose the composition of the mixture covering it. The coating may have the following properties:
- toxicity - the safest ones are made based on water, wax and oils. Nitrovarnishes and polyurethane varnishes are applied in a respirator;
- drying speed - alcohol-based compositions dry the fastest (almost instantly). Varnishes and stains on water and nitro varnishes are slightly inferior to them (about three hours). Oil solutions take the longest to dry (at least a day);
- the ability to prime small irregularities and porous wood - conditionally divided into ready-made self-priming compositions, nitro varnishes with a large dry residue and varnishes with the addition of a filler;
- wear resistance - polyurethane varnish is the most resistant to any damage, but if used carelessly, it tightly glues the planks. The most unstable nitrocellulose;
- fire resistance - ready-made fire-resistant varnishes. Fire resistance directly depends on the thickness of the layer;
- absence of odor - there is no fuse for acrylic varnishes and water-based stains. The smell from epoxy and oil compounds disappears in up to three days.
They differ according to the type of application:
- with a brush - viscous compositions based on oil, resins and wax are applied;
- spray gun - a mixture based on alcohol and water.
The first thing that interests any person is what visual effect the stain will give, and they start from this when choosing the composition.
Painting wood with stain is used not only as a decorative coating; sometimes tinting hides the mistakes of previous experiments or helps to achieve a uniform color for a product made of porous wood. For tinting, powder stains are used, mixing them with a solution to which pigment is added.
If you are a follower of ancient technologies, use organic dyes; they retain color for centuries. Their color range is more sparse, but if you have a recipe, you can create the same shade decades later.
Using plant ingredients, you can achieve the following shades:
- red - a decoction of larch bark or onion peel;
- brown - nut shell powder with the addition of soda. If you need a rich color, mix willow and oak bark, alder catkins and walnut shells, brew a tincture with this mixture with the addition of soda;
- gray - after applying the stain with nut broth, soak the surface with vinegar;
- black - with the addition of a decoction of oak or alder bark;
- yellow - mix a decoction of barberry root with alum and boil;
- scarlet - a composition of wolfberry juice and Glauber's salt;
- blue - wolfberry juice with the addition of soda;
- green - potash with wolfberry juice.
The powder stain is diluted with a decoction and applied as if diluted with water.
This category includes all types of stains, without additives. True, they set off the color of the boards a little. This is due to the type of wood - on dense wood the natural color will remain, but on a porous structure it will become several tones darker.
There are two ways to get this effect. Purchasing a ready-made composition with increased penetration into deep layers or applying a regular stain to a sanded surface and then removing it in convex areas. To enhance the contrast, go along the grain of the wood with a wire brush, then the softer areas will become deeper and darker.
They are used to obtain “Arctic oak”, “bleached oak” and other options with bleaching. For work, purchase water-based stain with white pigment, oil stain and wax. The first layer is applied for bleaching, and the second is a mixture of stain with the addition of melted wax. Excess is removed with a rag. The oil is absorbed into the veins, highlighting the wood structure.
Not all solvents are universal; some are not suitable for children, but they are indispensable when processing parquet. Before purchasing the composition, decide where it will be used.
Which breeding basis is right for you:
- alcohol - resistant to ultraviolet radiation, does not require additional protection with varnish;
- oil - ideal for beginners without special tools, environmentally friendly and abrasion-resistant;
- waxy - not suitable for further coating with polyurethane and two-component acid-curing varnish;
- nitro - applied with a spray gun due to capriciousness and frequent appearance of stains;
- water-based - requires sanding after application due to lifting of the fibers.
It is better to purchase several types than to spoil the product in pursuit of savings.
Stain or, as it is also called, stain is a finishing coating for wood, which, without painting, favorably emphasizes its structure. It consists of a pigment and a base, which can be water, alcohol, or oil. Recently, water-based stains based on acrylic resins have become very popular. In addition to being decorative, they have the properties of a good antiseptic.
Another type of stain is wax. The thin film of wax that forms when covering the surface with stain gives not only the decorative effect of natural wood, but also reliably protects it from water.
When choosing a stain, you must be guided by the following criteria:
- Operating environment (external or internal work). Exterior stains contain pigments that are resistant to ultraviolet rays.
- Composition safety. In children's rooms or children's household items, stains without harmful compounds are used. These include water-, oil- or wax-based stains.
- Powdered or ready-made stain. Water and alcohol stains are also available in dry form. They must be bred at home. If there is any doubt that the desired result will be obtained, then it is better to give preference to ready-made stain.
- Method of applying stain to a surface. It is better to apply alcohol stains with a spray gun, as they dry very quickly and it is difficult to achieve an even coating. Small objects and surfaces are covered with brushes, foam rubber or fabric swabs. For a large finishing area, use a sprayer.
- Design solution for interior or exterior. It is important to know that the sample presented in the store often differs in color from what is obtained during finishing. The reason for this may be different species and structure of the tree, lighting. Even different batches of the same type of stain have differences in shades when coating.
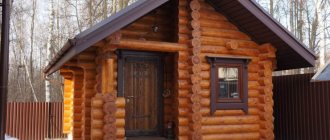
To change the interior, you don't have to buy something new. One possible option is to renew wooden doors by painting or varnishing. This updated model will harmoniously fit into a rustic, modern or other style. But in order for the result to please its owners, you need to know exactly how to varnish an old wooden door, and what measures need to be taken for this.
We suggest you familiarize yourself with: Bathhouse optimal size and layout
Before you paint a wooden door with stain and varnish, you need to select the material. On the market you can find many types of products that differ in their basis:
- alkyds have a yellowish tint. The main component is the solvent. Among the advantages are strength, water resistance and quick drying (less than a day). The disadvantages include an unpleasant odor when painting and fading in the sun;
- nitro varnishes are colorless and retain the natural color of the wood. The main components are acetone and nitrogen compounds. The advantages include low cost, durability and strength. Disadvantages are flammability and toxic substances;
- polyurethane ones darken the color of the wood. The main components are polymers with long molecules. The advantages are low toxicity and absence of unpleasant odor. Among the disadvantages, the need for a brightening primer should be highlighted;
- acrylic ones are made on a water basis. Used to restore things in residential areas. The advantages are resistance to ultraviolet radiation and does not crack during use. The disadvantages are long drying time and low abrasion resistance.
To renew the varnish coating, you must first carry out preparation. To do this, remove the old paint layer using one of the following methods:
- Using sandpaper. For more convenient work, it is recommended to use a block with sandpaper stuffed on it. To completely remove the coating, it is necessary to start processing with coarse-grained paper, gradually approaching zero.
- Using a grinding machine. This option is much faster than the manual method. The tool carefully removes the old coating, leaving the surface clean and smooth.
- Solvent. Chemicals do not completely remove all layers, leaving marks on the wood. But this option is also used during coating removal.
The future appearance of the canvas directly depends on the quality of the prepared surface. Preparation of the canvas includes the following activities:
- sanding previous layers in a convenient way;
- dust removal;
- filling of cracks and depressions. Re-sanding;
- application of bioprotective impregnation;
- final sanding with 180 grit paper.
First you need to mix the product in an open jar with calm movements. Then pour into the tray. To renew the surface, use brushes or rollers. Apply the product to the canvas using smooth and quick movements.
It is necessary to cover the entire canvas without interruptions or delays. The next layer is applied perpendicular to the previous one. If you decide to open it in three layers, then the direction of the third should be the same as the first. After each applied layer, wait until it dries completely. The amount of time is indicated on the packaging.
A narrow brush is used to cover the paneled part. To update the frame and trim, you need to paint them in a vertical position. If drips form, you need to use sanding paper.
To paint a piece of wood, you need to remove the fittings from it so that the impregnation can get into all hidden areas of the structure. If this is not done, rot may form or a bark beetle may infest.
In order to renew the surface of wood, you can use the following methods:
- Paint the canvas. A wide range of colors allows you to choose the desired shade. You can choose a plain color option or paint the canvas with a specific pattern. The materials differ not only in color, but also in composition. After painting, the surface is covered with a layer of varnish.
- Self-adhesive film and wallpaper.
- Laminate. Ideal option to hide wood defects. You can choose any color, and the material is attached with glue.
- 1 Varnish selection
- 2 Preparing the door
- 3 Surface varnishing
- 4 Videos
Color palette
There are different colors of wood stain, and it is very difficult to answer the question of how to choose the most suitable one. This material allows you to add almost any shade to wood products. For example, black stain is very popular, which allows you to give the surface the appearance of a black mirror. It is recommended to polish the base before applying it.
Gray stain makes it possible to avoid highlighting the treated product from the overall interior. It is worth painting with it only if the walls and textiles in the interior are bright. Gray can cause depression, and products in this color will look too faded and gray.
Psychologists advise choosing a green stain (colored stain), since this shade evokes positive emotions. Green color is suitable for surface treatment of various interior items. Blue stain allows you to get a very expressive look to the finished product. Choose it to combine with yellow and white tones.
Selection of varnish: how not to make a mistake in choosing
To update a door, you can use several types of coatings. Alkyd varnishes contain solvents that give the wood a yellow tone and resistance to moisture.
To improve drying ability, increasing moisture resistance and strength, hardeners are added to the mixture. The surface coated with this product dries within 24 hours.
Alkyd varnishes make wood moisture resistantYou can impregnate wood with acrylic varnishes, which are made from water. They are non-toxic and odorless. To increase strength, hardeners are added to their composition.
You can update a room decorated with wood using nitro varnishes. Their main advantage is quick drying. They are based on solvents. One of the disadvantages is increased toxicity, so nitro varnishes are rarely used.
Polyurethane coatings are characterized by increased strength. Due to polyurethane, the wood is given a dark shade, so the surface of the canvas is primed.
How to paint doors coated with varnish or paint
Over time, any doors wear out and become unsightly. The moment comes when they need to be restored. It would seem that this is not a difficult task, and anyone can do it
But not many people know that before finishing the doors, you should pay attention to the coating with which they were previously painted. If you are not going to completely remove it, then you should take care of the compatibility of coloring agents, those that were previously applied and new ones
In this article we will tell you how to paint doors coated with varnish or other paints. We will also figure out which paint is suitable for this or that material from which the door is made.
Deciding on the material from which the doors are made
If the door is quite old or, on the contrary, new and expensive, then in 95% of cases it is made of natural wood. To accurately determine this, just lift the door; if it is heavy, then it is wood. Modern versions of such doors are finished with veneer, while older examples were simply coated with paint or varnish.
If you lifted the door without much effort, it means that there are voids inside it filled with cardboard, so the weight of the door is not significant. But such a door does not have high sound insulation, and therefore its price is much less than that of natural wood. The top of such doors, just like wooden doors, is finished with veneer. Note that the texture of veneer resembles natural wood and is mainly varnished for stability.
Painting a veneer door
It would seem that the new door will not have to be painted, but this is not so. When selling a door, the buyer is often warned that after installing it, additional varnish treatment is required. The fact is that unscrupulous manufacturers, having made doors and instead of covering them with varnish in several layers, they do it only once. Therefore, additional processing is required. How to paint varnished doors, but it’s not at all difficult to do. A clean door must be coated with a layer of varnish, and after it has dried, the entire door leaf should be sanded. Then remove all chips from the surface using a brush or vacuum cleaner and apply a second coat of varnish. After it dries, the door can be used.
An important point in this work is that the door sanding process should be carried out before each painting. Then the surface will be even and smooth, and the doors will become attractive.
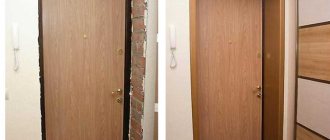
How to Paint a Previously Painted Door
Now we will look at a sample of an old door, opened with varnish or painted. In our version, this is a seasoned door with many chips, cracks and scratches. Such a door can be restored by removing it from its hinges or in a vertical position. Use a spatula to remove all paint peelings.
The entire surface of the door is sanded with sandpaper, and special attention is paid to cracks and pits. Using wood putty, all defects and unevenness of the door leaf are treated, but before that, they are impregnated with a special primer
After the putty has dried, the door is again sanded until smooth, all dust is removed, and areas that are not to be painted are sealed with tape. All this work is carried out before painting the doors coated with varnish or paint. After this, you should apply the first layer of paint and paint, and after it dries, the second. This can be done using a brush, roller or spray.
An important point here is the coating with which the doors were previously painted. If it was varnish, then the door should be varnished, and if it was paint, then paint
When choosing paint, pay attention to the compatibility of old and new material. If you decide to open painted doors with varnish, then in this case you should use a product to completely remove paint from the surface of the doors and only after that you can start painting with varnish
Don’t forget about the door frame and trims; they must be painted using the same technology as the door, only they cannot be removed, so all work will need to be carried out directly at the place of their installation. Now you know how to paint doors coated with varnish or paint.
What tools are needed?
You need to prepare for the work in advance, as you will need tools that the home craftsman may not have. To paint an interior door made of chipboard and other materials you will need:
- Supports for laying the product. It is much more convenient to paint by placing this interior attribute on a horizontal surface. You can place the door on trestles, stools, a large table, etc.
- A special tray or tray for paint and varnish. If you plan to paint with a roller, it will be problematic to dip it into the paint can. It is better to pour it into a wide container.
- Paint roller, brush or spray gun. You need to choose a tool for applying the coloring composition taking into account the characteristics of the latter and the type of product being painted. Thus, it is better to paint a laminated door not with a brush, but with a roller or spray gun, and the use of a spray gun is preferable. However, a brush should be purchased in any case. It is useful for processing hard-to-reach places.
- Rubber gloves to protect hands from paint.
- A respirator to prevent poisoning from dye vapors.
- An old robe or apron.
Modifications of stains
They are classified depending on what they are made from. They go on sale in the form of ready-made liquids, gels or powders, but the properties of stains depend only on the components and their proportions.
Water fighters
- Such stains come in a wide variety of shades, so you can choose the composition for almost any type of wood and make it the required tint in relation to the interior of a particular room.
- "Environmental Safety". For those who are concerned about the “purity” of the product, water-based stains are the best option. No harmful fumes, regardless of external factors. First of all, temperatures.
- Considering the base, it is clear that it is not difficult to wash off such a stain with water. In some cases, this is relevant if, in the process of working with wood, it is necessary to slightly change the resulting shade.
- Water-based stains are deep penetration agents. This property also has a negative component. During the processing process, the wood is additionally saturated with liquid. What does this mean? Firstly, it becomes more susceptible to moisture absorption. Secondly, shrinkage lasts longer and often initiates curling of the processed workpiece. Therefore, the use of stains from this group requires both experience and accuracy.
- The need to subsequently apply a protective layer to the wood. For example, varnish, which is most often practiced.
Alcohol stains
- The impregnation dries quickly. Some consider this a disadvantage, but the ease of use is obvious. Especially during outdoor work, when the weather is unstable and there is a possibility of precipitation.
- High-quality protection of wood from ultraviolet radiation and dampness.
- Strong specific smell. When organizing work in a room, it is necessary to ensure its effective ventilation. Will it be possible to do this in winter?
- Rapid absorption into the structure of the material. This makes it somewhat more difficult to treat wood with alcohol stains, since due to the uneven application of impregnation there is a risk of stains appearing against the general background. Experts advise using a spray gun, since it is almost impossible to achieve uniform shade of wood manually (with a brush) without proper experience.
Oil stains
Pros:
- Do not fill the wood with moisture.
- Easily change shade by adding dyes.
- The stains of this group are applied to the wood in a thin layer, evenly, so there are no difficulties in working with them.
- Do not fade when exposed to ultraviolet light.
- Application of an additional protective coating (varnish, wax) to the wood is not required.
- Inert to changes in ambient temperature and humidity.
- Certain toxicity.
- Long drying time (depending on application conditions).
Wax and nitro stains (acrylic)
Their characteristics are largely similar.
- After such stains dry, a thin protective film appears on the wood.
- Uniformity of shade over the entire treated area is guaranteed. The presence of stains and bald spots is excluded.
- The structure of the tree stands out especially clearly.
- The difficulty of working with these stains. Mainly due to the quick “setting” of the impregnation. Therefore, any further alterations are no longer possible.
- One of the advantages of wood is lost - the ability to “breathe”. The reason is the film that forms. Not all users note this, but nevertheless. How permeable it is is a big question.
Rustic stains
Quite new drugs. Their main purpose is to emphasize the structure of the material, to achieve several shades in one area
The use of such compositions requires high professionalism, so the author does not focus on them. Only for informing the reader, since it is unlikely that it will be possible to process wood yourself
If, of course, we mean a quality result.
Painting a door step by step
Having figured out how to cover a wooden door, you can proceed directly to the painting process.
Let's look at it step by step:
- Preparatory stage. Before painting wooden interior doors, they need to be removed from their hinges, laid on a stable and durable horizontal surface, and the fittings removed. If the latter is problematic, then you can wrap all the elements in foil and seal the locks with tape.
- Removing old finishes. When the canvas is ready for processing, the previous layer should be removed. For example, before repainting a varnished wooden door, you need to clean it and remove the old coating. It is best to take a grinding machine, which will work much faster than by hand. If there is none, you can use coarse sandpaper. If bubbles appear, a hair dryer will help. It will heat up the paint layer, and all you have to do is remove it with a spatula. You can also remove the old coating using an abrasive attachment on a drill. After finishing the work, it is necessary to sweep away all debris from the surface and grind. If the canvas requires reinforcements, then before painting the wooden door, you need to install them.
- Putty and sanding. If there are cracks, depressions, or unevenness on the surface of the canvas, they should be thoroughly filled with putty. It is best to choose a mixture of the same tone with the door structure, so that there are no problems with subsequent paint application. When the mixture dries, you need to walk over the sealed areas with fine-grained sandpaper to level the surface.
- Antiseptic coating. This stage is necessary for structures installed in rooms with high humidity. The antiseptic will protect the product from the formation of fungi and mold. The composition is applied before painting interior wooden doors. It is better if both this mixture and the paint are from the same company. When the antiseptic has dried, cover the surface with a primer, and then go over the entire door with putty. It is necessary to apply two layers: the second - after the first has completely dried.
- Coloring. Many people are interested in how to properly paint wooden doors? It is not difficult to restore the beautiful appearance of the structure on your own. You should not buy a spray bottle if you need to treat one or two systems. A roller or brush will do just fine. Before you paint a wooden door with your own hands, you need to thoroughly fluff the brush and remove loose hairs. It is best to paint a panel door with a roller. The process will take three stages, you should start from the upper left corner, gradually moving to the right, processing the entire surface of the door. When the first layer has dried, we re-paint the canvas longitudinally. The third stage is processing, starting from the upper right corner. As you can see, painting a wooden door correctly is not difficult and it does not take much time.
A brush is suitable for painting solid pine doors with your own hands. You need to move smoothly and confidently, avoiding applying the composition in excess.
Particular attention should be paid to the corners: paint should not accumulate in them.
Do-it-yourself painting of wooden doors with alkyd enamel is done in a horizontal position. If the structure contains glass elements, they must be sealed with tape or film. If the product has decorative paneled elements, they are painted first. To make the material adhere better, you can dilute the composition with liquid soap for the first layer. Apply clean paint with the second ball.
If you are covering the door with stain, then you do not need to apply a primer before painting a wooden pine door. This product penetrates the material quite deeply, creating high-quality protection against negative factors. The composition can be applied in the traditional way, or by rubbing and spraying. Before processing, the canvas should be slightly moistened. The composition is applied along the fibers and then across. After the stain has dried, sand the door with zero-grade sandpaper. Remove dust and dirt, then apply the next layer.
Often other materials are made to look like wood. It is not difficult to create such an effect. To do this, first apply any light paint to the canvas. When the layer is dry, wipe it with liquid soap. Next, the surface is covered with dark paint, and the liquid soap is removed.
We told you how to paint a wooden door coated with varnish or paint, what compounds are used for finishing, how to choose materials for processing a new or old structure. By choosing the right product, you can do the work yourself without involving professionals in the repair, that is, save money.
Wood imitation
If desired, you can paint it to imitate MDF or plywood-lined doors to look like natural wood. There are several ways to decorate this way.
Option one
The door leaf is painted with light gray, light beige or yellow paint and left until completely dry according to the instructions of the manufacturer of the coloring composition. Using a wide brush, the entire surface of the door is treated with liquid soap. A layer of darker paint is applied, and the liquid soap protruding onto the surface is washed off.
Option two
To do this, you will need a special brush, which can be purchased at any hardware store. This brush treats the soft fibers of the door covering. Then the surface is painted with two different colors (like wood) with dyes. Changes in the structure of the canvas made by the brush will spontaneously give curls, creating the illusion of wood.
After complete drying, the surface is sanded and varnished. Furniture can also be restored in a similar way.
Carrying out such work will not be too easy, so it is recommended to first practice on another similar surface, and not on the door itself.