Buying logs
Before buying logs, you must calculate the required number. Remember that the thicker the floorboards, the less joists you will need, but excess joists will not hurt and will give the floor additional strength. The maximum distance between the logs is 80 cm if the boards laid on them are 45 mm thick. Based on this example, calculate the required number of joists for your floor.
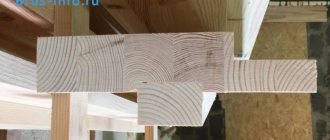
Speaking about the choice of logs, the first thing to note is that they should be made of coniferous wood, for example, pine or larch. Coniferous wood has high moisture resistance, as well as antiseptic properties that prevent the formation of mold and mildew.
Remember that during construction it is often necessary to resort to alternatives, so here too you can replace the timber with double pine boards. This method of laying a floor is almost as strong as a floor on blocks, but choose boards with a large cross-section without any defects.
When purchasing timber for construction of logs, inspect it carefully. You cannot use material with many large knots, however, by using support posts under the joists, you can allow a large through knot, remembering that it must be strictly above the support. There should also be no cracks or rot on the surface of the joists. It is better to buy a more expensive material that will last a long time than to change the floor several times using cheap wood.
Don’t forget to also buy an antiseptic, which should additionally be used to treat the logs before installation (for more details: “How to treat logs against rotting - choosing an impregnation and antiseptic”). It will protect the wood from fungus and most pests.
What are they needed for?
Properly installed beams and the distance between them ensure sufficient ventilation of the underground space of the house.
Laying wooden beams as lathing under the future floor allows you to strengthen the entire floor structure as a whole. In addition, noise and heat insulation materials are placed in the distance between the joists, which greatly improves the characteristics of the floor.
What methods are there for joining floor boards together?
Properly installed beams and the distance between them ensure sufficient ventilation of the underground space of the house, which means that the wood will not rot over time. Especially if the building is located on an area with high groundwater. How to properly install logs and calculate the optimal distance between the sheathing beams is discussed below.
Base for a wooden floor on joists
The joists can be laid on various bases made of wood or concrete, they can also be attached to the walls, additionally installing support pillars under the joists to give greater strength to the floor. Each option has technological features, which we will discuss below. When choosing one of these methods, you should pay attention to the operational purpose of the room in which you are building the floor, for example, if the floor in this room will bear heavy loads, then it is better to use a concrete base for a wooden floor.
Preparatory work
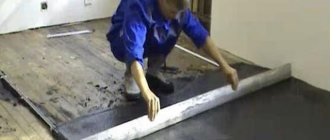
To install the main floor, you need to prepare a leveling base made of chipboard on which it will be laid.
Features of a chipboard subfloor
When constructing a base floor, it is necessary to leave gaps from the walls to prevent deformation of the sheets during seasonal expansion.
In places where moisture is likely to get in (bathroom, bathhouse), laying a subfloor made of wood-based material is not recommended.
Dark spot where chipboard is flooded with water
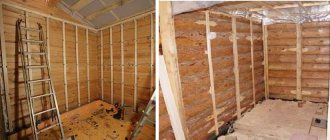
Installation of a wooden floor on joists on a wooden base
This method of constructing a wooden floor also has many different options, which have minor differences, but even the little things need to be thought through long before the construction of the building. When thinking about building a floor, consider not only the purpose of the room, but also the local climate, as well as your financial capabilities.
The floor construction algorithm may differ slightly from what is described below, but it is always the same. The wooden base for a floor on joists can be OSB boards or moisture-resistant plywood (for more details: “Installation of a wooden floor on joists - laying technology”). When building such a floor, you can lay insulation - glass wool or polystyrene foam, but do not forget that steam and waterproofing must be laid under the insulation.
Construction process:
- Preparatory stage
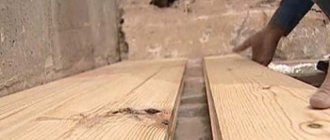
. Calculate the required number of logs and purchase them. Next, proceed to the most crucial moment - marking. If you do it incorrectly, you may face many difficulties later. - Installation of extreme joists
. The outermost logs will serve as guidelines along which you will lay the rest of the timber, so at this stage it is important to constantly monitor the horizontal level with a building level. If you are installing joists above a subfloor, you can fasten them to it with iron angles, which will increase the reliability of the future floor. Start attaching the joist from one of its ends, focusing on the marks and controlling the distance from the wall. Do not rush to immediately tighten the self-tapping screw to the end; first, it is better to simply tighten it in order to make control adjustments.
Having secured one end, adjust the opposite part of the log, controlling its horizontal position, and then securely fasten both ends.
In the same way, secure the outermost joist to the opposite wall.
- Installation of the remaining logs
. To avoid adjusting each joist separately, stretch ropes or wire between the outer joists. Using the rope as a guide, lay the remaining logs. Be careful and control the height difference with a building level, which should not exceed 2 mm. It makes no sense to align the joists more accurately, because it will take a lot of time, and a difference of 2 mm can be easily corrected when installing the finishing coating. - Floor insulation
. If you decide to insulate the floor, then first you should lay waterproofing material on the joists and base. When choosing insulation, make sure that its thickness is 5 cm less than the height of the joists. Next, cut the insulation so that its width exceeds the distance between the joists by 2 cm. Lay the insulation and begin laying the floorboards.
Floor beams can also serve as a wooden base for laying logs. This flooring is often used in non-residential premises. The algorithm for its construction is similar, but the logs are attached to the beams from the side with nails.
Ventilation of such a floor is ensured by vents in the foundation; in addition, you must ensure that the distance between the floor and the ground is at least half a meter.
Docking nodes
The quality of the flooring depends on the proper joining of the slabs and assemblies to each other and their correct installation to the joists or other base.
A few requirements that must be met:
- When joining conventional plates, be sure to leave a gap of 1 mm between them.
- The length of the screws should be three times the width of the sheet.
- The sheets are attached to the bars in increments of 15-20 cm, and in the middle of the sheet - 25-30 cm.
- If the joints of the slabs do not hit the logs, then a transverse sheathing is sewn to the horizontal beams.
When installing tongue-and-groove sheets, the joints are compacted with gentle blows of a hammer on a die with a groove cut from the remains of chipboard.
Correct joining of tongue and groove slabs
The main types of fastening elements for joists are metal anchors, brackets, corners or self-tapping screws on dowels.
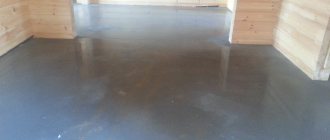
Construction on a concrete base
Concrete flooring is a complex and expensive structure, but its strength and long service life make concrete the most popular base for a wooden floor. When laying logs on concrete, you will not need cabinets for the logs, but they will have to be isolated from each other, otherwise this will lead to the formation of moisture, which will lead to damage to the wood.
Isolation is performed in several ways:
- Laying insulating materials. It does not carry any disadvantages and perfectly preserves wood from rotting.
- Logs can be impregnated with special solutions that prevent rotting processes. This method is really good, and the expensive impregnation will not be inferior to the previous method, but there is one drawback - such treatment negates the environmental component of your floor.
- The gap between the joists and the floor will prevent rotting of the wood, thanks to good ventilation. Construction while maintaining a gap is much more difficult, but the result is worth the effort. If you decide to maintain a gap, you can use metal corners for this. Using this method, you will slightly reduce the load-bearing characteristics of the floor.
Algorithm for building on a concrete screed:
- Marking. To make markings on a concrete screed, you can use a special rope that is dipped in paint, but you can also use improvised means. A rope soaked in paint is attached to the concrete at both ends, after which it is pulled back and abruptly released. This will “punch” a straight line on the concrete.
- Next you need to drill holes for the mounting angles. This can be done with a pobedit drill and a drill.
- As in the case of logs on a wooden base, secure two logs to opposite walls, screwing them to the corners, after which you can tighten the thread and adjust the horizontal position to install all the logs.
Installing joists using corners is one of the most common solutions. Despite the fact that this method somewhat reduces the strength of the floor, builders recommend laying logs on a concrete screed in this way, because it has a lot of advantages:
- You completely prevent rotting processes caused by contact between concrete and wood.
- To secure the logs in this way, you do not need to pour a clean concrete screed, because all the unevenness of the rough screed (up to several centimeters) will be hidden thanks to the metal fastening corners. Without making a clean screed, you save a lot of time, because it will take a lot of time to dry it, in addition, you will not have to spend money on the solution.
If you decide to lay logs directly on concrete using waterproofing materials, then they should be secured with anchors or also with fastening angles.
Vapor and thermal insulation with penofol
| Attach penofol with a stapler to the sides of the sheathing bars or joists. |
Instead of the top layer of insulation and vapor barrier film, it is more profitable to lay penofol - a foamed polymer covered with aluminum foil, 10 mm thick.
(also available under other trade names).
Penofol must be laid with the aluminized side up, towards the ventilated gap, across the sheathing bars and lowered on both sides of each bar. After this, penofol is nailed with a stapler to each side of all the bars so that a gap of 3-4 cm is formed between the aluminized surface and the floor covering slabs. The joints of the penofol panels are sealed with aluminized adhesive tape. The penofol layer will provide heat transfer resistance equivalent to a 40 mm thick layer of mineral wool and the necessary vapor permeability.
Subfloor boards are attached to the sheathing bars on top of a vapor-proof film or penofol. Instead of boards, slabs are more often used: cement-bonded particle boards (> 22 mm thick), plywood (> 18 mm), etc. Sheets and slabs are placed with the long side on the sheathing bars. Spacers are secured under the short side between the sheathing bars. All edges of the laid sheet must be supported - a block or spacer.
The use of polystyrene foam and polystyrene foam boards as insulation is not recommended. Such slabs serve as a barrier to moisture, which is always contained in the wood of the floor. By preventing moisture from escaping from the wood, foam insulation shortens the service life of the wooden floor parts. In addition, mineral wool insulation, due to its better elasticity, adheres more tightly to the joists than polystyrene foam.
To protect the underground space from ground moisture, it is advisable to cover the entire surface of the soil with a waterproofing film (and not just under the posts, as in the figure). The joints of the covering panels are sealed. The junction of the film to the walls must be connected to the waterproofing of the walls and also sealed. The floor posts lie directly on the film.
As a result, we obtain a ventilated underground space, limited by sealed shells - on top (vapor barrier) and below (waterproofing).
Household products
⇆
Such an underground space protects the house not only from moisture and cold, but also from the penetration of radioactive soil gas radon
.
Laying wooden logs on the ground
You can use this method of laying logs if you decide to build an economic, non-residential building, for example, a bathhouse, gazebo or barn. Laid logs must be treated with antiseptics, otherwise they will not last long. This method of laying lags assumes that you should use brick columns under the lags, which will serve as the foundation. If the load on the floor indoors is high, then you should use a strip foundation, but do not forget to make special ventilation vents in the foundation so as not to rot the wood.
Work order:
- Preparing the area. First, you must remove all the topsoil inside the room. You can use the removed soil to level the area.
- Holes for support under logs. Start with markings: calculate the required number of columns, taking into account the load on the floor and the size of the floor joists. Next, dig holes in the marked places. The dimensions of the pit should be equal to a masonry of 2 bricks (approximately 40x40), and its depth should be 40 cm. Next, you need to create a layer of sand inside the pit. Fill in the sand, water and thoroughly compact it down to 10 cm. After this, you need to fill in crushed stone 15 cm thick. To measure the layer, you can use a thin strip, which must be removed after completion of the work.
- Pouring concrete begins with preparing the solution. In order to make columns for floor joists, use a solution of cement, sand and crushed stone in proportions: 1/3/2. Next you need to talk about how to make columns for logs. The formwork for future posts does not need to be made in the ground, but it should be done above it in any case. The height of the wooden formwork depends on your further decision. If you build brick columns under the logs, then the height of the formwork should be small, about 5 cm above ground level. When making columns entirely from concrete, the formwork should be made directly under the logs, measuring the horizontal line with a building level. Pour concrete mortar inside the formwork and wait a day, after which you can begin laying joists or bricks. If you have made a concrete base for brick posts, then it’s time to start laying. The easiest way would be to do this with two people, so that one person lays out the brick and carries the mortar, and the other does the masonry with a single-row dressing. Having laid all the pillars under the floor joists, additionally measure them with a building level to avoid difficulties when laying the joists. When thinking about how to make the joist cabinets more durable, you can reinforce them using a wire frame.
- Laying lags. Before laying the logs, be sure to cover the cabinets under the floors with two layers of roofing felt, which will protect the wood from moisture. The logs should also be laid starting from the edges. To eliminate large differences in height, use special pads between the posts and joists. Do not use wooden wedges as they may dry out and lose their shape, causing an unpleasant squeaking sound on the floor.
- Lay all the remaining joists, stretching a guide between the outer bars. To secure the logs to the posts, it is best to use iron corners, which are attached to the posts with dowels. To give additional strength to the floor, as well as to avoid unpleasant creaking, it is recommended to fasten the corners on both sides of the joists. Next, you can lay the floorboards directly on the joists, or lay a subfloor first, such as plywood. Read also: “Which mastic is best for a wooden floor - types and rules of use.”
Fastening boards
Any wood is subject to deformation under the influence of moisture and temperature changes, so the edge board is laid so that there is a gap of 1-2 cm between it and the wall, this will preserve the integrity of the wooden flooring, even with strong changes in temperature and humidity.
After laying the floor boards is completed, the gap is closed with a plinth. Nails can be used to secure the boards, but they can rust and lift off the surface of the board over time. Therefore, for fastening it is better to use self-tapping screws with a length of 60 mm and a diameter of up to 4.5 mm.
What the logs on the posts look like is shown in the video:
Source
Design features and configuration of supports
Initially, the supporting elements were metal pins to which special shelves were welded. Gradually, the products were modernized, attention was paid to strengthening the elements, improving the design for reliability and ease of use.
The design principle of modern adjustable supports resembles a screw jack. The required height of the racks is adjusted by unscrewing the screw part. The adjustment accuracy is one millimeter. When the required height level is reached, the element is fixed using a special key.
Manufacturers produce:
- durable metal racks that can withstand heavy loads and are fire resistant;
- screw adjustable supports made of high-tech durable plastic, which allow you to adjust the cover precisely in height.
The plastic product is made from polypropylene. Depending on the modification, the product is equipped with various parts.
The basic basis of the product consists of the following parts:
- base;
- extension supply couplings with internal and external threads, different adjustment ranges;
- vertex.
The package also includes a slope corrector. The element is produced in the form of a disk and is integrated under the base of the rack.
The part performs the task of compensating for tilt and ensures installation of the support in a strictly vertical direction. If necessary, correctors are stacked on top of each other. Depending on the product modification, the elements compensate for a slope from 0 to 5%.
Auxiliary parts of the kit are holders in different designs. For example, the domestic manufacturer Level produces Level-Top mounts in the form of a disk equipped with a mounting lip.
The elements are designed for attaching wooden, wood-composite or special aluminum joists with dimensions from 30x45 to 100x100 mm to supports.
To secure the tiles, Level-Fix clamps have been developed, which simplify the installation of the coating. The fastenings are suitable for material widths from 300 to 600 mm. To install one tile, use 4 clamps. The parts are inserted into the holes provided in the upper part of the supports. Craftsmen who have worked with the systems write on the forums that additional fasteners are not needed, and the clamps are suitable not only for the specified tiles, but even for porcelain tiles of any size. Only the required pitch between the posts varies.
BUZON brand systems include clips for one-sided fastening of logs of various sizes, which snap onto the top of the support, special fasteners for aluminum logs and crosses with dividing plates for installing slabs.
1 — Clip 2 — Dividing cross 3 — Fastening for aluminum joists
Auxiliary components also include shock-absorbing rubber pads.
They level out different coating thicknesses, evenly distribute loads, prevent slipping and absorb impact noise. To make the pillow, special technical rubber is used that is resistant to deformation and aggressive environments.
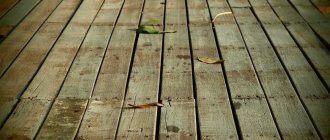
Place on adjustable supports:
- natural wood board;
- plywood;
- decking;
- board made of wood-composite material;
- tiles
What should be taken into account when making calculations?
When performing the calculation, the following factors are taken into account:
- thickness of the flooring material (chipboard, boards, etc.);
- approximate step between floor joists;
- expected specific maximum load on the floor.
All these parameters will determine the cross-section of boards, timber and other lumber used to construct the floor.
When calculating what distance should be between the floor joists, it should be remembered that the outermost joists cannot be placed further than 30 millimeters from the walls; an allowance must be made for this in the calculations.
As a result of calculations, the result is usually not a whole number, but it should always be rounded up so that the actual number of lags does not turn out to be less than the calculated one. Otherwise, the strength of the floor structure may not be sufficient, especially considering that such savings will be completely insignificant compared to the likely risk.
The cheapest floor joists can be found at sawmills, followed by online construction stores.
When it comes to floor installation, it is not recommended to save too much. The logs must have not only a suitable cross-section, but also sufficient density. If you make the lag step for a floor made of boards too large, the boards will begin to sag and “play.” Likewise, if the distance between the joists for an OSB floor is made greater than acceptable, then the slabs will begin to crumble and crack.