If your own bathhouse is still only a dream, then it’s time to leave them and move on to action. In fact, anyone can build a bathhouse in their own yard. The main thing is to know in what sequence and what actions to perform. The article will provide step-by-step instructions that will allow you to do everything yourself.
Drafting
No building is complete without a good design. Regarding the bathhouse, you will need to think about the number of rooms. A steam room will be a must for the bath. Its size will depend on the desired number of people who will be in it at the same time. If it is possible to make a steam room in a bathhouse with a size of 3x2, then you can be sure that six people can comfortably fit in it. In addition to the steam room, a relaxation room is needed in the bathhouse. Usually it occupies the largest space in area. In this room in the bathhouse, as a rule, the necessary furniture is installed for a comfortable pastime.
Another room that is necessary for a bathhouse is a washing room. It can accommodate a shower stall and a toilet. This room does not require a large area. If you separate the bathroom, then the washing room can be an intermediate link between the relaxation room and the steam room in the bathhouse. It is also worth providing a hallway or dressing room in the bathhouse. It will provide an air cushion that will prevent heat from escaping quickly.
Buy or build
Building a high-quality bathhouse that holds the temperature well, has the required level of humidity, is properly ventilated and has other necessary qualities is not an easy task. For an experienced builder, building a real bathhouse on your own site will not be difficult. But you shouldn’t take on this without special skills, especially since today you can inexpensively order a bathhouse from professionals.
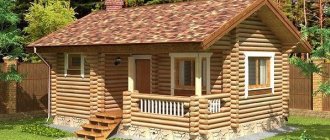
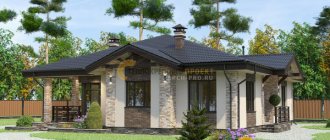
It is better to contact well-known construction companies with an impeccable reputation and a full range of services. Such organizations enter into contracts with their clients and are responsible for the quality of work performed. Professional builders will first approve the finished plan for a 6x4 bathhouse, and after that they will assemble the log house in accordance with all the rules of technology. Beautiful and successful bathhouse designs
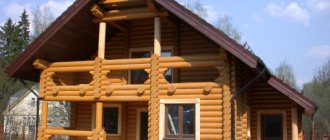
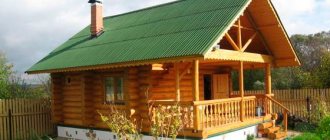
Having your own bathhouse next to the cottage is an opportunity to fully relax with the whole family or with friends. In addition, the bath is good for health. Another advantage is that it decorates the site and gives any home a respectable and luxurious look.
Bathhouse layout options can be any Source banya-ili-sauna.ru
Foundation
The frame structure is lightweight due to its features. This means that for such a bath there is no point in pouring a slab or strip foundation. An excellent solution would be to use screw piles. They are metal pipes with a small drill at the end. Thanks to the drill, the piles can be easily immersed in the ground to the required depth. The length of the piles must be such that its lower part can pass through heaving soils and be fixed below the freezing level of the soil. In this case, its upper part should protrude above the surface at a given distance.
Some craftsmen do not recommend marking for screw piles, which will serve as the foundation for the bathhouse. The reasoning is that it is quite simple to orient the position of the piles for a bathhouse relative to a fence or other structure. If the construction of a bathhouse is carried out in an open area, then markings for piles are indispensable. The photo above shows how this can be done. According to the developed bathhouse project, the dimensions are transferred to the site where construction will take place.
Pegs mark the places where the piles should be screwed in. The distance between the piles should be 1.5–2 meters. Everything will depend on the load applied, i.e. on the total weight of the structure. After marking, one of the corners of the bathhouse is selected in which the first pile will be mounted.
To simplify your installation task, you need to make a pit. The depth of the pit must be no less than the diameter of the pile screw. It will help to start rotating and deepening the screw pile.
The photo above shows that for high-quality installation you will need three people. Two carry out the twisting using levers, and the third holds the pile in a vertical position. In this case, the use of a magnetic level to track the vertical position is not yet required, since the pile is not firmly fixed in the ground.
After the pile is firmly planted in the ground, you can attach the magnetic level. In the photo above you can see that it is fixed perpendicular to where the tightening levers are located.
Two people continue to tighten the pile, and the third monitors its position by level. Thus, it is necessary to secure all the corner piles of the foundation for the bathhouse. After this, two ropes are stretched between the piles, as shown in the top photographs. They form a shaped channel into which the remaining piles will be mounted according to the markings that were applied. Piles are required not only for the main walls, but also for the partitions. After the piles are installed in place, it is necessary to align them.
To solve this problem, you can use a hydraulic level. You must first set up one of the piles so that it serves as a control. A mark is applied to it, which will be transferred to the rest of the piles. One part of the level is applied to the control point, and the second to the opposite corner pile. Once the water inside the level has stopped fluctuating, you can apply a mark.
To transfer the markings to the remaining piles, there is no need to approach them with a level. It is necessary to stretch the fishing line between the outer piles so that it touches the intermediate supports. After this, a mark is made on the fishing line. The supports are trimmed according to the marks. Next, a metal square with a side of 25 cm is welded onto them. It is necessary to hold the lower frame of the building.
Next, the strapping for the bath is performed. To do this, you will need a wooden beam with a size of 15x15 cm. It is laid on prepared sites on stilts for a frame bath. The photo above shows how the individual elements are connected at the corners. It is necessary to make a slot for half the thickness of the beam, and also cut out a part that will be equal to its width. The result is a recess with a size of 15x15 cm. The same procedure is repeated for the second log. After this, they are connected to each other and fastened.
The photo above shows how to proceed with the strapping for the partitions. A similar recess is made, but in the middle of the beam. After this, the second part is placed on top and fixed. The result should look something like the one shown in the photo below.
Waterproofing is laid between the metal platform and the timber. The diagonals must be checked to ensure that the walls of the frame bath are even. If the beam for the foundation of the bathhouse has to be increased, then this is done using the same method as connecting two elements and always on a pile so that there is the required stop.
After assembling the trim, SIP panels are laid, which will act as an insulated subfloor. The panels are screwed to the sauna frame with self-tapping screws; this is done for temporary fixation. The panels sag quite easily under weight, so they need to be reinforced with a beam, as shown in the photo below.
In order for the beam to be well fixed in the SIP panel, polyurethane foam must be applied to the joint. A gap of 5 mm is left between the individual panels, which acts as a thermal seam.
Which one is more environmentally friendly?
You need to understand what a frame bath is . It can be made entirely of wood, including the frame, as well as external and internal finishing. Naturally, this option is the most environmentally friendly.
Of course, a similar effect cannot be achieved with a metal frame, but the biggest mistake for environmental friendliness would be the use of plastic in any finishing option. Even the highest quality materials will release harmful substances under the influence of temperature, albeit in small quantities.
Wall assembly
The next stage in the construction of a frame bath will be the assembly of the walls. For these purposes, you will need an edged board with a size of 15x5 cm. The structure is assembled from it, as shown in the photo below.
The distance between the individual vertical posts is equal to the width of the insulation that will be used for the bath. When the assembly is completed, the wall frame for the bathhouse is installed. Individual elements are temporarily secured with jibs, as can be seen in the photo below.
The finished design looks similar to the one shown in the photo below.
It is worth noting that the places where window and door openings will be located are additionally reinforced with vertical and horizontal struts.
Photo gallery of finished frame baths
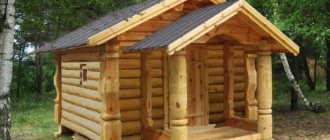
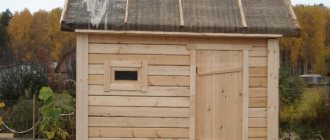
A modern frame bathhouse is not only functional, but also attractive in appearance. Both external and internal design are thought out in detail.
View this post on Instagram
Posted by banyatmb (@banyatmb)
It is worth evaluating a wide variety of photographs in order to give preference to the ideal option, which will suit all the moments. It is necessary to additionally pay attention to functionality, in particular to the wall pie of a frame bath , which should ensure insulation and durability of the structure.
Roof
An excellent solution for a bathhouse would be to install a pitched roof. Its equipment is somewhat cheaper and also simpler than a gable one. In the photo below you can see that the rafter system has three support points.
The rafter legs are located in increments of 60 cm from each other and are fixed to the upper elements of the wall. To achieve the required roof slope, it is necessary to calculate in advance the height of all walls so that an angle is formed between them. The roof slope angle for a bathhouse is determined individually for each project. Much depends on the meteorological conditions in a particular area, as well as the type of flooring chosen. If it is metal tiles, then the minimum slope should be 16 degrees.
In the photo above you can see that the front wall had to be raised a little. To increase its strength, jibs were installed on the sides. Roof overhangs are made at the front and back so that water flows down unhindered. Waterproofing, control sheathing and sheathing under the roof deck and the roof deck itself are attached to the rafters. A video about the construction of such a bath can be seen below.
Construction technology
External supports are mounted according to the planning scheme, connected to each other by horizontal and diagonal connections. The vertical posts rest on the lower beam frame and are connected from above with bars. The supports are placed in increments of 30, 40, 60 cm, the base and top chords are made from parts similar in cross-section to the racks. Internal and external coverings are attached to the vertical elements of the frame.
The parts are equipped with cuts, grooves and tenons for easy assembly of the bathhouse frame. The modular version according to the standard design is supplied disassembled with precisely adjusted connections and detailed instructions. The elements do not need to be modified in place for step-by-step joining.
Insulation and finishing
Due to the fact that SIP panels are laid on the floor, it does not require insulation. Floor finishing is carried out at the request of the owner. A heated floor can be installed on it and a screed can be poured on top or a laminate can be laid. Walls require a special approach to insulation. First of all, waterproofing is done on the outside of the bathhouse wall so that water does not get on the insulation.
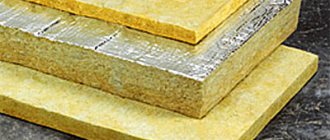
Insulation is installed in the prepared gaps that were left between the racks in the walls of the bathhouse. An excellent option for a bath would be mineral wool. It has a certain vapor permeability, which will facilitate partial air exchange between the bathhouse and the street. The insulation should be inserted with little force so that it is well fixed inside. After the insulation has been installed, vapor barrier of the bathhouse premises is performed. For a steam room in a bathhouse you will need thick foil, as shown in the photo below.
The inside of the bathhouse walls can be trimmed with clapboard, but the outside will look better as a block house.
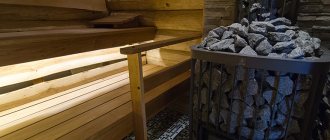
Installation of both the first and second versions of the bathhouse material is carried out on a wooden crate. After the cladding, the bathhouse is arranged. A stove is installed in the steam room, and interior doors are installed. If the bathhouse will be used all year round, then you should think about an autonomous heating system. Additionally, you can build a small terrace where you can spend time with friends.
Interior work
Communications and electrical wiring in a frame building
In a bathhouse, the wiring is made internal, hidden in plastic gutters; power cables are not allowed to be placed in metal boxes or steel-braided hoses. Lamps are used with moisture-proof housings; sockets and switches are not installed in the steam room, only in the dressing room.
The water pipeline is laid in the ground if the bathhouse is used all year round. Pipes are placed taking into account freezing and insulated with insulation. During summer use only, an air method of supplying water in a hose is allowed, but with the onset of cold weather, the liquid is drained from the pipes, tank and toilet siphon.
What's the best way to set up a stove?
The remote firebox, which is connected to the steam room by a channel for supplying heated air, works rationally. The stove requires a separate base made of brick or reinforced concrete. A channel is cut out in the wall of the dressing room adjacent to the steam room, which is lined with thermally insulated brick.
A chimney is installed vertically with an outlet to the roof.
The location for the combustion channel is chosen so as not to reduce the space for shelves in the steam room.
The foundation of the furnace is insulated with a heat-resistant insulator, for example, fiberglass, asbestos. A metal sheet is stuffed in front of the oven door.
Insulation scheme for a frame bath
You can insulate the walls using mineral wool.
Types of insulation are used that do not release toxic components in conditions of humidity and heat. Mineral wool mats become saturated with moisture and lose quality, so they require a ventilated gap between the insulation and the waterproofing.
The foil look works well. It is placed with the shiny side into the room so that the thermal infrared rays are reflected back into the room. The foil is selected according to the thickness of the walls, the screen is installed separately or together with standard insulation. Reflecting heat significantly reduces fuel volume.
Drain device
The volume of wastewater depends on the area of the bathhouse and the intensity of use.
Drainage is organized in the following ways:
- liquid intake into the ground under the floor;
- discharge through a system with drainage wells;
- use of a cesspool;
- use of a septic tank system;
- connection to the city sewer.
Pipes in the ground are insulated from freezing and placed at a slope towards the receiving sump. Timely drainage of water helps to avoid mold, mildew and destruction of floor structures. A separate sewer system is made for the bathhouse or a pipe is connected to the general drainage system to the septic tank.
Installing proper ventilation in the bath
After using the steam room, intensive ventilation is required to reduce the humidity in the room.
Three types of ventilation systems are used in the bath complex:
- natural hatching and feeding;
- forced method;
- system with air purification and recovery.
In the first case, the air leaves and is supplied through built-in or mounted channels. The forced method involves the use of fans. They are mounted at the input of the output channel and the output of the supply channel. A complex cleaning system is used in large establishments; it is not installed in private buildings due to its high cost.
Summary
As you can see, building a frame bath has its own difficulties. Some stages of constructing a frame bath cannot be completed without the help of a partner. An important stage of construction is the supply of various communications. These include water, sewer and electricity. All wires inside a frame bath must be double-braided and laid with non-flammable corrugation. For the steam room in the bathhouse, moisture-resistant lamps are used. To keep electricity consumption in the bathhouse to a minimum, you can consider using LED lamps. As windows for a bathhouse, you can use metal-plastic frames with a wood finish. They will cost a little more, but will look quite harmonious.
Recommended Posts
How to make shelves for a garage with your own hands
DIY workbench
How to raise a garage door with your own hands
Bath interior inside
Frame bathhouse 5x5: projects and drawings
How to make a greenhouse from window frames
Material calculations
A frame bathhouse of different sizes is being built with your own hands. We will consider a standard option that is suitable for construction by novice craftsmen.
The finishing of the bathhouse inside and out is often carried out with lining made from coniferous wood. The roof is equipped with a gable roof, and metal tiles are used for the roofing.
Starting from dimensions of 5 by 4 meters, to make the foundation we will need:
- two cubes of concrete;
- 0.3 cubes of edged boards;
- 80 linear meters of fittings.
A turnkey frame bathhouse requires large financial investments specifically for the construction of the frame. To make a frame you will need:
- 5.3 cubic meters of timber, section 12 by 12 centimeters;
- 36 square meters, mineral wool, 10 centimeters thick;
- about forty squares of vapor barrier material;
- 75 squares of wooden lining;
- 40 squares of waterproofing material.
If you need to save money, the timber can be replaced with a board. Floor installation is also an important point. To make a floor in a bathhouse with your own hands you will need:
- 0.2 cubes of boards 150 by 50;
- twenty linear meters of plinth;
- twenty squares of mineral wool and 20 squares of lining.
If you want to save money on the construction of a frame bath, then it is on the construction of the roof that you can do it. You can purchase the cheapest insulation and cover it with unedged boards.
But since our bathhouse will have a gable roof, the attic space can be used to store various tools and unnecessary items. To build a roof you need:
- one set of drainage;
- 0.2 cubes of slats for rafters;
- 0.1 cube of planks for sheathing;
- 0.1 cube of cornice slats;
- twenty squares of metal tiles.
In addition to the materials listed, you will need:
- asbestos pipes;
- screws and nails;
- staples;
- cement, sand and gravel.
If you are building a frame bathhouse with your own hands using step-by-step instructions, you need:
- level, square and tape measure;
- hammer, screwdrivers and pliers;
- electric drill;
- concrete mixer;
- container for dosing bulk materials;
- screwdriver;
- hand saw or electric saw.
Having made the necessary measurements and selected materials based on them, we begin to design the future premises.