New technologies and building materials from the construction industry have not been able to move the traditional log bathhouse from first place. So far it is ahead of any design in many respects.
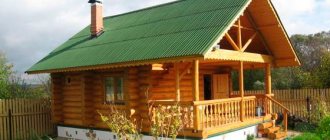
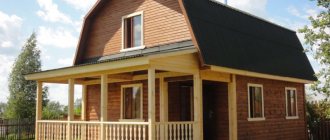
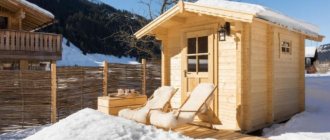
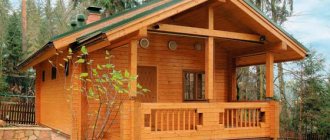
Very often in suburban areas you can find, for example, a 6x4 log bathhouse with or without a veranda.
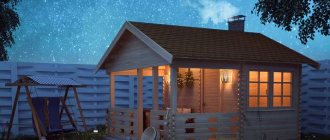
Log sauna with veranda
Advantages
- Natural material and environmentally friendly. Due to its natural origin, wood has a beneficial effect on the human body, giving it the opportunity to inhale beneficial substances.
- Saving money on the purchase of building materials.
- Low thermal conductivity of wood. In winter, a 6 by 6 bathhouse with a veranda retains heat well, even with thin walls. Heating costs are minimal.
- The log house of the bathhouse has an aesthetic appearance. Even log buildings of simple shapes and without additional finishing look stylish and beautiful.
- Ease of assembly is one of the most important components of a log sauna. Due to this, construction time is significantly reduced. If necessary, the building can be easily disassembled, transported and reassembled in a new location.
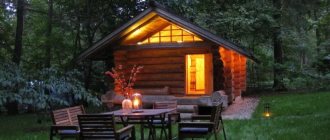
Bathhouse with veranda 6 by 4 made of logs
What could happen in such a project?
The choice of premises depends on the personal preferences of the owners. When planning a 6x6 bath house, the rooms usually have the following purposes:
- Rest room,
- Gym,
- Dinner Zone,
- Small cinema
- Bar,
- Workshop,
- Living space, bedroom.
Designing a Finnish house: important points of construction technology
On the ground floor you can place a dressing room, a washing room with a plunge pool, a vestibule with access to the terrace, a small dining area, a steam room, and a relaxation room. On the second there are a couple of rooms with a door opening onto the balcony.
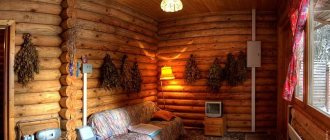
Wooden buildings encourage people to use them for permanent residence. Wood has the ability to saturate the room with life-giving air, which helps people get the most out of the city. This is noticeable from the first seconds of being inside.
Flaws
- Fire hazard. To reduce the influence of this property, all wooden structural elements should be treated with special means that help increase their resistance to fire.
- Shrinkage. Finishing work can only be done after six months.
- Care. In order for wood to preserve its original appearance and properties, it requires special care. Alternatively, you can cover the logs with veneer material to protect them from the environment.
Bathhouse 6x4 with veranda under construction
Floors
Since there is a washing room and a bathhouse on the ground floor, the flooring should be made of natural boards. It is important to provide a water drainage system. The rest room has insulated floors.
It should be understood that the steam from boiling water that flows from the shower and steam room cannot be quickly ventilated by air vents. Therefore, underground structures made of wood need to be thoroughly impregnated with antiseptics. To insulate the floor in a recreation room in a 6x6 bathhouse, you need to plan protection from steam.
How to choose wood
The most practical material for a log bath is pine. It is best to purchase wood harvested in winter, then it is more moisture resistant. Select high-density wood with log diameters of 180-250 mm.
Interesting projects of bathhouses made of 6x6 logs with a veranda for a suburban area
Tip: make sure that the difference in diameter between the trunks is up to 30 mm.
Use mainly logs harvested from northern conifers. Due to the dense structure of wood, their properties do not change due to increased humidity and temperature changes.
The photo shows a top view of a wooden bathhouse with a veranda
Features when purchasing
- There should be no blue spots on the cut of the log; keep in mind that its price will be higher.
- Make sure that the core is even in color, dark and occupies most of the cut.
- The surface of the log should be yellow - dark or light.
- Make sure that there are no gaps on the branches, if there are any.
- The wood should be hard when cut.
- The presence of resin pockets is unacceptable.
Foundation
The foundation is of the following types:
- Pile,
- Columnar-ribbon,
- Tape,
- Columnar.
Tape and columnar-tape options are considered the easiest to finish and the most durable. Although they are expensive, they are used often. Let's consider a strip foundation; as a rule, for its construction it is necessary:
- Dig a trench according to the diagram that is in the project. The depth should be slightly greater than the depth of soil freezing in a specific area,
- Create a sand cushion at the bottom so that the thickness is up to 15 cm. To do this, pour sand, pour in water, compact it,
- Install wooden formwork. For this purpose, ready-made boards or boards with a thickness of 25 mm are used,
- Place a reinforcement cage inside the formwork. This will help the foundation avoid cracking during temperature fluctuations,
- Mark the foundation horizon (top plane) using the water level,
- Pour in concrete mortar. You can prepare it yourself or order it from an organization. The upper plane of the foundation is located horizontally. Filling must be done in one stage, otherwise the foundation will not be very strong.
How to build a sauna from logs
Below instructions will tell you the main stages of construction. Try to stick to them.
How to prepare material for work
- Plane the log “under the bracket.” The difference between the upper and lower diameters by more than 30 mm is unacceptable.
- Saw along the length of the wall and arrange into sets. Place logs with unequal lower and upper diameters in a corner with different ends and cut them at right angles.
- Cut out the grooves and “paws”:
- In the “bowl” is the most common method. There are three options, in one of which the “bowl” is turned down, allowing you to protect the wood from possible rotting;
Cutting into a bowl
- In the “paw” - the most economical option. However, subsequently such compounds begin to rot, so the first option is preferable.
Cutting into the paw
- After cutting down all the “paws”, check how tightly the logs fit. If not enough, put it on the bottom tow.
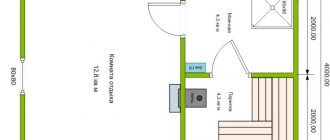
Layout of a 6x4 bathhouse with a veranda, a relaxation room and an entrance hall
Foundation
The construction of a bathhouse with your own hands should begin with the foundation, having first determined the nature of the soil on the site. Most often, a log bathhouse is installed on a columnar foundation, the depth of which is 700-1000 mm. They use brick, concrete or stone for this, as they are more durable than wooden pillars.
The strip base should be erected when it:
- garden;
- forest;
- clayey;
- loamy;
- marshy;
- from coarse sand or fine gravel.
When the building is located on a slope, or when swelling of the soil is possible, a screw or pile foundation for the bathhouse should be made.
Project of a 6 by 6 bathhouse with a veranda on a summer cottage
Walls
- Waterproof the foundation with two layers of roofing felt.
- Install the “mortgage crown”.
- Place the first pair of logs on the foundation parallel to each other on opposite sides.
- Cut them into a “bowl” for laying the top logs.
- Place the next pair of logs into the finished slots. Check the connection, it should be at right angles.
- Install the second crown and all the others in the same way.
How to caulk walls
The process involves filling the cracks between the wooden elements of the bathhouse, for example, logs and in the notches, with fibrous materials. In this case, the material for caulking should protrude from the grooves on both sides of the frame by 50 mm or more.
Spread the fiber materials so that their fibers are located across the groove. After this, they are hammered into the cracks using caulking. Work should be carried out consistently around the entire perimeter of the bathhouse. The inside needs to be caulked after the outer layer.
Tip: to reduce the ventilation of the walls, apply caulking twice - after erecting the walls and after they have settled.
Roof structure
When building a 6 by 3 bathhouse with a veranda, use a pitched or gable roof. Make rafters from well-dried coniferous wood. Remember the main thing: when installing the roof and conducting communications, you should not drive nails directly into the logs; the bathhouse will shrink over time.
Veranda
The sauna terrace is a great place to take a break from the steam room in the summer. It can be attached to an already finished structure or done simultaneously with it. The second option is more practical, since in the first case you will have to wait 1.5-2 years until the wood dries and shrinks.
It differs from an ordinary room in that it has no walls. But, they can be made sliding, turning the veranda into an additional room. (see also the article Projects for bathhouses made of rounded logs: options)
Self planning
Despite the presence of a large number of different schemes, you can also plan the future building yourself. The advantage of designing a bathhouse with your own hands is the ability to create a building that will fully meet your wishes and needs.
There are several useful recommendations from experts that you should pay attention to when designing yourself.
Dimensions
The terrace does not have to have fixed dimensions. Despite the fact that one part of it must be integral with the bathhouse and cannot extend beyond its boundaries, the other can be stretched to the size you need. The area of the veranda is determined not by the length or width of the main structure, but by the number of people relaxing on it.
Also, the size of the terrace is greatly influenced by the secondary elements that you plan to place on it. Objects such as a swimming pool should be included in the layout from the beginning and greatly increase the area of the bathhouse veranda.
Form
Bathhouse with terrace
Traditionally, the veranda follows the shape of the house, which is quite natural, given that it is a kind of continuation of it, but this condition is not mandatory. The terrace can also take the form of a covered corridor that will connect the house and the bathhouse - you can equip it with a home solarium or winter garden.
Note! If the terrace has a complex or broken shape, do not forget that you can experiment only with three available sides, while the fourth side is one of the walls of the bathhouse. The exception is a veranda in the form of a corridor or a separate covered extension connected to the main building through a covered passage.
Exterior
Bath terrace
The material from which the terrace will be built must be similar to the walls of the main building so that the extension looks organic. On the foundation, the veranda should be located with the same depth as the bathhouse, so that its shrinkage has the same significance as the main building.
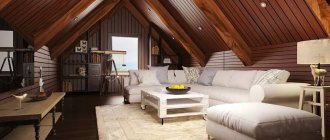
Second floor
If the bathhouse will be built with an attic, the terrace can also be located at the level of the second floor using support pillars. The price of such a design will be an order of magnitude higher than its ground-based counterpart, but fresh air and a light breeze will be a guaranteed reward for the increased costs.
