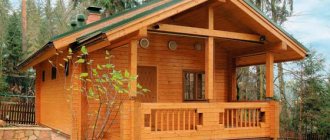
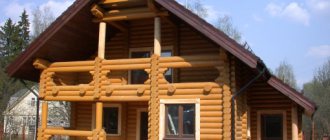
The steam room room should be small; the popularity of projects for small one-story bathhouses is often higher than for full-size buildings 5x7 m or even 8x12 m. According to many experts in bathing, comfort and free space in a small-sized sauna or bathhouse, you get less steam, but the steam produced is significantly greater hotter and richer.
Which bathhouse project to choose
If you do not go into the intricacies of the bathhouse process, but focus only on objective indicators, then the construction of a small one-story bathhouse looks more attractive from all points of view:
- Low costs for drawing up a project and erecting a one-story building;
- Minimum consumption of firewood or electricity;
- Long service life of a one-story bathhouse.
The last point has always remained a mystery for many customers, and for developers of standard projects for one-story baths, although there is nothing unusual about it. A small one-story building, in which a steam room or sauna takes up most of the usable space, warms up and dries many times faster, better and more efficiently than huge bath houses with billiards and a swimming pool.
But comfort remains comfort; even for a summer cottage as a temporary shelter, there is no point in choosing a project with a minimum level of comfort. At a minimum, even in a small bathhouse there are two compartments:
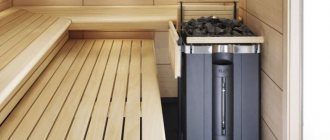
- Steam room, which is allocated at least 3 m2;
- Locker room or rest room for 2-3 m2;
- A small shower behind a partition, which in many small bathhouse designs replaces a suspended wooden bucket or tank of water.
For your information! In the project of a summer one-story bathhouse, instead of a locker room or rest room, a covered terrace or canopy can be used.
This does not mean that all winter bath projects are much more comfortable and convenient than summer ones. Often the sauna box itself is built a short distance from the house next to an artificial pond or swimming pool. According to the design, the one-story winter bathhouse contains nothing but a very hot Russian steam room, a brick heater that occupies half the building, and a small dressing room in which you can leave shoes and outerwear thrown over your shoulders.
According to the owners, all amenities are in the house. The steaming process is as close as possible to a Russian bath with short-term gatherings in a small, very hot steam room, plunging into an ice bath or dousing with water, followed by a long rest in comfortable conditions at home.
Peculiarities
At the initial design stage, the specifics of the bathhouse building should be taken into account. A small structure made from high-quality building materials costs the owner less than the construction of a large steam room. You can do the construction yourself or outsource the job to professionals who will complete the project in a few days. This is a huge saving of money, time and nerves.
The 3 by 4 layout allows, in the presence of low temperatures, to organize high humidity, which contributes to the rapid heating of the room. In the Russian steam room, the main energy carrier is natural wood, which, when heating the bathhouse, has a positive effect on the human body. A mini-bath can be compactly furnished with modern equipment, which creates free space. Therefore, a 3 by 4 bathhouse is popular among summer residents; it fits organically into the decor of the site.
Attention!
For work, wood treated with antiseptics is used, otherwise dampness or existing damage will shorten the service life of the structure.
What material should I use for a bathhouse project?
The construction of even the smallest one-story bathhouse requires a very thoughtful and balanced calculation. If there is no ready-made sample, for example, from friends or neighbors, from which you can copy the solution, then it is best to order a layout or use one of the standard designs for small-sized one-story baths. Anything that is built at random, as a rule, heats poorly and does not last long.
In the vast majority of cases, small baths are built from wood; this can be a building project made of timber, logs, or even a frame version with double insulation and facade finishing with siding.
Ardent fans of Finnish saunas often order projects made from SIP panels or hollow red brick blocks. A small one-story building on stilts, depending on the design, can retain and maintain heat in a steam room for almost two days from the moment the electric heater is turned off or the stove is turned off.
Construction of brick walls
For a bathhouse, it is better to use red brick, which has undergone heat treatment and has a lower thermal capacity. To calculate the amount of material needed, you need to calculate the area of each wall. To do this, the width is multiplied by the length. Then you need to divide this number by the area of one brick. The area of the masonry joints can be neglected, because you will still need to make a reserve in case of battle or marriage.
Calculation of the number of bricks
The wall can be erected using several methods:
- in two bricks with external insulation.
- with air gaps, they are about 6 cm;
- with a layer of insulation between two rows of bricks.
Work begins with the construction of corners. This is an important process because... It is they who will subsequently ensure the correctness of the entire structure. In order to maintain the vertical level of the future walls, two metal profiles of 5x5 cm and a length equal to the height of the future walls are dug into the corners. They are leveled and secured with jibs. A fishing line is stretched between them to the height of one row. After it is laid, the line is rearranged to the height of the next one. The thickness of the seam should be about 20-25 mm. It should be applied at a distance of no more than a meter so that it does not have time to dry. Additionally, the plane is checked using a bubble level. If the second and third types of masonry are chosen, then it is necessary to ensure a bandage between the two walls. This is achieved by laying two bricks transversely opposite each other at certain intervals. Also, each row should be offset by half a brick to ensure the overall interweaving of the entire plane.
Brick wall laying
A lintel must be installed over windows or doorways. Usually it is reinforced concrete. You can purchase it ready-made or pour it directly on site. It should extend beyond the openings by at least 25 cm. Supports are installed and a wooden board is mounted on them. Two rows of bricks are laid out on edge. Between them there are reinforcement rods, which should also extend 25 cm beyond the opening, and it is better to bend them to intertwine them with the existing masonry. Concrete is poured inside. After complete hardening (usually 10-12 days), the lower supports can be dismantled and the logs removed.
Brick lintel
Universal projects and solutions for one-story baths
The most budget-friendly option for a one-story steam room can be called a bath structure assembled in the form of a barrel on a low-power columnar foundation. Despite its apparent simplicity, the room has a small locker room and a dressing room, separated by a partition with a steam room.
In a small bathhouse, up to four people can steam at the same time, but the project is not very convenient for so many people due to the fact that you can only walk through the room along the center line of the room. If a fire or any emergency occurs, it will not be easy to quickly leave a small room. This type of bathhouse is convenient to use as a seasonal steam room in a suburban area.
Steam room area
The size of the room where the main process takes place depends on several reasons.
- Steam room heating options. If the stove is brick, then we start from its size. If it's electric, it won't take up much space.
- The number of people who will steam at the same time.
- The height of the tallest family member.
The minimum size of the steam room is 2 sq.m. It’s convenient to steam there for one person, or less often for two. An area of 3 square meters or 1.5x2 meters around the perimeter is suitable for three or four people.
If the size of the plot and the family budget allow, then the size of the steam rooms in the bathhouse is determined based on the power and speed of heating the room. the long wall for the shelves should be less than 2 m, the short one at least 1.5 m.
The height of the ceiling in the steam room affects the speed at which the air in it warms up to the desired temperature. As a standard, ceilings should not be lower than 210cm. then, when swinging a broom, nothing will interfere with this bath procedure. If there are tall people in the family, then the ceilings are made 230 cm. The maximum ceiling height in the steam room reaches 250cm.
The size of the shelf depends on how the owners are used to steaming. If you are sitting, then there is no need to make them long. A length of 150cm and a width of 45cm will be sufficient. In a lying position, you will need a shelf from 1.6 to 2 meters in length and a width of 65 cm.
The windows in the steam room are located at a height of 120 cm from the floor. Window size 35 x 35 cm.
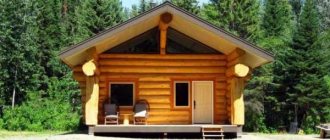
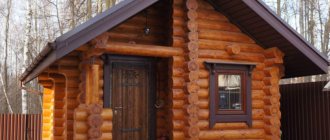
Classic log bathhouse
A real Russian bathhouse should be built from logs. A properly built log house can stand without repair for at least 15 years. Moreover, the walls of a one-story building are often not even insulated according to the design, only the facade is periodically updated, and the joints are minted on the windows and lower crowns of the building.
As an example of a project made from a 3x4 m bathhouse log, you can use the photo below.
This is exactly the case when the developer managed to invest in the project important construction solutions that are usually ignored by non-professionals:
- The entrance to the bathhouse, locker room and steam room are on the same line. There are small windows in each of the steam rooms and locker rooms, as well as in the entrance door. This means that in case of heavy smoke or gas poisoning, you can always leave the room without any problems;
- The roof of a one-story building was built according to all the rules of science. For bathhouses - log houses 3x3 m or more, the roof overhangs are made very long. This allows you to effectively retain heat, get rid of condensation and protect the building from rain and wind;
- At the entrance to the bathhouse there is a covered platform under a canopy. For a small bathhouse there is no point in building a full-fledged terrace, but a canopy over the entrance will help organize summer gatherings in the evening, after the steam room.
In general, the project turned out to be successful, durable and, like all good things, very expensive; on average, the construction of a small one-story log bathhouse will require at least 300 thousand rubles.
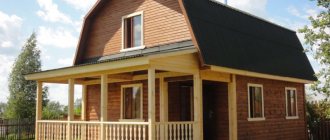
A more affordable project for a 3x3 m log bathhouse is shown in the diagram below.
As in the previous case, the box of a one-story building is assembled from 200 mm logs.
The room is divided in a classic way into three sections:
- A dressing room combined with a rest room;
- Small washing room;
- Steam room with an area of 3.5 m2.
The disadvantage of this one-story bathhouse project is the poor roof design. If you build a steam room, as they say, in an open field, then it is best to use a roof, as in the photo.
Waiting room
The dressing room is made with a minimum area of 1.3 sq.m. This size is enough to take off clothes and hang them on hangers.
In a large bathhouse, space for a dressing room can be separated by calculating the number of people who will be there at the same time. Typically the area is from 6 sq.m.
In front of the dressing room, you can make an additional corridor that traps cold air in winter.
Timber bath projects
The construction of even a small one-story steam room is always associated with the problem of allocating a free local area. Therefore, we have to look for projects for the smallest bathhouse buildings. The timber has a remarkable property - it can be used to build an arbitrarily small bathhouse, down to the size of a doghouse. One of the options for a 2 by 2 m bath is shown below.
The steam room is assembled from logs, all other parts are from timber. The result is an inexpensive one-story sauna, warm and durable. Walls made of timber do not retain heat very well, so the room is traditionally lined with siding or upholstered with a block house.
A more civilized version of the previous project involves the arrangement of a canopy and a small summer terrace. Such designs are very popular for small country houses and dachas, where most of the site is occupied by beds, fruit trees and shrubs.
Any sauna or steam room in the yard is always fraught with problems with melted snow, the appearance of puddles and, as a result, the need to deal with groundwater. This problem cannot be neglected, otherwise the base part of the timber frame will rot in 3-5 years.
At a minimum, you will need to make a full foundation blind area, lay drainage and cast a concrete walkway. If you have to install a small bathhouse on an unprepared site, then it is best to immediately place the steam room box on a columnar foundation or piles.
Pile foundation
Sectional view of foundation on screw piles
There are several ways to build a foundation. Piles can be bored or driven. In the first case, a well is drilled, formwork is made, reinforcement rods are lowered and the entire space is filled with concrete. In the second option, ready-made concrete, wooden or metal posts with a pointed end are driven in immediately. The most suitable options for a small bath will be screw ones. They consist of a metal base in the form of a pipe and blades that help immerse the supports into the ground. You can purchase them or make them yourself. If you chose the second option, then you need to act like this:
- The first step is to find out to what depth the soil freezes. To do this, you can contact the appropriate service.
- Pipe blanks with a diameter of 110 mm are purchased. The thickness of its wall should be more than 3 mm. The total length should be such that it can be sunk below the freezing level by 50 cm and at the same time so that it is 30-40 cm above the ground surface. Additionally, you can buy blanks for screws. It is also necessary to make a square cap on the pile. It should be 25x25 cm in size and 5-6 mm thick.
Screw pile manufacturing processIf blanks for augers have not been purchased, they can be made from metal 5-6 mm thick. To do this, you will need a sheet with a size of 30x30 cm. A circle is cut out of it. A hole is made inside the diameter of the pipe. After this, it is cut halfway and the parts are bent to form blades.
- The end of the pipe that will plunge into the ground becomes sharp. To do this, several vertical cuts of 15–20 cm are made in the form of triangles. After that, they are folded inward and boiled.
- The screw is welded on.
- Additionally, in the upper part you can provide holes for a lever with which they will be wrapped in the ground.
- All piles are primed with paint and coated with an anti-corrosion compound. This will extend their service life.
- The distance at which it is better to place the elements between each other is 1 m. Additionally, it is necessary to provide for the presence of supports for the partitions of the building.
Installation of pile foundationTo ensure that the piles go into the ground exactly vertically, you can tape them with tape or attach a level with a magnetic base. It is important that someone constantly monitors the value of the bubble so that any corrections can be made in time.
- After all components are immersed, they must be aligned in a horizontal plane. For this purpose, one standard is selected that has the smallest offset. A mark is made on it. Using a laser level, a rule with a level, or using a water level, these marks are transferred to all other elements. Next, trimming is done using a grinder.
- Holes are drilled in the caps to make it easier to secure the grillage later. It can be made from beams measuring 20 × 20 cm (you can also use logs 15 × 15 cm, 10 × 15 cm or 10 × 10 cm), or by pouring lintels. In the first option, it is necessary to provide a dressing. To do this, in the logs that will be located perpendicularly at the edges, a sample is made to half the depth and to a width equal to the width of the log. After this, they are fastened together with hexagonal head screws (“capcaillie caps”). For a concrete base, a trench is dug between the piles to a depth of 20 cm, a backfill of sand is made, which is compacted. After this, the formwork is set up, the sheathing is laid and the mortar is poured.
Grillage options
In each of the described options, separate supporting elements for the stove should also be provided, especially if you plan to use a heater. This is very important, because its weight can be large, which can lead to damage to the floor and joists.
Note!
Such a foundation will be an ideal solution for frame structures, log buildings, as well as small foam block bathhouses. If the soil in the area where construction is planned is quite strong and rocky, then you can use something between a pile and strip foundation - a columnar foundation. In this case, separate holes with a size of 50x50 cm are dug every meter to a level below freezing of the soil. Formwork and metal lathing are installed inside and mortar is poured.
Sectional columnar foundation
Small bathhouse design projects
The most common planning is to divide the premises into three sections. The entrance to the building according to the project can be located from the front of the building or from the side.
In the first case, the convenient location of the entrance door allows you to achieve maximum comfort for summer recreation on the site next to the steam room building.
In this case, the maximum space is allocated directly under the relaxation room and the attached terrace, usually its area is at least 4-7 m2, the rest of the interior space is given over to a steam room and a small sink.
The side entrance to the bathhouse is used mainly for bathhouse projects with a “carriage” layout of the room.
The design turns out to be quite simple to manufacture; you can use a shorter beam or log, which significantly reduces the cost of construction.
In practice, the tandem arrangement of rooms is considered a necessary measure. Such projects are used in cases where it was possible to inexpensively purchase material for construction, or the format of the site does not allow the construction of a more economical and warm bathhouse with a square layout.
The smallest baths 2x3 and 3x4 m can be built according to projects in which the room is divided into only two rooms - a steam room with a sink and a dressing room.
Such simplification in the project is also considered a necessary measure; an increase in the number of rooms has practically no effect on the level of comfort or atmosphere in the steam room, and additional partitions in a small bathhouse only lead to meaningless losses of usable space.
About the required premises
But even the smallest bathhouse cannot consist of one steam room - it’s simply inconvenient. Therefore, in small projects, the main room is divided by partitions into several rooms, which are assigned one or another role. It is not necessary to make load-bearing partitions and lay a foundation under them - it is enough to divide the area with light wooden partitions, as shown in the project below. The layout of the bathhouse itself is quite spacious - 4 x 6 meters.
Dividing the bath into rooms
Dividing the main building into several rooms will allow (and this is the main thing) to quickly, efficiently and efficiently warm up the steam room, without overheating the remaining rooms, especially the relaxation room. In addition, the plan of the bathhouse needs to be carefully thought out regarding free access to all rooms.
How to design a small bathhouse
Experts consider the most practical and convenient project to be one with a small covered terrace at the entrance to the premises.
A project with a terrace can be developed and combined with a bathhouse with a gazebo under one roof.
The largest number of applications are received by projects of one-story bathhouses with an extension for a barbecue or fireplace.
In essence, this is a new format of a summer kitchen with a built-in small bathhouse for a country plot. The developers tried to create a one-story building made of timber that would best meet the needs of vacationers outside the city.
When drawing up a future sauna project, you don’t have to try to copy traditional shapes and designs; you can always find a more original design. For example, a small one-story sauna room with a gazebo can be built in the European style.
The most unusual design of a small bathhouse involves extensive use of brick, metal, timber and glass. The building looks quite unusual and attractive, and will certainly raise a lot of questions from neighbors and friends.
In essence, this is a new idea for drawing up projects, in which the bathhouse space looks less and less like an old wooden “birdhouse”.
Be sure to consider a few more nuances
- The most ideal place to build a bathhouse is, of course, the backyard.
- Be sure to decide for yourself whether your bathhouse will be separate or an extension to the house.
- When designing, you must provide for ventilation and wastewater disposal.
- Do not place the sauna on slopes or damp areas.
- Choose a flat surface for construction.
For proper placement, you must comply with all requirements of regulations and legislation.
Frame construction
There are many options for constructing bath walls. We will use the simplest and fastest - frame. For its construction we will need the following materials:
- wooden blocks (5x5 cm);
- boards (minimum thickness – 2.5 cm);
- foil/film for waterproofing;
- thermal insulation.
Frame mini bath: the simplest and fastest construction option
According to a previously prepared project, a frame of beams is assembled. The inside is lined with boards. You can use ordinary screws or anchors as fasteners. Don't forget about heat and waterproofing. The first thing we install is a material that does not allow heat from the bathhouse to pass out. For this purpose, you can use expanded clay, sawdust or mineral wool (rarely used). Bitumen mastic is suitable for creating a waterproofing layer. The final stage of wall construction is the internal board covering (not mandatory, but a desirable element).
All that's left to do is build the roof. First, we prepare the rafter system and mount it on the frame. Then we begin laying the roof: metal tiles, slate, etc. will do. Don't forget about the chimney - you need to leave a free opening on the roof for it.
To complete the appearance of the bathhouse, lining or a block house is used as a protective and at the same time decorative element. Lining is the most common option for finishing the external frame of a bathhouse. This material is cheap, practical and durable. In addition, it is a fairly successful imitation of a wooden beam. The block house is similar in appearance to the lining, but differs in a more presentable appearance and quality of wood.
A mini bathhouse sheathed externally in wood will delight with its aesthetic appearance
Mini-sauna in a country house of 6 acres - myth or reality?
What are the usual reasons why a summer resident does not decide to build a bathhouse on his property? Of course, this is the lack of funds for its construction and the necessary space on the site. As for a mini sauna in the country, it can be an ideal solution to these two issues. Let's try to figure out whether it is worth undertaking such construction or whether it might be easier to purchase a ready-made one and install it on the site.
Let's start with the fact that buying a ready-made room for a bathhouse is an easier solution, but at the same time, the summer resident faces another problem - after all, he really needs a budget option. And this cannot in any way include the acquisition of a finished building. It is for this reason that today we will consider the construction of a bathhouse with our own hands. Although we will definitely dwell on the cost of ready-made ones, but a little later.
Everyone puts a different meaning into the concept of “small bathhouse in the country”. After all, for some, even a plot of 20 acres is considered small. But we will consider the average garden plots of 6-8 acres. This means that the bathhouse on them should not occupy more than 4-6 m in length and 2-3 m in width. First of all, we’ll figure out what bathhouses can be like on a summer cottage, what they can be built from, and only after that we’ll decide how to do all the necessary work.
Frame walls
After the foundation is erected, an additional foundation is made for such a structure. It is carried out according to the example of the grillage discussed above. For the corner posts we will need exactly the same timber as for the base. In addition, you will need to stock up on edged boards with a length equal to the height of the future walls, a width equal to the width of the grillage and a thickness of 5-10 cm.
Construction of a bath frame
- At the base, it is imperative to check the diagonals so that they are the same. It is attached to the concrete foundation using anchor bolts. It is advisable to recess the head. For this purpose, a countersunk groove is made in advance. Waterproofing made of bicrost or roofing felt is laid under the grillage on a concrete foundation.
Pie wall frame bathTo secure the corner posts, a tenon with dimensions of 5x5x5 cm is made at the end. A corresponding hole is made in the base. The beam is installed and leveled. It is fixed using metal corners. Jibs are also installed that will hold it.
- The top trim is made. This is a beam that will connect the racks together.
- Additional vertical beams are installed every 50–60 cm. They are strengthened with oblique struts.
- At the locations of windows and doors, embedded lintels are installed for rigidity.
- Floor joists are installed. For them, you can use a beam measuring 15x10 cm. In order for them to be secured in the best possible way, a cut is made in the grillage to half the width of the board. A cut is made in the joists and placed into the cut. Fastening is carried out with self-tapping screws; additionally, internal metal corners can be installed.
- The floor is insulated. In the case of a strip foundation, waterproofing in the form of a membrane or film is placed in the resulting space. Expanded clay is poured from above up to the beams. A separate layer of hydrobarrier is laid on the logs; it is secured to the boards using a construction stapler. Insulation is placed in the cavity between the joists. This can be mineral wool, polystyrene foam or penoplex. Everything is covered with a finished floor on top. If the foundation is columnar or pile, then first you will need to hem the beams from below, and then lay the hydraulic barrier and insulation.
- The outside walls are covered with facing material.
- A hydraulic barrier is laid on the inside. Insulation is inserted into the space between the vertical boards. You can use the same as for the floor. Finishing can be done using a block house or other suitable material.
Frame on a pile foundation
Erection of the roof
For small buildings, the ideal solution is a pitched roof. It is necessary to plan its production at the design stage. It is very important to be able to raise one wall higher than the other. When this is done, in the case of a wall made of brick and foam block, waterproofing made of bicrost or roofing material is laid on the upper end. Additional beams are mounted on it, which will serve as a Mauerlat. They are attached to the base using anchor bolts or walled-in studs. Beams are laid on top onto which the sheathing will be placed. They can be secured to the Mauerlat using metal corners.
Bathhouse with a pitched roof
In another option, the walls are made the same. Ceiling beams are laid on the Mauerlat. On one side, vertical boards are installed that will form a pediment, from which the rafters are lowered onto the other wall. At the point where they adjoin the Mauerlat, they are cut to the required angle. They are secured with metal corners. To make it easier to maintain the roof in one plane, the two outermost elements are installed first. A string is stretched between them, which will serve as a level.
Rafter system of a pitched roof
The ceiling must be insulated. A vapor barrier is attached to the top of the ceiling crossbars. Thick foil can play this role. Insulation in the form of mineral wool is placed in the space between the beams. Additionally, it is covered with plastic film. The inside is hemmed using wooden lining or polished edged boards. Read more about insulating the ceiling in a bathhouse here.
Insulation of the ceiling in the bathhouse
Note!
For a house made of timber, when attaching the rafter legs to the mauerlat, it is better to use floating corners. This is necessary to prevent the roof from skewing during shrinkage.