Finishing is the final stage of construction. It is incorrect to include insulation work in it. When it comes to tiling floors, walls, ceilings, installing doors and windows, painting surfaces, this can be called finishing. We need to somehow define the terms if we want mutual understanding. This article will focus mainly on the finishing inside the steam room, but the finishing of the washing room will also be partially touched upon. If the site contains thematic articles that cover a particular issue on the subject, read it, you will probably find useful information there, and for your convenience we have provided links.
Do you need ceramics in a bath?
A modern bathhouse is no longer just wooden, as builders and designers constantly use a variety of materials for decoration. Therefore, no one is surprised anymore by the appearance of hog ceramic tiles not only on the floors, but also on the walls. But how justified is this for a bathhouse or can you get by with just one tree to create a comfortable environment.
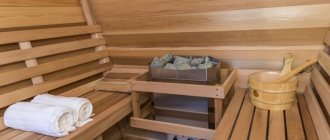
An original version of finishing a bath with ceramic tiles
Ceramic tiles can withstand high temperatures
The ceramic component is quite often used in the Turkish bath. But it is built of brick or stone, which naturally limits the use of wood as a finishing material. But for a traditional Russian bathhouse, this material is not entirely natural. And yet, “hog”, creamogranite and other options for baked clay products can be used for all rooms.
Thanks to its properties and parameters, ceramic material creates a special atmosphere in a wooden bathhouse. They are chosen because:
- Dries quickly;
- Does not warp from moisture;
- Can tolerate large temperature changes;
- Easy to clean from dirt;
- Expands engineering and architectural capabilities.
In addition, you can get premises with different purposes, but having the same properties. But in most cases, ceramic tiles are used for places where the concentration of water is maximum. For example, in the wash room. This space is often equipped with a shower, which naturally means falling water.
Laying tiles is optimal in areas with open water sources
This material also has negative aspects that prevent the use of Kabanchik ceramic tiles in bathhouses. This mainly applies to the moment of laying, since at this time a large number of losses occur due to the carelessness of the craftsmen or errors during transportation. Otherwise, ceramics follow an ascending route, transforming the bathhouse and all its rooms.
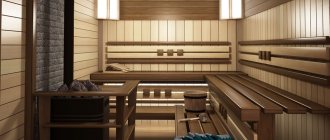
Finishing inside the steam room
Since buildings are made of different materials, owners are interested in whether there is any difference in how to decorate a steam room in a bathhouse, say, from brick or foam concrete. In principle, there are no differences even at the level of constructing an insulating pie, and even more so the finishing does not depend on what the walls of your bathhouse are built from.
However, options do exist.
Interior decoration in a bathhouse made of timber or logs
A beam or log is a material that in itself has excellent decorative qualities, so there is no point in hiding it under the skin, unless your area is in the Arctic cold, that is, if the thickness of the log or beam is enough to keep warm.
In this case, the owner’s main concern will be insulating the joints with inter-crown insulation between logs or beams and sealing (which we will discuss separately). In addition, finishing works include protecting log walls from various misfortunes (fire, water, insects, fungi and bacteria) and revealing the decorative properties of wood - both are done with the help of impregnations.
BUT! In the steam room, protective measures are limited to antiseptic on the lower rims and impregnation for the walls as a whole, which will protect them from water.
A well-sanded log has a beautiful “moire” pattern, which can be made more visible with the help of varnish or impregnation. On our website parilochka.com there is an article that talks about paints and varnishes that are acceptable for processing steam rooms.
Finishing with clapboard in a bathhouse made of aerated concrete, foam concrete, brick, frame
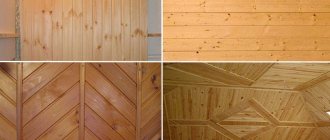
The finishing of a steam room in a bathhouse built from the materials listed in the title will in the vast majority of cases be reduced to clapboard cladding. This is the easiest way to make the interior “wooden”. In addition, lining is a convenient and affordable material, and the difference in profiles gives the owner the freedom to choose according to his tastes.
Baths not built from wood are usually insulated. In this article we will not describe the thermal insulation pie - you can read about it in this article on our website. However, we will spoil it: methods of thermal insulation finishing of a steam room in a bathhouse made of aerated concrete, foam concrete, etc. are the same . And the lining is the final stage of this finishing.
The lining is attached to the counter-lattice. There are several ways to attach it inconspicuously. Previously, this was most often done with finishing nails through a groove, but this is hard work, especially when compared with the modern method of fastening to staples or nails using a pneumatic gun through clamps. As an option, you can attach it to self-tapping screws.
IMPORTANT! Clippers do not replace fastening with nails or staples, they only simplify it. A nice and convenient addition.
Watch the video, which clearly demonstrates the method of fastening the lining using clamps:
Regarding the finishing of the steam room with clapboard, it is worth saying one more thing: there are two mounting options - vertical and horizontal. Accordingly, the counter-lattice should go in a perpendicular direction.
Since we are talking about a humid and hot room, it is worth noting that vertical fastening of the lining is not optimal. Each individual lamella with this arrangement is moistened unevenly, which leads to stress inside the wood. In the future it may crack.
At the same time, horizontal fastening makes the lamellas moisturized more uniformly . The main thing is not to forget when fastening that the groove should be on top, and the tenon should enter it from below. Then water will not flow into the lock.
In addition to the above, the described types of lining installation also have this feature: vertical fastening visually makes the room taller, and horizontal fastening makes the room appear lower.
Surface preparation
Preparatory work for different baths differs depending on the material from which they are built. So in brick or block buildings the whole process will be reduced to removing dirt and dust from the foundations. It is also necessary to remove existing oil stains. All surfaces must first be insulated so that the owners simply do not freeze during water procedures. In such a bathhouse, all work related to the slope of the floor, when it is covered, has already been completed at an earlier stage of construction.
How to prepare walls
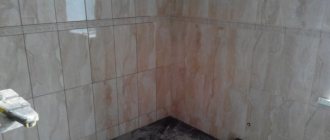
Before starting work, the surface of the brick (cinder block) masonry must be prepared, namely: clean it of layers of fat (if any), dirt and dust. After this, after wetting the surface of the wall with a simple household sprayer, it is necessary to level out all roughness, sharp changes and depressions larger than 10-15 mm with the solution. In a word - do rough plaster. Next, you need to make small notches on the plaster to better attach the tiles. For work, use a simple spatula or trowel.
If the walls of the bathhouse are made of timber, then it is necessary to waterproof these walls. For such work, a simple roofing material is suitable, although you can use other rolled material. After this, it is good to secure a reinforced mesh onto the roofing material (you can use a chain-link mesh with a fine mesh). The plaster must be applied over a metal reinforced mesh using cement mortar 15-20mm thick.
Decorating the inside of the bath: The best ideas
The advantages of a bathhouse are difficult to overestimate. This is a great place for rest and relaxation. Bath procedures improve sleep, normalize blood pressure, and remove toxins. Neither Jacuzzis, nor showers, nor other delights of plumbing can compare with the advantages and such widespread popularity of the bathhouse. Today we’ll talk about the features of its internal contents in terms of decoration and design in general.
Types of interior design of baths
The classic layout of a bathhouse includes 3 rooms: a dressing room (dressing room), a washing room (shower room) and a steam room. Although in traditional Russian baths the steam room and shower can be combined. All additional premises - a font (swimming pool), a games room (billiards), a kitchen, a recreation area, a toilet, a smoking room - are a matter of financial capabilities and personal preferences of the owners.
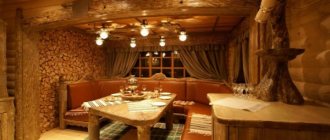
However, the most popular decoration is in the usual Russian style - restrained, laconic, with a massive table, benches and couches. Billiards or TV will add a touch of modernity.
The interior of an old-style bathhouse can be complemented with forged elements, wooden household items and utensils decorated with carvings. Walls decorated with oak, birch brooms or bundles of fragrant herbs will also look colorful.
Materials for finishing the bath inside
Materials for the interior decoration of a bathhouse must meet a number of conditions:
- resistance to temperature changes, high temperatures, high humidity;
- safety – the materials used must be hypoallergenic, not cause burns upon contact with skin and not release toxins in hot weather;
- strength and durability;
- hygiene - the finishing material should be optimal in care - easy to wash, and not react with household chemicals;
- aesthetics – beautiful interior design that does not irritate the eye – is what you should strive for when decorating the interior of a bathhouse. In this case (especially for Russian baths), wood is ideal. This material meets all the above requirements, is completely environmentally friendly, and, moreover, has an aromatherapy effect. The main thing here is to choose the right type of wood individually for each type of room.
Choosing material for walls of various rooms
The most popular and suitable types of tiles:
- Glazed products are highly durable and moisture resistant;
- Unglazed coatings are used only in dry rooms;
- Metlakh tiles are characterized by high resistance to extreme operating conditions, durability and fairly high cost;
- Porcelain tiles with water absorption less than 3%
To cover the shower walls, glazed cladding is used, the elements of which can be of various shapes, colors, glossy or matte, with relief, patterns - this is determined by the design of the room. If there is a pool, its finishing is made of similar materials.
Advice! Porcelain tiles, due to their qualities and durability, are a good solution for finishing the walls of wet rooms. With its help, you can imitate various types of natural stone or wood, but the cost of finishing increases.
The presence of a stove in a bathhouse automatically implies an extremely high temperature, so its lining must be heat-resistant, durable, not highly porous, and have a thickness of at least 8 mm. Several types of materials have the corresponding characteristics:
- Terracotta tiles are unglazed ceramics of a bright brown color, which should contain refractory clay, fireclay and quartz sand.
- Clinker is a material made from several types of clay in a wide range of natural shades. It has a thickness of 9-12 mm and is considered the most durable at the moment.
- A coil is a product made from a semi-precious stone that has healing properties when heated. It activates cerebral circulation and normalizes blood pressure.
- Tiles that have a reverse side in the form of an open box, which significantly increases the level of heat transfer. The high cost is due to the manual production of the material from marly or earthenware clays.
Advice! It is not recommended to use paired tiles to finish surfaces - if you choose them incorrectly, you can easily get burned. But, “if you really want to,” it is necessary to leave several samples of different compositions in the room until it heats up to its maximum—you can only use the material that was able to maintain an adequate temperature during the test.
The dry rooms of the bathhouse - the relaxation room, the dressing room - can actually be covered with any tiles that meet the basic requirements. In these areas, special attention is paid to interior design.
Steam room
For the interior decoration of the steam room, only deciduous wood is suitable. This type of wood does not heat up, does not emit resins, and, importantly, even with light ventilation it dries very quickly, preventing dangerous fungus from developing. We list the most common types:
- linden – visually attracts attention, does not darken over time, has low density and heat capacity: it heats up quickly, but it is impossible to get burned on contact. When heated, it releases a pleasant delicate aroma. Linden finishing is quite popular, so it is quite affordable.
- aspen is a common material for northern regions. The wood is durable, difficult to split or split, and has bactericidal properties;
- alder – has a beautiful appearance, is pleasant to the touch, resistant to cold and hot water, condensation and steam, alkaline and acidic detergents, and is easy to process.
- Abash is a tree from the tropics of Africa. Even in the hottest heat, it hardly heats up and maintains a temperature close to the human body temperature. Even under the influence of external factors (water, temperatures and steam) it does not darken at all.
Important! Wood cannot be coated with varnish or paint, even of the best quality. When heated, they release an unpleasant chemical odor. During the installation process, nails (screws) must be covered at the top and set deeply, otherwise they may burn when heated. It is better to mount the lining vertically, as drops formed by condensation will drain faster. The junction of the floor and walls must be protected with high skirting boards made of a waterproof material.
Typically, the steam room has wooden floors made of hardwood. But still, tile will be preferable. It washes well, dries quickly and is resistant to fungus. If this coating seems cold to you, you can put a removable wooden grate on top.
Options for washing and steam rooms: materials
Let's briefly look at the materials suitable for finishing bath sinks and steam rooms.
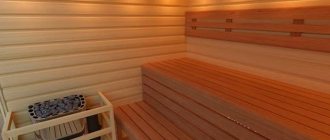
Wood
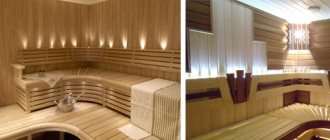
In the photo: finishing the steam room of a bathhouse with wood (lining)
To decorate the steam room, it is strongly recommended to use hardwood, such as linden, aspen, and alder. These rocks are suitable for walls and ceilings, finishing doors and windows.
For the floor, you can use more resistant species, for example, larch. Conifers should not be used because of the resin they contain, which flows out when the temperature rises. But on the floor the temperature is usually low, so there are no restrictions.
However, it is worth saying that linden and aspen have low resistance to rotting and biocontamination (for example, by fungi). Therefore, we still recommend additionally protecting surfaces made of this wood with impregnations and varnishes.
There is no point in using wood in a sink, unless it is a design decision. In this case, it is worth recommending conifers - they are more resistant to water.
Stone
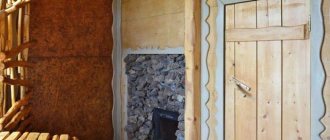
An option for decorating a steam room in a bathhouse is stone tiles. Of course, we are talking only about partial finishing, for example, near the stove (more on that below).
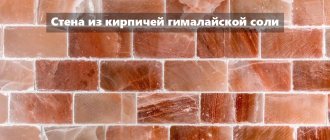
What types of stone are best suited for finishing walls in a steam room? You will be surprised, but there are practically no restrictions here - the main thing is that it is not rock salt, for example. But pink Himalayan salt is often used as interior decoration. Of course, it will not dissolve as quickly as table salt in a pot of soup, but its composition is the same as salt in a salt shaker.
The wall behind the stove, of course, heats up, but the stones are quite capable of withstanding such temperatures without harming themselves. But the situation will change if you decide to cover the stove with the same stone. The temperatures there are somewhat different. And it’s worth focusing at least on those stones in the lining of which ready-made stoves are sold, for example, soapstone.
As an option, you can decorate part of the steam room not with smooth tiles, but with cut pebbles or cobblestones, which are mounted on the mortar with the convex side up. It turns out to be quite a nice decor. As you can see, even street cobblestones can come in handy.
In the photo: interior decoration of the steam room with stones around the stove
You can use stone in a sink, but this is rarely done, because it is easier and cheaper to cover the walls and floor with ready-made ceramic tiles.
Tile
The tiles in the steam room are used either on the floor or on the wall behind the stove. As for the floor, rough tiles, for example, Metlakh, behave best here. In general, it can be recommended for wet rooms. But it is better not to consider all varieties of smooth glazed tiles as a covering for the floor of a steam room.
In a washing room, it is also better to use rough tiles on the floor, and for the walls... here, in general, you can see more clearly how sober visitors will wash in your washing room. If not particularly so, then give up smooth tiles there too, eliminating unnecessary opportunities for injury.
In the photo: finishing the shower room of the bathhouse with tiles
Sealant
Special mention should be made of such finishing material as sealant for steam rooms in bathhouses.
Sealants in a steam room can be used only in two cases: if it is a bathhouse made of logs and needs to seal the joints between the logs, as well as sealing cracks in the logs themselves, and the second option is to seal the joints, for example, foam glass, if it is used as a heat insulator .
In the first case, we can recommend special sealants for wood that have a certain elasticity, because wood tends to constantly change volume under the influence of moisture. In addition, it is worth asking the sellers which wood sealants can withstand steam room temperatures well (name the numbers at which you are used to steaming).
We came across a report from one bathhouse owner in which he praised the Perma-Chink wood sealant he used for seams and Check Mate for sealing cracks. However, we cannot say with certainty that this was not promotional material.
As for the sealant for the heat insulator, then you need to take silicone without impurities, for example Ottoseal S 73.
Waiting room
The room is not hot, but retains heat. Therefore, coniferous species will be an excellent material for finishing here. Their noble aroma is not only pleasant, but also incredibly useful. Phytoncides have a beneficial effect on the immune system, stimulate the body's resistance to various infections and improve overall well-being. Let's look at the main types:
- Pine is a very popular material for dressing a dressing room, because it has a number of advantages: economical, durable, environmentally friendly and quite durable. May change color slightly over time, acquiring a reddish tint. Scandinavian pine with smooth pinkish wood is becoming increasingly popular. Its annual rings have an original decorative pattern;
- spruce – has a uniform structure, does not crack when drying, and is slightly lighter in color than pine wood;
- fir - the main characteristics are almost the same as spruce, while almost no resin is released from its wood.
Birch is a good option for a deciduous tree for a dressing room. In any case, when decorating, the main thing is to follow the basic rule - the entire room should be paneled with the same type of wood.
Pouring and arranging a concrete floor
Before starting work, you should develop a scheme for the catchment and drainage system, leading the sewer pipe to the street. The walls of the catchment must be concreted, and their thickness must be at least 5 centimeters.
After this, prepare the base and level the soil, on which a layer of broken brick should be laid and another layer of crushed stone on top. Next, the base is covered with a preliminary layer of concrete, with a coating of at least 5 cm (but not more than 30 cm, otherwise the monolith will crack). After the first layer has completely hardened, it is covered with expanded clay and filled with a finishing layer of concrete, which in turn is additionally reinforced with mesh and metal structures. After which the surface is leveled using sand mortar and leveling tools (although a regular board with even ends is quite suitable for these purposes). The following tools are used for leveling:
- hydraulic level to determine the straightness of the surface,
- hammer,
- chisel,
- steel brush,
- putty knife.
In addition, experts recommend using perlite, a special expanded sand, in the preparation of cement mortar, which is used to give the mortar excellent thermal insulation properties, which is especially important for this material.
Concrete is highly valued by professionals, but it is worth knowing that it is quite specific, has high volatility due to its light weight and is quite difficult to mix (if you work alone). The finished screed and cement mortar can be immediately distributed over the entire surface of the bathhouse, if the building is small in size, or, to achieve a better effect, the sectors can be divided into sections that should be processed sequentially. Next, a layer of thermal and waterproofing will be laid on them.
Finishing a bathhouse inside: basic rules
A bathhouse is, first of all, a place to relax. It is better to exclude bright colors and expressive shapes here. The main principle is to create an ideal environment for a cozy and relaxing pastime, without unnecessary details.
Lighting should be soft, with warm shades, conducive to a pleasant and relaxing holiday. This effect can be achieved by using a two-tier lampshade that diffuses light. All electrical wiring parts must be reliably protected from moisture.A modern interior for a bathhouse is a manifestation of the designer’s imagination and taste. Tell us about your favorite places to rest and relax. Were there any of them that impressed you the most with their exquisite interior?
Work order
Even when purchasing, it is necessary to check the evenness and consistency of the sizes of the facing elements with each other, for which they are selectively applied to each other with their backs - they must be strictly the same. This circumstance and strict adherence to installation technology are a guarantee of long-term preservation of the coating.
Step-by-step instructions for laying tiles:
- Laying starts from the corner.
- Applying adhesive only to the area for laying one tile will prevent premature hardening of the fixing composition.
- Leveling the glue with a notched trowel dipped in water. The size of the tool should be proportional to the dimensions of the tile. The adhesive layer should not be greater than the thickness of the facing element.
Advice! You can use a laying solution made independently from a mixture of cement grade at least 300 and sand in a ratio of 1/5. But the best solution is to purchase ready-made tile adhesive, since modern compositions include various polymer additives that significantly improve their qualities.
- Gluing the tiles with alignment along the level ruler and tapping with a rubber hammer.
- Installing plastic crosses to ensure uniform seam thickness.
- Removing glue residue using a spatula.
Attention! During the laying process, it is necessary to control the flatness of the surface and the evenness of the rows using a level and plumb line.
After the glue has hardened and the plastic crosses have been removed with a rubber spatula, grouting is done. Its color is chosen in accordance with the design idea and can be the same color as the tile or contrasting.
Tiles in the bathhouse - choice, photo, video
Of course, tiles are primarily chosen based on their appearance. However, a very important factor here is the ease of use. There are enameled (i.e. glazed) tiles and non-enamelled tiles.
In the first case, the product is subjected to double firing, which has a positive effect on the strength of the tile. Typically, this type of tile is more preferable for lining the floors and walls of a bathhouse. Its surface easily withstands sudden temperature changes and other significant loads.
How to make a slope correctly
The optimal angle of inclination of the floor in the washroom is 1:100 to the center of the room. A drain is installed in the center to arrange a drain into the sewer pipe. Alternative places for drainage may be an area at the entrance or in a corner.
To maintain the slope when pouring the floor, beacon cords are installed. The easiest way is to slope towards the center of the room. For other options, an “envelope” fill is used:
Manufacturing of unglazed tiles
Unglazed tiles undergo only one firing during production, i.e. its strength characteristics are not so high.
The nature of the tile surface in a bathhouse plays a very important role. To minimize the risk of slipping and injury, you need to choose ceramic tiles that have a rough surface. And so that it is not slippery even when wet.
This requirement applies primarily to floor tiles. However, for the tiles that are used to decorate the walls of the pool and washing area, it is also advisable to adhere to these recommendations. When a person leans against a wall, he should not be afraid that, due to accumulated moisture, the surface of the wall will be too slippery.
Features of concrete floor
In a steam room or washing room in a bathhouse, a concrete floor looks preferable to a wooden one.
When additives that increase water resistance are introduced into the solution, this design does not rot and resists moisture well
It is important to correctly solve the question of how to fill the floor in a bathhouse under the tiles
To ensure a smooth surface, the top layer should be poured using beacons
First of all, before constructing a concrete floor, a drainage system must be carefully thought out to allow waste liquid under the floor to be drained beyond the boundaries of the structure. The construction itself is carried out in the following order:
- thorough compaction of the soil and backfilling with a cushion of sand and crushed stone 12-18 cm thick with compaction (broken brick can be used);
- pouring the first layer of concrete 5-7 cm thick;
- laying a thermal insulation layer (expanded clay, felt, mineral wool, etc.) and waterproofing from roofing felt or thick polyethylene film;
- installation of a reinforcing element made of metal mesh or steel wire;
- pouring a second layer of concrete 10-15 cm thick, forming a slope in the direction of the drain;
- covering the surface with a primer with an adhesive base for better adhesion to ceramic tiles.
The hole is formed using formwork or a vertically installed pipe with a diameter of at least 5 cm. To ensure a flat surface, the top layer should be poured using beacons.
Ceramic tiles have proven to be a very reliable and effective floor covering in bath rooms such as steam rooms and washrooms, where the highest humidity occurs. The floor in a tiled bathhouse can be either wooden or concrete, and all the work can be done independently
It is important to approach this important event correctly and take into account the features of the floor structure
The basis of modern ceramic tiles
Modern ceramic tiles can have a porous or dense base. In our case, it is important to take into account the fact that the number of pores and their size determine the degree of moisture absorption by the product. The greater the number of pores, the more intense the water absorption of the tile.
Due to the fact that the bathhouse requires high humidity in the premises, the tiles should be chosen that have the least number of pores. Or one whose base is very dense, i.e. does not provide for the presence of pores at all.
The absence of pores allows:
- reduce the risk of mold, mildew,
- maintain hygienic cleanliness,
- dry and ventilate the room efficiently and quickly,
- maintain the integrity of tile surfaces for a long time.
Floor tiling
We mark the floor. If the drain is in the center, we will start dancing from there. You can lay out the tiles in an “envelope” by laying out a central square of triangles. The markings will be made from the center with rays to each corner of the room. The imagination now pictures a pile of tiles cut at different angles... Indeed, the best option would be simple, standard masonry.
The center of the first square will be the drain hole. We make a block from 4 tiles, measure it, and according to the resulting size, divide the entire area into blocks. Why is this necessary? Firstly, it is easier to lay out even rows and adjust seams. And secondly, the glue dries out quite quickly and loses its properties. Therefore, marking will help to apply the mixture to such an area that you can cover with tiles without compromising the properties of the adhesive solution.
Spread the adhesive mixture evenly over the floor and tile surface with a comb. Let us remind you that the tiles are first soaked in water for 5-10 minutes so that the moisture from the adhesive is not absorbed by the porous structure of the material.
What to look for when choosing tiles?
When choosing tiles for a bath, the shape of the finishing material is also important. Classic tiles have a square or rectangular shape. However, other variations are also produced: hexagons and octahedrons.
If an experienced craftsman will lay the tiles, then you can choose any shape. If you don’t have enough experience, then it’s better to opt for the classic version. Before purchasing tiles, you should accurately measure the dimensions of the room. However, it is better to buy material 5%-10% more than necessary (taking into account the possible battle).
Along with the tiles, you need to buy crosses, as well as a special adhesive composition that is not afraid of high humidity and temperature changes. In addition, you will need to purchase moisture-resistant grout or sealant - they will be used to seal the tile seams.
Articles about baths:
- back to the section “Building a house with your own hands”
- Bath brooms
- Bath and sauna in the house
- Ventilation holes in the bath
- Bath ventilation system
- Internal structure of the bath
- Interior decoration of the bath
- Construction of a chopped bathhouse
- Construction of bath walls
- Auxiliary materials for the construction of a bathhouse
- Choosing a place for a bath
- Choosing a stove for a bath
- We make furniture for a bath
- Reducing humidity on the walls of the bathhouse
- Which sauna should you choose?
- Choosing stones for a bath
- Installation of a sewerage system for a bathhouse
- Caulk of a wooden bath
- Operation of hatches and chimneys
- Materials for building a bathhouse
- Installation of a concrete floor in a bathhouse
- Installation of bath doors and windows
- Installation of a wooden floor in a bathhouse
- Bathroom ceiling installation
- Lighting in the bath
- Finishing of sauna log houses
- Bath heating
- Cleaning the ash pan
- How to choose the right stove for a sauna
- How to take a steam bath correctly
- Heaters for solid fuels
- Steam room ceiling
- Rules for lighting the stove
- Types of sauna stoves
- Bathhouse repair
- Chimney pipe repair
- Repairing the crown of the chimney
- Bath walls
- Arrangement of the roof of the bathhouse
- Thermal insulation of the bath
- Oven Installation Instructions
- Bathhouse foundation
- Cleaning chimney bricks
- Choosing an electric heater for a sauna
Do-it-yourself installation
On the walls of the washroom, like any other room, not only a hog, but also just ceramic tiles are suitable. It all depends on the chosen style and design that will characterize the interior of the bathhouse. But whatever the project, everything must start from the first row.
Laying tiles in a bathhouse on a “warm” floor
To work you need to prepare:
- The spatula is smooth;
- Notched spatula;
- Building level;
- Plastic container;
- Electric drill with attachment;
- Crosses for seams;
- Tile cutter or grinder with a diamond blade.
With this set, laying tiles in a bathhouse yourself will be much easier. The first row should be marked first. Using a building level, a straight line is drawn along which you will need to navigate. If the floor that needs to be insulated has a slope, then you will have to use pads to maintain the horizontal level.
Similar topics
Building a bathhouse from a log house with your own hands
Building bathhouses from a log frame is not a difficult task; this technology is, in principle, no different from conventional bathhouse construction, the technology of which we recently described on our resource
Interior decoration of the bath: doors and windows, lighting, ceiling
Doors and windows in the bathhouse should be smaller in size than in ordinary residential premises - this will help retain heat.
Types of baths: Finnish sauna, Russian steam room, hammam, ofuro
To make it easier for you to make a choice, we will introduce you to the main types of baths, their characteristics and parameters
Bath stones, installation methods, photos, videos
The main function of stones in a bathhouse is to retain and release heat. The stones must have good heat capacity and resistance to destruction under the influence of sudden temperature changes
Operation of hatches and chimneys - instructions
On the eve of the winter period, you need to make sure that your sauna stove is ready for significant loads. That is, you must carefully inspect the chimney to make sure that the stove is in excellent condition, and also to identify any flaws or shortcomings.
Do-it-yourself installation of bathhouse doors and windows
In order to more effectively retain heat, the windows and doors of bathhouses are made smaller than in residential premises. With a threshold height of 15 cm - 20 cm, the height of the door itself from the floor should be no more than 160 cm -180 cm, and the door width - from 65 cm to 80 cm.
Providing the wash room with water
Calculation of the capacity of the water supply pipes must be made based on the expected number of people and the area of the future bathhouse, since a sufficient water supply is an important condition for the functioning of the bathhouse.
To provide washing hot water in sufficient quantity, you can choose one of the following methods:
- heating water with a gas heater, if it is possible to supply gas to the bathhouse;
- using an electric boiler.
Thus, if it is possible to connect to the central water supply, then solving the issue of providing water is not difficult.
But if no communications are laid near the bathhouse, the required amount of water for washing all visitors to the bathhouse must be prepared in advance so that everyone can collect the required volume of water for themselves in a separate container.
Therefore, the calculation of the approximate volume of water must be made in advance. Considering that on average one person needs about 7-10 liters of hot water at 80-90 ºС and 3-4 times more cold water, it turns out that each steamer will need about 45 liters of water.
By multiplying the resulting value by the number of visitors to the steam room, you can determine how much water is required. Hot water is prepared in a large vat, leaving it on a stove, which is usually heated with birch wood.
Frequently asked questions and answers
Today, cadastral work and its result is a document that is an electronic form of an approved form (Xml schema). Any result of cadastral work can be signed with an electronic digital signature (EDS) of the applicant, which will allow the copyright holder not to waste time visiting the MFC to transfer a package of documents for cadastral registration or registration of rights to a property, but to send an electronic document via the Internet to Rosreestr. To produce an electronic signature, you must contact any certification center that produces qualified certificates of electronic signature verification keys (KSKP EP), in accordance with the Federal Law of 04/06/2011 No. 63-FZ “On Electronic Signatures” for Rosreestr. When producing KSKP ES for individuals and legal entities, a special information encryption algorithm is used, which excludes changes to the document signed with such an electronic signature.
The procedure for approving the boundaries of a land plot is established by 221-FZ of July 24, 2007. and is mandatory if cadastral work is carried out, as a result of which the location of the border(s) of the land plot in respect of which the work was carried out, or adjacent land plots, information about which is included in the Unified State Register of Real Estate, is clarified:
1) property; 2) lifelong inheritable ownership; 3) permanent (indefinite) use; 4) lease (if such adjacent land plots are in state or municipal ownership and the corresponding lease agreement is concluded for a period of more than five The procedure for approving boundaries includes: 1) Notifying all interested parties; 2) carrying out coordination of boundaries and drawing up an approval act. Notification of rights holders of adjacent land plots can be carried out either individually or by holding a meeting to agree on the location of boundaries and by publishing in the media in the manner established for the official publication of municipal legal acts. The publication of a notice of border coordination is carried out in the absence of information in the Unified State Register of Real Estate about the contact addresses of interested parties. You can read more in detail in this article at the link.
From 01/01/2017 there was a merger of procedures for cadastral registration and registration of rights to real estate in accordance with the Federal Law No. 218 of July 13, 2015, which came into force. “On state registration of real estate.” It will now be possible to register a property in one stage by the copyright holder submitting a package of documents to the authorized federal bodies to carry out a set of procedures and, as a result, receive an extract from the Unified State Register of Rights about the registered right. To date, this procedure, unfortunately, has not been technically implemented by Rosreestr, but according to information provided by the Ministry of Economic Development, the possibility of carrying out simultaneous cadastral registration and registration of rights is planned for 07/01/2017.
In the case of the formation of a land plot from lands in state or municipal ownership, in accordance with the Land Code, the plot is provided on the basis of the layout of the land plot on the cadastral plan of the territory. The layout diagram for the KPT has an approved form in accordance with the orders of the Ministry of Economic Development and can be prepared both electronically and in paper form. The electronic form is an Xml schema format and is signed with the electronic signature of the authorized local government body. The provision of a land plot based on the layout of the KPT is carried out for plots provided for gardening, personal farming, and individual housing construction.
After completing the documents (preparing a technical plan or land surveying), the package of documents is sent to Rosreestr through the MFC. The registrar checks the availability of documents, their compliance with the established forms, and the correctness of the information provided. If he finds obstacles to registration, he makes a decision on suspension, which he informs the applicant about. To explain the reasons for the suspension, and to decipher the bureaucratic phrases with which the suspension is usually replete, it is worth contacting the cadastral engineer who prepared the documents. You usually have three months to make changes. You can read more about suspensions and the reasons for them here.
The inability to read a disk certified by the electronic signature of a cadastral engineer on the device of the MFC or the Rosreestr registrar is one of the reasons for the suspension of cadastral registration. However, the problem is often not a defect in the disk or reading device, but in other nuances, which are reflected in more detail here. To solve this problem, you should contact the cadastral engineer who prepared the package of documents again, and he will rewrite the disk for you.
Heat from porcelain stoneware in a steam room - experiments and results
I bought a box of porcelain stoneware 60x60x10 mm.
x 4 pcs. 570 rub. for 1 m2 - whitish speckled. I laid out the tiles on the top shelf = 1m from the floor. I started heating the bathhouse. This time there was a constant flow of air under the bathhouse through a window in the sink - ventilation a la Alexander from Donetsk. I’ll immediately report the conclusion - the steam room warmed up more slowly and the maximum temperature in the mode = closed door and NO ONE with the most intense heating did not exceed 73-75 degrees at a height of 140 cm. In the “operation” mode, the temperature froze at 58-60 degrees. The porcelain stoneware slabs - brought in from the cold - warmed up very quickly. The tiles and wooden shelves reached a temperature of 40-45 degrees at the same time.
Separately, I measured the temperature of porcelain stoneware and wood in the strong IR zone - 40-50 cm from the pipe with t = 300 degrees. So - the temperature in the range of 40-50 degrees of the material was absolutely almost the same for both objects. The air temperature during the warm-up stage was 20-25 degrees. Once again I was convinced of the very soft heat from porcelain stoneware at a distance of 30-50 mm at a temperature of only 40 degrees.
Cooling down - stopped heating the stove for 20-30 minutes during the warm-up stage. The temperature of porcelain stoneware decreased from 48 degrees. up to 43-45, and wood - up to 41-42 gr. But - the porcelain tiles, with most of their area, were closer to the stove. Additional heat transfer was possible.
The main initial idea was to place the slabs along the shelves along the walls. But at the same time, I remembered about the heated ceramic sunbeds in the steam room. Therefore, I laid out the tiles on the bottom shelf - height 60-70 cm. The mode in the steam room is already stationary 58 degrees, gave in and settled down. I lay there for a long time, sweated great, the ceramic temperature was 35-38 degrees, I could breathe very easily. In reality, it was much more comfortable than wood. I don't need a heated lounger anymore. The second plus is that the ceramics were easily washed off from honey after the procedures.
The next stage is to lay the tiles again on the top shelf. The temperature of porcelain stoneware and wooden shelves is 48-49 degrees. Well, I think I need to lie down again. Wig-you.. Even the palm of the ceramic burns. I try to douse myself with cold water and plop down from acceleration - we are “steelworkers” - wig-you. Okay - I cover the tiles with a terry towel - wow. I pour two splashes of cold water over the tile and get a hot water cushion on the tile.
The last combination - I douse myself + two ladles of cold water + a towel - I lie there for 2 minutes - my back really gets welded. That's it - the experience is over. The result was that on the second day my back really burned from the heat, but it didn’t hurt.
Quality criteria
Of course, I would like to leave the bathhouse predominantly wooden, so that it is natural wood that creates the necessary level of comfort.
But bath tiles are used for finishing sinks, stoves, pools and heaters. Wood is certainly not suitable here, even if impregnated with protective compounds. To determine how well the selected material meets the requirements and operating characteristics of the bathhouse, when purchasing, you need to present six main requirements for the tile.
- Moisture absorption level. A bathhouse is a place where the tiles will constantly be in contact with water. Therefore, choose minimal moisture absorption. If the material is too porous, over time this will lead to the destruction of the coating. This criterion depends primarily on the method of processing the clay. Remember that the tile must be made by pressing or extrusion.
- Wear resistance indicator. Here, pay attention to the markings indicated on the packaging. A footprint indicates that the tile is intended for the floor.
- Qualitative characteristics. Here you need to pay attention to the appearance of the material. Look at the geometry, correctness of shapes, compliance with angles. If the tiles are uneven, you will have a very difficult time laying them. Take several pairs of tiles from different boxes and place them face to face in pairs. If the sides match, then the game is good.
- Design. In this case, be guided by your own preferences, wishes or design features of the bathhouse itself. This is a purely individual question.
- Purpose. It hardly needs reminding you that there is a huge difference between floor and wall tiles. Choose exclusively floor tiles and no others. Even the most reliable wall-mounted one is not suitable for laying on the floor of a bathhouse.
- Glue. This is no longer a requirement for tiles, but it is also very important. Choose adhesives that have the ability to work under conditions of high humidity. There are special formulations designed for Russian baths. This is the perfect choice.
Kinds
There are many types of tiles suitable for use in baths, saunas, and hammams. Among them are fireproof, heat-resistant ceramic products, perfect for finishing the lower part of the walls and lining the stove. A stone-like slab for floor finishing looks interesting; however, beautiful natural minerals and rocks today are also sold in the form of piece products and are not too expensive. A striking example of such an affordable finish is soapstone and coil.
A relatively new option is non-slip tiles, indispensable in baths with high humidity and low steam temperatures. Here, any other materials quickly become unusable.
From porcelain stoneware
An aesthetic and durable composite material, porcelain stoneware combines the advantages of natural rock and traditional ceramics. Among its advantages:
- high mechanical strength;
- wear resistance;
- decorativeness;
- moisture resistance;
- low water absorption;
- versatility of use;
- wide choice of formats and sizes.
Porcelain tiles come in plain colors and with patterns like marble, granite, natural wood, and travertine.
Soapstone
Tiles made from natural rock - soapstone - are widely used in the decoration of baths and saunas. Its advantages include natural texture, neutral light gray color scheme, and pleasant texture of the material. On sale you can find ready-made tiles of various sizes, with a polished and honed surface. The usual thickness of the material is 10 mm, the most popular format is square. Aged versions of this antique style finish, rectangular “torn stone” bars with a rough texture, look interesting.
The main use of soapstone tiles is in wall decoration. This material is too soft for flooring. In addition, polished stone in damp rooms will slip a lot underfoot.
Clinker
Made from natural clay, clinker tiles differ from ceramics in the firing method, thickness, and composition. Here it is multicomponent; different types of mineral fillers are used. The tiles themselves are most often rectangular, quite thick 8-12 mm. During production, they are subjected to high-temperature firing, which gives the finished products heat resistance, strength, and low moisture permeability.
Other
This list of tiles for finishing a bath is not exhausted. Quite often the following materials are used in its premises.
Ceramics
Classic tiles, tiles and other tile options in this category are made from clay that has gone through the stages of molding and firing. During production, the material is pressed or extruded. The more times a material is fired, the lower its thermal and mechanical resistance - single is suitable for steam rooms and washrooms, double can be used in a rest room or dressing room.
Mosaic
It can be ceramic, with a glazed coating, glass, or a heater. This finishing option looks good in the washing area or near the font, and is suitable for finishing a swimming pool in a bathhouse. Small elements of different colors can have the usual square or polygonal shape. Mosaic is the most difficult type of tile to install; assembling a large panel takes a lot of time, but this decor looks very attractive.
Terracotta
Unglazed ceramic tiles that resemble the surface of brick or natural stone. It does not have a wide range of colors; it is presented in shades of red-brown. This is a porous, moisture-resistant and heat-resistant material, ideal for cladding walls and other surfaces exposed to intense heat. Terracotta tiles are rarely used as flooring.
Coil
Natural stone of a beautiful green color looks noble and elegant, giving the premises of the bath complex a special chic. The coil costs less than marble and has an original design. Tiles made from it have average heat resistance, but the material is quite soft, easily picks up moisture and cracks. This type of finish is not suitable for unheated rooms; in addition, it should be considered exclusively as wall decoration; for the floor, mechanical strength will be insufficient.
This list of materials is not exhaustive. Tiles made of marble and travertine and other expensive natural minerals are highly valued, but are not very appropriate in a simple home bath.
Unglazed tiles
For some reason, some people believe that finishing a bath can only be done with glazed tiles. Let me disagree. And there are several objective reasons for this.
- Unglazed tiles are made from special refractory types of clay. Some of them are fired at a very high temperature. As a result, density and strength are at an excellent level.
- The level of water absorption of glazed slabs is higher than that of unglazed slabs. But this indicator plays a role only when there are sharp temperature changes in the room from plus to minus. The bathhouse is not subject to such loads. Therefore, tiles without glaze can be used.
- Unglazed slabs have roughness, which becomes extremely important when finishing the floor. You won't slide on it.
- Perhaps the only drawback of unglazed tiles is the uniform colors of the collections. But from the point of view of finishing the bath, this is rather a plus. Bright and shiny tiles will not overshadow the color of the wood, thus wood will become the main material inside the bathhouse.
Kinds
Before tiling the sauna sink, you need to choose the type of decorative material. Each variety has certain advantages and disadvantages.
Positive aspects of porcelain stoneware:
- Possibility of use for finishing walls, floors, stoves;
- resistance to low temperatures;
- immunity to moisture;
- high strength.
There are no serious disadvantages to porcelain stoneware.
Advantages of clinker tiles:
- high density;
- immunity to high temperatures;
- resistance to water.
Clinker tiles are not recommended for cladding walls above the stove, as they will quickly peel off.
Advantages of the coil:
- attractive appearance;
- presence of medicinal properties;
- Possibility of use for cladding walls, stoves.
Tiles on the floor in the dressing room
Tiles do not withstand sudden changes in temperature.
Positive aspects of soapstone:
- heat preservation;
- high strength, durability;
- ease of operation;
- no slipping when wet.
The only drawback is the high price.
Advantages of tiles:
- availability;
- high strength;
- waterproof.
Since tiles have no serious drawbacks, they are considered the most popular material for finishing showers.
A separate variety is mosaic. Working with it is difficult and time-consuming, but the finished surface will surprise you with its appearance.
Which tiles should not be used?
- Porcelain tiles. This is due to the fact that the material has a high density and a smooth surface. Therefore, it is not suitable as a floor covering.
- Glazed tiles are not suitable for finishing protective screens that are located above the heater or stove. The fact is that the enamel used will not be able to withstand such a high temperature. Over time, it will become covered with cracks.
- Despite the attractive design, never use tiles with a smooth surface when laying the floor in the shower and sink. The likelihood of falling and getting hurt will be extremely high. The same goes for walls. Leaning on a smooth wall surface can cause your hand to slip. The consequences may be different, but hardly pleasant.
Is it worth combining a sink with a steam room?
At the design stage of the entire structure of the bathhouse, you need to decide whether you want to equip a steam room combined with a sink, or a separate one. Although, in fairness, we note that such a decision may be dictated not so much by wishes as by objective necessity.
The following factors are important in this matter:
- material capabilities of the developer;
- availability of building materials and other components;
- area of the building plot.
Often, a steam room combined with a sink is equipped when there is a lack of free space and funds.
In any case, even with a small building area, there will be at least two rooms in it. In the first - the dressing room - there will be a locker room, a rest room with the necessary furniture, as well as part of the stove, which will be heated from here. The second room is the washing-steam room itself. A heater is laid out in it, which provides heat, beds are installed, as well as a place for bath accessories - brooms, basins with cold water. Hot water is heated on a stove in a large container.
Despite the apparent inconvenience, a number of positive aspects can be found in this design:
- from an economic point of view, it is cheaper and also requires less fuel for heating;
- The layout of such a steam room is simple and laconic - the stove goes into the steam room with a heating part with a heater, so you can heat water directly on it.
At the same time, one cannot ignore the negative aspects:
- the small dimensions of the room do not allow several people to wash at the same time;
- after each visit to the steam room by a separate group of people, the steam room needs to be ventilated and the stove heated;
- This type of washing is not suitable for people with poor health.
In order to somehow compensate for these shortcomings, you can think of a competent layout, that is, place the washing area slightly lower than the steam room area, so that washing is not so hot.
Thus, if you have a small area for a bathhouse - no more than 16 m2, it is better to make a steam room combined with a sink, since if separated, it will not be comfortable to be in very cramped rooms.