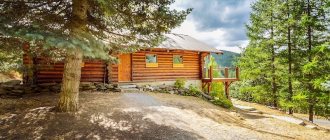
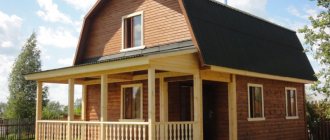
During the production process, clay bricks are subjected to heat treatment. It gives the product solidity and significantly increases its strength. Thanks to these properties, red brick is used for building walls and laying stoves. In order to save material, brickwork can be done using a special technology, which involves creating and filling voids in the wall with cheap materials with good thermal performance.
Finishing work: what to consider
When creating with your own hands, it is very important to know not only how to build a brick bathhouse, but also what to pay attention to when starting finishing work.
Note that a bathhouse made of brick has a huge advantage in terms of choosing the most suitable and preferred materials for finishing, when compared with a bathhouse made of wood. Thus, for external finishing work, you can choose any type of material - from ordinary plaster to modern thermal panels.
Finishing the inside of the bathhouse is also very simple and affordable
The main thing you should pay attention to is that for the dressing room and washing compartment you need to use coniferous wood, while in the steam room you should give preference to deciduous trees. You should choose high-quality and well-dried material
An approximate sequence of finishing work inside the bathhouse will look like this:
- Lathing walls.
- Insulation layer.
- Vapor barrier layer.
- Clapboard finishing.
After this, the main work on creating a brick bathhouse with your own hands can be considered complete.
Thus, having studied the above information, armed with a solid stock of knowledge and the necessary building materials, you can begin to work. Moreover, it will be easy to build a brick bathhouse following our recommendations. And the end result will definitely please you with quality and reliability!
Step-by-step filling of the solution
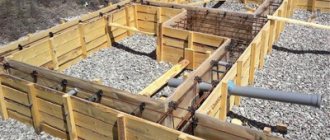
Step-by-step pouring of the base
- The finished solution must be poured in small layers of 30 cm. After pouring, each layer is thoroughly compacted. When the trench is filled 10 cm above the ground level, you need to lay asbestos or plastic pipes equal in length to the width of the foundation - for ventilation, and fill in the rest of the solution .
Note! During the first 7 days, the solution will gain strength.
Hardening will begin no earlier than this period, and if work is carried out in hot weather, the foundation must be moistened to avoid cracking. In rainy weather, on the contrary, it is better to cover the entire surface with roofing felt. Work on the construction of walls can begin only after three weeks.
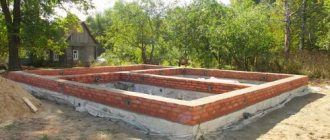
Before erecting walls, the entire surface of the foundation is laid with roofing felt. To ensure reliable fastening, it is first lubricated with bitumen.
If you need an economical option
It is not necessary to build a large sauna to enjoy steam treatments - there is always the opportunity to build a sauna cheaply, using an economical option. At the same time, you can save on many things, for example:
- Wall material. A bathhouse made of wood is more preferable, but one made from blocks is economical. If you do not want to deviate from wooden buildings, it is preferable to choose frame construction technology, in which you can use used edged boards or low-grade unedged ones, giving additional flavor to the appearance of the bathhouse.
- Careful planning. At the project creation stage, reduce the size of the rooms to the minimum acceptable. You can refuse the rest room. But the steam room should be carried out taking into account all safety requirements: in a steam room that is too small, it is easy to get burned on the heater or scalded by the steam. The washing room can be combined with a steam room.
- Drainage system. You can refuse to supply water to the bathhouse through a pipeline; it is enough to equip a stove with a tank for heating water and bring water in buckets. You can even give up the bathroom altogether.
Economy bathhouseSource drevo72.ru
Design
First you need to draw up a project, a drawing of the future building. It is necessary to indicate all the features of the structure: from the appearance, number of rooms and general dimensions to the wiring diagram of all communications, calculation of the required amount of materials and weight distribution of the structure.
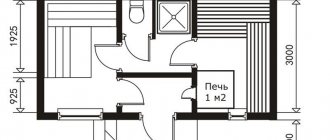
The simplest bathhouse designs consist of one room, which is a steam room, a washing room, and a changing room. But this option is not always convenient, especially when several people use the bathhouse. Therefore, most projects have in stock:
Steam room. Set up as a dry steam sauna or a traditional Russian bathhouse
During construction, taking into account safety rules, it is important to install the steam room door so that it opens outward
Important! Experts do not recommend building a steam room with high ceilings; the height from floor to ceiling should not exceed 2.5 m, since additional financial resources, time and effort will have to be spent on construction, and it will take much more time to warm up such a room to the desired temperature
- Rest room. You can sit there, chat and even have a snack.
- Locker room or dressing room. If the area of the bathhouse is limited, then, in addition to wardrobes, you can install benches, armchairs or chairs, a table and even a sofa. Also, fuel and bath accessories are usually stored in this room.
- Washing room (represented by a shower or swimming pool).
- Veranda.
For example, if a bathhouse is being built as an extension to the main residential building, a washing room may not be equipped, since its role will be played by the bathroom of the house.
If you want to save money, you can find ready-made brick bathhouse projects and detailed instructions for them on the Internet.
Construction material for baths
If you think that baths should be built only from wood, then you are mistaken. For example, in the southern regions, wooden baths do not last long. They are destroyed by beetles that settle in the tree and eat it away.
In some regions, baths were made of adobe. A self-built bathhouse made of adobe is the cheapest option compared to a wooden log house. Such a bathhouse will serve for quite a long time.
In the modern world, bathhouses are most often built from brick. Building a bathhouse is not a cheap pleasure, so they are installed mainly in already built or attached premises.
Then there is no need to perform additional work on laying sewerage, water supply and lighting. And, if you already have such a building, then you can safely equip a bathhouse in it.
If you nevertheless decide to build a new, free-standing bathhouse, then it will be much more expensive.
Construction of walls for a bathhouse made of bricks
To build a brick bathhouse with your own hands, you first need to choose the right one. Reliable walls are built only from red brick, since its silicate counterpart quickly collapses under the influence of moisture, which is well absorbed by its surface. Ceramic brick is more resistant to dampness, and due to its fire resistance, it is even used when laying stoves.
Methods and rules for laying brick walls
For bathhouse walls, there are the following methods of laying bricks:
- One and a half or two bricks.
- The “well” masonry consists of double walls connected internally by short transverse partitions. The free space is filled with insulation.
- Double walls with an air gap of 4-6 cm between them.
When laying bricks, it is important to follow these rules:
- The first row of masonry should always consist only of undamaged piece products.
- Each row is laid from the outer bricks.
- Broken brick can be used to fill the inside of the tray rows.
- Broken bricks are not used for bandaging corners and laying support areas.
- Before laying, the brick is moistened with water for better adhesion to the mortar.
Now let's look at how to lay masonry with ceramic red bricks.
Preparing for bricklaying
First of all, you need to establish orders on the finished foundation. This will help to maintain an even laying. This is done using a plumb line at the points of contact and intersection of the walls at the corners of the masonry and on its straight sections. The cords are tensioned to align each row. To avoid sagging of the cord, beacon bricks are placed under it every 5 m.
How to bandage brickwork
To ensure that the finished wall does not creep along the vertical seams after the bath shrinks, they must be properly bandaged.
There are three ways:
- Single-row chain system - alternating tie and spoon rows. Vertical seams are tied by half a brick, and transverse seams in each row are shifted by one quarter of a brick. This system is quite labor intensive, but reliable.
- Every three spoon rows alternate with one back row. Transverse vertical seams are not tied in three adjacent rows. This system is very suitable for masonry columns and small partitions.
- The “multi-row” system - here five spoon rows alternate with one tie row. The transverse vertical seams of the spoon rows are shifted by half a brick, and the butt rows by a quarter. This type of masonry can use half bricks, thereby saving material.
Laying the corners of a brick bath
They begin to lift the first corner by laying it in? bricks If the load on the walls is low, half bricks can be used for the bottom of window openings. To avoid displacement of the vertical seams, a mile is laid on one quarter of the brick (a mile is the outermost rows of bricks in the masonry). When laying an odd row, use the butt sides (the brick lies across the wall), and when laying an even row, use the tongue sides (the brick lies along the wall).
The internal verst is done in any way - it depends on the thickness of the wall. The voids in the corners are filled with quarters of brick. The geometry of the laid corner is checked with a construction square, and its verticality is checked using a plumb line and a rule. Minor deviations are corrected next above.
Creating joints in brickwork
Masonry mortar is prepared from water, sand and cement. It must be sufficiently plastic to properly fill the voids between the bricks. If you lay the bricks correctly using high-quality mortar, the masonry will be strong. The thickness of its vertical seams is assumed to be 10 mm, and the horizontal seams - 12 mm. The shape of masonry joints can be concave, convex and rectangular. It is created with a special tool - construction jointing.
Brick lintels for openings in the bathhouse
Ordinary lintels over window and door openings are used for spans of less than two meters. When making them, it is necessary to observe the horizontality of the rows and the rules for tying the bricks in the masonry. An ordinary lintel has 6-9 rows in height, and its length is half a meter greater than the width of the opening. The lintels are laid on M25 mortar made of high-quality bricks.
To make lintels, formwork made of boards 4-5 cm thick is used. Sometimes it can be replaced by door and window frames fixed in the masonry. In this case, their wood must be protected with a layer of roofing felt.
First, the mortar is laid on the formwork in a layer of 2-3 cm, three reinforcing bars with a diameter of 6 mm are placed in it, which are launched into the general masonry by more than 25 cm and secured by tying the brick.
An ordinary lintel is kept on the formwork for a little more than 12 days at an ambient temperature above ten degrees and up to 24 days at an ambient temperature of up to ten degrees.
Interfloor ceilings
Interfloor ceilings
There are 2 types of interfloor ceilings.
- Monolithic.
- Prefabricated.
Monolithic ceiling
They are excellent for foam concrete baths, as they have many positive qualities, including:
- low cost;
- fire resistance;
- durability;
- simple search and selection of necessary materials;
- easy installation technology.
For this type of work, it is not recommended to use self-produced concrete. In the factory, the proportions are monitored, which plays a big role in the reliability of future floors.
When constructing a monolithic floor, the following difficulties arise:
- concrete rises to great heights. A concrete pump is useful for this;
- The formwork is installed over the entire work area, tightly joining the blocks to each other.
The production of formwork must be approached carefully. The concrete mixture weighs approximately 500 kg per 1 square meter, despite the fact that the layer is about 15 cm. The formwork should easily withstand this weight. A safety margin is also required, since when concrete is poured, the force of the jet is applied to the structure, and all processes associated with the gradual hardening of concrete are also withstood.
The minimum parameters for formwork materials include the use of timber measuring from 10x10 cm, and plywood panels are at least 1.8 cm wide. When producing formwork, it is necessary to constantly check its horizontalness, using a building level.
Operating procedure:
- installation of supports in the vertical direction at a distance of at least 1 m;
- installing boards on supports at 5-7 cm;
- Boards are laid on top of the initial structure, serving as the main part of the formwork.
Pouring the structure:
- roofing material is laid out on the lower part of the formwork;
- reinforcing bars form a network and are placed on reinforcing stools at a maximum height of 5 cm;
- concrete is poured in a layer of 10 cm, but usually a level of 15 cm and above is required.
Floors made of hollow concrete slabs
Pre-designed slabs are placed on the top of the bathhouse using a crane. They are fastened together using a special solution. To ensure the reliability of their installation, the production of a wooden or reinforced concrete frame is undertaken in advance.
Types of floors:
- concrete plates;
- foam concrete slabs.
Interfloor ceilings made of wooden beams
Interfloor ceilings made of wooden beams
Wooden and glued beams are used. First, the installation of rough boards is carried out, and then the finishing part of the structure. The resulting empty space must be filled with insulation, preferably in slab form. In addition to wooden beams, you can use metal ones.
Interior decoration of a brick bath
The next step in the phased construction of a brick bathhouse is the floor. Porcelain tiles are a practical and aesthetic option. To prevent the tiles from deteriorating during the winter, it is better to lay them on a frost-resistant mortar.
Errors in masonry will quickly make themselves felt with wet spots after heavy rainfall as in the photo. If such a problem manifests itself, you will have to coat all the seams.
After installing the stove and installing the chimney, you need to make a test fire to make sure that everything is done correctly.
Next, you need to think about arranging the floor in the dressing room. The lower part is covered with sand. Logs are installed on the projections of the foundation.
They are subsequently covered with boards. No boards are used near the firebox. Then you will get a recess suitable for storing a small amount of firewood.
As a result, a wooden floor will create comfortable conditions for people leaving the steam room. And finishing the space in front of the firebox with porcelain stoneware will ensure fire safety.
It is better to cover the ceiling in the steam room with linden clapboard.
For the ceiling in the dressing room, ordinary pine paneling is suitable.
The walls are covered with clapboard. Metal fasteners should not be used in areas where the skin will be in contact with the wall. After finishing the interior, the heating time to 80°C was reduced to 50 minutes.
The shelves are made in parallel with the cladding. They are usually installed opposite the stove. They require deciduous wood (linden, aspen) so as not to get burned by the resin that will protrude from conifers at high temperatures. Attach the shelf strips to wooden pins.
Like the entire interior space of the bathhouse, the ventilation holes are decorated with wood.
Even before decorating the walls with clapboard, water is carried out using metal-plastic pipes.
You can use a regular metal door as an entrance door.
The oven is filled with stones.
A mandatory step in the instructions on how to build a brick sauna is the installation of an internal door that leads to the steam room. It should only be made of wood, and its fasteners require operation in a humid environment and at high temperatures.
The total cost of building such a neat brick bathhouse is about 200 thousand rubles. All that remains is to decorate it externally, fitting it into the surrounding space.
Which oven to choose
The “heart” of the sauna is the stove
And if earlier it was only stone, today it is possible to choose different types of this very important attribute of the steam room. Sauna stoves are wood-burning, electric and gas, stone and metal, home-made and factory-made
When choosing, you should take into account the significant differences between these types.
Traditionally, a brick stove was installed in the bathhouse. However, today it is a rarity. There are two reasons for this circumstance:
- Lack of specialists in brick kiln laying.
- When using it, the steam room heats up for a very long time.
However, these devices are very durable, fireproof and capable of heating large bath rooms.
For those who are looking for an inexpensive and easy-to-install option, metal stoves are suitable. The most popular among them are cast iron and steel. In addition to ease of installation, their advantages include compactness. Furnaces of this kind do not require foundation preparation, which also reduces installation costs. They are easy to burn and do not emit carbon monoxide.
https://youtube.com/watch?v=P5mAtBbPR64
Large areas cannot be heated with metal stoves. When using them there is a risk of heat stroke. From a fire safety point of view, stoves of this type are also not the best option.
The simplest representative of metal stoves is the “potbelly stove”. However, today many consider its use a relic of the past. Experts in the field of heating equipment recommend using modern models of metal stoves, as they are safer.
One of the most important criteria for choosing a unit is its power. It should be optimal for the room. In this regard, very often two types of mistakes are made: purchasing an insufficiently powerful stove or, conversely, one that is too powerful. In the first case, the device will work hard to fully warm up the bath. This will negatively affect its service life. In the second, the air will be hot and the stones will be cold.
To determine the optimal power of the stove, you should multiply the parameters of the bath room (length, width and height). The areas of non-insulated areas of the steam room are calculated separately. Both obtained values are multiplied by 1.2. The final number is added to the volume indicator. The final calculation of the required power is made from the equality 1 kW = 1 cubic meter. m.
Devices of the first type are strong, safe and durable. They take up little space and heat the steam room quickly and evenly. This is an economical option that does not require large expenses. In addition, to put electric furnaces into operation there is no need to build a chimney or connect gas pipes. The device runs on electricity. However, in areas where the power is often turned off for a long time, such a stove will not be suitable.
When using gas furnaces, there is no need to control heating. There is no need to throw logs into such a device - it will be powered by gas. But you can adjust the temperature at your discretion. Such stoves consume little fuel, but at the same time warm up the room in a short time. If the stove is “powered” by a cylinder, you will have to take additional care of fire safety.
Wood stoves are optimal where electricity and gas are not provided. They are heated with wood and are reliable. It will take a long time to heat up the steam room, and then add logs from time to time. You should also regularly clean the ash pan of such a stove.
It is highly undesirable to light a stove in a bathhouse for the first time. When the firebox is first fired, the factory paint sets. It will give off a very unpleasant pungent odor, which will hurt your eyes and sore your throat, and make it difficult to breathe. Therefore, it is highly advisable to carry out the first fire in the yard.
How to build?
Step-by-step do-it-yourself construction instructions will help you correctly build your own bathhouse on the site.
Any construction begins with choosing a site for the structure. At the selected point, markings are prepared, and then the construction of the foundation begins. For a brick bath, the best option would be a strip base. Such a foundation requires the preparation of a trench that needs to be dug, then it is secured with boards. The walls of the trench need to be covered with formwork, and the bottom is covered with sand. The sand cushion will evenly distribute the load. After this, reinforcement is performed.
You can prepare concrete mortar for a small bathhouse yourself. For large volumes of construction, you can order a ready-made solution. It takes time for the foundation to settle. This period depends on the characteristics of the concrete solution. Sometimes the foundation is treated with waterproofing materials.
If you build a bathhouse with your own hands, then it is easier to use one-and-a-half red bricks. Laying walls for a bathhouse is permissible in one brick. To calculate the amount of material, the planned width and height of the verticals must be divided by the product of the height and width of one brick. The amount of material is selected taking into account the required number of doors and windows.
The wall courses begin with the outer bricks. The material must be wetted when laying, especially if it is hot enough outside. Lay bricks along the entire perimeter of the building, only then move on to a new row. The use of broken bricks is unacceptable for supporting structures. During the process, pay more attention to the quality of the seams.
Appropriate openings must be prepared for roof beams. The ends of the beams that will lie on the bricks must be wrapped with roofing felt. The simplest version of the bathhouse ceiling is the lean-to type. A flooring of boards is made on top of the laid beams. Fabric asbestos is suitable as a waterproofing material. A sawdust-clay mixture is placed on top of it. The dried base is sprinkled with sand.
Pay attention to the location of the chimney
It is important to highlight this area with a sheet of metal
Lath the rafter system of the brick bath. Place roofing material on top of the rafters. It can be slate or profiled sheets.
The next step in the phased construction of a brick bathhouse is laying the flooring. To do this, the lower part of the floor is covered with a sand mixture. Logs are installed on the projections of the foundation. The floor can be covered with boards. Another suitable option is porcelain stoneware. Finishing with tiles will ensure high fire safety of the structure.
Lining is suitable for covering the ceiling, in the steam room it can be linden wood, and in the dressing room you can use pine. The walls inside can also be lined with clapboard. Make shelves parallel to the wall paneling. Use hardwood. The shelf slats are secured with wooden pins; you can get burned on iron ones.
Install the doors. The outer structure can be ordinary, metal, and the door to the steam room can only be made of wood. Please note that it will be used in a humid environment and at high temperatures.
Device
Brick baths differ in size, layout or other characteristics.
Design companies have both economical projects designed for 2-3 people with a small steam room and a small changing room, as well as solid projects of brick bathhouses with a second floor for receiving guests and for the hosts to live there. In addition, sometimes large baths are provided with various extensions in the form of terraces, verandas or gazebos. After all, often a bathhouse in a suburban area is not only a place for taking water procedures, but also a meeting place with friends and relatives.
There are standard projects that differ in that they are cheaper and have already stood the test of time. Those customers who prefer exclusive buildings on their site are offered individual brick bathhouse designs.
An ordinary standard bathhouse, including a brick bathhouse, consists of a dressing room, a washing room and a steam room. For heating, the sauna usually has a stove with a hot water tank.
A variant of a brick bath is proposed, in which the partition in the steam room is made of salt bricks, which are made by sawing them out of a block of salt. At the same time, the hot, humid air in the steam room is saturated with healing salt vapors. Walls made of salt bricks allow light to pass through, which reduces the number of lamps, and due to the refraction of light passing through the salt bricks, unusual lighting effects occur in the steam room.
The interior of a brick bathhouse is usually insulated. For this purpose, insulation is used, on which a layer of vapor barrier is placed. The top of the interior of the bathhouse is covered with wood. Usually lining is used for this. It is correct to decorate different rooms of the bathhouse with different types of wood.
For example, a steam room should be decorated with larch or linden. These types of wood do not overheat and will last a long time. Pine is usually used in the locker room, which emits an indescribable bath aroma that is very beneficial for health.
How to insulate a bathhouse from the inside? You will find out the answer by reading our next article.
And this article talks about how to insulate a bathhouse from the outside.
Finishing a brick bath
The outer walls of the bathhouse can be left to shine with the beauty of facing bricks.
If there is none, they can be plastered using cement-lime mortar containing light filler: expanded clay, pumice or slag. Internal walls are painted or covered with clapboard. In the steam room, the cladding of the walls and ceiling is made of aspen lining, i.e. wood that does not release resin at high temperatures. The floors and walls in the washing area can be tiled. How to build a bathhouse from brick - watch the video: The main part of the construction is completed, you already know how to make a bathhouse from brick. All that's left to do is install the stove, fill the openings with windows and doors, cover the bathhouse with a roof and lay the floors. There is still work to do, but you can do it!
Construction of walls of a brick bath
Only after waterproofing work do they begin to lay brickwork on the walls. It is recommended to use red one-and-a-half brick.
At the same time, do not forget to leave ventilation gaps, window and door openings. Jumpers are installed above doors and windows. Also, prepare holes for laying floor beams.
Roof
Next they begin to install the roof. The simplest roof option is a pitched roof. The floor beams are laid on bricks directly into the prepared recesses.
You should wrap roofing felt at the ends of the beams that will come into contact with the brick. Only their end part remains uncovered.
After laying the beams, the flooring is made of boards. To provide waterproofing, the floor beams are wrapped in fabric asbestos, which is secured using a stapler.
Roll up
It's time to roll up. A mixture of clay and sawdust is applied to the beams protected by waterproofing. The dried mixture is sprinkled with sand.
Particular attention is paid to the chimney. Compliance with fire safety measures will help to avoid fire in the future.
Wood should not come into contact with the chimney in any way. Therefore, this area is sheathed with metal sheets. Next, the roof rafters are installed and the lathing is done.
Roofing material
The roofing material is laid on the grid on top. This could be tiles, slate, corrugated sheets or another type of roofing.
The place inside the room where the stove and chimney will be located is also covered with metal. And around the chimney in the area near the ceiling, it is necessary to insulate it by filling it with expanded clay.
The lower reflector is attached to the fittings. Another sheet of metal is placed on top.
Basic mistakes
A high-quality project and a serious approach do not exclude the occurrence of errors during construction or finishing
To minimize shortcomings, special attention is paid to the following points:
Proper room planning is important. For a couple of people, 10 sq.m. is required. Ceiling height 2-2.5 meters
Low ceilings cause discomfort, and high ceilings cause irrational use of coolants. Doors should be placed on the south side, and windows should face west and south. Door and window openings should be minimal. For example, for a door - 75x180 cm. A country bath should be built from lightweight materials with energy-saving properties.
The blocks have proven themselves to be excellent in the construction of bathhouses on a summer cottage. The masonry is made using a special mortar and does not require special construction skills. A warm and cozy bathhouse will delight you after a hard day of work and will warm you up on cold evenings.
Correct location of the bathhouse on the site - distances from borders and other objects
The correct location of the bathhouse at a distance from the boundaries of the site is one of the main requirements for its construction, since it ensures fire and sanitary safety. If the development plan is carried out by a design bureau, you don’t have to worry about meeting all the requirements. But if you decide to plan the location of the house and bathhouse on the site yourself, we recommend that you familiarize yourself with the information that we will present later in the article.
Before the fence
The indicator may increase taking into account the height of the fence and the material from which it is built. Such restrictions will protect against fire and sewage entering the site.
When the neighboring area is not built up, the distance can be reduced to 2.5 m. But provided that the height of the bathhouse along the ridge line does not exceed 3 m.
To the neighbor's fence
The recommended setback from the border of the neighboring plot is 3 m.
As in the previous case, the distance can be increased for reasons of fire and environmental safety. Plus, a building with an attic is a significant shading of the neighboring estate.
When planning a corner structure, the requirements of the regulations often have to be violated, so it is better to discuss this point with the neighbors in advance and obtain their written permission.
To the neighbor's house
In accordance with urban planning requirements, a distance of 8 m must be taken from the bathhouse to the neighboring or own house. When the structure is built from non-combustible materials, the distance is reduced to 6 m.
If the side of the house that the sauna faces is solid (without windows) made of brick, blocks or stone, then the required distance is reduced to 1 m.
Provided that the bathhouse will be built later than the neighbor's house, the party who plans the construction must comply with the requirements of the code.
To the bathhouse (in neighboring areas)
The acceptable distance between two bathhouses is considered to be 2 m. One of the bathhouses can be located a meter from the fence if it has a central sewerage system with drainage.
According to fire safety requirements for buildings made of flammable materials, the distance increases to 5 m.
This is often practiced in rural areas. When there is a garden, sheds, vegetable garden, and pens for livestock around the sauna. And the house and other residential properties are located in the opposite part of the site.
To other buildings on the estate
The sauna is allowed to be placed 1 m from other buildings of economic importance, provided that both structures are made of fire-resistant materials.
Interior decoration
To ensure an ideal microclimate in the bathhouse, you need to pay special attention to the interior decoration. It is the finishing that needs to be given special attention
Floors
First you need to make the floors. It is recommended to use porcelain tiles, which are laid on a frost-resistant mortar.
Porcelain tiles are a new type of finishing material that quickly gained popularity. The reason is its performance characteristics.
The floor in the waiting room is done as follows:
- first the soil is covered with sand,
- then logs are laid on the protrusions of the foundation,
- Floor boards are attached to the joists.
Boards cannot be laid directly next to the firebox. It is recommended to lay out a small section of the floor under the firebox with bricks, or fill it with concrete.
Then, cover the floors with thermal insulation material, lay roofing steel on top, measuring at least 55 by 70 centimeters.
At the side wall of the stove, you can build a small recess in which firewood will be stacked and stored.
Wall decoration
We make sure to inspect the masonry and correct any errors made during construction.
If we find cracks, be sure to thoroughly coat the defective brickwork seams. If this is not done, then wet spots will appear on the walls in the future.
After the installation of the stove and chimney is completed, you need to try to heat the stove, make sure that everything works and the installation of the stove is done correctly.
Before covering the internal walls with wooden boards, you need to install a water supply system from metal-plastic pipes.
In order for there to be enough steam in the bathhouse, you should never leave brick walls unprotected. For example, they can be sheathed with linen. But this is a very expensive option.
Therefore, wood is mainly used for decoration. A clapboard board will do. Many say that this is not enough. This is a wrong opinion. It is quite enough to cover the walls with clapboard.
After all, we don’t need to warm up all the walls. It is enough to warm up only the air inside the room. The heat transfer of wood is very low, so the temperature in the bathhouse will rise quickly and remain for a long time.
To warm up wooden walls and shelves faster, they are doused with water. Steam is generated, which stabilizes the desired temperature, equalizes the conditions and creates exactly the microclimate that is needed for the bath.
Ceiling finishing
It is recommended to cover the ceiling in the steam room with linden clapboard. Linden and aspen are used for shelves, as they do not emit resin, which can cause burns. But for the ceiling in the dressing room you can use ordinary pine.
Doors and windows
A metal door can be installed at the entrance to the dressing room. You choose windows at your discretion.
But the internal door through which you can enter the steam room must be made only of wood.
It is imperative to comply with the conditions for its fastening to operate the door in a humid environment at high temperatures.
Insulation
Insulation of a bathhouse is carried out in several stages:
- Exterior walls. The insulation is laid inside lightweight masonry.
For it, you can use sheets of expanded polystyrene, which are cut to the desired shape and filled with them into the space inside the lightweight masonry as the internal walls are built.Mineral wool is also good for these purposes. External structures must be insulated so that when warming up the bathhouse there is no need to spend money on heating the entire building. The task of a sauna stove is to warm up the air inside the room.
- Internal walls.
Here it is necessary to make a high-quality finish so that the heat does not escape into the walls. To do this, the rough masonry is waterproofed with coating materials (for example, bitumen mastic). Next, a layer of plaster is applied, a lathing is attached to it, and fiberglass is placed inside the resulting cells. A layer of thermal insulation is laid (expanded polystyrene, ecowool, basalt wool). Next, the wall is covered with a vapor barrier (for example, foil), on top of which the finishing is placed. Experts recommend using lining, which quickly warms up and will become an obstacle to the transfer of heat to the brick. - The wall near the stove is insulated with a denser layer of heat-insulating material, according to the same principle as the internal surfaces of the bathhouse. Foil must be used as a vapor barrier, since the steam room is the wettest part of the bath and is subject to the most dramatic temperature changes.
The steam room must have high-quality ventilation so that when heated the room does not turn into a kind of thermos without air access.
Construction of walls and roof
Red brick should be used to build walls. The required amount of material is easy to determine: divide the area of the bathhouse box (the total height and total width of the walls multiplied by each other) by the area of the selected brick.
Advice. When calculating, add 5% to the resulting figure in case there are broken bricks in the batch.
There are two ways to lay brick:
- The first one is single-row. The so-called chain system, according to which bricks are alternately laid crosswise and lengthwise. This masonry is quite difficult to execute, but allows you to build very strong walls.
- The second is multi-row. This scheme involves alternating one transverse brick with five longitudinal ones. Its main advantage is significant material savings. But in terms of strength, the multi-row method is inferior to the single-row method.
To bond the bricks, prepare a mortar of cement, lime, sand and water. It should turn out plastic, but not liquid. The optimal thickness of the solution layer is 10 mm.
Construction of bath walls
After the walls, proceed to the construction of the roof:
- lay rafters or joists on the brick walls - the base of the roof;
- place the lath on the base;
- fix the roofing material on the sheathing: corrugated sheeting, metal tiles, slate.
Foundation for brick baths
A brick bathhouse is a structure with quite a lot of weight, so it requires the formation of a solid foundation. It is laid below the freezing point of the soil. These indicators are individual for different regions and may vary significantly.
Most often, a strip foundation is chosen for a brick bathhouse, which provides a reliable foundation for a heavy object. Despite the high cost and low speed of construction, the strip foundation fully ensures the strength and reliability of the building.
Difficult soil, problematic terrain and deep freezing of the soil in winter require a pile foundation. Piles are installed at the corners of the bathhouse, the walls, and also every two meters.
Pile foundation for a small bathhouse with a grillageSource mirstrojka.ru
The construction of a reliable brick bathhouse has its own characteristics and requires the formation of a wooden or metal grillage.
General information
Brick is known to be a strong and durable material that can withstand temperature changes and high humidity. In addition, there are a number of other features of brick baths.
Advantages
Among the advantages of such a structure, the following points can be highlighted:
- Architectural elements of any configuration and shape can be made from brick.
- Brick steam rooms are much more durable than wooden ones. If construction technology is followed, their service life is more than 150 years.
- A brick building has a much higher fire safety rating than a log bathhouse.
- Buildings made from facing bricks do not require finishing.
Flaws
Of course, along with the advantages, there are also some disadvantages:
- The cost of building a brick bathhouse is always more expensive than a chopped one.
- Brick has a high heat capacity, so it takes more time to heat such a bath. This problem can be solved with good thermal insulation.
- Brick tends to get damp, as it has less vapor conductivity than wood. However, this drawback can also be corrected with the help of ventilation and vapor barrier.
