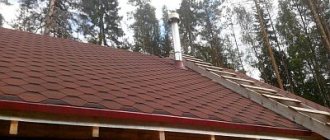
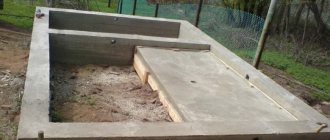
When building bathhouses of medium and large dimensions (from 6x6 m), it is customary to equip a roof with variable slope angles. The minimum width of the building for such a design to be effective must be at least 6 meters. In smaller sizes, the construction of such a roof for a bathhouse will completely lose all its advantages. A broken type roof for any building is a structure of two flat and two steep slopes. As practice shows, large baths are made only with sloping roofs, because this makes it possible to arrange, if not a full floor, then at least an attic above the steam room.
Materials for arranging a broken roof
Before starting installation work, you need to prepare a sufficient amount of wood for the construction of the rafter system. Coniferous wood with a moisture content of no more than 25% is best suited for these purposes. When choosing a material, you need to carefully inspect the future rafters - they should not be damaged by insects.
The next step should be to treat the wood for the roof with special means - fire retardant and antiseptic. Each of them is applied in 2-3 layers with a wide paint brush. The treatment is intended to protect against the harmful effects of high temperature, the development of mold and mildew, and insect damage. Do not forget about your health: during any work you must use protective masks and gloves.
Having a ready-made bathhouse project, and knowing exactly the parameters of each of the slopes of the sloping roof, it is not difficult to calculate its total area. To do this, the length of each individual slope must be multiplied by its width, and the results obtained must be summed up. Having such data, you can calculate the amount of required hydro-, thermal insulation and roofing materials. The most common bathhouses are with sloping roofs, covered with:
- metal tiles;
- slate;
- ondulin;
- tiles.
You need to carefully approach the choice of fasteners for a sloping roof. It is better to take galvanized roofing brackets, brackets, tile screws and corners in order to get a durable roof and not be afraid of destructive corrosion processes.
Mounting the Mauerlat
Having worried about how to properly make a sloping roof with your own hands, you should understand that construction according to the standards begins with laying the mauerlat. The thickness of the timber must be increased for a large area, and, accordingly, the weight of the roof. For a small country house, a section of material of 10x10 cm will be sufficient, but a large private house will require a beam of 20x20 cm.
Before installation, it is necessary to waterproof the fastening area by laying a double layer of roofing felt or multilayer film. The process of mounting the Mauerlat is guided by the type of materials used to build the house. The most common is installation on a block concrete screed using metal spiers.
It should be borne in mind that a smaller number of holes in the Mauerlat leads to increased strength of the entire roof. In this case, the spire should be placed directly under the leg of the sling, and not in the space between the rafters. Otherwise, cracks may occur, which will make the Mauerlat completely unusable.
Example of installing a Mauerlat Source kakpostroit.su
Preliminary work before the construction of a sloping roof on the bathhouse
In any construction, the very first step is design. The development of a sloping roof needs to be treated with special attention. A proven option would be to install the lower rafters at an angle of at least 60 degrees, and the upper rafters at an angle of about 30. At this point, you need to calculate the potential load-bearing capacity of the entire roof structure. This parameter is very important for selecting the cross-section of materials and their effective placement. In addition, you need to think in advance:
- total load from the selected material for a sloping roof;
- additional load after installing the roof sheathing;
- total mass of all insulating materials;
- distances between rafters and sheathing components;
- slope of all slopes;
- the total length of the span from the eaves to the ridge of the roof.
During construction, many people forget to take into account in these calculations the inevitable additional loads on the roof, such as: precipitation, ventilation system and chimney, double-glazed windows in the attic windows.
For the most accurate calculation of the load-bearing capacity of roofing rafters of a certain size, special programs and various tables with specific examples have been developed. In addition to taking into account the basic parameters, you need to refer to maps of loads on the roofs of buildings from wind and snow in a specific region.
Common mistakes
In addition to incorrectly calculating the amount of materials and the load on the building, there is another mistake that will have a bad effect on the reliability of the roof - the lack of ventilation or its improper arrangement. Violation of the ventilation regime will lead to the roofing cake collapsing over time.
To avoid such consequences, it is important:
- leave a sufficient gap between the roof and the insulation;
- make special passages for ventilation in the ridge and eaves of the roof;
- leave the required air gap - for flat roofing coverings the gap should be at least 50 mm, and for profiled roofings - at least 25 mm.
Step-by-step instructions for installing a sloping roof
Experienced builders claim that a 6 by 6 bathhouse with a sloping roof is the most versatile option for such a structure in terms of price-to-result ratio. If we briefly describe the process of arranging a sloping roof, then it is conditionally divided into 3 stages:
- Installation of the supporting roof frame.
- Works on hydro- and thermal insulation.
- Installation and fastening of the final roof covering.
Each of these stages is quite labor-intensive, it is difficult to carry out all the work on your own, so to arrange the roof you need to involve at least two workers.
Before installing the sloping roof rafter system, be sure to lay several layers of waterproofing around the entire perimeter. The material for these purposes is usually a special roofing “Gidroizol” or roofing felt. The film is laid in such a way that its edges hang down slightly. Further work proceeds in the following order:
- along the perimeter of the walls, using steel wire or studs, the Mauerlat - the base of the roof - is attached. The studs must fit between the rafter elements;
- the floor beams are fixed at the bottom. To increase the strength of the structure, it is recommended to use double beams with a cross section of 25 cm2;
- Installation of front vertical rafters attached to the floor beams is carried out. A rope is stretched between the rafters as a guide for the correct placement of the following roofing elements;
- the pitch between the vertical posts must be maintained from 2 to 2.5 m;
- all vertical elements of the roof base are connected by temporary struts;
- special roof purlins must be laid on top, the remaining racks are attached strictly vertically;
- transverse ties are strengthened with the help of struts;
- The lower side components of the roof rafter system are installed. First, the extreme ones are attached, and then the intermediate ones. The step should be no more than 1.2 m. It is important to ensure that all parts rest against the supporting structure of the bathhouse;
- The upper elements of the rafter system are installed and attached to the roof ridge. In preparation for the installation of roof windows, the upper part of the roof frame is strengthened with additional crossbars;
- The bases for window and door gables are prepared on the outer rafter beams.
When building a broken roof for a bathhouse with your own hands, you need to take into account that lightweight timber (section 5 cm2) is ideal for all racks of the vertical system. You also need to know that the upper parts of the rafter system must be hanging, and the sheer slope of the roof must be inclined.
Customer reviews
“Inexpensive, but not at all angry! It’s even surprising that there are still such honest companies as SK Bober!”
“No matter how many companies we visited, SK Bober, in my opinion, has the most affordable prices in Moscow, and at the same time they work normally!”
“We wanted the builders to make some adjustments to the layout of the house: they removed one window and changed the kitchen a little. They didn’t even charge us extra!”
“Special thanks to foreman Ivan! Leader from God! And the main thing is that all builders respect him.”
Thermal insulation measures in the process of arranging a sloping roof for a bathhouse
To create a comfortable and cozy atmosphere in the attic room of the bathhouse, as well as to reduce energy costs for heating, you need to properly organize the roof insulation. To achieve the desired result, you need to follow some recommendations:
- The entire frame from the ridge to the mauerlat itself must be sheathed with a vapor barrier, the material must be overlapped (up to 30 cm), and the joints must be taped with thick tape. The vapor barrier is fixed with thin wooden strips and a special stapler.
- The type of main sheathing is determined depending on the finishing roof covering. Hard material requires sparse lathing, while soft material requires continuous lathing.
- The thermal insulation material most often becomes mineral wool. It is laid between the rafters and the sheathing.
- The top layer is fixed with waterproofing material. It is overlapped and additionally glued with a sealant.
For those who want to simplify the construction process, a ready-made insulating “pie” is offered, which only requires installation according to the instructions for it.
Additional thermal insulation
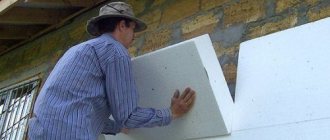
Insulation is an almost mandatory process, because the use of an attic under a sloping roof is usually limited to residential purposes. Experts mainly use mineral wool with a basalt base.
For central regions with a temperate climate, as a rule, a layer of insulation of 15-20 cm is used. You will also need a vapor barrier film, a moisture-proof layer and a frame that serves as the basis for fastening.
On the inside, the slopes are equipped with a counter-latten made of boards with a width slightly greater than the thickness of the insulation, which is categorically not recommended to be compacted.
The process of thermal insulation of an attic roof Source legkovmeste.ru
More specifically, when using a 15 cm layer of mineral wool, you will need 5x20 cm boards. The presence of such a gap will also promote good air circulation, which will ensure natural ventilation. The insulation is laid between the beams of the counter-sheathing, followed by sewing with the selected material.
Video description
This video shows instructions for properly assembling gables:
- You should also consider insulating the gable space from the inside of the room;
- As insulation, professionals recommend the use of mineral wool or fillers with polystyrene foam base.
Upon completion of the above steps, a cornice of boards is mounted along the perimeter of the building. For this, lumber measuring 25x15 cm is ideal. Afterwards, a drainage system is installed, which is mandatory for the construction of a sloping roof.
Important! Carrying out work with already covered roofing material will be more labor-intensive and problematic for a beginner.