Methods for removing soot from the internal surfaces of a bathhouse
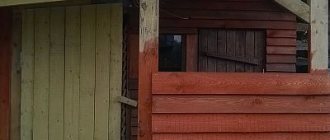
It is most difficult to remove soot from wooden walls and ceilings in a bathhouse. Simply removing it with soapy water will not work. Soot does not dissolve well and simply spreads over the surface. Wood is a hygroscopic material, and soot particles penetrate inside along with water, penetrating into small pores and cracks. It will be impossible to wipe them off after this. You will have to remove the top layer of the wooden covering along with the ingrained soot.
Mechanical method
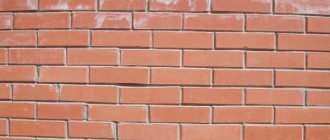
You can remove soot from brick and wood with a stiff brush.
To remove black deposits on walls and ceilings effectively and without the risk of getting into the pores of the wood, you need to scrape them off. This is long and tedious, since considerable physical effort is required even when processing smooth surfaces.
Soot must be picked out from joints and cracks using sharp objects or special brushes. In addition, such actions lead to damage to the upper layers of wood with which the steam room is sheathed. The result is clean walls without any soot residue.
Chemical method
Using detergents to remove soot saves effort and time. But you need to be careful when choosing chemicals.
The basis of the composition of soot is carbon, and it practically does not dissolve in anything. Using strong chemicals with acids will damage the structure of the wood. To remove soot, alkali-based wash-off compounds are used. They clean off carbon deposits, but do not harm the wood surface.
When removing soot and soot, wear protective clothing
Before you begin cleaning the bathhouse in any way, you must take measures to prevent the spread of removed soot particles:
- Go over all contaminated surfaces with a vacuum cleaner.
- Cover the floor and shelves with polyethylene or paper.
- Wear protective clothing, rubber gloves on your hands, and a mask on your face.
- Brush off the top layer of soot with a broom or hard bristle brush.
Wood is a natural material that is highly hygroscopic. Together with water, wooden surfaces can absorb any type of contaminant - soot, soot, sweat, dust, etc. Therefore, it is not recommended to clean wood floors, walls and ceilings covered with soot with water.
When considering the question of how to wash off soot in a bathhouse on walls and other bases, you need to exclude the following products:
- water;
- laundry or liquid soap;
- soft or abrasive sponges;
- hard brushes;
- spray.
Such products can be used for final cleaning after carbon deposits have been removed from the wood.
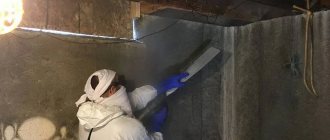
To clean the walls and floor of the bathhouse from plaque and soot, it is recommended that all work be carried out using personal protective equipment:
- rubber gloves;
- glasses;
- gauze bandage or petal respirator;
- robe;
- cap or scarf.
Many owners wonder how to clean a bathhouse from dirt and soot with their own hands. There are two cleaning methods available:
- mechanical devices;
- chemical compositions.
You can safely remove the resulting soot from ceiling, wall and floor surfaces using special devices - a scraper with a sharp base or a spatula. They allow you to dry clean every centimeter of surface dirt. To put this cleaning method into practice, you will need a lot of free time and physical endurance.
To prevent serious contamination of surfaces, after each firing of the sauna stove, the floor and walls must be thoroughly cleaned with a soft brush intended for wood.
To simplify the task of removing soot, experts recommend using a grinding machine with a flap-type wheel with a diameter of up to 12.5 cm and a grain size of 35 units. You can remove the resulting dust after cleaning the surfaces with a clean rag and soap solution.
Tools and products used during cleaning
When choosing mechanical soot removal, the following are used:
- various brushes with hard or metal bristles;
- sharpened metal scrapers or spatulas;
- a sharp knife or awl to remove soot from cracks and joints;
- special narrow brushes for the same purpose;
- sandpaper of different grain sizes;
- grinder with flap type grinding wheels.
Awl - for removing soot from narrow crevices
Flap type grinding wheel for cleaning large surfaces with an angle grinder
Melamine sponge for small, light stains
Light deposits of soot can be wiped off with a melamine sponge, which acts like an eraser. But it wears out quickly, and several pieces will be needed to tidy up a large area.
Good results can be achieved by using folk cleaning agents - crushed brick or fine sand. You need to wash off soot with their help by pouring a layer of such abrasive onto a thick brush or hard sponge, and then wipe the contaminated areas.
Mechanical means and tools are suitable for removing soot from any surfaces in the bathhouse - wooden finishing parts, brickwork and metal elements of the stove.
Household chemicals for soot
Docker Mazbit plus - an effective remedy for soot and soot
To clean the bathhouse from soot deposits using a chemical method, you can purchase specialized cleaning agents:
- Mazbit+ . Designed to remove fire marks on wooden surfaces. Easily cleans off fresh soot, preventing it from penetrating into cracks and pores.
- BZ-20 . Alkaline cleaner used to remove greasy, sooty marks.
- Facade cleaner No. 2 . In addition to washing soot, it disinfects, neutralizing substances with carcinogenic effects.
- Chist-Dezo . Used at the final stage to eliminate the burning smell.
Before using any purchased product, you need to study the instructions for it. Pay special attention to what type of surface the composition is intended for. Do not violate the order of application.
Traditional methods
Vinegar essence diluted with water in a ratio of 1:2 helps to wash off soot from stove bricks. The solution is applied with a sponge to the smoked masonry, and after 10–15 minutes it is washed off with a damp cloth. To remove a dense layer of soot, vinegar is not diluted.
You can clean soot from bricks with ammonia. But then you will have to ventilate the bathhouse for a long time to remove its smell.
The easiest way to remove soot is from glass surfaces, since it does not eat into the interior. Any glass cleaning fluid can be used, or in their absence, a weak solution of vinegar.
Cleaning from burning various surfaces
Various materials suffer from soot and soot. It is worth noting that the same method will be effective for one type of surface and absolutely useless for others. In order for the procedure to give the best result, study how various materials behave under the influence of certain substances.
Metal
To clean metal surfaces, use highly concentrated solutions or acids. It is enough to simply treat the contaminated area with the product, and then wash off any remaining dirt with a damp sponge. Be careful, chemicals such as acids or gasoline can cause allergic reactions on the skin and mucous membranes. To prevent this, protect yourself before cleaning.
Abrasive substances based on river sand or crushed bricks also work well with smoke and soot. Add a little water to the dry mixture and apply the resulting slurry to the surface with a sponge. Rub a little and then remove any remaining substances with a wet cloth.
Plastic
Plastic actively absorbs dirt and unpleasant odors, so try to clean plastic surfaces first. To avoid leaving scratches on the coating, first carry out dry cleaning, and only then proceed with wet cleaning.
Use special substances for plastic, dishwashing liquid or an alcohol solution for cleaning. Apply detergent to the surface with a sponge and rinse with water. Repeat the procedure if necessary.
Tree
Wood surfaces are very difficult to care for, so cleaning them from burning and soot can only be done with an integrated approach.
For the best effect, first treat the wooden surface with a dry cleaning method using a broom or vacuum cleaner. This will help prevent soot from penetrating into the structure of the material. Next, carefully rub the coating with sandpaper. When most of the stains have been removed, apply a special wood cleaner and leave for the time specified in the instructions to act. Afterwards, thoroughly wipe the surface with a damp sponge.
Glass
Soot and soot may leave dark stains on the glass. To prevent this, try to wash windows and mirror surfaces as quickly as possible. A vinegar solution works well for cleaning glass. Dilute 1 tbsp. l into 1 liter of water and pour into a container with a spray bottle. Spray the resulting liquid onto the surface and leave for 30 minutes. After the allotted time has passed, rinse off the solution with a sponge soaked in warm water and wipe the glass dry with a dry cloth.
Laminate
You can remove traces of soot and soot from the laminate using kerosene, technical ethyl alcohol or solvent. Simply soak a cloth in the substance and thoroughly treat the surface. Do not forget that the substances used can harm the skin and mucous membranes, so take care of ways to protect the skin and respiratory system.
Water-based paint
Before washing walls or ceilings painted with water-based paint, keep in mind that most substances can harm the painted surface. Solutions of technical or medical alcohol are considered harmless means for cleaning painted walls and ceilings. Dampen a clean rag or gauze in the substance and treat the surface.
Brick
Regular table vinegar is best suited for removing soot from bricks. Be sure to dry clean before processing. Pre-mix vinegar and water in equal proportions. Apply the liquid generously to the surface and carefully wipe off the dirt with a brush.
Textile
It is better to wash textiles by hand, otherwise after washing in the machine a black residue may remain on the drum. To clean textiles, you can use regular washing powder in combination with citric acid. Mix the ingredients in equal proportions and dissolve in water. Soak the product in the solution for half an hour, and then rinse thoroughly with running water.
We remove soot from smooth, washable surfaces
Plastic laminated coverings, linoleum, and varnished interior items do not contain pores, so dirt disappears from them quickly. To quickly remove soot from such coatings, any detergent is sufficient: laundry soap, washing powder, liquid soap, even dish gel will do.
A soap solution is diluted in hot water. How to remove soot depends on the amount of dirt. It will be convenient to wash a cabinet or other small piece of furniture with a soft cloth or gauze. For small items it is better to use a sponge. And for the floors you need rags.
A napkin/sponge/rag is moistened in a soapy solution and the smoked areas are washed. If there is a lot of carbon deposits and the water quickly turns black, change it. And so on until all the soot is washed away. Finally, the surface is washed with clean water.
We suggest you read: How to properly install floor joists
Soot deposits on walls and ceilings are removed in a few steps. Be sure to cover the floor with cellophane, and it is recommended to seal the joints with tape so that the removed soot does not soak into the floor. Plaque can be removed with a vacuum cleaner or a dry broom using jerky movements, and then treat the walls and ceiling with a specially impregnated sponge.
The chemical composition is left on the surface for a specified period of time in accordance with the manufacturer’s recommendations, and then washed off with warm water along with any remaining soot and soot. If necessary, repeat the procedure. After completing the treatment, allow the surface to dry thoroughly.
How to clean soot
The first thing to do is to move the furniture away from the damaged area and, if possible, remove it from the room. Remove large pieces of soot using a spatula or vacuum cleaner. Remains of contamination can be removed using a folk or special ready-made product that is designed to remove such stains.
Folk remedies
If you need to restore a stove, chimney or other damaged surface to proper condition, you can use a folk remedy made from improvised materials. The easiest way to clean the chimney and the inside of the stove. To do this, just add salt, potato peelings or aspen firewood to the fire. This method can also be used for prevention to protect pipes from unwanted damage.
If you need to clean soot from the walls, ceiling or floor, you can prepare one of the following folk remedies:
- A soda solution consisting of 2 tablespoons of soda dissolved in 2 glasses of water.
- A soapy solution made from dishwashing or toilet detergent dissolved in water.
In this composition, you should thoroughly moisten the sponge and treat the damaged surface with light movements. After the soot has softened, you can try to scrub it off with a brush, and then re-treat it with a sponge soaked in a folk remedy. If after cleaning there are stains on the chimney or the surface is damaged, then it should be additionally treated with a primer.
Important!
When trying to wash away soot after a fire, you should first put on a respirator, closed clothing and gloves.
When interacting with water, it will begin to release caustic toxic substances; it is very important to protect the skin and respiratory organs from them
Ready set after a fire
It is easier to deal with the problem by purchasing a special ready-made product for treating damaged areas from soot. This product is easy to use. To do this, it is enough to moisten the damaged area by spraying the composition on it or treating it with a soft sponge. To improve the effect, you need to preheat the air temperature in the room to 25 degrees.
Sometimes it is necessary not only to clean the surface from visual damage, but also to get rid of an unpleasant odor. The ready-made special kit after a fire also includes a special liquid. To refresh the room, it is enough to treat the areas affected by soot with it, then open the window and ventilate the room throughout the day.
Professional compositions
You can also wash off soot after a fire using one of the ready-made products:
- Mazbit+ is a product designed to clean surfaces after a fire or smoke. It is an aqueous base containing organic and alkaline substances. Therefore, it easily copes with stains, while being safe for health.
- “Facade Cleaner No. 2” is another effective concentrate designed to clean contaminants from the surface of building materials. Its advantage is the presence of a spray bottle, which allows you to significantly save its consumption.
- "Chist-Dezo" is a special chemical composition designed to remove burning stains and odors. It effectively affects combustion molecules, causing them to volatilize and split.
- “BZ-2” is another effective cleaner that allows you to wash soot off the ceiling and any other surface. Additionally, it is endowed with antibacterial properties.
The method of using each product is identical. To do this, you need to dilute the active composition with water, apply it to the damaged area using a sponge or spray bottle and wait until it is completely absorbed. After this, just wash it off with a damp cloth. To find out in what proportions the active substance should be diluted with water and how long it needs to be completely absorbed, you need to carefully study the instructions.
Oils and impregnating compounds for lining in steam rooms
To protect the lining from the negative effects of high temperatures and humidity, safe and effective compounds are used. For decorative finishing of the steam room, aspen, oak and linden lining is used. How can this type of wood be treated to improve its performance?
For these purposes, impregnations and natural oils are used - sunflower, hemp, linseed, rose, lavender and anise. This treatment allows you to create a protective coating that prevents dirt from penetrating into the wood fibers and protects against rotting.
Deep penetration impregnation for lining has similar properties, which provides maximum protection of wood fibers from destruction.
To prevent the lining from darkening or rotting, reliable and safe preparations of imported and domestic production are recommended for processing.
The products of the famous Tikkurila brand are especially popular:
- Saunasuoja Supi is an acrylic water-based impregnation that provides protection against mold and darkening. It has a colorless structure, but can be tinted to suit any shade. The composition is applied to a clean surface with a brush or spray in several layers. Not used for treating bath furniture.
- Laudesuoja Supi – oil-based impregnation for treating wall surfaces and furniture.
- Saunapesu Supi is an antiseptic impregnation for removing lime deposits and bleaching wood.
Among the domestic analogues, the following drugs can be distinguished:
- "Eurotex Sauna" is a wood oil that provides protection against increased moisture and rot.
- “Usadba (U 409)” is an impregnating composition that prevents contamination and darkening of wooden surfaces.
Chemical cleaning methods
How to heat the stove to clean the chimney? These substances include the following:
- Naphthalene. It is added to the surface of the fuel in a well-heated furnace. At the same time, naphthalene evaporates, and its vapors destroy the entire layer of soot deposits. It is carried out in the form of flakes into the atmosphere. The disadvantage of this method is the unpleasant odor of this drug that remains in the room. Therefore, it is not used for cleaning pipes where an open source of fire is used (for example, a fireplace).
- A blue mixture made with your own hands from simple and affordable ingredients. Let's take a look at the composition:
- 1/5 copper sulfate;
- 1/7 saltpeter;
- 1/2 medium fraction coke.
The mixture is added to a well-heated firebox. The evaporation products, as in the first case, destroy the layer of soot that goes out with the flue gases. The amount of mixture added for one cleaning is about 20 grams, the frequency of use is 1-2 times a month. The firebox door must be closed tightly after adding the mixture.
- To combat soot deposits, aspen firewood is used, which is added to the maximum heated firebox in the amount of 1-2 medium-sized logs. The combustion temperature of such firewood is higher than that of commonly used fuel, and minor soot deposits burn directly during combustion. If there are significant deposits, this method is not used so as not to provoke a fire. It is recommended to do this regularly, a couple of times every 7 days.
- Walnut shell. Its combustion also occurs at a significant temperature and the principle of operation is the same in the previous case. A single dose of shells should be no more than three liters.
- Rock salt. It is added to the firebox when igniting the stove in the amount of 1-2 spoons. The evaporation from it softens the layer of soot in the pipe, which peels off from the walls and falls into the storage tank.
- Potato peelings. They are used by adding to the firebox in quantities of up to 5 kilograms in dry form. Starch vapor effectively softens the soot, and it literally falls off the pipe walls in pieces. The product is used as it accumulates.
You can also use starch to clean the chimney in the amount of one spoon per firebox.
- Chemicals for protecting chimneys. They are produced by industry specifically to protect chimneys from soot and soot. Release forms vary from imitation firewood or briquettes to powder or liquid formulations. Let's point out some of the most popular ones:
There is a wide range of carbon removers available in stores, and you can always choose the appropriate option for any situation.
When using purchased chimney preventatives, you must strictly follow the manufacturer’s recommendations, especially regarding safety requirements.
Mechanical soot removal technology
The most effective method to quickly bring a chimney back to normal is mechanical cleaning. The work is labor-intensive and requires the performer to comply with a number of rules.
Chimney sweep tools and equipment
Chimney cleaning devices used many years ago are still relevant today.
Indicative list:
- A metal brush with a diameter 20-30% larger than the cross-section of the chimney. For square pipes, a stiff brush is selected.
- Cable and brush holders.
- Steel round core with cable and carabiner. The diameter of the weight is 2/3 of the chimney section.
For cleaning, it is better to choose a brush with nylon hard bristles.
Polyamide bristles take the shape of the channel, and unlike a metal scraper, do not scratch the internal walls of the chimney. The high flexibility of nylon helps to get rid of plaque in hard-to-reach areas of the chimney
Before doing dirty work, you need to take care of personal protective equipment - wear long sleeves, glasses, a respirator and gloves, and put on boots with non-slip soles.
Working Conditions: Basic Safety
It is important to take the following precautions during the cleaning process:
- The inspection hatches of the chimney must be closed so that soot does not get inside the room and spoil the finish. Cover the open fireplace with a damp cloth.
- Work is carried out in calm, dry weather.
- Be sure to use a safety rope and belt.
- It is advisable to enlist the support of one responsible assistant.
- It is strictly forbidden to start cleaning while drunk, tired, or after taking medications that slow down the reaction.
It is necessary to inspect the chimney in advance for the presence of foreign objects, for example, bird nests.
If the socket is low, then it needs to be pushed in the direction of the combustion chamber. A high-positioned object can be reached from above
Step-by-step process of chimney cleaning
The whole process consists of several steps:
- Remove the pipe head from the top of the chimney and use a broom or long stick to remove visible dirt.
- Perform a test run with a weighting agent. The core should split large layers - small fragments will fall into the firebox.
- When the patency of the canal is restored, pull out the cable and connect the brush to the core.
- Clear a small area by lowering and raising the rope.
- Clean the rest of the chimney in the same way.
- Check the inspection chamber and remove any fallen soot.
The described technology is effective for straight chimneys - even at an angle of 45°, the passage of the core will be difficult.
Multifaceted professional brushes on a flexible shaft are designed for cleaning chimneys, ventilation systems and sewers. Markings on the cable allow you to control the depth of passage
Grinding
If the lining has darkened slightly, how can you lighten it by sanding? In the case where the blackening has not penetrated to a great depth, you need to take an angle grinder with a power of up to a kilowatt for a wheel with a diameter of 125 mm. For doing the work yourself, this is the safest and easiest to use option. You can remove the protective cover from the machine. This is a safety precaution, but it allows you to get into all the grooves of the wood panels to thoroughly clean them.
Craftsmen recommend using a flap grinding wheel. This is a special device with ribs over the entire surface. The optimal grain size is about 40 units (on sale you can find wheels from 36 to 150). The lower this value, the rougher the processing will be. To completely eliminate blackness, it is usually necessary to remove the top layer of wood 3 or more millimeters thick.
Cleaning walls and ceilings
Solving the problem of how to clean soot in a bathhouse begins with a vacuum cleaner. To do this, you need to walk it on wooden surfaces. Next, you need to carefully sweep away the soot and soot from the walls and ceiling with a broom.
Prepared surfaces must be cleaned with specially impregnated sponges. They are sold in hardware stores. During the manufacturing process, such sponges are impregnated with special compounds that destroy soot and soot.
Sponges get dirty quickly, so you need to purchase several of them at once. You can extend the life of use by cutting off the soiled layer of the sponge. When the soot and soot have been completely removed, you can clean the surfaces of the walls, floors and ceilings with aqueous solutions of detergents.
Abrasive powders cannot be used in this case. They spoil the structure of wooden surfaces.
On a note! It is advisable to use degreasing powders and/or gels. They are added to hot water.
To clean hard-to-reach areas, it is better to use a mop with a long handle.
Surfaces are washed 2-3 times. In this case, the water must be changed periodically, adding a new portion of detergent to it.
When the question of how to clean the lining in a bathhouse from soot has been resolved, you need to rinse off the cleaning solution with clean water. For this it is better to use running water. It is better to feed it from a hose under low pressure.
At the end of the process, wipe the washed surfaces dry with a clean soft cloth. You can use an old bath towel. A large amount of moisture or poor thermal insulation may cause the lining to turn black. In this case, the answer to the question of how to clean the lining in a bathhouse will be a grinding machine, but this is if the darkening has affected only the surface layer of wood.
To clean walls lined with clapboard, you will need an angle grinder with a power of no more than 1 kW and a flap wheel with a diameter of 125 mm (grit size no more than 40 units). The lining is sanded in such a way as to remove the darkened layer to a depth of approximately 3 mm.
Final disinfection
Humidity, which is constantly present in bath rooms, leads to the development of mold or mildew. Therefore, even after cleaning the surface from soot, carbon deposits and soot, it is necessary to carry out disinfection. Antiseptics diluted in water are suitable for this: Domestos gel, ethyl alcohol, potassium permanganate, a solution of salt and copper sulfate dissolved in water in a ratio of 18 g, 44 g per 1 liter of water, respectively.
Then, after cleaning and disinfection, you can apply preventative agents to the surface that will repel dirt and prevent it from eating deep into the wood structure. This manipulation allows you to maintain the appearance and neatness of the steam room.
Proper maintenance of the bath
To prevent severe contamination and the appearance of fungus, mold, and woodworms, the bathhouse must be kept clean at all times. It is advisable to periodically treat internal surfaces with antiseptics to protect against microorganisms.
To prevent rotting of wooden coverings, it is necessary to apply special compounds to walls, shelves, etc. All wooden surfaces should be inspected periodically. Elements affected by rotting must be removed partially or completely.
After each use, the bathhouse must be ventilated to dry the interior. Immediately after taking bath procedures, you need to do cleaning. This will remove any stains from the interior surfaces before they are absorbed into the wood.
They are removed with a special brush, sponge or rag. After that, shelves and other surfaces should be washed with warm water. This will help remove residual sweat, detergents, etc.
The remaining water on the floor must be carefully adjusted to the drain holes. When cleaning, special attention should be paid to the space under the shelves.
To prevent cockroaches or mice from getting in, all leftover food from the rest room must be removed immediately and the trash taken out. Bath accessories should be dried and placed in storage areas. The final stage is wet cleaning of all sections of the bathhouse. It is also necessary to carry out general cleaning periodically. Proper maintenance of the bathhouse will preserve the attractive appearance and cleanliness of the interior space, as well as the integrity of all coatings.
How to remove soot in a bathhouse?
Soot appearing in a bathhouse indicates two not very pleasant things:
- about improper operation of heating equipment;
- about the constant risk of a fire hazard.
In addition, soot noticeably worsens the appearance of a home steam room, turning it into a dark, unpleasant room in which it is impossible to relax body and soul.
There are several ways to deal with this “trouble,” but the most effective method is selected individually.
Grinding
An angle grinder quickly rids the cladding boards in a steam room of soot and soot, but only if it is used correctly.
If you use an angle grinder with high power or choose the wrong wheel grit, you can not only get rid of dirt, but also reduce the thickness of the lining by 2-3 times.
To polish this building material, you can only use:
- circles with a minimum grain size of 36 units and a diameter of about 125 mm;
- Angle grinder with power up to 1 kW.
Attention: To remove dust resulting from cleaning from the surface, it is enough to wipe the walls, floor and ceiling with a clean rag soaked in a soap solution.
Traditional methods
Traditional methods of cleaning a bathhouse from soot are the least expensive, but the most labor-intensive. They involve careful, repeated repetition of the same actions (until the desired result is achieved).
One way is to remove soot with a soap solution and sand “grinding”.
You will need:
- a container with hot water in which grated laundry soap dissolves;
- soft rags;
- river sand.
- First, all surfaces of the steam room and dressing room are thoroughly rubbed with a soap solution. After it dries, the walls, floor and ceiling are thoroughly wiped with river sand.
- The second stage is washing off the soap and sand and evaluating the result.
- If the soot is not completely removed, the procedure is repeated.
Chemical method
Many people believe that the most effective way to clean wooden lining is to use special chemicals.
Advantages of the method:
- quick removal of any contaminants;
- low labor intensity.
The chemical method has one disadvantage - not all chemical compounds can be used to clean finishing boards.
Chlorinated cleaning agents are absorbed into the lining and, when it is subsequently heated, are automatically released into the air. Being in such a room is life-threatening.
Therefore, to give the lining its original appearance, it is recommended to use only a special detergent that helps remove dirt and grime from surfaces damaged by a fire.
It is safe for humans or animals, since it contains alkaline composites and organic detergent additives.
separate article
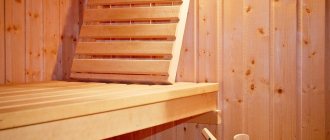
Cleanliness in the steam room
The steam room in the bathhouse requires special attention. After all, when using brooms, particles of plant pigment from stems and/or leaves are absorbed into wooden shelves and walls along with moisture. Therefore, the question inevitably arises of how to clean the steam room in a bathhouse to give it a fresh and pleasant look.
The problem of how to clean linden lining in a bathhouse, especially in the steam room, can be solved in different ways. If the wood darkens slightly, you can use special liquid detergents and/or paraffin oil.
The cleaning liquid is applied to the darkened surfaces manually using a piece of foam rubber or a regular sponge. The pre-detergent must be diluted with water. How to do this is detailed in the instructions.
Paraffin oil is gradually applied to pre-dried surfaces using a dry sponge. In this way, you can not only clean the lining in the steam room, but also give the wood water-repellent properties. This will protect the wood trim and various items from severe and rapid contamination.
What you need to know about soot
The properties of soot directly depend on what materials were burned. For example, wood releases more resinous soot; when plastic burns, it is caustic and sticky. In any case, carbon deposits contain a certain amount of fat, so you can’t just wipe it off the surface.
If you try to wipe off the soot with a regular napkin dipped in water, the situation will only get worse. To remove soot, you must use fat-soluble products.
Soot particles are very small. They easily penetrate into porous materials, from where they are difficult to remove.
Among other things, fumes are toxic. It is especially dangerous to stay indoors for a long time after a fire. When cleaning, it is recommended to wear a respiratory mask and protect your hands with gloves. When cleaning the ceiling, wear safety glasses to prevent the suspension from getting into your eyes.
If soot gets on your clothes
When trying to put out a fire or even when cleaning a room from soot, you can get your clothes dirty. But there is no need to panic, soot is easily removed from fabrics. You don't need any special tools. Simply soak the item in soap or powder and then wash it in the washing machine at the maximum temperature allowed for the fabric.
For white items, you will most likely need to use bleach.
How to clean a chimney
The chimney and pipe in the bathhouse are cleaned chemically and/or mechanically. In a special store you can purchase liquids and/or powders for cleaning the chimney. Detailed instructions are printed on the packaging. After reading it, it will become clear how to clean a pipe in a bathhouse.
A good answer to the question of how to clean soot in a bathhouse that has accumulated in a chimney would be a “log chimney sweep.” It is impregnated with special chemicals. During combustion in the furnace, smoke of a special composition is released. As a result, the soot becomes soft and pliable. After 2 or 3 days it can be removed with brushes without much difficulty.
For mechanical cleaning of the chimney you will need the following tools and devices:
- rope and/or rope;
- weight (ball);
- brush-ruff (preferably on a thin metal cable).
First you need to check the safety of the structure. Then you need to remove any objects that accidentally got into them from the pipe and chimney. For this purpose, a brush-ruff is used, selected according to the size and shape of the pipe.
A special modern brush will make cleaning work easier. It comes with a handle consisting of several links. This allows you to adjust the length of the brush as needed. During cleaning work, any brush must be moved inside the pipe, gradually moving it lower and lower.
Such work must be performed in a special set of clothing, which must include:
- overalls or suit;
- respirator;
- gloves;
- protective glasses.
If the chimney is not very dirty, you can call a specialist. He will clean it using a special high-power vacuum cleaner. This will remove soot from the chimney through the firebox opening. The use of special means will help resolve the issue of how to clean the chimney of contaminants and how to clean the pipe of soot in a bathhouse.
Main recommendations
An important rule is to never use water or abrasive devices to clean wood walls. Immediately exclude such aids as:
- bleach or other chlorine-containing preparations;
- water;
- abrasive sponges;
- metal brushes;
- liquid soap;
- cleaning powders;
- sprayers;
- Karchers and steam cleaners.
Cleaning soot from the ceiling in a bathhouse Source alfaclean.by Using a mechanical method to clean soot and deposits in a bathhouse Source remontnik.ru
When cleaning a bathhouse, be sure to follow safety rules, wear items of clothing that make contact with chemicals safe. These items include:
- working headdress (cap, headscarf, scarf);
- latex gloves;
- plastic buckets, basins (metal may oxidize);
- petal respirator (a four-layer gauze bandage is also suitable);
- robe;
- protective glasses.
When using special cleaning products for wood, be sure to read the instructions. Otherwise, you may harm the wood partitions.
Petal brush for cleaning wooden walls in a bathhouse Source ecosrub.ru
Special means
In the store today you can find many different products specifically designed for removing soot from wooden surfaces. These can be either chemicals or sponges pre-impregnated with such substances.
Chemical sponges can be easily purchased at a hardware store. They are impregnated with a substance that can dissolve soot. The principle of operation using such sponges is very simple. You just need to move them along a contaminated wooden surface, making quick movements directed from top to bottom.
But the problem is that such sponges are disposable. Just a few movements on the surface are enough, and they will already become dirty. Therefore, you need to purchase several sponges at once so that you definitely have enough
And after using sponges, it is important not to forget to wash the surface with plain water.
Bath water purification
The required amount of water for hygiene procedures is often provided by drawing water from a nearby reservoir, well or borehole. Before use, it is necessary to thoroughly clean the bath water from various impurities, silt, sand, and small pebbles.
The main methods of water purification are filtration and sedimentation. You can buy a special water filter in a store or make it yourself. For this you can use a fine mesh.
To settle, water is poured into a large tank about a day before its intended use. During this time, all impurities will gradually settle to the bottom of the tank. From above it will be possible to take clean water suitable for hygiene procedures.
We invite you to familiarize yourself with: Cladding and finishing the stove in the house with your own hands (including ceramic tiles), instructions with photos and videos
The basic rule: the settled water should be taken from above, trying not to raise sediment. The water is not used until the end. It is better to pour the remains into the drainage well along with the sediment. Therefore, you need to prepare water with a reserve.
Why does the chimney become dirty?
How to clean a chimney in a bathhouse depends on the nature of the contamination. With use, types of clogging may occur such as:
- soot and soot, which accumulates very quickly when burning household waste;
- condensation that forms due to irregular use of the bathhouse;
- foreign objects accidentally falling into the chimney.
All of these types of contaminants ultimately impede the free circulation of air and the escape of smoke through the chimney.
This may cause carbon monoxide poisoning. Condensate is a weakly concentrated acid solution. Under its influence, the chimney masonry begins to collapse from resinous deposits. If you use a sauna regularly, you need to make a schedule and determine in advance when and how to clean the pipe in the sauna. Carrying out such work regularly will preserve the chimney and stove and allow you to use the sauna without any problems.
Causes of soot and soot
Smoke with soot appears due to the low combustion temperature in the furnace or an improperly organized traction system. In such cases, when the boiler door is opened, clouds of smoke will come out and be absorbed by the walls. There are a number of other reasons why soot accumulates:
- The chimney pipe becomes overgrown with soot or a foreign object gets inside, making it difficult to remove the soot.
- Errors in the construction of heating equipment. Incorrect slopes, incorrect location of the smoke exhaust duct and the design of the stove itself can cause soot to appear. Only a thorough modification of the sauna heating will correct the situation.
- Strong wind. If the weather is bad outside, the wind can blow into the chimney. This will cause smoke to escape in the opposite direction. In this case, soot on the walls is inevitable. Some designs include a ridge, but often if the wind direction is unfavorable, it is absolutely useless.
- The appearance of cracks in brickwork. New holes begin to draw air out of the oven from all sides. This causes smoke to escape from the firebox. Even if you manage to ventilate the room, soot will still fall on the surface of the wooden walls.
- Smoke. If, after a long break, the firebox is not preheated, then smoke penetration into the room is inevitable. To prevent this, before starting the kindling, throw a few newspapers or a rag doused with gasoline inside, then set it on fire.
Single-story baths are a common practice; accordingly, the smoke exhaust system will be located lower. Therefore, bad weather and other factors that prevent normal air circulation inside the stove will cause smoke inside the room.
Cleaning walls in a bathhouse with ammonia diluted with waterSource dizainvfoto.ru
Features of washing various surfaces
In one house there are coverings made of different materials. Therefore, you need to know how soot is washed off from each of them, and in what ways.
Laminate and plastic
You can remove soot from the floor and furniture using solvents. They easily clean laminate flooring from soot. And plastic coverings are wiped with a rag soaked in kerosene. Industrial alcohol also cleans well.
Glass
Glasses are cleaned with crumpled paper. Then it should be washed with window cleaning liquids. It is necessary to carry out the operation several times, changing rags.
Wood and metal
Soot eats into wooden coverings strongly. You will have to remove the top layers with sandpaper or a sander. Both river sand and brick chips will do. But polished and varnished surfaces cannot be cleaned in this way.
Water-based paint
Ceilings and walls are cleaned with a solution of industrial alcohol. If the soot is covered in a thick layer, it is better to remove the top layer of paint. Whitewashing with lime can be washed off with warm water and the walls can be renewed again.
Brick
The bricks are washed from burning using a soap solution. If the layer of soot is strong, then wipe with vinegar after pre-moistening with water. Then brush over the brickwork.
How to remove soot from walls
Wood is a porous material, so soot settles not only on top, but is also absorbed deep into the wooden walls. You need to clean it constantly so as not to turn the bathhouse into a black firebox.
Method 1
We wash off the soot from the walls with a stiff brush, adding detergent. You will have to make a lot of effort to remove the soot that has stuck to the walls.
If the layer is too thick, you need to act more radically. Using a scraper or other sharp object or a grinding wheel, the soot is removed along with the top layer of wood.
Method 2
Among the modern methods of removing soot from walls in a bathhouse, the most effective is the chemical method.
A special remover has the ability to break down viscous soot molecules.
The prepared solution is applied to the wall for a while and then washed off with water.
We get clean, undamaged walls with minimal physical effort.
Useful tips
The ceiling is decorated with chandeliers and all kinds of spotlights. And, of course, even the cleanest ceiling will not sparkle in a new way if there are dusty lighting fixtures on it. It happens that a bulky crystal or glass chandelier with many elements is difficult to remove from the ceiling. Then, using a stable table or stepladder, wash it directly on the ceiling. First, do not forget to unscrew the light bulb and insert paper into the socket.
As for spotlights, it is better to disassemble them for complete cleaning. The room must be de-energized and the lamps carefully removed. If you are afraid that you won’t be able to put everything back in place later, take a photo of the sequence in which you disassembled the structure. You can try to clean the lights without removing them. But then it will not be possible to fully clean the dirt from the inside that has accumulated between the ceiling and the lamp. In addition, there is a risk of damage to the tension surface. You may accidentally press down and enlarge the cuts made for the flashlights. There is also a risk of breaking the connection of electrical wires.
How often to wash the ceiling is up to you. It all depends on how many times a year you do general cleaning in the apartment, whether you wash the floors every day and wipe off the dust. After all, its particles settle on the ceiling, and over time turn into dirt under the influence of various factors. Where the ceiling is located also plays an important role.
A suspended ceiling located in the kitchen loses its original appearance faster than its “brothers” installed in the rooms. No matter how neat the owner is, the hanging structure will get dirty someday, and it will be “decorated” with grease and soot. Tension fabrics here need to be washed much more often than in other rooms, at least twice a year. And if the family is large and the cook is constantly steaming, frying, boiling and baking something, then general cleaning is required even more often. Otherwise, it will be very difficult to clean the ceiling well later.
Other rooms also have their own characteristics:
- In the bathroom, the ceiling suffers from limescale deposits, which in turn form steam and drops. In a large family, it will be useful to install a horizontal curtain; it will protect the upper part of the room from premature plaque.
- The suspended ceiling on the loggia needs to be wiped weekly with a dry towel. Here the coating will constantly gather dust, especially if there is a road nearby.
- In the living room you can afford to install a glossy multi-level ceiling with all kinds of lamps. This structure can be cleaned once a year during global cleaning.
- Fabric and matte canvases are typical for offices and bedrooms. Materials containing an antiseptic layer can simply be wiped with gauze.
- The same applies to hallways. But children’s rooms will most likely need wet cleaning as they become dirty; most likely this will happen more than once a year, or even twice, but much more often.
For more useful tips on how to wash a suspended ceiling, watch the following video.
How to properly insulate a bathhouse to prevent condensation
With a properly designed and built bathhouse, good solid doors and windows, there is no need for additional insulation. But often such problems still make themselves felt during operation. Several things can happen:
- draft and insufficient temperature in the steam room;
- cold floor;
- frosting of entrance doors;
- freezing of drains and pipes.
Theoretically, even when building a log house, you should have laid caulk between the logs, and then carefully caulked the grooves.
Caulking is a mandatory stage in the construction of a bathhouse
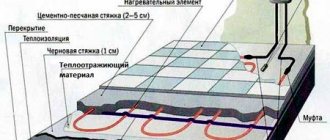
The installation of the bath floor also had to be done according to all the rules, with expanded clay insulation.
It is recommended to insulate the floor in the bathhouse with expanded clay
But if this was done in violation of the technology, the bathhouse has become askew over time, and cracks have formed, then you need to carefully examine the walls and doors from the outside and inside, especially carefully checking the corners. Surely you will find places somewhere where heat escapes. Then they can be caulked again outside and inside, pushing a jute tape into the gap and covering it with a similar cord.
Jute caulking set consists of tape and cord
If it was not possible to find such places, you will have to agree that the thermal insulation properties of the walls, ceiling, floor and doors are not enough, and you need to completely insulate the bathhouse.
Wall insulation can be external and internal. In the first case, the bathhouse is lined:
- vapor barrier material, for example, foam;
- insulation (long-fiber mineral wool is good for this quality, its sheets are laid overlapping, or foam insulation mats);
- waterproofing material (roofing felt);
- clapboard, siding or blockhouse.
It is recommended to insulate the bath from the outside
Internal insulation is done according to the same principle, only the sheathing must be made of natural wood such as steamed pine or birch.
The internal insulation of the bathhouse is carried out in the same way as the external one.
The ceiling also needs to be insulated.
Ceiling insulation has its own characteristics
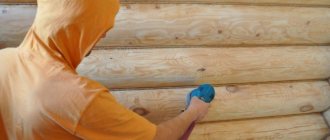
Impregnation for baths and saunas inside
If external impregnation has already become more or less clear, you can move on to the extensive issue of internal impregnation.
How does internal impregnation differ from external impregnation? If we are talking about antiseptics, then the degree of aggressiveness. After all, all antiseptics are poisons not only for mushrooms or insects, but also for people. It’s just that now these are low-toxic substances, but before there was a nightmare of arsenic and chromium. However, indoor antiseptics should be even safer.
If we talk about impregnations for wood in a bathhouse for interior work, then these are not paints, which can be more harmful if used outside. Impregnations will differ only in the presence or absence of additives that protect the wood from the sun and other environments. Such additives are not needed indoors.
For lining
Lining is a thin profiled board. What is it impregnated with and why? Of course, any wooden part when moistened is at risk of infection with fungi that cause rotting or mold.
But in our opinion, only the lining that is located in the washing room and (attention!) near the floor in the steam room needs antiseptic protection
Impregnation for lining in a bathhouse
Let us explain: the temperature near the floor, even in the steam room, is not that high, and the lower lining often gets wet. An antiseptic may or may not be used if it is replaced with high-quality ventilation and drying (see the section on ventilation), as well as some life hacks, the point of which is to prevent the lining from coming into contact with the floor.
So, if an antiseptic for lining is needed, it is in limited quantities. In the washing room, a primer for (interior) acrylate varnish will be sufficient.
For boards
Lining is also “boards”. But even with ordinary edged (or even unedged) boards, a bathhouse can be sheathed inside and out. This is an extremely low-cost construction option, so we will not say that such a bathhouse should be covered with compounds purchased for a lot of money from the Finns.
Impregnation for boards in a bathhouse can be quite inexpensive if you use an old, time-tested recipe for a mixture of linseed oil and wax. Watch the video, which clearly demonstrates the process of preparing such a composition and its application in practice. And note: the owner of the bathhouse was happy to cover it with it inside and out!
For floors
Again the same point: impregnations are antiseptic and water-repellent. Both are in demand for floors, because there is dampness from the underground, and moisture from the steam room and washing room (you shouldn’t think that if water doesn’t pour onto the floor, then everything is dry, there is also moisture in the air, which condenses instantly, if there is a cold surface).
There is a lot of moisture in the bathhouse. Therefore, it must be dried and protected. We recommend covering the floors with some kind of interior antiseptic, but on the condition that the seller or manufacturer was able to assure (or better yet, prove) that this antiseptic protects not only from mold, but also from rot. We have said more than once that these are different types of mushrooms that require different compositions.
A finishing coating can be applied over the antiseptic. Typically, special paints and varnishes with additives are used for flooring, which increase their wear resistance. In particular, these are urethane and polyurethane additives. They are needed because we constantly wear down the flooring with our feet.
In steam rooms and washing rooms, you can use yacht varnish as a finishing coating, which is not afraid of moisture. However, here we go beyond the scope of our topic. Because varnishes are not impregnations. We have a separate material about impregnations for bath floors.
On the other hand, using oil to impregnate the floor inside a bathhouse is a bad idea. Of course, there are oils that do not cause slipping. But the fact is that oil impregnations do not provide a coating that is resistant to abrasion. And they give varnishes. Therefore, wooden floors are coated with varnish.
Processing lining inside the house - instructions
A huge number of people all over the world are decorating their homes, and of course they prefer a beautiful and natural material - wooden lining. This is environmentally friendly, and you will be surrounded by natural beauty, and such material not only creates a beautiful impression, it also affects the favorable microclimate in the room.
But in order for this natural material to serve for a long time, it needs to be looked after, and most importantly, this needs to be done correctly. You cannot take it and paint it with regular paint - you will ruin all the attractiveness, the material will stop breathing, and after a short time the paint will begin to crumble.
Processing lining inside a house includes a full set of works based on four stages:
- Preparation.
- Primer.
- Protection.
- Decorative painting
If you use eurolining, then you can skip this stage, because European manufacturers operate according to special standards, which require the mandatory primary treatment of decorative wood panels with protective compounds.
For those who bought standard domestically produced lining or will be installing not new, but previously treated lining, this stage is required.
Preparation of new lining
Preparing a new wooden lining that you purchased from one of the building materials stores includes the following activities:
- A batch of lining, as a rule, allows up to 10% regrading, which means that the first-grade material may contain a small amount of second-grade board. In order not to disturb the integrity of the surface, the material must be carefully examined and sorted.
- The lining that you purchased before installation should be perfectly dry. It should also lie down in the room where installation will be carried out for 2-3 days so that its temperature evens out.
- Elimination of defects. Defects on the surface of the lining include unevenness, blue or white spots, and knots. You don’t have to touch part of the defective lining, because during the work you will need a short piece of material for finishing above the doors and windows, and you will have something to cut from. But before installation, the front surfaces of the material must be cleaned of stains using bleaching.
Preparing the lining
Unfortunately, painting wooden lining is not a process that can be performed only once during its entire life. This procedure must be repeated periodically.
Before painting or varnishing the lining, it is necessary to pre-treat its surface.
As a rule, repainting the lining is necessary in the following cases:
- the bottom layer of paint has peeled off;
- the lining has lost its color;
- paint or varnish has lost its shine;
- a significant defect has appeared on the surface, for example, fungal damage;
- The existing color of the lining is not suitable for the new interior of the house.
How to clean the lining from varnish, paint and dirt? There are two ways to remove old varnish or paint from the surface of the lining:
- Chemically. Includes the use of various synthetic liquids and forms - removers and softeners, which help the paint peel off the surface. Keep in mind that the chemical method is quite aggressive. After removing the top layer, the lining should be washed with water or wiped with white spirit.
- Mechanical. In this case, the top layer is removed using a metal brush, scraper or hair dryer and spatula. To completely remove paint from wood, you can treat the surface with a soda solution. The big disadvantage of this method is the possibility of damaging the smooth surface with a brush or scraper.
Important!!! If you can't decide which surface cleaning method is best, consider these tips:
- The mechanical method of cleaning lining is the most suitable for removing oil paint.
- If you plan to cover it with a transparent varnish after cleaning the surface, then it is more profitable to prefer a mechanical method, because washes can unevenly whiten the lining.
If there are deep defects in some places in the material, they must be repaired using wood putties.
Priming the lining
To give a unified structure to the wooden coating, the primer material is applied with a gun or brush.
If you apply primer before painting, this will give the wooden lining several undeniable advantages:
- will improve the “adhesion” to the future surface layer - varnish or paint;
- protects the wood from moisture penetration;
- will close the pores, allowing you to apply the topcoat more evenly;
- will reduce the consumption of decorative coating - paint or varnish.
Types of primers for liningThe types of primer depend on the composition. On the modern building materials market you can find the following types of primer coating:
- Alkyd. This coating is suitable for both external and internal use. The material is adapted to different tree species, so the choice here is very diverse.
- Acrylic. This composition is reliable protection against all damage except rot and rust. This primer is suitable for use when carrying out internal repair work.
- Polystyrene primers. Due to high toxicity, only suitable for outdoor use.
- Primer with PVA glue. This option is deservedly popular; a PVA glue solution is prepared in a ratio of 10 drops of glue per 100 ml of water, applied in two layers. This is necessary in order to avoid the appearance of unprimed areas, which will only be visible after complete drying.
- Gelatin primer. Some people recommend using edible gelatin as a primer. Gelatin is soaked in cold water in a ratio of 1 part gelatin to 2 parts water, then heated in a water bath until the granules are completely dissolved. Cool the composition until slightly thickened and apply it to the lining in 2-3 layers.
Wood protection
In order to protect the surface from scratches and other damage, it must be coated with special chemical compounds. These products are designed to protect wood from moisture, rot, fungal infections, pests and ultraviolet rays.
Methods and means for protecting wood
The specificity of such protective agents is that they become invisible when they dry and penetrate deeply into the structure of the tree. The use of such forms is a very important step in protecting the lining. Eurolining manufacturers do this during pre-sale preparation.
Fire retardants. Compounds that form the basis of aqueous salt solutions. They are designed to protect wood products from fire.
Antiseptics. These are chemical compounds that have an active antifungal effect. They are designed to protect the lining from the biological activity of various fungi and pests.
Natural resins, oils and waxes
natural is supposed to be made from raw materials obtained from renewable sources, and only minor chemical changes are allowed in these raw materials. The product must also be biodegradable and its production, use and disposal must not negatively impact the environment.
In general, we can say that buyers are mistaken when they believe that natural substances are always completely harmless. And among them there are those that are toxic and dangerous to human health. Many of the substances that plants contain are deadly.
Of course, such dangerous compounds do not exist in natural coatings, but you should be aware that “natural” or “bio” alone does not ensure complete safety for your health. It should also be emphasized that ordinary natural finishes, compared to synthetic paints and varnishes, have lower physical and chemical properties and need to be restored more often.
Natural oils that are most often used for surface treatment are:
- linen;
- tung;
- castor;
- hydrogenated;
- hemp;
The drying time of natural, unprocessed linseed oil is very long - more than a week, so it is not convenient for practical use. Thus, a special varnish is made from it, containing heat-treated linseed oil, and drier is added to it to speed up curing.