The modern construction industry is developing rapidly, offering consumers a variety of materials with unique properties. One of the building materials that can significantly reduce the cost of production and save time allocated for construction is penoplex or EPS. Such products are designed to insulate a building and improve the performance characteristics of concrete structures. However, to obtain maximum results, you should approach the installation process with special care.
How to glue foam to concrete?
Polystyrene foam is used as insulation, since its thermal insulation properties are higher than those of natural materials, and the cold buildings in which it is used are mainly made of concrete. Often polystyrene foam needs to be attached to surfaces where it is impractical to assemble rigid sheathing (walls, ceilings, facades). In such situations, sheets of material are attached using a variety of methods and adhesives. The right technological solutions make the work easier. So, how to glue foam to concrete?
Peculiarities
Penoplex is a foam type material that has a homogeneous, uniform structure of small air cells. Only 2 types of this material are available to buyers, differing in density - 35 and 45 kg/m³.
They differ in many characteristics, properties, technological qualities and purpose:
- Penoplex with a density of 35 kg/m³ is used for industrial purposes and can provide thermal insulation in residential premises.
- Penoplex with a density of 45 kg/m³ is used in the construction of highways, the construction of oil and gas pipelines, as well as railway construction.
The material can also be used for less significant purposes, such as insulating the foundation, roof, facades, walls and interiors.
Penoplex has the following technical characteristics:
- Increased strength.
- Moisture resistance.
- Low thermal conductivity.
- Resistance to mechanical stress.
- Easy to install.
- Reduced chemical activity.
- Fire resistance.
- Ecological cleanliness.
- Long service life.
- Reasonable price.
Penoplex is installed using specialized tile adhesive. If you choose the right adhesive mixture, the service life of the material will increase, and it will also ensure safety for the health of people who are often indoors or live in the house.
Installation methods and materials used
Installation of polystyrene foam slabs can be done without the use of any additional fasteners, however, the concrete surface should be carefully prepared:
- clear;
- plaster;
- treat with primer.
Advice: if the protrusions interfere with your preparation, use cutting reinforced concrete with diamond wheels to dismantle them.
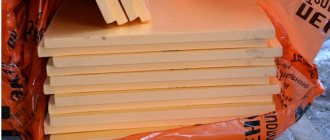
In the photo - foam boards
Materials
Before gluing penoplex to concrete, you need to prepare the following materials:
- cement mortar;
- primers;
- adhesives for polystyrene foam;
- drills for mixing glue components;
- containers in which the components will be mixed;
- serrated spatulas.
If installation is planned to be carried out using additional fasteners, the set of materials will be even smaller:
- insulation;
- glue;
- seam sealant;
- dowels
- The method of attaching insulation using liquid nails is widely popular. Its advantage is that this substance does not need to be applied to the entire surface of the sheet - it is enough to apply it pointwise.
Application of liquid nails
Advice: keep in mind that its use is not possible with every type of insulation, moreover, it contains toxic substances. To carry out work using this method, in addition to polystyrene foam and liquid nails, you will also need protective gloves.
- Another option that answers the question of how to glue penoplex to concrete is the use of special foam . However, it is advisable to resort to this method only when working with floors, since the foam has rather low adhesive properties. There are several types of foam:
- for fastening foam block structures;
- for foam sheets;
- for polystyrene foam boards.
Below we will talk in detail about how to glue penoplex to concrete and the characteristics of these materials.
Properties of various types of glue and options for its use
- Bituminous. Its key advantages include:
- pronounced waterproofing properties;
- resistance to low temperatures.
It does not require any special preliminary preparation, however, if work is carried out at an air temperature below + 5 ˚С, it is recommended to warm the glue to + 18-20 ˚С.
- Clean and prime the concrete surface to be installed.
- Apply a thin layer of the product to the expanded polystyrene sheet using a solid or notched trowel.
- To ensure reliable fixation of the plates, they should be pressed for 20 minutes so that the adhesion becomes more stable.
The disadvantages of this material include toxicity and a tendency to ignite when exposed to high temperatures.
Bitumen adhesive for EPPS
- Bitumen-latex emulsion mastic. It is widely used primarily because of its excellent properties, in particular, the possibility of application even on a damp base and the absence of the need to warm up before use.
Mastic for gluing penoplex
This is a composite material of fine bitumen, synthetic rubber and a number of special additives. Due to its resistance to low temperatures and humidity, mastic can also play the role of a waterproofing coating.
- Silicone glue "Master". It is equally good when used to insulate both internal and external walls. It is a viscous liquid based on a special type of rubber, which vulcanizes in air for about a day. A distinctive feature of this glue is the ability to use it in a wide temperature range - from - 60 ˚С to + 300 ˚С.
- Polyurethane foam CT 84 from Ceresit. An excellent material for installing expanded polystyrene, which does not have secondary expansion and therefore does not lead to divergence of seams between sheets.
Polyurethane foam CT 84 Ceresit
The foam is applied to the concrete surface using a mounting gun, after which the insulation is pressed against this surface. The substance sets within ten minutes, even under conditions of high humidity and low temperature (up to - 10 ˚C). Please note that foam is toxic and flammable.
Tip: using diamond drilling of holes in concrete, you can make the necessary communication channels before insulating the facade.
Features of the preparation and use of dry mixtures
The use of cement-polymer mixtures is advisable when attaching insulation to foundations made of brick, concrete or plasterboard. The main components of these mixtures are Portland cement, a plasticizer, as well as various additives that enhance their properties.
Dry mixture for gluing EPS to concrete
Dry mixes, both universal and specialized, produced by Ceresit, have become especially popular in recent years. Universal adhesive includes ST-85 adhesive, which contains a large number of different polymers that provide high strength and ductility of the mixture.
Glue ST-85 Seresit
However, due to the use of expensive additives, the cost of the glue turns out to be quite significant, therefore, to install insulation on concrete, they most often resort to using dry glue ST-83, the price of which is approximately one and a half times less.
Tip: when preparing the adhesive mixture, you should keep in mind that it hardens within 2 hours, so it is best to mix it in small portions.
An undeniable advantage of dry cement-polymer mixtures is the possibility of their use even if the base on which polystyrene foam is installed has an uneven surface. Applying glue to the insulation board should be done in intermittent strips with a 2 cm indentation from the edge.
In this case, after pressing the slab to the base, the air will come out absolutely unhindered, and air pockets will not form.
Tip: if the surface has slight unevenness, the mixture can be applied using a notched trowel.
The mixture for installing polystyrene foam boards must be thoroughly mixed by hand before application so that it is as uniform as possible, without lumps and water. It is best to mix using a drill with a specially designed attachment, which will make the process simpler and easier.
However, it is necessary to ensure that the nozzle is completely covered with the mixture and does not capture air, otherwise air bubbles will remain in the solution.
After kneading, it is recommended to leave the mixture for 5 hours, then mix again and use immediately. Holding for the specified time is necessary in order to achieve complete homogeneity of the mixture and eliminate water from it, which interferes with high-quality adhesion.
Preparatory work
Regardless of which method of attaching penoplex is chosen, to improve adhesion and extend the service life, the surface should be carefully prepared. Before gluing EPS, you must:
- level the surface;
- clean the concrete surface;
- plaster the wall being treated;
- apply a primer mixture (this treatment will not only increase the adhesion of surfaces, but will also prevent the occurrence of fungi and mold).
If metal rods protruding from the concrete structure interfere with the fastening of the penoplex, it is necessary to level them using a grinder equipped with special diamond wheels for reinforced concrete.
Materials for attaching penoplex to the wall
In addition to insulation, adhesives and dowels, to install the slabs you will need polyurethane foam to fill the joints, a reinforcing mesh that is laid to cover the insulation, as well as foil tape to insulate the seams.
The tools you will need are a glue gun, a puncher for punching holes when installing on dowels, a knife, a drill, containers for preparing the solution, a spatula, and to control the perpendicularity of the seams you need a building level and a plumb line.
The list of fastening materials includes commonly used adhesives and hardware.
Mineral-based dry mixes
The main binder is Portland cement. To improve the qualities of the future glue, plasticizers and polymers are added to the sand-cement mixture. The advantage of the solutions is that they can be used on uneven surfaces.
Sequence of installation work:
- add water to the powder poured into the container and knead the solution using a drill attachment, avoiding the formation of air bubbles;
- wait 2 hours for the liquid to be completely absorbed by the mixture, repeat stirring;
- Apply the prepared solution onto the slab with a notched trowel, retreating 2 cm from the edges;
- install the insulation in its intended place and hold for 1-2 minutes.
Polyurethane-based adhesives
They are used for fastening insulation outside and inside the building; the compositions are used at temperatures ranging from -6...+30ºС. They set in light frosts and in conditions of high humidity in a time not exceeding 30 seconds, and completely harden in 15-30 minutes. Polyurethane adhesives are available in the form of a viscous liquid, ready for use.
- adhesive foam is applied with a mounting gun in straight or wavy lines along the perimeter of the slab and along the long side in the middle of the penoplex;
- the insulation is pressed against the concrete base for 30-40 seconds;
- The installation work continues after the slab is laid, after 2 hours: this is installing dowels and painting or plastering the front side of the structure.
Polyurethane glue is used by professional builders to carry out large volumes of building insulation. The price of the compounds is quite high. The need to use a mounting gun is another disadvantage. In addition, you need to remember that foam is toxic and burns well.
Liquid Nails
The adhesive is used for a smooth surface of a concrete wall. Its advantage is that there is no need to cover the entire area of the slab.
Available in tubes, applied using a gun in the following order:
- point portions are squeezed out along the perimeter of the penoplex and in the center;
- the plate is applied to the wall, then torn off and left for 10 minutes until the glue dries;
- The insulation is finally fixed to the wall by pressing and holding for 40-60 seconds.
Bitumen mastic
The traditional use of bitumen in construction is waterproofing the underground part of foundations. On its basis, mastics are made for gluing penoplex to concrete walls, which have water-repellent properties.
Installation of penoplex sheets is carried out after preparing the concrete surface:
- the cleaned wall is primed;
- the mastic is applied in a thin layer to the insulation boards with a spatula, another option for the foundation is to thickly coat the wall with a brush;
- penoplex is pressed against the concrete surface for up to 1 minute.
The disadvantage of bitumen glue is flammability at high temperatures and toxicity. If the insulation is installed indoors, air exchange must be ensured and measures must be taken to comply with fire safety rules. Mastic is sold in buckets ready for use. Foundations and plinths of buildings are objects for insulation and waterproofing using bitumen.
Disc dowels
In order to increase the strength of the adhesive connection of the slabs to the concrete, the insulation is additionally secured with dowels with a wide cap - mushrooms or umbrellas. Hardware has a number of advantages: the use of a washer allows you to increase the radius of coverage of the surface from 30 to 50 mm, the anchor structure of the polyamide rod can withstand a pull-out load of 100-150 kg, and is not susceptible to corrosion and rotting.
The procedure for strengthening the fastening of the insulating layer on the facade of the building:
- Points for drilling holes are marked. The diameter of the drill for a concrete wall is 10 mm. The depth is taken from the calculation: length of the dowel sleeve + 1-1.5 cm. For adjacent sheets, one hole drilled in the connecting seam is sufficient.
- Use a hammer drill or impact drill to make holes for umbrellas through the foam plastic in accordance with the markings. Drill cuttings are blown out with compressed air. The anchor must fit freely into the hole.
- Dowels are installed: the cap is pressed into the slab with a hammer so that it does not protrude beyond the plane of the insulation. A rod is inserted into the umbrella and hammered.
The penetration of the hole into concrete is ≥45 mm. The length of the dowel with an insulation thickness of 5 cm will be 95 mm. Before installation, the glued slabs must stand for at least 3 days. After completing the installation work, the wall surface is prepared for finishing: dents and voids are filled with adhesive using a spatula.
The importance of sealing joints
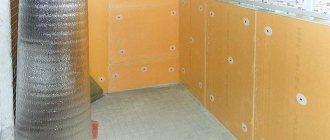
The vapor barrier film is laid on the inside of the room, under the thermal insulation. Its task is to protect thermal insulation from moisture from residential premises. The film itself does an excellent job, but fumes can penetrate through the joints of the canvases. To do this, each joint is insulated with special tape.
In addition, when gluing the vapor barrier in the house itself, comfortable humidity and microclimate are maintained. This happens because the insulation absorbs vapors from the air, making it drier. Due to lack of water, problems with the health of the skin and respiratory tract can begin.
It is necessary to glue the joints of the vapor barrier layer during new construction of a house or major roof repairs. It is also recommended to check the quality of the roofing pie when buying a house, be it an old or modern building. The adhesive tape may come off over time due to age or due to poor quality installation work.
In such a situation, you have to undertake repairs and it is important to choose the right type of adhesive tape and manufacturer
Insulation of the building facade
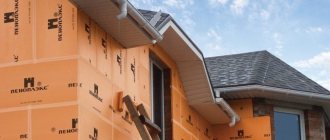
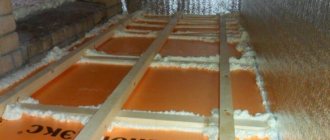
Insulation of walls with penoplex
The main part of heat loss occurs through external walls. Before you begin insulating the facade, it is necessary to carry out preparatory work, which includes:
- cleaning the wall surface from dust and other contaminants;
- leveling with plaster;
- for better adhesion, notches should be applied to a smooth surface using an ax;
- in addition, it is necessary to apply a layer of primer, for this a concrete contact primer would be a good choice.
Read about how to apply primer to walls in this article.
Maybe,
Soil thermal insulation technology
Thermal insulation of the soil significantly reduces the estimated depth of the foundation, and therefore reduces the overall costs of its construction. It is produced by insulating the blind area.
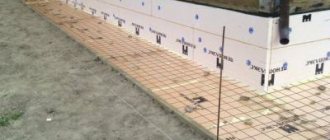
Insulation of the blind area
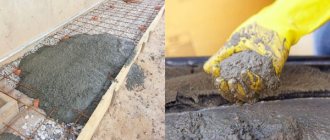
Thermal insulation of soil is most often carried out after vertical thermal insulation of the foundation. To do this, near the lower edge of the slabs, backfill with sand or gravel is done 15-20 cm below the ground level. Next, plank formwork about 30 cm high is placed at a distance of a meter from the walls.
The bottom of the blind area is carefully compacted and leveled, and foam tiles are laid on it along the perimeter of the base. A polyethylene film is laid over the penoplex and concrete is poured.
So, insulating the foundation with penoplex prevents freezing of the foundation, does not allow temperature changes and, consequently, the formation of condensation. After the penoplex insulation procedure, which you can easily do yourself, the microclimate in the house improves significantly, which increases the service life of the entire structure.
Types of glue for penoplex
Before you figure out whether we will glue building materials to concrete, you need to find out the types of fasteners, their prices, and only then choose.
For penoplex, the following types of adhesive composition are used according to the characteristics:
- Polyurethane
- Mineral cement
- Polymer
- Waterproofing
We will distribute the funds into two different subtypes: to glue the slabs inside the house, and to glue them to the wall outside.
In the first case, we can glue everything inside to the wall or ceiling using polyurethane or polymer adhesives. They have good strength, but the main thing is that they are not harmful to humans.
It is strictly forbidden to use waterproofing compounds that contain solvents or petroleum derivatives for the interior wall, which will greatly affect your well-being and overall health. When insulating a wall from the outside, use mineral or cement-based compounds to adhere the insulation.
Mineral compositions have a high level of adhesive properties (the ability to stick). They are especially different when you want to glue penoplex to a concrete wall. But we’ll talk about fastening to a concrete surface later.
Waterproofing compounds
This group of materials that will glue penoplex includes adhesives based on bitumen, acrylic, rubber, they are produced in the form of mastics. You can’t buy simple ones, they corrode the material, just like waterproofing agents with petroleum products. The best way to glue penoplex is Bitumast XPS. The mastic does not include solvents, sets in 2 days, and has a high peeling force of 500 kPa.
Acrylic adhesives can easily attach penoplex to wood, concrete, brick, connect penoplex to penoplex, and glue penofol to penoplex. They are suitable for interior and exterior work and have very low consumption. Bitumen mastics have the most pronounced waterproofing properties and are resistant to low temperatures.
Technical characteristics and advantages of penoplex
Penoplex is a type of extruded polystyrene foam. The material is wear-resistant plates, inert to mechanical damage, rotting, destruction and high humidity. It is also characterized by a long service life, frost resistance and does not require the use of waterproofing protection.
The high performance characteristics of penoplex allow it to be used for internal and external thermal insulation of foundations, walls, ceilings and floors. In addition, the material is widely used for interior decoration of wet rooms, insulation of balconies, loggias and verandas.
Particular attention is paid to the technology of installing “Facade” insulation from the outside. In this case, it is necessary to create a ventilation space for laying the waterproofing layer.
For internal installation, Comfort penoplex is used, which provides good thermal insulation of the room, has increased strength, flexibility and reliability.
For external and internal work, it is recommended to use material of various sizes. Slabs up to 4 cm thick are suitable for internal installation, and up to 10 cm thick for external installation.
The materials have the following characteristics:
- Thermal conductivity (W/mk): “Facade” and “Comfort” – 0.03.
- Flammability (MPa): “Facade” – 0.2; “Comfort” – 0.17.
- Moisture absorption (%): “Facade” – 0.6; “Comfort” – 0.41.
- Sound insulation (dB): “Facade” and “Comfort” – 42.
- Operating temperature (degrees): “Facade” and “Comfort” – from -99 to +74.
Plates for external and internal installation have standard dimensions: length - 1.2 m and width - 0.6 m.
Penoplex has a lot of advantages that set it apart from other well-known insulation materials (mineral wool, expanded polystyrene):
- Universal use.
- Wide operating temperature range.
- Resistant to steam and moisture.
- High thermal insulation.
- Long service life.
- Ease of processing and installation.
- Chemical resistance and safety.
The abundance of building mixtures has led to a dilemma: what and how to glue penoplex to the walls correctly so that the thermal insulation effect is maximum. To make a choice, you should study the characteristics and operating instructions for each type of glue. The possibility of using the composition in a particular situation also depends on the type of insulated surface.
Bitumen mastic
The adhesive mixture, made on the basis of bitumen, ensures reliable fastening of the penoplex, and also improves the waterproofing characteristics, thanks to which it can be used for thermal insulation of structures located in special conditions. The mastic is applied using a special gun. Bituminous glue is applied to the penoplex around the perimeter, and the middle of the slab is also coated. It is important to take precautions since the mixture contains petroleum products. The advantage of this fixation method is its affordable price, as well as the ability to move the insulation board during gluing.
Mineral
Mineral-based dry mixtures are considered universal, so when the question arises of how to glue penoplex to a concrete wall, gas silicate blocks or brick, you can safely give preference to this type of glue. It is important to follow the recommendations of professionals on how to glue penoplex to the wall. To do this, use a toothed grater. The use of such a device allows you to increase the adhesive ability of the insulation. The composition must be diluted according to the instructions. Mineral glue is used sparingly, since it must be applied in a thin layer. An advantage of mineral compositions is considered to be increased frost and moisture resistance. After drying, its volume does not change, which eliminates subsequent shrinkage.
Polyurethane
It is convenient to attach penoplex to the surface with polyurethane glue, since it is sold in ready-to-use cylinders. It is enough to connect them to the gun and apply them in a zigzag pattern to the insulation. The composition sets quickly - within 30 seconds, complete drying occurs after 15 minutes.
Liquid Nails
Liquid nails will help you glue penoplex to concrete, brick walls and other types of surfaces as quickly as possible. Strong, reliable fixation occurs in 10-15 seconds. It is convenient to apply the composition thanks to its packaging in special cylinders. When determining which composition is best for attaching extruded polystyrene foam to the outside, you should give preference to frost-resistant glue, which tolerates temperature changes well. Among the disadvantages of this material is its high cost, so before gluing penoplex to concrete, brick, gas silicate blocks, it is worth assessing the rationality of using this type of adhesive mixture.
Instructions for gluing insulation
Before gluing penoplex with the selected composition, you should carefully study the instructions for use and adhere to the manufacturer’s recommendations. In addition, there are a number of general tips that should be taken into account when installing extruded polystyrene foam so that the insulation result is effective.
Preparing the surface for installation
In order for the penoplex fixation to be strong and reliable, the base should be carefully treated, since the fastening is carried out on a flat surface without defects. The preparatory stage includes the following procedures:
- Removing the remnants of the old coating, cleaning the base with a metal brush.
- Treating areas affected by mold or mildew with a special mixture of copper sulfate.
- Uneven areas are plastered or covered with pads or an additional layer of slabs during installation.
- Metal surfaces are coated with an anti-corrosion compound.
- Secure additional elements, if provided, for example, brackets for mounting an air conditioner, etc.
Apply a uniform layer of primer to the leveled surface. This improves adhesion and reduces the consumption of the adhesive mixture.
How to properly attach penoplex to concrete
Professionals prefer the combined method of attaching penoplex. Boards glued with a mixture and fixed with dowels are characterized by higher strength qualities, and therefore a longer service life. The smooth surface of extruded polystyrene foam sheets is treated with a stiff brush to improve adhesion. The adhesive mixture is applied to the foam board according to the instructions. There are 3 key application methods:
- Striped means applying the mixture in even stripes around the perimeter. When fastening, it is important to press the slabs tightly to prevent the appearance of spaces filled with air.
- The beacon method involves treating the perimeter of the foam sheet with glue, as well as partially filling the center.
- The continuous method requires processing the sheet completely. The mixture is applied with a notched trowel in an even layer.
It is important to check the evenness of the penoplex placement with a level. During installation, it is important to ensure that the plates are firmly attached to each other to avoid heat leakage through the seams.
The best way to cut penoplex
Penoplex has become widespread not only for its high thermal insulation qualities, but also for its ease of installation. The material is malleable in processing. Cutting is easy to do with the help of available tools. To insulate difficult areas, window and door openings, slopes, it is necessary to make cuttings in advance. To do this, use a jigsaw. In the absence of such a tool, you can use a stationery knife to cut penoplex.
Glue consumption
Knowing the consumption of the adhesive mixture, you can calculate the required amount of adhesive for insulation. This will avoid unnecessary expenses. The average consumption is usually indicated on the packaging by the manufacturer. The figure may vary slightly during application. Ready-made adhesives in tubes are consumed more economically, since the use of a gun allows you to rationally dose the mixture, therefore reducing consumption.
How to glue correctly?
The process of fixing penoplex boards is not complicated, but requires compliance with special rules and recommendations. First you need to decide on the choice of suitable adhesive regarding the type of wall surface.
Inconsistency between materials threatens to quickly “lag” behind each other and, as a result, additional repair work. The universal building material can be attached to almost any surface, but most often it is concrete, wood and metal.
Fixation to concrete wall
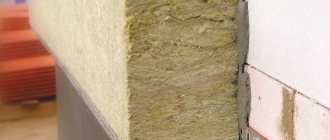
To attach insulation boards to a concrete wall, it is advisable to use a mineral mixture , because the components are almost identical. Initially, the wall must be treated with a primer solution in order to remove dust deposits and other contaminants.
A layer of mortar is applied to the glued side of the slab and evenly distributed using a spatula-comb. Next, she leans against the wall and presses herself.
Combining two slabs together
The two surfaces are cleaned of possible dust formation and treated with a primer. There are no special requirements for the choice of glue, because any is suitable for this procedure.
The technique for applying it can be different, but most often the point method is used. To do this, for example, you need to attach a can of polyurethane glue to a professional construction gun and make short, dotted strokes along the entire perimeter of the slab, as well as a few in the middle.
Tips for use
To make the process of thermal insulation of your home effective, comfortable and economical, you should take into account some professional advice:
- For beginning craftsmen, use the mixture in aerosol cans and avoid using quick-drying compounds, since mistakes made are difficult to correct.
- Make calculations on the amount of glue required, taking into account the information indicated on the packaging. Purchase material with a reserve, since more mixture is wasted on surfaces with defects.
- Follow the manufacturer's recommendations for diluting dry mixtures and their use.
- Apply the composition no more than 2-3 mm. The increased amount of material will not make the fastening stronger, but will lead to costs.
- Level the penoplex immediately after contact with the surface, without waiting for the glue to set.
- Take precautions when working with hazardous compounds.
Taking into account the recommendations of professionals and purchasing high-quality materials, even an inexperienced builder will be able to carry out insulation quickly, reliably and efficiently.
Today there is no consensus on which adhesive mixture is best suited for installing penoplex. It is necessary to make a choice based on the characteristics of each specific situation. By taking care of thermal insulation at the time of building a house, it will be possible to reduce the consumption of building materials and make the process less labor-intensive.
Heat transfer resistance table
| City (region) | R - required heat transfer resistance m2×°K/W |
| Moscow | 3.28 |
| Krasnodar | 2.44 |
| Sochi | 1.79 |
| Rostov-on-Don | 2.75 |
| Saint Petersburg | 3.23 |
| Krasnoyarsk | 4.84 |
| Voronezh | 3.12 |
| Yakutsk | 5.28 |
| Irkutsk | 4.05 |
| Volgograd | 2.91 |
| Astrakhan | 2.76 |
| Ekaterinburg | 3.65 |
| Nizhny Novgorod | 3.36 |
| Vladivostok | 3.25 |
| Magadan | 4.33 |
| Chelyabinsk | 3.64 |
| Tver | 3.31 |
| Novosibirsk | 3.93 |
| Samara | 3.33 |
| Permian | 3.64 |
| Ufa | 3.48 |
| Kazan | 3.45 |
| Omsk | 3.82 |
