Pressure from earth masses has a detrimental effect on the foundation, cracks appear, and pieces of cladding fall off. In addition, the thermal insulation of the room suffers.
The first floor of the house becomes cold, the floors freeze, and dampness forms in the underground. Heating a building requires more resources, and heating costs are rising.
According to research, the presence of an insulated blind area increases the temperature inside the building, allows you to preserve its integrity for a long time and significantly saves the heating budget. Most often, the blind area is insulated if the house has a shallow foundation or there is a basement floor.
We will tell you in the article how to make an insulated blind area around the house with your own hands.
When can you insulate yourself, and when should you turn to professionals?
The blind area is one of the simplest elements in the construction of a private house. Any homeowner who knows how to work with their hands can handle it themselves. The main thing is to follow the technology of the device and correctly create a “layer cake” from building materials inside the structure.
There are 3 types of blind area:
Tough. It is based on pouring concrete or paving. The participation of specialists is recommended here, since the technology is labor-intensive and will require hiring equipment and auxiliary tools.- Semi-rigid. The final covering here is made of paving slabs, which lie on a concrete base.
Laying out the material and pouring the base require certain skills; it is not always possible to carry out the process efficiently the first time on your own. - Soft blind area. The technology does not involve concrete, so this process is easier to do yourself.
Accordingly, you can insulate the blind area with your own hands with a soft coating that does not require the participation of equipment and concrete work. For other types of coating, the intervention of professionals may be required, but if you act carefully and according to the instructions, insulation and installation of the coating yourself is possible for everyone.
Do you need a vertical thermal protection belt?
Proper insulation of the blind area is not limited to placing thermal insulation under the concrete covering; the thermal protection must be combined with the vertical insulation belt of the foundation. This is necessary in order to prevent heat leakage through the concrete itself, which has high thermal conductivity.
Therefore, parallel to the installation of insulation of the blind area, polystyrene foam slabs are fixed to the above-ground part of the foundation with glue and disc-shaped dowels, which are subsequently hidden under the finishing of the base. It is extremely important that the thermal protection of the foundation and blind area has a continuous contour. The best option is when a horizontal belt is first laid, and then the base thermal insulation slabs rest on it with their lower end.
Requirements for insulation
There are a great variety of thermal insulation materials on the market today. The best options for insulating a blind area should have the following properties:
- Coefficient of thermal conductivity . The operating conditions in a particular region matter. The lower this indicator, the better the insulation performs its main function.
- Humidity and biostability . The material must be dry, the amount of moisture inside is minimal, since otherwise it will affect the integrity of the blind area itself. Its physical properties should not change due to temperature changes. The presence of moisture in the pores directly affects the proliferation of microorganisms.
- Ability to absorb water . The less water the insulation absorbs, the lower its thermal conductivity. High-quality material for the blind area should not be susceptible to moisture, the indicator is indicated as a percentage. When choosing between the same insulation from different manufacturers, the water absorption indicator should be decisive. It is recommended to choose the one with the lower percentage.
- Density. For the blind area, you should choose materials with high density, since it will be in conditions of high humidity and under the influence of atmospheric conditions. The marking is displayed in kg/m3, the maximum value is 400.
- Strength. Affects susceptibility to mechanical stress. Soil heaving should not affect the physical properties of the insulation. For the blind area, insulation with a strength above 5 MPa is chosen. This also affects integrity during transportation.
- Durability and frost resistance . For blind area insulation, these are the two most important indicators that directly affect the safety of the building’s foundation and the structure itself. The indicators show what temperature the insulation can withstand and how long it will last under operating conditions.
For the blind area, solid types of insulation are used, elastic and frost-resistant. Also, they should not shrink, as this could cause the entire structure to deform.
Recommendations from experts
The main advice that professionals give is to use only high-quality materials. Reliable protection will be provided only if each layer properly performs its functions. It is also important to strictly follow the technology for laying a soft blind area so that the result is perfect.
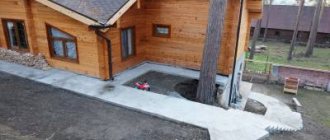
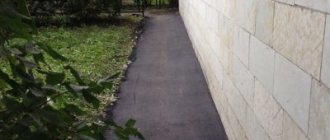
A flexible blind area is an excellent alternative to a concrete path, which, with proper installation and minimal maintenance, will last much longer than its concrete counterpart.
In addition, such a design can add attractiveness to the exterior and become an original flower bed.
Which material to choose?
Since the material is subject to rather stringent requirements, only a few are suitable for insulating blind areas. Each of them can be installed independently.
Expanded polystyrene
A type of foam plastic, it is used more often than other materials due to its versatility and low cost.
Advantages:
- low thermal conductivity and moisture absorption;
- high strength;
- frost-resistant;
- flexible;
- service life reaches 80 years.
Disadvantages: flammable, it is important to securely lock it under the top layer of the blind area and cover it with the plinth facing material.
Suitable for all types of blind areas, ideal for concrete coverings , but it is necessary to lay it with additional insulating material (film or geotextile) to eliminate mechanical impact and the possibility of fire.
Penoizol
It is sprayed on the base of the building and on the bottom of the trench, under the blind area, where a cushion of clay, sand and geotextile is laid.
Advantages:
- applied without joints, in a uniform layer from a special machine with a sprayer;
- dense, does not absorb moisture;
- low thermal conductivity;
- does not allow oxygen to pass through.
- durable, non-flammable.
Flaws:
- application requires the participation of specialists with equipment;
- toxic, respiratory protection is required for all those present and isolation of the neighboring area (so that the plants are not damaged).
Penoizol is not recommended for regions with high humidity and places where there is heavy rain. The material cannot withstand excess water levels and its application is expensive. Sold in various forms, including sliced.
Styrofoam
One of the most famous materials, elastic, is suitable for strengthening expansion joints.
Pros:
- low thermal conductivity;
- affordable;
- easy to lay and model to the desired shape.
Minuses:
- easy to damage mechanically (reinforced mesh is required during installation);
- subject to combustion;
- if the density is low, moisture absorption is high.
Polystyrene foam lasts much less time than other insulation materials. But it is simple to replace and easy to install yourself.
Expanded clay
The most harmless, environmentally friendly, natural material. It is created from a mixture of clay and slate.
Advantages:
- to use, you don’t need anything other than a shovel - it’s simply poured into a trench;
- non-toxic;
- It's inexpensive.
Disadvantages: not recommended for hard blind areas. Lightweight material is intended for insulation of structures covered with crushed stone, gravel, and lawn.
Several finishing options
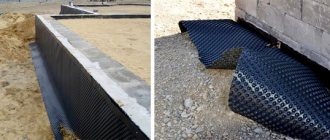
After laying on the slope-forming layer, the profiled membrane is covered along the edge with a layer of crushed stone, on which a curb stone is placed on a cement/concrete lock. This option has an important advantage - ease of execution, in addition, the membrane removes moisture under the curb stone. But there is also a minus: it is inconvenient to walk on the crushed stone surface, and the crushed stone itself quickly spreads throughout the entire area.
The construction of pedestrian paths is a little more complicated. The profiled membrane must be covered with a layer of crushed stone, separated by a layer of thermally bonded geotextile, and sand laid on top. In this case, it is important to choose thermally bonded geotextiles rather than needle-punched geotextiles, since the latter does not allow water to pass through well and if it is installed, water will absolutely not be able to quickly escape from the structure. Blind areas and sidewalk paths with a profiled membrane are laid on the underlying layer without the use of cement materials, for example, dry mix. Paving slabs are installed on the prepared base. This blind area looks beautiful, and it is also repairable.
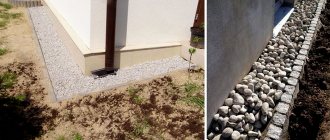
The so-called “green” blind area is gaining popularity, in which the finishing layer looks like an ordinary lawn. In this case, after the profiled membrane with a layer of geotextile, a layer of crushed stone is laid, and fertile soil is poured on top of it. In the spring, the area of the blind area is sown with lawn grass. In this design, it is advisable to install rain trays in areas of greatest accumulation of water to collect moisture. Otherwise, clearings in the lawn may form in these places.
Regardless of the choice of finishing coating, an insulated blind area is a kind of guarantee of the durability of the foundation, and, consequently, the entire house. Performing several functions simultaneously - protection against freezing and frost heaving, increasing energy efficiency, draining water - it extends the life of the structure and relieves home owners from the headaches associated with premature repairs.
How to calculate the required amount of building materials?
If polystyrene foam is used as insulation, it is laid in several layers, since the standard thickness of 5 cm is not enough to maintain the temperature in the ground.
For central Russia, 2 layers are enough, that is, 10 cm thick. For northern regions 3 layers. The quantity is calculated by square meters, taking into account overlaps on the wall of the building.
Example : the perimeter of a building is 8*4 meters = (8+4)*2 = 24 m. With a standard blind area width of 1 m, it turns out that only this part requires 24 m2 of polystyrene foam. The overlap on the wall is equal to the same perimeter, but its height is 30 cm.
We count 24*0.3 = 7.2. With a reserve of 8 m2. A total of 32 m2 of polystyrene foam is needed for laying in 1 layer. For a double bottom layer you need 24+24 = 48 m2. And 8 m2 for the walls. A total of 56 m2 of polystyrene foam will be required.
For foam plastic, the calculation follows the same scheme , but depends on the thickness of the material.
If the tiles are initially larger than 10 cm, then the insulation is placed in one layer. This means, if you look at the example above, 32 m2 including the walls. Penoizol is calculated based on consumption per 1 m2. The layer thickness should not be more than 25 cm; at standard air temperatures and normal winter (not northern or southern regions), up to 15 cm is sufficient. According to manufacturers’ calculations, 1.3 liters per 1 m2 is required.
Example : similar to the previous calculation. The blind area itself requires 24 * 1 * 1.3 = 32 liters of mixture. On the wall 24*0.3*1.3 = 10 l. Total 32 l. Here it is also recommended to take with a reserve of 35 liters. Expanded clay is sold in cubic meters, consumption is calculated based on the height of the layer.
Example: a layer of expanded clay is 10 cm, the building parameters are still the same. 0.01 m3 is consumed per 1 m2. We calculate 10*24 (area of the blind area)*0.01 = 2.4*1000 = 2400 liters. Total: according to the given parameters, you will need 2400 liters of expanded clay. It is packaged in 50 liter bags. Divide 2400 by 50. This means you need 48 bags of expanded clay.
To each calculation you need to add a few more units in case of errors or omissions. If the building has a porch, near which there is no blind area, then its length must be subtracted from the perimeter.
Making a blind area
To understand the structure of an insulated blind area, you need to find out what it consists of and how to make it yourself. First, let's find out what the general scheme for constructing a hard and soft blind area looks like, and then consider the installation of each insulation. The step-by-step instructions look like this:
- Pegs are driven in around the house and a cord is pulled between them to mark the location of the future blind area. A trench is dug along the cord. The determination of its width was discussed above, but the depth depends on the soil. If the soil is clayey, a depth of 450 mm is sufficient. On loose soil, the depth must be increased to 600 mm to lay a clay castle.
- Formwork is installed around the trench and layers begin to be laid. If you want to make a clay castle, it is made as the first layer. Clay is poured with a thickness of 100–250 mm, which is selected individually according to the condition of the soil. The layer is leveled, compacting tightly to create a slight slope from the foundation.
- The next layer is sand, 50–100 mm thick.
- A waterproofing film is laid on the sand, wrapping it onto the base.
- At this stage, it’s time to lay the insulation with your own hands. The selected material is tightly laid on top of the waterproofing. If it is decided to insulate the base, then this is also done at this stage.
- The insulation is covered with another layer of waterproofing on top and backfilled with a layer of sand of similar thickness.
- A geotextile fabric is laid on the sand. It will prevent mixing of the fractions of the two layers, and in the case of a soft blind area, it will play the role of a water filter. A 100 mm layer of medium-fraction crushed stone is poured onto the geotextile.
- If the option of a soft blind area is chosen, then 50 mm of sand is poured on top of the crushed stone and paving stones are laid or simply covered with decorative stone.
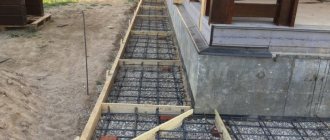
- To make a concrete blind area with your own hands, you need to lay a reinforcing mesh with cells of 100x100 mm on the crushed stone. Every 3–6 m, at corners and bends, install boards edgewise. They are needed to create expansion joints that protect the screed from cracking. In addition, the correctly selected height of the boards will serve as beacons when pouring the screed.
- The concrete solution is poured in one day. When the screed has hardened, but is still damp, dry cement is rubbed over it and covered with film. Such ironing will give the concrete strength and reduce water permeability.
- Finishing is done on top of the completely frozen screed. This can be paving slabs, asphalt, stone or any other material at the discretion of the home owner.
So, this has been considered the general scheme of the screed pie. Now we’ll find out what the step-by-step installation instructions for each type of thermal insulation look like. By the way, in order to properly prepare concrete for screed, the required proportions can be found in the table:
What is required to create a warm structure?
To build a blind area outside the house you will need:
- shovels, shovels and bayonets;
- gloves;
- vibrator;
- plumb line, tape measure, thread, pegs;
- sharp knife;
- boards for formwork;
- rule.
Materials:
- sand;
- crushed stone;
- clay;
- waterproofing;
- thermal insulation;
- geotextiles;
- covering: concrete, paving slabs, granite chips, lawn, etc.
Depending on the type of blind area, some of the listed materials and tools may not be needed.
DIY filling instructions
When arranging a blind area made of pebbles, the waterproofing layer is the main one, so the material for its installation must have high strength and the ability to withstand high long-term loads from various layers.
Stages of work:
- Preparatory. At this stage, measurements are taken and the required amount of materials is calculated, depending on the size of the blind area of the house.
- Marking, soil preparation. Using pegs or posts, the area where it is planned to organize the blind area is marked. The area is fenced off with a rope.
- Excavation. Select the required amount of soil, which is then leveled and compacted. Add sand or crushed stone. For very loose soil, clay is used, which is leveled and compacted.
- Installation of insulation. To prevent freezing and additional insulation of the foundation, an insulating layer is made with special materials. Usually, it is not additionally fixed.
- Waterproofing layer. The membrane is rolled out into a layer overlapping the walls. It is necessary that it completely covers the “pie”. The layer is fixed, the seams are taped with double-sided tape.
- Backfilling with pebbles. A layer of pebbles is poured onto the prepared area. The material is leveled so that its surface is the same throughout the entire area of the house.
This method of arranging a blind area is called soft and is considered the simplest and most economical. Longer in time and more financially expensive - using concrete. The pebbles are poured onto a concrete-filled and dried surface using waterproofing materials.
Correct insulation technology
The first steps in the process of building a blind area are the same:
Dig a ditch with a depth of ½ the depth of soil freezing (approximately 30-40 cm). The width is 20 cm greater than the width of the roof overhang. Treat the bottom with chemicals that prevent plant growth and the appearance of insects.- Form the bottom at an angle from the building of about 10 degrees. Dig a groove along the outer edge of the trench for the drainage pipe.
- Pour moistened clay or sand up to 10 cm high into the bottom. Compact with a vibrating machine.
- Place waterproofing with an overlap of up to 20 cm on the wall.
- Pour 10 cm of crushed stone on top as drainage.
- Compact another 10 cm of wet sand.
Next, a layer of thermal insulation is laid . Each uses its own technology:
- Expanded polystyrene is laid in slabs.
- Penoizol is applied with a sprayer (special machine) evenly over the entire area of the blind area with a small backdrop on the wall. It does not form seams and creates another additional layer of waterproofing.
- The foam is laid in tiles evenly. If necessary, the material is cut and formed into the required area.
- Dronite is poured before and after expanded clay. The expanded clay itself is 10 cm thick.
There should be 2-3 cm of free space between the blind area and the wall of the building; it is called an expansion joint. It is left in case of shrinkage of the building and seasonal expansion of natural building materials (wood).
After this, the process is completed with a finishing coating:
- Pouring concrete. A blind area is installed around the entire perimeter. A reinforced grid is laid on the heat-insulating layer. Next, damper joints are installed along the entire perimeter in increments of 2 meters - boards 2.5 m thick. Concrete is poured in one layer at an angle of up to 10 degrees from the house. Ironing is carried out, complete drying with periodic moistening.
- Paving slabs are made according to the same principle, only the layer of concrete is 2 times thinner and tiles are laid on top.
- The soft blind area is laid out without reinforcement or concrete. A layer of sand and gravel is poured onto the insulation and covered with geotextiles. And the final layer is placed on this coating: gravel, granite chips, drainage with lawn and others.
A layer of thermal insulation is also laid on the lower part of the wall, its height is up to 30 cm. It lies inside the expansion joint and serves as a softening elastic stop. At the final stage of construction, the insulation layer is covered with the finishing of the base.
The video will tell you about insulating the blind area with polystyrene foam:
Briefly about the next steps
After this, it is necessary to start implementing drainage located along all edges of the installed blind area. This can be done in several different ways.
First option. Asbestos-cement pipes, the diameter of which should reach 100 mm, are laid close to the blind area on an underlying layer of crushed stone or sand. They must first be cut in half.
Second option. A special monolithic concrete trench is installed over the crushed stone bed. To ensure the most suitable shape, you can use a small piece of metal pipe or a pre-sanded log.
Drainage arrangement
It is very important to properly insulate the blind area, because the preservation of heat in the house, its stability and service life directly depend on it.
What mistakes can there be and how to avoid them?
Main mistakes:
- laying polystyrene foam in one layer - there is no need to save money, the more reliable the thermal insulation, the more durable the entire structure will be;
- the overlap on the wall is done for greater thermal insulation efficiency and protection of the foundation from freezing - you should not forget about it;
- The lamellar insulation is laid in even layers, the seams are connected as tightly as possible - if you put the material overlapping, cracks will form.
Insulation is recommended for all types of blind areas in Russia, since most regions experience severe winters.
The absence of this detail is detrimental to the foundation of the building; the cold quickly destroys it, making the house uninhabitable. If errors occur with the installation of insulation, the blind area is completely disassembled and the procedure is repeated correctly.
Preparing tools
When calculating all the specified parameters, you can take care of the necessary tools and materials.
- To remove soil you will need a shovel, pickaxe, and crowbar.
- For formwork you need boards, pegs, twine, so you will need auxiliary tools: a hacksaw, a hammer, nails. Reinforcement requires a metal mesh, mesh cells 50X50 or 100X100, welding equipment, and a tool for cutting metal.
- For the layers you will need materials: sand, clay, roofing felt or polyethylene. The next layer is gravel or crushed stone, the top layer is cement.
- To make a concrete mixture, you need a mixer for mixing it, buckets, and carts. You can rent a mixer from a hardware store.
- Additional tools for leveling the concrete surface: building level, trowel, spatula, sealant for sealing joints.
Expenses
Average prices for insulation in Russia:
Expanded polystyrene. The price depends on the thickness and volume of purchase. Piece by piece 2 cm - from 55 rubles/piece, 5 cm - from 115 rubles/piece, 10 cm - from 250 rubles/piece. The standard plate size is 118.5*58.5.- Styrofoam. 1 cubic meter from 220 rubles.
- Penoizol. The work is carried out by specialists from 140 rubles/cubic meter. They bring the mixture ready for application and spray it, creating a thermal insulation layer.
- Expanded clay. Bag 50 l from 120 rub.
You will find a lot of important and useful information about insulating the blind area around the house in this section.
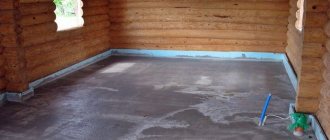
Thermal insulation of the base
Insulation of the foundation occurs at the stage of laying thermal insulation in the blind area. The most effective insulation is sprayed polyurethane foam. It was discussed above, so let’s move straight to traditional materials.
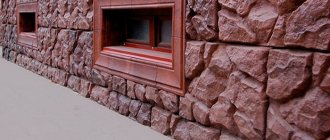
The base can be finished with penoplex, polystyrene foam or expanded polystyrene. The installation process is the same. The slabs are glued to the wall with glue, stacked tightly against each other. Only the option with expanded polystyrene provides for laying waterproofing between it and the wall. For reliability, the slabs are fixed in the corners and in the center with plastic umbrella dowels. Next comes the finishing work. Usually a mesh is glued onto the slabs, primed and covered with decorative plaster.
That's all the instructions showing how to insulate the blind area and foundation around the house yourself.
In contact with