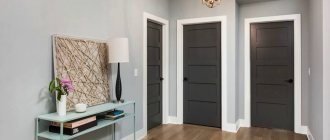
When installing doors, we simply cannot ignore such elements as platbands. The latter perform decorative functions and hide the frame structures, as well as seals and fasteners. And how good the door will look depends on this final stage. Today we will talk about how and what is the best way to cut various types of platbands.
Working with this essential component of any door begins with choosing the type. Now we will try to list them and talk about their features.
Cashing on the door: the simplest way to cut at 45° even without experience
The platband is an integral part of the door frame, which gives aesthetics to the appearance. However, this element is very often scratched and wiped out, which means it requires replacement. And here the main task is to cut it at an angle of 45°. This kind of work is quite simple if you have a miter box at hand, but what to do if you don’t have one and need to do it urgently? In today's article we will talk about the simplest methods of cutting at 45°, even without experience, using available tools and materials. But first, the simplest option is to use a tool such as a miter box.
Conditions for replacement and return of low-quality products
What to do if a consumer bought a product from us that does not suit him for some reason: design, size, configuration, etc.? The purchased product has not been used, the consumer parameters remain in their original condition, the presentation has not deteriorated, the packaging is not damaged? In such a situation, within two weeks you can contact the point of sale and submit an application with a request to exchange the product for a similar option or return the money, provided that the desired model is not in stock. The costs associated with the delivery of goods for exchange, and the organization of delivery itself, are borne by the buyer.
Using a miter box in cutting trims
A device such as a miter box is very convenient to use and is also inexpensive. Therefore, if possible, it is better to purchase it in advance; it will not take up much space in the pantry. Most often, a miter box is sold together with a thin hacksaw, which makes it easier to cut platbands. If it is missing, then you should not use a regular hacksaw with a wide layout for cutting. A hacksaw for metal is best suited for this purpose; the cut with its help will be more accurate.
PHOTO: vbud.in.ua Miter box - a very convenient device for cutting at the desired angle
What are there
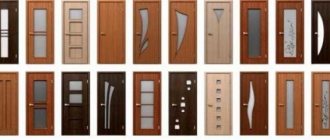
If we talk about materials, then to the traditional platbands made of solid wood or laminated planks, new ones have been added: made of MDF, covered with veneer or PVC film. There are also plastic trims. They are the most inexpensive, look quite decent, and come in a variety of colors. They are also made of metals - steel and aluminum, but they are placed on entrance doors.
Door trims made of MDF look very decent
Platband sizes
These products are classified as molded - they are sold by linear meters, so we are not talking about length standards. But usually it is somewhere around 2.2-2.5 m (with a margin for adjustment). Standard width is also a flexible concept: from 30 mm to 80 mm. In this range you can find a platband made of any material. On request they can be made from wood of any configuration and dimensions.
The width of the casing is selected depending on the size of the door itself and how close the frame is installed to the opening: the gap must be blocked. In general, for narrow doors a narrow frame is necessary; with double doors, a massive frame looks better.
The sizes of the platbands may be different. Even if you don’t find the required dimensions ready-made, you can order custom-made
Shape and color
The platbands differ in shape. There are flat, figured, paneled, carved. Recently, decoration with capitals and balusters has become fashionable. But such door framing is not suitable for every interior.
“L”-shaped and telescopic platbands also appeared on the market. This is a very interesting system that makes it easy to match the door frame and finish to the width of the wall. The process of installing telescopic platbands is largely individual: the systems are assembled differently, and accordingly, there is a difference in the installation process (described in detail in the instructions).
The color range is very wide: you can find a frame to match almost any color of the canvas. It needs to be matched tone to tone. Often (but not always) these products are included with the door leaf and frame. Then you don’t need to agonize over the choice: they are matched tone to tone. All that remains is to install.
The form can also be very diverse.
What to do if a suitable tool is not available
In this case, you can use a regular school protractor. It makes it easy to measure angles. However, a protractor may not be at hand if there are no schoolchildren in the house. In this case, an ordinary tile will help out, with the help of which a strip is drawn at a right angle, and then divided in half. The cut is best made from the front side, working with a hacksaw along the entire plane.
PHOTO: YouTube.com Using a protractor you can easily mark any angle you need
You can also use a regular ruler for marking - the marks will be much more accurate than using tiles.
PHOTO: ukrasy.ru A square or even a simple ruler can do a good job of this.
About telescopic cashing
Such frames are suitable for installation without fastening parts. Telescopic products do not require the use of additional extensions, since it is possible to straighten the gaps between the device and the width of the doorway by aligning the sliding frame. In this case, the tongue in the form of a beard is inserted into the recess on the door frame.
You should read about the existing differences in the operation of a particular telescopic product in the instructions attached to it: the diagrams and installation technologies for products from different manufacturers may vary.
Another way to apply markings to platbands
Another method that also gives an almost ideal result is marking in place. Here you will need long finishing nails for the job. With their help, the side trims are lightly nailed first, and then the top horizontal one. They should be slightly longer than the box.
PHOTO: YouTube.com Stages of marking platbands in place - the main thing is not to drive the nails too deeply
Next, marks are made with a pencil along the intersections so that the corners meet. All that remains is to dismantle the cash, draw lines along the marks and cut. It's quite simple.
Complex cases
Not all doors are installed in such a way that the platbands can be installed without problems. Difficulties may vary.
The most common option is that one of the walls is too close. If there is at least some gap, it is necessary to saw off the “extra” from one plank. Only then the assembly will be in a different order: install the uncut side plank, the top one next to it, and place the narrow one at the very end.
Sometimes the thickness of the wall is greater than the width of the door frame. Then they either install an additional bar - an extension, or use an L-shaped platband. Depends on the distance that is not covered by the box. If it is small - 1-2 cm, you can cover it with a platband; a more substantial one needs to be covered with good.
By gluing the trims you can secure them with clamps
The nuances of cutting and fastening various types of platbands
It is worth considering wooden platbands as the most commonly used. They can be divided into 3 types - trimmed, non-trimmed and telescopic.
PHOTO: ldoors-spb.ru Platbands can be varied, there are differences in their attachment to the box
The first ones require cutting at an angle of 45°, and they were already discussed today. It is much easier to work with untrimmed ones; it is enough to have a square on hand. They are cut at right angles, which is due to their shape, although no one forbids cutting them at 45°.
Telescopic - their design is more complex, but here you can hide a slightly uneven cut using special connectors. Such platbands can be compared to plastic skirting boards.
PHOTO: dveri067.ru Telescopic platbands are easier to install than others - they do not require additional fixation
The simplest paper template for foam baguettes
In today’s step-by-step instructions, everything will be explained using the example of foam ceiling moldings, however, similar tactics can also be used to file corners on wooden or plastic trims.
Methods for fixing trimmed trim to the door frame
Attaching the trim to the door frame can also be varied. The simplest is to attach telescopic trims. The main thing here is to correctly trim the elements to size, and then simply insert the cash tenon into the groove of the box. Additional fixation is usually not required.
Other types of platbands can be fixed with finishing nails. They have practically no cap, and therefore they will be completely invisible. The next option is self-tapping screws. There is also a nuance here - you need to think about how to hide them. Otherwise, the hats will spoil the appearance.
A separate option worth noting is fixation with liquid nails. But, despite the simplicity of such a fixation, it has its drawback - if it is necessary to replace the platbands, you may encounter the problem of dismantling, while the previous options allow you to easily remove the elements.
Kinds
Traditional trim strips are secured to the frame with nails. The recently appeared telescopic ones are worth special mention because they do not require additional tools for fastening. They are attached using the “tenon-to-groove” principle.
Invoices
These are flat, curved or slightly curved rectangles 70 mm wide, 8 to 10 mm thick. Nails are required for installation. They are made from different materials. The most common are wood, metal, plastic. The stone and ceramic types presented in stores are used much less frequently.
Plastic
Plastic in door decoration is very popular. It is durable, easy to clean, and water resistant. The material is artificial, therefore it is not susceptible to mold, rotting, or swelling. But the main thing is that the plastic remains bright after many years and does not deteriorate under the influence of moisture and sunlight. It can even be installed on external doors due to its resistance to temperature changes.
Metal
Often installed on street doors. Metal strips made of steel strip are installed on profile boxes coated with enamel or primer. They are attached by welding and covered with paint of the same color as the door. They cannot be called exquisite, because the price is economy class.
Bent metal - elegant, expensive, suitable for powder coated entrance doors. The thickness/width of both types is 20 x 40 mm.
Wooden or MDF
Wood is an environmentally friendly material. Wooden products are durable and reliable. For production, lining is selected from pine or coniferous wood, which is known for its long service life. It is varnished and painted.
The planks can be smooth, semicircular, embossed - sometimes there is a carving pattern. Thickness - 12 mm, width - from 40 to 80 mm. Disadvantages: low moisture resistance, rapid loss of its former luster.
A more expensive option is oak or maple. They are recognizable due to their texture, light, close to gray tint. The advantages include a high degree of resistance to mechanical damage and temperature changes.
MDF products are moisture resistant, because they are coated with a composition that repels water and are not subject to rotting. Thickness 16 mm, width - 70. At a low price they have decent quality.
Telescopic
Unique in their design - they are produced in the shape of the letter “L”, with a curved edge attached to the door frame. This method is called “tenon and groove” - it resembles the connection of Lego parts and allows you to change the size of the box by about 1-1.5 cm without the use of extensions.
Attention! To attach telescopic trims, nails are not needed - they are held only in the grooves of the box. Therefore, their price is higher.
Simple and telescopic slats can be of three shapes - flat, rounded, curly. Curly ones with a round cross-section are cut only at an angle of 45˚, and flat ones are sawn at 90˚. This is justified by aesthetic considerations and texture.
Final part
Installing platbands cannot be called too simple, especially if the home craftsman does not have experience in this area. However, with due diligence and accuracy, anything is possible. If a home master doubts his abilities, it is better to seek help from specialists. After all, by sawing off the extra half a centimeter, you can completely ruin the platband fabric. However, it is not a fact that the store will have the desired color. If the master decides to do all the work himself, then the best option would be to first practice on unnecessary boards.
We hope that the information presented today will be useful to novice home craftsmen. The editors of our online magazine will be happy to answer your questions if any arise during the reading process. All you have to do is state them in the comments below. There you can share your method of washing down the platbands at the desired angle. If you liked the article, do not forget to rate it - your opinion is extremely important to us. And finally, as has already become customary, we bring to your attention a short video that will help to more fully reveal today’s topic. Take care of yourself, your loved ones and be healthy!
Warranty conditions
The RF Doors store provides a 1-year warranty on all products, covering manufacturing defects. If within 12 months (i.e. the warranty period) manufacturing defects are revealed during use of the products, we will exchange the purchased design or refund the money paid.
Liability cannot exceed the cost of the door leaf on which the defect is found. Claims regarding a product whose design has been changed will not be considered.
According to Art. 476, responsibility for the delivery of a defective product falls on the seller, provided that the buyer can provide evidence confirming that the defect in the goods appeared before its transfer, or as a result of factors that occurred before that. The following tips will help protect you from such misunderstandings:
– after the product is delivered, carefully examine it to make sure that it meets the parameters of quality, configuration, and there are no external defects;
– before installation, be sure to inspect the product again, and only after completing the inspection, proceed with installation and throw away the packaging.
If there are traces on the surface of the door leaf resulting from mechanical damage and there is no packaging from the factory, the product cannot be returned or exchanged.