We go to the bathhouse not only to take a steam bath, but also to wash ourselves. After the steam room, it’s good to splash yourself with ice water, but you want to wash yourself in hot water. Therefore, it is important to take a hot shower in the bathhouse. In this article we will look at various ways to make it yourself.
[toc]
The easiest way to make a hot shower in a bathhouse is to install a dousing device (bucket) and supply water to it. Such a bucket shower for a bath can be bought in a specialized store. There are models into which water is poured from a regular bucket, and there are those into which water is supplied from a tap. Turning on and off the water supply is controlled by a float (a device similar to that found in waste tanks).
Bucket shower for a bath
Features of creating a shower in a bathhouse with your own hands
When arranging a shower for a bath, first find out its purpose and location. Why do you need a shower for a bath? To simply wash yourself or to combine business with pleasure in the form of contrasting douches after the steam room? It is important to decide on the type. A summer shower at the dacha or in a private house will come in handy in the heat. Heating occurs from the sun's rays. The winter one has a heating tank and is located in the bathhouse building.
The choice of location depends on the design of the shower and the characteristics of the bath. For example, a concrete floor will allow you to install both a shower corner and a cabin. The proximity of water intake points will reduce construction costs.
Then you should deal with a number of questions:
- Cold water supply.
- Drainage.
- Equipment, consumables.
- Ventilation and electrical.
- Heating water.
- Washing room design.
Let us dwell in detail on the most important aspects of building a shower.
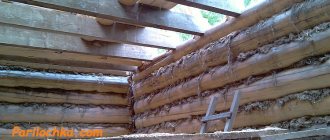
Construction of a roof for a bathhouse from pallets
Considering the temporary nature of the structure, as well as the fact that it is undesirable to place a large load on the base, the best option is to construct a pitched roof and combine it with the ceiling. We build it in this order:
- On one side we install horizontally connected pallets that were used to install the walls.
- We assemble the pallets according to the size of the future roof into one structure.
- We cut out triangular parts from peculiar sandwiches for horizontal installation between the partitions.
- We fix the assembled system on the roof using corners and nails.
- We lay two layers of vapor and waterproofing in a checkerboard pattern, overlapping by 20-30 cm.
- We seal the joints with sealing tape or reinforced tape.
- We fill the slats, dismantled from the pallet, with a thickness of 3-4 cm in increments of 10-15 cm to install the roofing material. The best option is ondulin. Its weight is only 3 kg/m2.
Please note that there must be a ventilation gap between the sheathing and the roof.
Water supply and sanitation
The bathhouse does not need to be connected to external utility networks. But the installed shower stall must be fully functional. For this purpose, an outlet and an inlet are provided. There are several ways to install a drain.
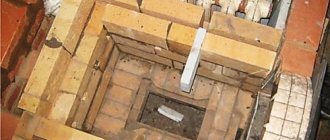
Organizing a drainage pit or septic tank is a common option. Expanded clay, broken brick or crushed stone are used as a filter. The disadvantage is the rapid clogging of cleaning materials. The well is also used as a method of drainage. It is better to build it at the initial stage of construction, so that the pit is located at the lowest point of the site.
Before digging, it is important to study the soil layer. In the presence of nearby groundwater, this method of drainage is not suitable. If the soil is loose, additional strengthening of the walls will be required. To do this, they are filled with concrete, lined with bricks, or factory-made reinforced concrete rings are purchased. Optimal trench dimensions: 3 meters deep and 1 meter wide. The distance to the foundation of the bathhouse is 2-5 meters. The washing room in the bathhouse with a shower and the drainage pit are connected by pipes at an angle of 20 degrees. This slope is sufficient for water to flow by gravity. At the end, the finished trench is concreted. The shower stall in the washing room is equipped with a drain. It protects against unpleasant odors and prevents waste from entering the pipeline.
Accommodation options
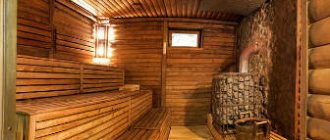
It is recommended to place the shower next to the steam room
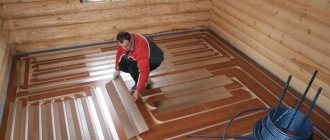
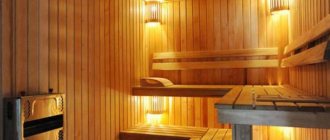
The most common option is to place the washing room next to the steam room. At the same time, you should not install a shower in a walk-through room. If the building is used all year round, it is advisable to provide the washing area with heating. It can be either autonomous or implemented during the combustion process of the furnace. For the first case, an electric heater is best suited. It is easy to use and has a low price.
It happens that the sink is also placed in another room, for example, combined with a rest room where visitors stay between visits. In this case, you can mount a shower stall in the corner or isolate the washing space with a sliding curtain.
Materials for shower equipment
When creating a shower in a bathhouse with your own hands, you should take a responsible approach to the choice of materials and equipment.
When installing pipes, preference is given to durable and lightweight polypropylene. Withstands temperatures up to +80 degrees. A polyethylene pipeline has the same advantages, but can heat up to +60 degrees. As the indicators increase, it is necessary to install reliable drainage systems. The metal is durable, but heavy and susceptible to corrosion.
A bathhouse with a shower is equipped with a set consisting of a flexible hose, a watering can with a holder and a mixer. When installing a water supply, a special tool for measuring and cutting is used, as well as a welding machine or soldering iron. The shopping list includes finishing materials, shut-off valves: taps, valves, gate valves and fittings for pipes.
Conclusion
A shower room is an optional, but pleasant addition to the bathhouse.
It gives you the opportunity to splash around in the water after a steam room if there is not enough space to install a pool. The arrangement of the room should be approached as carefully as the bathhouse as a whole. The video in this article will go into more detail about this topic.
Did you like the article? Subscribe to our Yandex.Zen channel
Ventilation and electrical systems
Ventilation in the bathhouse protects wood and the human body from damage by harmful bacteria and mold. Ventilation is divided into three types: natural, forced and combined. In the first option, the bathhouse with shower is ventilated by air entering through the window. In the second, a fan is used, and in the third, a supply and exhaust system and street air are used. In a well-built room, the supply and exhaust openings are located so that the air is distributed over a larger space when moving. When choosing a ventilation installation method, the material of the walls and the location of the building play a role. In a wooden bathhouse, the ventilation process involves windows, doors, vents in the foundation and holes in the ceiling or walls. To prevent drafts and steam from escaping, the walls are insulated by creating additional holes with valves for air removal and entry. For inflow they are made at the bottom, for outflow - at the top of the opposite wall. The minimum height is 80 cm from the floor level.
Engineering Communication
The water supply and electrical networks can be laid openly or hidden under the wall cladding. The second method is good because communications are hidden from view, making the room look more presentable. But installing such networks is more difficult, as is carrying out repair work. Another disadvantage is that if leaks occur, damage to wooden structures is likely to occur. With this method, communications are installed before the interior finishing of the bathhouse.
Open installation is good because network elements can be repaired or replaced at any time without significant expenditure of resources. In this case, communications are installed after finishing the shower walls.
Regardless of the method chosen, hot pipes must be located above cold ones, otherwise the heated air rising upward will form condensation that falls on the walls. If the latter are made of wood or covered with it, the material will soon begin to rot. The distance between the water supply and electrical cables must be at least 0.1 m, and the latter must be located higher. If communications are hidden under the casing, thermal insulation material is installed on the pipes to prevent the accumulation of condensate.
A pump must be purchased when water is supplied from a well or well, or in cases of low pressure in the system. When choosing the type of equipment, take into account how deep it is intended to supply water from sources. Water purification filters come in coarse and fine types. The former remove vegetation and sand, the latter remove silt and small debris.
Hot water for shower: heating methods
The simplest and most inexpensive option for heating water is the sun, when it is easier to do without running water. Building a warm shower is easy. It is enough to hang the tub in the morning under the scorching rays. But this is only suitable for hot summer weather. In order not to depend on solar energy and to enjoy a comfortable shower at any time, you need to choose other methods.
Warming up without power supply: oven and gas
Fans of old bathhouse traditions will appreciate stove heating. It involves the use of a remote or built-in tank heated by wood. From the container, water flows into the shower in the sauna or bathhouse.
The presence of gas on the site allows the use of a gas heater in the form of a column. Provides fast heating. Before use, it is necessary to check the premises for compliance with the rules for the operation of gas appliances.
Electric water heating
Showering in a bathhouse with water heated using electricity is done using heaters. They are divided into flow and storage.
The first type is a small device installed next to the mixer. The absence of a storage tank does not interfere with the rapid heating of cold water passing through the heating elements. The disadvantage is high energy costs. It is also worth considering the risk of fire due to poor wiring in the bathhouse building.
How to properly solder polypropylene pipes
Everything seems simple if you have experience, but soldering for the first time is scary.
It is necessary to mark the pipes before welding (see information below)
Step 1. Screw couplers to the front of the soldering iron to heat the internal or external surfaces of pipes and fittings. For showers, we recommend using Ø ¾″ pipes. The pipe is heated on the outer surfaces, the connecting elements (couplings, triangles, elbows, etc.) on the inner ones.
Preparing the soldering iron for work
Step 2. Connect the soldering iron to a 220 V network. On the body of the device there is a heating temperature regulator and two indicator lights. Green indicates that the soldering iron is ready for use, red indicates that the heating temperature is insufficient.
Turn on the soldering iron and wait until the green light comes on
Step 3. Set the temperature regulator to +250°C. Specific values do not play a big role; the degree of heating of the pipe is regulated by the holding time.
Step 4. Take the two elements to be connected and insert them each into their place in the soldering iron. Heat for approximately 5-9 seconds. The ends must fit into the heaters until they stop.
Inserting heated elements
We heat the couplings along the inner surface
This also explains why you should not use a soldering iron heating temperature table. We advise you to always set it to maximum - the pipe will warm up much faster.
Pipe heating table
Step 5. The surface of the heated plastic pipe should resemble thick sour cream. Once such softening is achieved, remove the elements simultaneously from both sides of the soldering iron.
Step 6. Connect the two heated planes together as quickly as possible, keeping them as level as possible. You need to hold it in the clamped state for 10÷15 seconds, the exact time depends on the heating temperature of the plastic. As you can see, almost all parameters and modes of pipe welding are determined not by instructions, but by the experience of the master. Experience will appear already on the second or third gluing, gain skills on unnecessary segments.
Sectional connection of PP pipes
Connecting heated elements
Selection of finishing materials for the shower
A washroom with a shower in a bathhouse in a country house or in a private house is provided at the design stage. This will avoid many problems, for example, with the drainage system. Finishing material is selected based on taste preferences. A shower in a wooden bath involves treating the walls with an antiseptic and priming with a waterproof compound. The cladding is made with natural and plastic lining. Plastic is less attractive, but is moisture and steam resistant. It is most often used for covering surfaces when installing a shower stall or a metal tray. Artificial stone and tiles are also found.
A shower room made of logs or timber is covered with waterproof plasterboard. The resulting smooth surface is covered with tiles or small mosaics. Natural materials give the room a rich look, but are the most expensive in price.
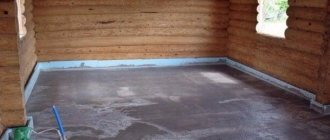
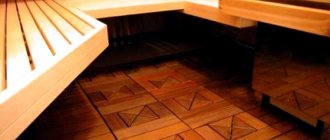
Concrete floors are better than wood floors. It does not rot, is durable and allows the use of any floor coverings, for example, porcelain stoneware. If the shower in the steam room has a wooden base, it should be protected from water. It is worth pouring a reinforced concrete screed on top. Tiling is the most convenient and advantageous option. You can take relaxing treatments right on the floor.
Bath showers are popular. With their help you can improve your health and have a good time. Contrasting douches strengthen, invigorate and relax. To get maximum pleasure, do not build a shower for a bath without water supply, ventilation and other engineering systems. They will protect your building and site from the negative effects of a humid environment, and create comfortable conditions for washing and strengthening the body.
Frame covering
For the outer cladding of the frame you can use:
- board;
- OSB;
- siding.
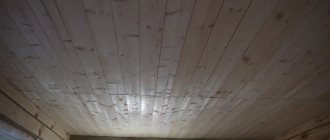
Any type of wood is suitable for interior cladding. Shelves, benches and other bathhouse interior items are made from the same material.
Wall cladding begins from the corners of the bathhouse, leaving openings for windows and doors. If all supporting elements are laid out horizontally, the seams between the material are almost invisible.