Happy owners of private houses are interested in many questions, one way or another related to construction topics. For apartment residents, renovations turn into a long-term nightmare that can significantly worsen the quality of life and require significant financial investments. For the owner of a country house, repair work never stops, so the vast majority acquire the necessary skills, so to speak, in the process.
One of the important issues that we will consider in our article is the choice of a high-quality mixture for plastering the stove. Even if you have autonomous gas or electric heating in your home, stove work may arise when designing a bathhouse, sauna, or even a fireplace, which owners love to decorate their homes with. If you have just started construction, the dimensions of refractory bricks for laying a stove are described here; the link describes how to make a mortar for laying a stove. You can also find information about which brick is best for the stove.
Advice from professionals
To ensure quality work when plastering a stove, professionals recommend:
- Proper mixing of the solution. To do this, you can take a small amount of the mixture and roll it into a ball in your palm. If cracks form on it, you need to add a little water.
- The mixture should be viscous so that it can be easily applied.
- Before starting work, all cracks must be repaired.
- To strengthen the plaster, use reinforcing mesh.
- After plastering, you cannot immediately heat the stove, otherwise the coating may crack. You need to wait until it dries completely.
For high-quality plastering of the stove, the main thing is to mix the solution correctly - it should not be too liquid or thick. Following the instructions will allow you to avoid common mistakes and get a durable and aesthetic lining for your home stove.
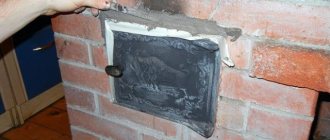
Surface preparation process
It is important to start work by treating the surface of the oven. If there is old plaster on it, it must be removed
Exposed brickwork must be perfectly clean. You can use a spatula to clean it. The surface must be cleaned carefully, avoiding sudden movements that could damage the masonry.
If cracks are found on the surface, they should be treated with special oven glue.
To treat cracks, the glue is brought to a thick sour cream state, after which the surface must be cleaned of dust using a brush
Then, it is important to moisten the same brush with water and treat the holes. Next, this defect must be treated with glue using a spatula
After all defects have been eliminated, it is necessary to apply a primer mixture to the working surface. An acrylate mixture is suitable, which is capable of penetrating deeply into the material, filling all the pores, and forming a film on the surface.
This will ensure a stronger connection between the primer and putty. The mixture should be applied with a brush and rubbed in. After this, you need to dry the oven, leaving it on for a day.
Buy heat-resistant Terracotta mixtures - the best solution to hot problems
Our company offers to buy fire-resistant Terracotta mixtures . The materials are made from high-quality non-toxic raw materials and are easy and convenient to apply to surfaces. This guarantees an impeccable result of the work as a whole. Whether it’s laying heated floors, or constructing/repairing a fireplace, stove, barbecue, it will be much more pleasant and reliable to work using modern products. Various packaging options, high-quality packaging and proven recipes will ensure economical consumption and profitability of the purchase. A wide range of models will provide individual choice. For professionals, an important point is a favorable price range combined with excellent technical parameters and ease of use. Therefore, among similar products, the Terracotta company’s products in Russia, as well as abroad, are the undoubted leader.
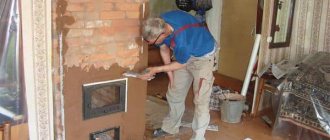
General rules for carrying out work
Before directly plastering the stove onto the work surface, the following work must be completed.
- The plaster must be stirred to achieve a homogeneous mass and the consistency of thick sour cream.
It is important to remove all contaminants from the working surface of the stove (dust, remnants of the previous plaster that were used when laying the stove). To improve the “grip of the mortar”, you need to clear the masonry seams to a depth of about fifty millimeters
Before application, it is important to heat the oven a little in order to achieve 20–25 degrees of heat; On warm walls, the plaster will lie more evenly, and an excellent level of quality will be achieved.
After all the preparatory procedures, you need to proceed to the main part:
- Additional surface cleaning.
- Treatment of cracks.
- Surface primer.
- Installation of reinforcing mesh.
- Plastering the stove
Plastering stoves with your own hands
When building a stove or creating a fireplace, you will need to decide not only on their design, but also on the facing material, mortar for fireplaces and stoves, chimney, and backing brick. A direct component of the process of creating a fireplace or stove is the solution for lining the stove or fireplace. The appearance of unlined stoves, as a rule, is not aesthetically pleasing; in addition, dust accumulates in the masonry seams, which, when the stove is heated, becomes a source of unpleasant odors. You can avoid such unpleasant consequences by plastering the stoves yourself or by covering them with decorative ceramics, tiles, glazed tiles, etc.
Composition of solutions for plastering ovens
The composition of mixtures for stoves and fireplaces may be different. To plaster the stove, you can use simple clay or complex mortars: lime-clay-sand, lime-gypsum, cement-clay-sand. The mortar for plastering the stove can be prepared either independently or purchased ready-made. Which dry mixes for the oven should you prefer in your case?
Plastering stoves with clay is the most common application. Plastering of the front surfaces of the structure begins after the brickwork has completely hardened, when the possibility of its further shrinkage is excluded. As a rule, this requires at least a month. Properly prepared composition of the mortar for plastering the stove is a guarantee of a long service life.
To prepare a clay solution, the clay must be soaked the day before work begins so that it absorbs water. The sand is pre-sifted. A mixture consisting of soaked clay, sand and water is stirred with a hammer drill with a mixing attachment until a homogeneous mass is obtained.
The amount of sand required for mixing into the clay is determined by its fat content. At a high value of this indicator, the proportion of the constituent components of the mixture is either 1/3 or 1/4. The strength of the plaster is increased by adding crushed glass fiber or asbestos fiber (0.1/0.2 share) to the clay solution.
PLEASE ATTENTION: a high-quality solution for plastering a stove should lie relatively easily on its surface and at the same time be smoothed out well
How to properly lay plaster on the surface of the stove?
The start of work is preceded by cleaning the front surface of the structure from dirt, dust and remnants of masonry mortar. To improve the adhesion of the mortar to the brickwork surface, first clear the seams to a depth of about 0.5 cm. Before lining, the oven is heated so that the mortar is applied to the warm walls.
How to prepare plaster for a stove? Below are the proportions of the most common types of plaster mixtures for plastering stoves:
The final stage is decoration.
You don’t have to create any difficulties for yourself and buy ready-made paint, the main thing is that it is designed specifically for fireplaces and stoves. Water-based dyes are suitable. If you cover the stove with one color, it will have a neat appearance. Do you want something sophisticated? Choose several colors that go well together and paint them. This work must be done before the surface is completely dry, that is, the plaster should be a little damp.
However, in the villages they don’t think about what can be used to paint the stove after plastering, but simply apply lime milk, add table salt to it, mix and apply the resulting solution to the plastered surface. The lime composition has a distinct advantage: after drying, it does not stain hands and objects.
An alternative option is to finish the surface with smooth or embossed decorative plaster.
Necessary tool
When carrying out work on plastering the stove on your own, you should prepare in advance the appropriate tools and containers for the solution:
- trowel or plaster spatula;
- falcon;
- grater and grater;
- rule;
- metal brush;
- brush or brush for wetting the surface;
- construction mixer;
- corner rail.
When preparing the solution, you will need a shovel, scoop, measuring containers, sieve, scales, and a container for mixing ingredients. It is better to control the leveling of the surface using a building level. A chisel and hammer may be useful for removing old plaster. A vacuum cleaner will help get rid of dust.
How to plaster a stove - step-by-step instructions
Plastering a stove with clay is like a whole ritual from ancient times. This is not surprising, the operating conditions of the stove are the most difficult in the house, so it needs much more attention than other furnishings. Before plastering the stove, prepare all the necessary tools and materials: a wooden grater, a container and a spatula for mixing, reinforcement materials, and mortar components.
Choosing the composition of the plaster
The question of how to plaster brick stove walls is the most important one when planning such an event. It should be said right away that the usual cement-sand mortar used for plastering the walls of a building is not suitable for stoves. It will simply crack in a very short time. For plaster, you can use a ready-made mixture intended specifically for this purpose, or prepare it yourself, but according to a special recipe.
To solve the question of what to plaster with, simple 2-3-component mixtures and complex compositions with the addition of various ingredients (fiberglass, asbestos, salts, plasticizers, etc.) can be used. The composition of the mortar also depends on the type of brick used for the construction of the stoves (fireclay, red brick, silicate varieties, etc.). Certain components added to the plaster increase its adhesion to the material.
If you decide to use ready-made materials, then you need to purchase a stove or fireplace plaster mixture. All the necessary ingredients have already been added to it, and preparation for application consists of diluting it with water in the proportion specified in the instructions. When using them, one caveat should be taken into account: their long-term storage is undesirable, since atmospheric moisture can lead to premature hardening of the mixture in the form of poorly soluble lumps.
Most often, homemade solutions for plastering stoves are prepared of the following types:
- clay;
- lime-clay;
- calcareous-sandy-clayey,
- lime-gypsum;
- cement-sand-clay.
The practice of furnace construction shows that it is precisely such compositions that are least susceptible to cracking when heated. Other additives are also introduced to improve properties.
When preparing the solution, it is important to choose the correct proportions of ingredients. Precisely selected composition allows you to easily and evenly apply a thin layer to the stove wall
In particular, a certain consistency of the composition is used as grout. The viscosity of the solution is regulated by the proportions of water, the plasticity largely depends on the amount of sand, and the more sand there is, the less elasticity of the mass.
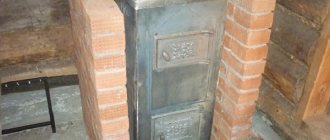
How to fix cracks in a metal structure
Often, the formation of cracks can lead to general destruction of the metal structure, especially when heated, and their early detection will help extend the life of the metal furnace.
Initially, cracks are eliminated by welding, but this is not enough: the crack can grow. To prevent this situation from arising, trap holes for cracks are created on both sides of the weld, the diameter of which must be equal to the thickness of the metal.
Special holes - catchers will delay the growth of cracks and prevent the general destruction of the metal structure
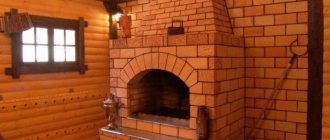
Features of the problem
Why is it recommended to plaster a brick oven? In terms of increasing the reliability of the entire structure, it is necessary to note the fact that the plastered brick is protected from the direct influence of aggressive bath factors (temperature changes, moisture, steam). The brickwork itself increases the strength and tightness of the seams. The bonding material is less susceptible to cracking. 2 important reason - improved appearance. After plastering, the stove has a smooth wall surface, which gives it neatness and makes it possible to create a specific interior.
//www.youtube.com/watch?v=kXcpeiwD3dw
Brick oven plaster has its own specific characteristics. First of all, this is due to the high temperature on the walls during its operation. The plastered layer must withstand the following influences: prolonged heating and open flame, temperature changes, mechanical influences, smoke and steam, oil splashes during cooking. As the oven heats up, the brickwork tends to expand significantly, and therefore the plaster solution for ovens must have increased elasticity in order to withstand such loads without cracking.
One of the functions of the stove is to heat the room. This condition dictates one more requirement for stove plaster - good thermal conductivity. If additional significant energy is required to heat this layer, then the efficiency of the entire structure will significantly decrease. In addition, when heated, the material used for plaster should not release substances harmful to the human body.
What solutions are used when laying individual brick oven elements?
The choice of solution for work must be carried out depending on which part of the stove it will be used for laying. Using the diagram below, we will consider each of them in detail.
General structural diagram of a standard furnace masonry
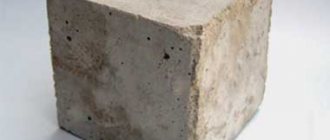
- The reinforced concrete base of the furnace foundation, which is also called the pillow or root. It is manufactured using standard technology, however, in order to avoid unpleasant consequences, it must be physically separated from the foundation of the house itself. The need to comply with this condition is explained by differences in the degree of shrinkage of the building and the furnace in it.
- Waterproofing layer. To create it, roofing material is perfect, which needs to be laid on top of the foundation in several layers.
- Actually, the stove foundation itself. Since it is not exposed to powerful thermal effects, it does not require the use of particularly heat-resistant mixtures when laying. At the same time, the reliability of the entire structure depends on the quality of assembly of this furnace element. There are cases when, due to errors in laying the foundation, it was necessary to completely disassemble the stove and redo it in a new way. Complex, three- or more-component cement-lime mixtures are used for work. Well, red solid brick is best suited here as the main building material.
- A layer of thermal insulation with a fire protection area. It is made from a mineral cardboard or asbestos sheet, on which a sheet of iron is placed on top, covering the entire structure with a finishing layer of felt cloth soaked in so-called clay milk (this is a solution of very thinly diluted clay; we will describe how to prepare it below).
- A heat exchanger that accumulates the energy released during the combustion of wood. It is one of the main parts of the so-called furnace body. During kindling, it rarely heats up above six hundred degrees, but is subject to very active influence from the smoke and other gaseous substances released during combustion. It is not uncommon for destructive acid condensate to settle on the inner surface of heat-storing masonry. The brick used here is special: stove type, M150 grade, solid red ceramic. The bricks are fastened together with a simple one-component clay solution. It should be noted that the term “simple” refers only to the composition of the building mixture. Its preparation is a rather labor-intensive process, the features of which we will consider below.
- The hot part of the stove body is also called the combustion chamber. It is subject to moderate chemical influence from gases, but heats up to very high temperatures, up to 1200 degrees. For masonry, so-called fireclay bricks and fireproof clay-fireclay mortar are used.
- The source of the chimney. It is made from the same brick and fastened with the same mortar specified in point No. 5, since this element of the furnace is subject to similar temperature and chemical influences as the heat-accumulating part of its body.
- "Fluffing" of the stove chimney. Its task is to create a flexible mechanical connection connecting the ceiling and the chimney itself. Allows you to avoid a situation where ceiling subsidence is possible. The fluff can be repaired separately; it does not require complete disassembly of the entire structure. The bricks used for masonry are standard stove bricks, and lime-type mortar is ideal for laying this part of the stove.
- A fireproof cutting is a special metal box filled with a non-flammable heat-insulating substance.
- Chimney pipe. This element is susceptible to wind and precipitation. It heats up weakly, so the pipe is laid from standard red brick. However, for greater reliability and heat resistance, they use lime mortar.
- Fluffing the chimney pipe (11). It is made from the same materials that are used when laying the main part of the pipe.
Purchased heat-resistant mixtures
Ready-made stove plaster can also be used for finishing. There are many varieties of such mixtures. But the most popular are “Pechnik” and “Terracotta”. The advantage of such plasters in comparison with those prepared by hand is a high degree of heat resistance. “Pechnik” and “Terracotta” are able to withstand temperatures up to 200 degrees.
Whatever mixture is used for plastering the stove, purchased or homemade, there is no need to prepare a large amount of it at once. The volume of a single serving should not exceed 8-10 liters. In any case, the solution needs to be developed in a maximum of 2-2.5 hours.
Heat-resistant putties and mastics
In addition to fire-resistant plaster, there are also fire-resistant putties and mastics. They are also used quite actively. It doesn’t hurt to clearly know the difference between these three types of finishing materials.
Unlike plaster, the basic putty composition uses a filler of a finer fraction. Large fractions contained in any plaster make it impossible to apply it in a thin layer. Therefore, it is not suitable for filling cracks and small potholes, or leveling small irregularities. For these purposes, heat-resistant putty is used.
Fire-resistant mastic is used mainly not for leveling, but simply for insulating ceilings and walls. Relatively speaking, putty is puttied, and mastics are simply spread on the wall (that’s why they are sometimes called coatings).
The thickness of the mastic layer usually does not exceed 1 cm, while the optimal thickness of the putty and plaster layer is 2-4 cm. Also, fire-retardant sealing mastic is characterized by the fact that it does not increase in size when heated.
Fire-resistant mastics and putties can differ significantly in their properties, composition and purpose. In the assortment of specialized stores, customers can find, for example, putty for metal, concrete, wood, non-flammable, fire-resistant mastic for cables, and so on.
Finishing stoves and fireplaces after plastering
How to paint a plastered stove?
In the future, the plastered surface can simply be whitewashed with water-based emulsion, lime, chalk, painted with heat-resistant paint, colored varnish and decorated with stucco. Since oil solutions darken faster when exposed to temperature, it is better to use pentaphthalic paint or nitro enamel.
Please note that all heat-resistant compounds have a very strong odor and release toxic substances when dry, so it is better to work with them in a respirator. Such compositions take longer to dry than conventional ones.
Decorative plaster
As decorative materials, you can use mineral compositions such as Bayramix, Misan, Ortner, etc. The surface of a stove or fireplace, finished with stucco or a rough decorative primer, and then treated with latex water-dispersed dyes, looks very original.
Another interesting option is to add brick flour to the water-based emulsion and then coat it with colorless heat-resistant varnish. For decoration, special plastic stamps for plaster are also used, with the help of which all kinds of embossing are made on the surface. Material costs with this method are minimal, and a stove or fireplace finished in this way looks simply great.
Tiles and tiles
As mentioned above, ceramic tiles can only be glued to those walls of fireplaces and stoves that do not heat up very much, for example, to a fireplace chimney. Even heat-resistant tile adhesive will not last long on hot surfaces.
Tiles have been used for hot stove walls for centuries. This is a special ceramic tile with a rumpa - a frame on the back side, which is filled with clay or sand. In the walls of the pump there are holes for attaching the tile to the stove masonry with wire or pins.
This type of finishing has many advantages:
- The thermal cushion of the pump allows you to retain heat longer without additional heating;
- protection from burns and fire at home;
- reliable mechanical fastening will not allow the tiles to fall off;
- a beautiful front side will turn the stove from a heating device into a home decoration;
- The surface covered with enamel or glaze is easy to clean.
Tiles are not only a functional solution for cladding, but also a way to create a unique interior for your home.
So, finishing stoves and fireplaces with your own hands is not such a difficult process. If the sequence of work is followed and the correct choice of mixture for plastering and final finishing, such a structure can be turned into an original and unusual part of the interior.
Decorative finishing
The decorative design of the stove walls is carried out in accordance with the taste preferences of the owner. An evenly plastered surface can simply be whitewashed; by the way, whitewashing is a traditional finishing method that has been used since ancient times. The whitewashed surface was often painted with imported paints, giving the room originality and emphasizing national traditions. In most cases, the ornament was selected according to local traditions.
Modern technologies and materials make it possible to create an imitation of natural stone or a uniform relief structure on the surface of the stove wall.
Quite often, craftsmen with a wide imagination decorate stoves with elements of three-dimensional designs, using various available means for this purpose. In particular, we are talking about plastic film, brushes, brushes and other materials and objects.
Creative people create relief compositions from decorative plaster, allowing them to protrude slightly beyond the stove walls. Subsequently, all this is covered with paints. Moreover, applying the coloring composition to wet decorative plaster promotes deeper penetration and increases the service life of the decorative finish.
In some cases, the dried surface is additionally painted, which allows for a brighter design.
Terracotta or ceramic tiles can be used as decorative finishing for stove walls. The additional purchase of corner finishing elements makes the installation of tiles and decoration simpler and more convenient, allowing you to obtain neat and aesthetic corners. The tiles are installed using a special cement-based adhesive composition, which is resistant to temperature changes.
Furnace painting
So, now you know how to plaster a stove so it doesn’t crack. Of course, after the applied solution has dried, its surface must also be whitened. It is best to use a milk-chalk mixture for this purpose. This whitewash tolerates temperature changes well and also does not get dirty. In order to prepare it, you just need to mix 1 kg of crushed chalk with 2 liters of milk. You can also paint the stove with regular lime. This finish will also not deteriorate due to high temperatures. In order for the lime to stick better to a hot surface, you can add a little table salt (35 g per 1 kg).
You cannot paint stoves and fireplaces using oil paint. The drying oil contained in such paints will begin to evaporate at high temperatures, and an unpleasant odor will appear in the room.
What are the features of mixtures for Terracotta stoves?
Construction heat-resistant mixtures have excellent technical characteristics. Branded packaging ensures safety, ease of transportation and storage. The mixtures are intended for use on objects of any size and level of complexity.
The quality and environmental friendliness of the products are confirmed by certificates and meet high Russian and international standards. The products are used for various surfaces exposed to heat, indoors or outdoors; heated floors, fireplaces, stoves, barbecues and more.
The line includes mixtures with heat resistance from 400 to 1780 degrees Celsius. All of them have excellent adhesion, are practical and easy to use, absolutely safe for people and the environment, and fireproof. To prepare the solution, the masonry mixture is diluted with a certain amount of water specified in the manufacturer’s recommendations. You can use a construction mixer to mix the mortar in large quantities. In small volumes, the solution can be easily prepared by hand.
Preparation of the solution
If you want to save money, make your own mortar for plastering stoves: the proportions and preparation technology are below.
Simple solution
Prepare a simple mixture like this: sift the sand, mix it with clay, pour it into a container, add water and stir with a mixer until creamy.
The proportions of clay and sand for plastering stoves depend on the fat content of the clay. If it is oily, add 3-4 parts of sand to one part. To determine the fat content of clay, put it in a bucket, pour in water and at the same time stir until creamy. Then scoop up a little with a board. If the clay covers it by 1 mm, it means it is not greasy. If it’s in a thick layer, it’s oily.
How to cover up cracks?
You can cover the stove with a purchased mixture or a solution you prepare yourself. Further about the features of the options.
Sand-clay mixture
Putty made of clay and sand is the most accessible and inexpensive option. Scheme for preparing the mixture:
- you need to take clay and fill it with water in a ratio of 1:3; after this you need to leave the mixture for at least a day;
- The clay should be thoroughly mixed, adding liquid from time to time; after kneading, strain with a fine-mesh sieve and tincture again (several hours);
- after the next infusion, you need to drain the water and make sure that the mass has a creamy consistency;
- you need to mix clay and sand - first in equal proportions.
Readiness is determined using an object used to mix the solution. If too much clay sticks to it, add a little sand. As a result, the ratio of components can be from 1:1 to 1:2.5. The composition can be considered ready when a small amount of the viscous component remains on the stick.
This recipe is approximate as clays can vary greatly. It is best to rely not on a stick with stuck clay, but on the result of experiments. Experienced craftsmen make grout with different compositions. After this, several different types of cakes are dried in a place free from sun and wind. Those pieces that are not cracked are dropped from a meter height. “Surviving” flatbreads demonstrate the optimal ratio of components.
Fireclay putty
Bag of fireclay clay
A slightly more expensive, but also more effective option. Fireclay clay is very heat-resistant and durable. Most often, fireclay is used for stove repairs. The material is sold by construction stores. Before sealing the structure, purchased clay is infused in water for a couple of days.
Oven adhesive
If you need the best option, use a special mixture for ovens. The solution consists of fire-resistant cement and fireclay powder. There are two main types of glue you can buy in supermarkets - viscous and hard. If you are looking for something to cover up small cracks on the stove, purchase the first type. Solid mixtures are used for plastering.
The main advantage of factory materials is the optimal ratio of components and very thorough mixing. It is impossible to achieve such quality at home. In addition, there is no need to waste time preparing grout. Another advantage of ready-made compositions is quick setting.
An alternative option is oven grout.
Factory solutions are good for everyone, except for the price. There is another opportunity to save money - use putty prepared according to the following recipe:
- the clay is broken into small lumps and infused in water for about 12 hours;
- sand is added to the mixture of water and clay, after which the components are thoroughly mixed;
- during the mixing process, crushed straw is added to the composition from time to time, which reinforces the solution;
- After the mixture becomes homogeneous, salt is added to it (about a pack).
The ratio of sand and clay is 1:4. You need about 10-15 kg of straw per bucket of clay. It is easy to see that this is a modified version of the sand-clay mixture described above.
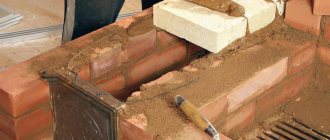
Covering
The last layer of plaster is necessary in order to completely level the surface of the stove. The primer needs to be moistened quite generously before applying it. The solution in this case should be used even less thick than for the first two layers. The mixture should fill absolutely all cracks and irregularities remaining on the surface. The thickness of the covering layer can be from 2 to 5 mm. It is impossible to level the stove in planes with plaster. Ultimately, the total thickness of the finishing layer should be no more than 1-1.5 cm. When laying out brick stoves for your home with your own hands, this should be kept in mind. When performing this work, you should initially try to make the walls as even as possible.
How to putty correctly
The service life depends not only on the quality of the purchased putty, but also on how technologically correctly the working surface is prepared, on compliance with the temperature regime and correct application.
Preparing for work
Having visually determined the degree of wear, they decide: to clean off the multi-layer coating down to the brick or make cosmetic repairs. If the structure is old, then remove the plaster, clean the seams between the bricks with a metal brush or a hammer with a chisel 1-1.5 cm deep, after which dust and sand are swept away with a stiff brush.
First of all, it is necessary to remove all dirt and dust from the working surface.
Before applying the finishing material, it is recommended to prime the base, but not with ordinary primer, but with heat-resistant one. Instead of a purchased solution, you can use a homemade clay-sand mixture. Before applying it, the surface is generously moistened with water.
If the structure is old, with curved horizontals and verticals, then before filling it is worth applying a layer of plaster using beacons so that when filling the thickness does not exceed 5 mm.
Although manufacturers indicate the ability to apply the mixture up to 3 cm, the thicker the layer, the greater the likelihood of its rapid destruction.
Mix the solution immediately before application. They start with a starting mixture, in which the size of the fractions is slightly larger than in the finishing mixture. But a universal composition will also work. We must remember that puttying in one layer is not limited to. In any case, the number of layers should not be less than 2. Each subsequent layer is applied as the previous one dries.
Be sure to wait until the previous layer has dried before applying the next one.
Temperature
The work is carried out at above-zero temperatures of +5 ºС - +25 ºС. The mixture is selected based on its characteristics: the higher the heat resistance temperature is indicated, the better the quality of the product, and the coating will last a long time without cracking or crumbling.
The temperature of the firebox depends on the amount of firewood or coal and the type of wood. Sometimes it exceeds the 1000-degree barrier. It is worth considering whether you need to purchase products where the recommended heating temperature is up to 400 ºС. The stove itself and the combustion door heat up to 600 ºС, respectively, the surfaces adjacent to them are not much colder.
Temperature of the outer lining of the furnace
When puttying, the temperature is evenly distributed over the entire surface and is 45-70 degrees Celsius. With strong heating - up to 85-90 ºС, and above the hob - 110-130 ºС.
What tools will you need?
The first starting layer is applied with a 10-centimeter spatula; it is easier for them to fill the gaps between the bricks. The second, leveling, is applied with a wide spatula. An angle spatula is also necessary. The mixture is diluted in a small container, stirred with an electric drill with a whisk attachment at medium speed. A second container will be needed for washing tools.
Surface Treatment Tools
For priming you will need a wide brush and a priming tray. Beacons, reinforcing mesh and self-tapping screws are needed for old rickety structures. Some craftsmen use burlap for puttying.
Reinforcement
The mixture will lie better if the oven is pre-heated, but not too much. It is enough for the outer wall to warm up to 30-50 degrees. Then proceed to reinforcement, which is done in several ways:
| 1. Drive the screws between the seams, but not completely, but so that the head protrudes 1-1.5 cm from the brickwork. | |
| 2. Take a metal or fiberglass mesh with a maximum mesh size of 1 cm and attach it to the outside of the oven with self-tapping screws, under the head of which a washer is inserted. |
The latter option is more suitable for relatively flat structures. If the differences between the bricks are large, then use the first one.
To prevent the appearance of cracks, burlap is sometimes used, which is glued instead of reinforced mesh, after having been moistened in a solution of liquid clay.
Applying the composition to the stove or fireplace
Apply the solution in a continuous, uniform, thin layer until it is viable and plastic. In mixtures with gypsum, the hardening time is 10-15 minutes. Manufacturers sometimes overestimate the viability of the mixture. If the solution could not be leveled in time, then the working surface is generously moistened with water from a spray gun and the problem area is rubbed.
The putty is applied in a continuous layer without gaps
The first layer is applied horizontally, the second - vertically after the first has dried. When using beacons, you must remember to remove them later and cover the grooves with a similar mixture.