When considering options for acceptable solutions for fastening bricks in fireboxes and other parts of stoves and fireplaces, it is important to understand that we are talking not only about the beauty and strength of the structure, but above all about safety.
A good refractory mixture for masonry stoves prevents the formation of cracks during repeated heating with any type of fuel, cooling, mechanical loads from cast iron grates, doors, and ash containers. Accordingly, no harmful combustion products will enter the premises, residents can enjoy the warmth with complete peace of mind and confidence in safety.
Masonry mortars for individual furnace structures
General requirements for the solution are:
- heat resistance – ensures the safety and functionality of the oven;
- elasticity is a condition for good crack resistance of furnace walls.
Based on the type of binders, all oven mixtures are divided into:
- cement;
- gypsum;
- limestone;
- mixed (if they contain more than one binder).
Furnace foundation. For its construction, lime or cement-lime mortars are used. If there is excessive moisture in the base under the foundation, cement mortar should be preferred; it is not afraid of moisture.
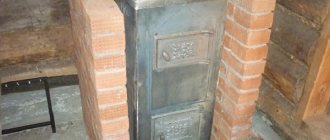
Chimney. For the part that protrudes above the roof, use lime or lime-gypsum mortar. If it is necessary to speed up the setting of the solution, then gypsum is added to it. If the priority is the strength of the masonry, then cement is added.
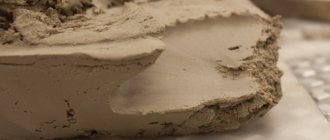
Furnace body. You can't do without clay here. The solution consists of clay, sand and water. The quality of the solution is greatly influenced by the fat content of the clay.
Additional uses of fireclay clay
Fireclay clay contains the elements sodium, magnesium and iron. But the main part is made up of highly dispersed hydroaluminosilicates.
Very often, refractory clay is used to make decorative elements. These can be tiles, figurines and even household dishes. The plasticity of such clay is given by special components added to the composition.
Fireclay clay can be used to prepare high-quality mortar for laying stoves and plastering various surfaces. When deciding how to plaster a stove with fireclay clay, strict adherence to all technologies allows you to independently complete the entire process from preparing the solution to applying it to the surface.
1. fireclay powder according to TU 1522-009-001190495-99; 2. sand for construction work according to GOST 8736-93; 3. molding sand according to GOST 2138-91
Laying the stove yourself - laying fireclay. Fireproof mortar BS-17, for wood fireboxes. Mixture for fireclay bricks. Photo.
We lay fireclay bricks on fireclay clay, how to lay fireclay correctly, don’t make mistakes, learn from mine. Ordering the oven. From 1 to 29 row.
Fireproof mixture for laying wood-burning fireplaces and barbecues. The temperature of burning wood is up to 600 degrees, clays are sintered at temperatures of 750 degrees and above. The BS-17 mixture solves this problem.
A correctly fired brick makes a loud sound when dropped and crumbles into large pieces. If the sound is dull or the pieces are small, the batch is not suitable for you.
If you have the opportunity to lay brick in your private home, you need to carefully consider the videos presented on this topic.
Fireclay bricks must be marked with the letter Ш.
Fireclay clay is soaked for 10–12 hours and stirred periodically
Kiln brick has only three fired sides
Contains 70% fireclay and 30% fire clay
The soaked clay must be ground through a sieve.
While watching these videos, you have the opportunity to gain useful information from those who are actually professionals in this field.
There are ready-made repair solutions that contain all the necessary components in the required proportions. You can also prepare the composition yourself.
Below are the types of solutions.
- Clay-sand. The mixtures have average heat resistance and high gas density and are not used outdoors. Their preparation requires special skills. They are used for laying the heat-accumulating part of the stove and the initial part of the chimney.
- Cement-clay. The solutions are highly durable. Used for laying the heat-accumulating part of the stove and the base of the chimney.
- Cement. The mixtures have high strength and low gas density. Used for laying foundations.
- Cement-lime. Solutions have higher strength, but have a low gas density. They are used for laying the foundation of a stove, fireplace, part of the chimney that rests on the ceiling, the main and final parts of the chimney.
- Lime-clay. The mixtures are durable and have an average gas density. They are used for laying the heat-accumulating part of the stove and the base of the chimney.
- Fireclay. The solutions are endowed with high heat resistance and strength. Used for laying the combustion chamber of a stove or fireplace.
- Calcareous. Heat resistance, fire resistance and gas density are below average. The compositions can be used outdoors. Used for laying the foundation of stoves and fireplaces.
In addition to the main components, the compositions may contain plasticizers, salt and other additives that improve the quality of the material, making it more plastic, durable, heat-resistant, airtight, and resistant to high-temperature environments. The purpose of the composition is determined by the quantitative content of a particular component.
Below are the most common ready-made formulations.
- "Terracotta". The heat-resistant mixture is environmentally friendly, durable and plastic. The composition includes components such as kaolin clay, sand, fireclay. The maximum operating temperature of the material is 1300 degrees above zero. According to reviews on the Internet, the solution has high strength, reliability, ductility, uniformity and ease of use. However, there are opinions that the mixture must be sifted, since large grains of sand are found in the composition. There are identical packages with a composition that may differ slightly, for example, there is more clay present. It is also noted that it is difficult to work with dry bricks and it is better to use soaked ones.
- "Stove maker." A heat-resistant mixture based on cement and clay is characterized by fire resistance, strength and high water-retaining properties. The maximum operating temperature of the material is 1350 degrees above zero. Among the reviews on the Internet there are both positive and negative opinions. The advantages include high strength, reliability, heat resistance and ease of use. Among the disadvantages, users notice high consumption of material, rapid hardening and high cost.
- "Emelya". The mixture based on kaolin clay contains additional components that increase the strength, adhesion and ductility of the material. The solution is also characterized by heat resistance, moisture resistance and odorlessness. The permissible operating temperature of the material is no more than 900 degrees above zero. Positive opinions include heat resistance, low odor and ease of use. Negative reviews include the low strength of the material and lack of moisture resistance.
- "Vetonit." The clay-based mixture is heat-resistant and durable. The composition also contains cement, sand, and additional additives that improve the quality of the solution. Not suitable for laying ceramic bricks. Withstands temperatures up to 1200 degrees above zero. Positive reviews include good durability, ease of use and high quality products. Among the negative aspects is the slight flowability of the material after drying.
- "Borovichi". The clay mixture contains quartz and molding sand. The solution has plasticity and heat resistance. The composition is used for laying red brick. The operating temperature of the material should not exceed 850 degrees. User reviews indicate that the solution is durable, strong and of high quality. Among the negative aspects, there is a lack of plasticity.
It should be noted that to obtain a high-quality solution, you must strictly follow the instructions for use. Any deviations can lead to undesirable results in the form of heterogeneity of the mixture and its rapid hardening. In order for the mixture to maintain its strength properties for a long time, it must be used for its intended purpose.
Therefore, before using any composition, you should consult a specialist.
- Clay. The natural element contains aluminum, silicon, sand and other components. The color range is very diverse. The main characteristic of clay is its fat content - it determines properties such as strength, gas density and adhesion.
- Cement. Mineral powder is characterized by high strength properties. The material is obtained from clinker by grinding it. Then minerals and gypsum are added. When laying stoves, Portland cement is often used, which is obtained by firing - this method improves quality and performance characteristics.
- Lime. During the production process, building materials are fired at high temperatures. Lime does not contain any chemical additives, therefore it is considered an environmentally friendly substance. It contains carbonates and minerals. When laying stoves or fireplaces, lime paste is used. A dense mass is obtained by slaking lime in water.
- Chamotte. Refractory material is obtained using deep firing. It contains components such as high-alumina clay, zirconium, and garnet.
The main component of fireclay clay mortar is burnt kaolin (fireclay). Kaolin is a natural clay, sedimentary rock. This is a very viscous, plastic material.
Kaolin clay consists of kaolinite. The chemical formula of this mineral is Al4[Si4O10](OH)8. Clay contains impurities:
- oxides of potassium, magnesium, calcium, sodium;
- hydroxides of iron, titanium and their sulfides.
Kaolinite is fired at a temperature of 1300-1850 degrees Celsius. When heated, bound water is removed from the mineral formula and fireclay is obtained. During the beneficiation and roasting process, sulfides and hydroxides of titanium and iron are removed.
The fired mass is partially sintered and loses its plasticity; after heat treatment, the material acquires its main quality - fire resistance. Pieces of the resulting fireclay are crushed to a finely dispersed state and to crushed stone with a fragment size of 0.5-2.5 mm. Depending on the firing technology, two types of fireclay are obtained:
- highly annealed (water absorption - from 2 to 10% water);
- low-annealed (water absorption - up to 25% water).
Reference. Regular clay contains not only kaolinite, but also other clay minerals. The amount of constitutional water reaches 14%. The low (compared to fireclay) heat resistance of ordinary clays is associated with their heterogeneous composition and a large amount of bound water.
Mixing and quality control
First, clay is poured into the trough. It should be filled with water in a small volume. The clay is left for a period of six hours to two days to soak it. During this time it is stirred. For example, you can put on rubber shoes and trample the clay. Water should be taken 1/4 of the available volume of raw materials. Next, sifted sand is added. The entire mixture is mixed with a shovel. You can check the consistency by the behavior of the mass. If the solution slides off the shovel slowly, then mixing can be completed. To determine plasticity, you should mold a small flagellum 20 cm long and 1.5 cm thick. It should be connected around a five-centimeter wooden blank. The flagellum should stretch evenly. If it is torn, then the ends should be sharp. If there are no cracks on the bend, then the solution is too greasy. Accordingly, in the presence of numerous breaks, the mass is “lean”. In the second case, clay should be added, and in the first, sand. As a result, you need to get several small cracks on the bend.
Advantages of modeling clay
You can watch a video on how to make clay with your own hands. This will provide some benefits:
- a person clearly sees in what sequence the craft is made;
- there is an opportunity to familiarize yourself in detail with each stage of the production process;
- in each instruction the number of necessary elements is calculated in advance;
- a person gets the opportunity to watch a video of the production process several times and see the final result.
Using video lessons allows you to independently learn how to prepare the desired type of clay and sculpt the desired craft.
A person has the opportunity to familiarize himself in advance with the list of necessary tools and possible pitfalls.
Having studied the technology in detail, you can begin baking your craft and applying appropriate painting to it.
As a result, you get the desired craft, which can be used to decorate your home interior or as a gift. As a bonus, a person gets a lot of pleasure and saves on the family budget!
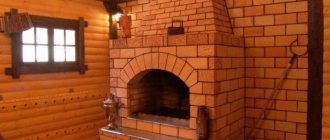
The main options for mixtures for laying a fireplace
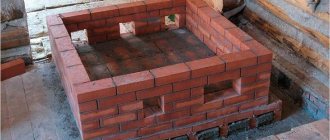
It is necessary to understand that the construction process involves three main stages:
- foundation preparation:
- masonry of the main mass;
- external finishing.
The corresponding stage will require a different mixture, although universal options can be used.
To fill the foundation, you need a concrete solution: take three parts sand to one part cement and dilute it with water until it looks like wet soil. You can add fine crushed stone.
This solution is not sold ready-made; it must be prepared immediately before pouring the base. The setting of the solution will begin in half an hour, and final hardening after a day. Next, you can proceed directly to laying brick or stone.
This process requires a fire-resistant masonry mixture, which will contain fireclay - a special type of heat-resistant clay. You can buy it ready-made and dilute it with water to the desired consistency, or you can make it yourself, which will save money, but will require more time and responsibility.
Preparation of mortar for plastering can be done using lime. This option is quite widespread. Components:
- lime;
- water;
- gypsum or cement.
The lime must be carefully sifted so that there are no stones or large compactions, since such inclusions will not be able to completely dissolve, and when dry they will “shoot”, which will negatively affect the final result.
Cement or gypsum are added to make the plaster more durable, but you can do without them. First, mix the dry ingredients, then add water in small portions. The lime will begin to slake as it dissolves.
The consistency should be like thick sour cream; if you get a liquid solution, you should add a dry component. During the cooking process, it is necessary to thoroughly mix the ingredients so that the hardening process does not begin. Once ready, you can start plastering.
How to choose quality clay
Types of plaster
Fireclay clay called “Kaolin” and ready-made mixtures are sold in construction stores. There are good reviews about both Russian and foreign manufacturers of this heat-resistant material. The best is considered to be fireclay produced at Western European enterprises.
When choosing materials, pay attention to the year of production and its quality. A high-quality mixture and clay do not contain particles exceeding the fraction size indicated on the packaging.
The mixture for preparing the solution should not contain crushed stone or sand larger than 2.5 mm.
The letter “U” on the package indicates that the fireclay is made from recycled, recycled material. The letter “Ш” means that the material has not been recycled, it is better suited for laying the firebox.
Construction materials are stored in specially equipped warehouses. If fireclay is stored in a dry room, in sealed bags, at a temperature from plus 40 to minus 40 degrees, then the shelf life of mixtures and clays is unlimited. Long-term storage (more than three years) in conditions of high humidity will lead to deterioration of the properties of the material due to moisture saturation.
Rules for preparing and applying ready-made mixtures
The advantage of purchased formulations is the ease of mixing the solution. To be able to prepare it, you will need a container of the appropriate volume and, without fail, a mixer or an electric drill with an attachment. The fact is that manually preparing a solution requires a certain amount of physical effort, and to make the work easier, more water is often added to it than it should be. As a result, there is a loss of quality of the finished mixture.
Preparation of the solution consists of pouring the dry mixture into warm water and stirring the mass until the lumps are completely dissolved. The consistency should be similar to thick sour cream. The solution is left for an hour, after which it is thoroughly mixed again.
Dry mixtures for laying fireplaces and stoves have water-retaining ability, so the bricks do not need to be pre-wetted. Firstly, it saves time, and secondly, it significantly reduces the period required to dry the masonry. The good elasticity of the solution, obtained through plasticizing additives, is reflected in the ability to make thin seams (2-4mm) and, as a result:
- on economical consumption of bulk material;
- on the attractive appearance of stove and fireplace walls;
- in the absence of cracks, which often appear in a thick masonry layer.
Heat-resistant compounds should be worked at an ambient temperature of no lower than +10 and no higher than +35 degrees. The solution can be applied in a layer of 10-12mm. Interestingly, seams made of fireclay clay mixture during the operation of the furnace acquire additional strength under the influence of heat.
Preparation of composition for laying fireclay bricks
A fireproof masonry mixture prepared on the basis of fireclay tolerates fairly high temperatures. Here you can use coal without any problems when heating, without worrying about the masonry. The preparation should be taken most carefully and responsibly, since if the components are calculated incorrectly or the manufacturing sequence is violated, the result may not be a completely suitable mixture for installation.
- We put the fireclay clay in a bucket and fill it with water so that it is not visible and leave it to infuse for about 12-72 hours. You will need to stir the soaked mixture from time to time.
- Then this clay will need to be rubbed through a sieve. It is best when the cell does not exceed 3x3 mm. Using the same sieve, you need to pass the sand and add it to the clay. Many experts consider the best ratio for masonry: 2 parts sand to 1 part clay. The dry composition of clay and sand must be mixed until smooth, and after that add water.
Attention: In order for the masonry composition to come out as good as possible, it must be constantly stirred when adding water. In this case, water should be added continuously, but in a small stream.
When the mixture becomes creamy, stop adding water. It is at this step that it is best to add salt to the solution.
- A regular bucket of mixture requires about 150 grams of salt. Salt gives the solution better strength. Then add about half a trowel of cement - it will strengthen the composition. In some cases, mixing with liquid glass occurs.
- A correctly prepared solution will flow down the shovel in an even layer, while an incorrect one will spread strongly or even become a lump. This mixture is the optimal choice for filling voids.
- The approximate amount of mortar for laying one hundred bricks is two buckets. In the case of laying out a Russian stove, the quantity must be increased by about twenty percent due to the specifics of the masonry.
A fireproof mixture is used for the fireplace and stove. By the way, the smaller the fraction of components, the higher quality the composition will be.
How to save on masonry materials?
The answer to this question would seem to be quite obvious: it is necessary to make maximum use of available materials, which can be obtained for free right at the site of construction of the furnace. In our case, we can independently obtain the following components: clay, sand and water. But, as practice shows, in reality everything is far from so simple. You can’t just take any water, mix it with the first available sand and clay, and as a result get a good quality mixture for masonry. A number of serious requirements are put forward for each component for creating a stove mortar. Let's learn more about each of them and learn how to select all the necessary components.
How to distinguish high-quality clay suitable for laying a furnace from other minerals?
Quite often, broken clay can be purchased cheaply from local stove makers, but we do not recommend that you take the easy route. Such material is usually heavily contaminated with organic impurities. Subsequently, they will rot and decompose, worsening the consistency of the mixture and the quality of the finished joints. It is much more profitable to find good clay in the surrounding area and dig it yourself. The difficulty lies only in learning to distinguish high-quality deposits from contaminated ones.
Clay is essentially a mixture of aluminum oxide Al2O3 and silicon oxide SiO2 (in simple terms, sand). The main determining parameter for clay is its fat content. In turn, the strength of its structure, plasticity, adhesiveness (ability to stick to other surfaces), hygroscopicity and even gas tightness will directly depend on it. Typically, the fat content of clay containing 62 percent aluminum oxide and 38 percent sand is taken to be 100%, and the fat content of pure sand without impurities is taken as the zero reference point - 0%. To mix the mortar for laying the stove, we will need clay with average fat content, because seams made from material with too high a fat content will crack during drying. “Low-fat”, or as it is also called, “skinny” clay is also not durable.
Clay deposits of various types
Clay has several fossil twins that are often confused with it. However, furnace work with other mineral materials is impossible, so it is important to be able to distinguish them from what we need.
Shale and marl. The material is a brittle rocky rock. It lies in horizontally arranged layers that are visible to the eye and have rounded edges. In addition, if you take a sample of shale and break it, the shale structure will be clearly visible on the resulting section.
Appearance of shale
The greatest difficulty in identification is caused by bentonite, also known as bentonite clay ( bentoclay ). This is a valuable mineral resource, but it is completely unsuitable for use in the furnace business. Sometimes bentonite is found in bright colors, virtually identical in appearance to the clay we need.
Bentonite clay, consisting of sodium-calcium compounds, montmorillonite and other impurities, has found its use in pharmacology, medicine, perfume production, winemaking and even in mining. The uniqueness of this mineral compound lies in its ability to absorb moisture. Bentonite saturated with water can increase in volume by one and a half dozen times without consequences, turning into a gel-like state. But, unfortunately, it does not have the properties of ordinary clay, such as fire resistance, gas tightness and heat resistance. It is quite simple to distinguish benthoclay from the building material we need. It is enough to take a small test sample and place it in a glass filled with water. After a short period of time, bentonite will absorb moisture and noticeably increase in size. After waiting a sufficient period, you will be able to witness the transformation of the sample into a bentonite gel, which looks like a jelly, somewhat similar to jellied meat. Clay in water will not turn into anything like that.
Appearance of bentonite clay
In the figure below you can see a schematic cross-section of the soil structure characteristic of our country. Clay located in the upper layers of the earth is highly contaminated with organic impurities. On top, the main layer of clay deposits is covered with so-called loam - a layer of soil with a significant admixture of alumina and sand. In the diagram, loam is indicated in yellow. Actually, the main layer of clay has uneven fat content: at the top it is minimal and grows as it goes deeper into the soil.
Layout of clay layers
We will determine the fat content of clay using a special test. Raw materials for analysis must be collected after passing through a layer of loam. In this situation - starting from five meters from the surface of the earth.
The clay test itself is very simple: we pick up a lump of material the size of half a fist. We wet our hands with water and begin to knead it like plasticine, gradually giving the sample the shape of a ball.
Test ball rolled from clay
After the ball is ready, we begin to slowly press it with two flat boards on both sides exactly until the first cracks form. If you managed to compress the ball by at least a third of its diameter, then such clay is quite suitable for our tasks. We take about five more kilograms of material in a bucket and take it home for further tests, which we will talk about later.
Testing a clay sample using boards
How to find high-quality water used in mortars for masonry stoves
It is necessary first of all to check the quality indicators of the water that we plan to use to create the stove solution. Only so-called “soft” water, or at least water with medium hardness, is suitable for work. Hardness is measured in units called German degrees. One such degree means that each liter of water being tested contains 20 milligrams of calcium and magnesium salts. Kneading the stove solution can only be done if the water hardness is below ten degrees.
| An experiment that allows you to determine water parameters will require purchasing about 0.2 liters of distilled water from a pharmacy. We also take a piece of laundry soap and crumble it into small pieces. It will be our indicator, since soap neutralizes salts dissolved in water. One gram of standard 72% soap neutralizes about 7.2 milligrams of hardness salts. Until the process of completely softening the water is complete, the soap solution will not foam. This is what will show us how “hard” the water is. | |
| Heat the water and add soap crumbs to it | Heat distilled water to about 75 degrees and carefully dissolve the soap in it. This operation should be performed carefully, avoiding foaming of the mixture. The proportions in which our “indicator” must be added will be as follows:
|
| Draw a soap solution into the syringe | As a result, after everything has cooled, we will get the so-called “titration mixture”. We take about 500 milligrams of the test water using a beaker, and 20 milliliters of the resulting soap solution with a syringe (without a needle). |
| Water with soap dissolved in it | Add the solution drop by drop to the water being tested, stirring it carefully as you do so. First, the soap, interacting with calcium and magnesium salts, will begin to precipitate in the form of characteristic gray flakes. We continue the process until foam with rainbow-colored soap bubbles begins to form. When bubbles appear, we stop adding soap dissolved in the distillate and see how much solution we needed to completely neutralize all the salts. Next, we perform simple calculations and find out the hardness of the water. |
| Example of calculations. | |
| Let's say we used pure 100% soap, 10 milliliters of which contains one gram of soap. This amount of soap in 500 milliliters of tested water should have precipitated 10 milligrams of Mg and Ca salts. This means that one liter of water contains 20 mg of hardness salts, which corresponds to one German degree. And if we spent 80 milliliters of soap titration solution, then the water hardness is 8 degrees and it is also suitable for stove masonry. The main thing is not to cross the hardness limit of 10-11 units. | |
What sand is suitable for laying a stove? Sand preparation
As for sand, there is no need to take samples. Near clay deposits you can always find layers of white quartz sand and yellow sand containing feldspar. The first is suitable for creating any stove structures, and the second can be used in the laying of all elements except the hottest part - the firebox. Remember that preparing sand for use will require a significant amount of water. That is why you should take care in advance to resolve issues regarding uninterrupted water supply.
Sand dug up on your own must first be passed through a sieve with a mesh size of 1-1.5 millimeters. This allows you to get rid of various large debris and obtain the necessary set of fractions. The biggest problem for self-dug sand is organic impurities and various living microorganisms living in it. The sand must be cleaned from them, otherwise the masonry seams may deteriorate over time.
Sifting sand with a sieve
There are many industrial methods for cleaning sand, but they all involve significant energy costs. In order to save money, we will use a simple and accessible washing method for everyone.
To make a cleaning apparatus, we need a piece of pipe 15-20 centimeters in diameter. Its height should be approximately three times its thickness. We fill a third of the volume with sand and supply water from below under high pressure. The power of the water jet must be selected in such a way that the washed sand swirls, but does not flow into the drain located on top. After clean water flows into the drain, wait about ten minutes more and finish the procedure. The first batch of purified sand is ready. All that remains is to dry it.
Scheme of a sand washing apparatus
The method of filtering sand by washing also allows us to remove from it various inclusions of alumina that we do not need.
Proportions of mortar for laying a stove, how much sand, water and clay should there be?
An important step in preparing a construction kiln mortar is to determine the optimal proportion between sand and clay. After we bring home the clay sample selected according to the algorithm outlined above, it is necessary to divide it in two. We set aside the first half, and divide the second again into five identical pieces. We place each of them inside a separate bowl and add water (hardness up to 11 German degrees), about a quarter of the volume of the clay itself.
Next, we leave the clay to liquefy in the water. Typically, this process takes approximately 24 hours. After a day, stir it thoroughly and pass it through a sieve with a mesh size of three millimeters to sift out large lumps.
Clay dissolving in water
Place the container with the strained solution back to settle. When a cloudy slurry (the so-called “sludge”) appears on the surface of the solution after settling, remove it by pouring it onto the ground.
That's it, now you can start adding sand to each container with prepared clay. This must be done in the following proportions:
- First container - do not add sand;
- The second is one part sand to four parts clay;
- Third - two parts sand to four parts clay;
- Fourth – 3 parts sand and four parts clay;
- Fifth - sand and clay are added in equal quantities.
Adding sand to each container must be done gradually, in small portions, in several approaches (optimally - no less than three and no more than seven). Everything needs to be mixed very thoroughly. Do not rush to add the next portion of sand before the previous one has completely and evenly dissolved in the mixture. A well-mixed clay-sand solution is quite easy to identify: just try rubbing it between your fingers. If the roughness of individual grains of sand is not felt, then everything is done correctly.
Add sand to the clay
The next step in preparing the clay-sand mortar will be the production of prototypes. We take clay in each of the five containers and alternately do:
- Two bundles of approximately 35 centimeters in length and a centimeter and a half in diameter;
- We fashion a ball with a diameter of five centimeters;
- A round clay cake with a thickness of 12-15 millimeters and a radius of 7.5-8.5 centimeters.
As a result, we will have exactly 20 samples on hand that need to be marked and left to dry inside the building. For normal drying, samples should not be exposed to drafts or direct sunlight. Usually the ropes dry out in a couple of days, but cakes and balls can take up to two dozen days. If the ball does not wrinkle and the cake no longer bends in half, it means the material has completely dried.
Clay ball and cake
When the samples are ready for testing, we proceed to the next classic experiment, which allows us to determine the fat content of the clay solution. To do this, wrap a clay rope around the handle of the shovel, then tear it apart and observe the results:
- The greasy clay, indicated in Figure G (from the German “greesy” - greasy) will practically not crack, and when the rope is torn in half, the break point will have teardrop-shaped ends.
- Clay of normal fat content (marked as N) will have a cracked top dried layer and, after breaking the rope, its thickness at the point of separation will be approximately a fifth of its original thickness. These are the samples we need to select.
- Dry (lean) clay, designated as L (from the German “Lean” - lean), will be marked by the maximum number of deep cracks and, when broken, will have the largest area where the pieces of the rope separate.
As a rule, after selection, several (usually 2 or 3) seemingly suitable samples remain.
Determination of clay fat content
Dried balls and cakes will help us carry out the final “clay casting”. We drop samples from a height of a meter above the bare floor. The most durable of them will indicate the required consistency of sand and clay. If, after falling from a meter, all samples remain intact, we begin to gradually increase the height until we can determine the strongest of them.
Checking a clay-sand mortar using a flat cake as an example
Checking the quality of a clay-sand mortar using a ball as an example
The next step in preparing the mortar for laying the stove will be to calculate the required ratio of water to the proportion of sand in the mixture. The physical limits within which a clay mixture will have normal fat content are quite wide. Our main task, since we are building the stove for ourselves, is to make the strongest possible structure, with excellent gas tightness of the connecting seam material.
First of all, we sift the clay remaining during the test sampling. Press the clay through a fine mesh sieve so that it mixes evenly with the sand. Add the required amount of prepared washed sand. We learned the proportions of sand and clay earlier thanks to experiments. We start adding water and gradually mix the solution. Remember that the water must meet the hardness parameters that we talked about earlier.
Next, we take a trowel in our hands and make a depression on the surface of the mixed solution.
The mark from the trowel (trowel) will help determine the readiness of the solution
- A tearing hollow indicates that there is not enough water (Fig. 1)
- If the hollow immediately behind the trowel begins to float, it means you have overdone it with water (Fig. 2). Let the solution settle and remove the sludge into a separate bowl. The difference in volume between the filled water and the squeezed out sludge will show us the required optimal proportion.
- If you immediately guessed the required amount of water, the trowel will leave a clear, clearly visible, even trace with highlighted edges on the surface of the mixed solution (Fig. 3).
Proportions and proper preparation of clay mortar, testing for strength
The so-called cross test will allow you to find out whether our clay solution will be sufficiently strong and have the required degree of adhesiveness. This final test will show how accurate the results of all our preparatory checks on the material were and how well we cleaned the constituent components of the oven mixture.
To test, we need a couple of bricks, one of which we place flat on the ground and cover its largest plane (the so-called “bed”) with a thin layer of prepared test clay mortar. Place a second brick on top and, tapping it with a trowel, let the mixture dry for about ten minutes . After this, we grab the brick located on top with our fingers and pull it up. Having raised it to a certain height, we shake the structure by weight: if the bottom brick does not come off, it means that all the preparatory work was carried out carefully and we correctly calculated all the proportions of the clay mortar.
If you still do not understand the individual details of preparing mortar for laying a stove, we recommend that you watch this video:
Proper preparation of mortar for laying a stove: video tutorial
Fireproof putties
In addition to traditional refractory mortars, putty materials are also used in finishing work. They are used for lining heated surfaces. Almost all materials for such work have a similar composition, only the proportions of the components differ. The basis everywhere is clay and lime.
Most often, fireproof putties are used to finish the stove for further finishing. The mass has the following advantages:
- Safety. The composition of the substance is environmentally friendly. When heated, the putty does not release components harmful to humans.
- Fire resistance. Even with strong heating, the formation of cracks on the surface of the putty layer is unlikely.
- The service life of the coating (if properly applied) is more than 40 years.
- High degree of adhesion with other building materials and coatings.
When finishing the stove, it is important to follow the correct sequence of application of materials. Otherwise, the finish of the product may crack.
Advantageous properties of clay
Fireclay has some advantages over other materials due to the following characteristics:
- Long service life. Fireclay clay mortar does not crack, does not crumble, and retains its original shape for a long time.
- High adhesive properties, thanks to which the material adheres perfectly to any surface.
- Vapor permeability.
- Ability to withstand fairly high heat.
- Safety and environmental compliance.
Options for mortars for laying stoves
Today, various modifications of masonry mortars are used, among them the following are popular:
- heat-resistant mixture, which is intended for outdoor use. Such solutions are used for masonry and plastering of barbecues, barbecues, smokehouses, stoves, which are used only in the open air;
- mortar for laying household, industrial stoves, fireplaces made of fireclay refractory bricks. The operating temperature of such structures can be up to 1750 degrees;
- a special masonry mixture designed for working with red brick. Using this solution, fireplaces are laid. household stoves, heater stoves, the operating temperature for which is up to 850 degrees;
- A special masonry mixture is used for fastening tiles and plastering the surface of fireplaces, chimneys and stoves.
The masonry mortar has the following characteristics:
You need to add lime paste to a thin solution, and sand to a fat solution.
- the appearance must be uniform and free from foreign impurities;
- moisture content of the composition - no more than half a percent;
- maximum grain size - up to 2.5 mm;
- bulk density - 1500 kg per cubic m;
- ready-made masonry mortar can be used for three hours;
- the water-holding capacity of the resulting solution is 95 percent;
- compressive strength - two Mega Pascals;
- loss of mixture mass during calcination - up to 5 percent.
The special composition that is used for filling and repairing the hearth inside the furnace has the following characteristics:
- the minimum temperature for work is five degrees Celsius;
- time to use the ready-made solution is one hour;
- maximum grain size - 5 mm;
- water consumption for preparing 25 kg of mixture is 2.5-3.5 liters, finished mass is 11-12 liters per 25 kg;
- heat resistance - 1300 degrees.
Features of application
If you prepare the solution yourself, you must consider several rules:
- To build a furnace array, it is worth increasing the heat resistance of the material.
- With a joint thickness of 3 mm, 25 kg of mortar is needed for every 90 bricks.
- Fatty types of clay lose strength after drying and crack.
- In order to increase the strength of medium-fat clay, cement can be added to the mass.
- You can speed up the drying of the masonry by adding lime to the solution.
- The volume of building materials is checked after the final batch.
- For each day of work, a new portion of the mixture is prepared.
The stove should be heated after laying after 3 days.
When working with ready-made products, follow the manufacturer’s recommendations. The materials are accompanied by instructions with specific tips for use:
- Water is added to the contents of the bag.
- The ingredients are mixed with a drill with a mixer attachment for 1 hour of use.
- After hardening, they do not work with the mixture again.
- The heating structure is laid at a temperature of +10 degrees.
- To prevent cracking of the seam, it is necessary to purchase materials with plasticizers.
- The first heating is not carried out for 3 days after laying.
- Cladding is carried out 20-30 days after putting the furnace into operation.
- Efflorescence on the seam is removed with a damp cloth.
The effectiveness of ready-made solutions is better than homemade ones, but they are more expensive. For this reason, it is worth researching the products of different brands.
Factory-made masonry mixtures for laying stoves
We are talking about fireproof dry powders, which, after dissolving in water, turn into a homogeneous mass. The cooking recipe is usually indicated in the accompanying instructions. Along with the usual components (sand and cement), the solution contains special heat-resistant additives.
The refractory mixture for laying furnaces produced at the enterprise has a number of advantages:
- Well-calibrated composition. Under production conditions, careful dosage of each component is carried out, according to time-tested recipes and proportions.
- Specific additives. The components that give refractory mixtures their “proprietary” characteristics are often not commercially available (and sometimes even kept secret).
- Versatility. As a rule, industrial solutions are multifunctional: they can be used to lay stoves and then plaster finished walls.
- External aesthetics. Although a finishing finish is still applied over masonry or plaster, it is much more pleasant to work with an attractive-looking mortar.
Our stove makers especially liked the products of such manufacturers of masonry mixtures for stoves and fireplaces: “PLITONIT”, “TERRACOT”, “Makarov Stove House”, “Pechnik”, “Scanex”, “SPO”. As for the disadvantages of this type of material, it is usually called their high cost. In cases where it is necessary to save money, they try to use self-prepared heat-resistant solutions.
Working with mixture and fireclay bricks
Mixtures for laying fireproof stoves must be made with high quality
But it is equally important to do their proper installation.
Particular attention must be paid when filling the seams with mortar. If the filling is poor, water may get into the seams, and if it freezes, the masonry will crumble much earlier than planned.
The choice of brick laying category depends directly on the future temperature condition. The higher the temperature, the smaller the seam should be:
- 1 mm – first category;
- 2 mm – second category;
- 3 mm – third category;
- more than 3 mm – fourth category.
To determine the quality of the seam, I use a special probe with a width of 15 mm, and the thickness must be equal to the seam.
- The probe must penetrate 20 mm into the seam. To ensure that the bricks are positioned correctly, they are tapped with the handle of a trowel. To ensure that the seams are of a certain horizontalness, ordering slats are used and a cord is attached to them. After the first layer, the laying is determined only by this cord.
- The characteristics and reliability of masonry largely depend on the uniform application of the mortar to the surface.
Note: The brick sucks moisture out of the mixture, preventing it from drying out. Therefore, the brick is periodically wetted during the laying process, or even pre-soaked beforehand.
The fireproof mixture will help you make a quality structure, but you should never rush. You should look at photos and videos to understand the entire cooking process. After all, construction requires high-quality materials.
This is interesting: How to choose a set of drills: we explain the question
Advantages and disadvantages
You can quickly prepare a high-quality solution from a purchased mixture.
For laying stoves and fireplaces, a high-temperature mixture is used, which contains clay, sand, lime or cement, and heat-resistant ingredients. To obtain a homogeneous mass, water must be added to the material. Using finished products has several advantages:
- ease of mixing components;
- ready-made recipe that ensures the strength of the composition;
- versatility of use - suitable for cladding, laying external and internal parts;
- attractiveness and evenness of the masonry seam;
- availability of complete instructions with operating and mixing rules;
- ease of application and no risk of seam destruction.
The use of building materials is associated with some difficulties. The mass is mixed only with a mixer or in a concrete mixer, it hardens quickly, so it is prepared in portions.
Mortar mixtures
One of the most popular mixtures for stoves is mortar. It comes in the form of a very fine powder. For use, the powder is diluted with water and used for masonry in tandem with refractory bricks or stone.
Not every mortar mixture is suitable for laying a hearth. There are fire-resistant and conventional hardening mixtures. The latter become hard during heat treatment, like ceramics. They contain hydraulic cement.
Mixtures without hydraulic inclusions with other additives are called fire-resistant. There are different types of mortar, differing in grain size. So, fine-grained mixtures are called mixtures with particles up to 1 mm, and large-grained - up to 2.
Different markings of the solution are designated by the letter abbreviations MS. The material is most often used for home or commercial stoves; for industrial fireplaces, an alax mixture is used. The finished shell from the mortar mixture has very high strength and can be used for many years without problems.
Manufacturers of ready-made furnace solutions
Fire-resistant Plitonit masonry mortar
Russian consumers can purchase compositions of domestic and foreign production. Heat-resistant, fire-resistant and standard masonry materials are available on the market.
Plitonit
A domestic brand that produces stove solutions using German technologies. Popular products include:
- Thermal laying. An economical product for repairing and laying the outer parts of fireplaces and stoves;
- Fireproof. A mixture with reinforcing components is used for the construction of a combustion chamber made of heat-resistant bricks;
- Hot melt adhesive. The adhesive material on which ceramic tiles sit. The glue is also used as plaster.
Mixing proportions are indicated in the instructions and depend on the type of composition.
Stove maker
Fireproof mixture for masonry stove is made on the basis of clay and cement ingredients. It has high water repellency and ensures adhesion strength. The peculiarity of the Stove stove masonry mixture is that the heat-resistant products can withstand heating up to +1350 degrees. The advantages of the material include heat resistance, ease of use and reliability of the seam. The disadvantages are high consumption due to rapid setting.
Bossnab
Terracotta is a dry mortar based on fireclay clay.
Russian products based on red clay and quartz sand allow you to mask the seam. The mixtures are available in two series:
- Budget. Inexpensive compositions in the form of a mix of red clay and sand. The materials are suitable for interior work and are low in consumption - 25 kg is enough for 90 bricks;
- Premium Characterized by resistance to temperature fluctuations. Plasticizers and lignosulfates in the composition allow masonry to be carried out outdoors.
Budget solutions have a heat resistance of +500 degrees, premium ones – +1100 degrees.
Terracotta
Heat-resistant products are made from kaolin clay, fireclay and sand, and are environmentally friendly. The plastic solution allows you to form a strong seam that can withstand heating up to 1300 degrees. The masonry line is uniform, the composition is applied easily. The manufacturer recommends sifting the material to remove large grains of sand and working with soaked brick.
When building a stove yourself, you need to choose the right materials. Ready-made factory mixtures eliminate the time spent on preparing the solution and preparing the ingredients.
Features of preparing working solutions
Regardless of the chosen composition of the refractory mixture, the master will need water in any case.
It should not contain large amounts of hardness salts - calcium and magnesium bicarbonates. Usually, the population knows the characteristics of local water, the location of sources with water of low hardness. If necessary, you can slightly soften the water using special methods, but it is advisable to do this only as a last resort, since the pleasure will be quite expensive.
For do-it-yourself masonry of all parts of the furnace, white sand with a quartz composition is ideal. Yellowish sand grains can be used for laying any parts of the stove structure, except for the combustion chamber.
There are long-standing historical methods for determining the amount of sand to add to clay. The ancestors lived a leisurely, measured life, so the mixtures were tested for more than 3 weeks. Now people do the test faster - they prepare several versions of cakes or balls, wait for them to dry completely, then drop them onto a wooden surface from a height of one meter. The composition that did not split is worthy of attention. If there are several such resistant samples, the height for testing can be increased, ultimately choosing the most durable option.
The final control check can be carried out as follows: smear the wide part of the brick (bed) with the prepared mixture with a layer of mortar of at least 3 mm, lay the second brick on top, press it well by tapping it with a wooden handle, wait 10 minutes and lift it. If the bottom brick is held and does not fall, the compound is suitable.
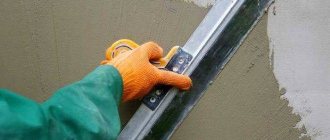
Plastering process
A solution of refractory clay is used in cases where it is necessary to obtain a perfectly flat surface. In the process of work, corners and a special profile are necessarily used. Several profiles installed on one wall help to achieve absolutely even plaster. During the installation process, it is recommended to use a plumb line or building level. Corners are used to obtain smooth edges; they are glued directly to the plane.
To obtain a perfectly flat surface, you should use the rule. It is fixed across the vertical profiles so as to achieve simultaneous contact of all beacons horizontally.
When installing beacons, you should also pay attention to the level of extension of the furnace door and the blower. The level of the profiles and doors must match so that the surface is smooth, without protrusions and depressions.
Lime mixture
It contains lime paste and sand.
You can prepare lime paste yourself by mixing quicklime and water in a ratio of 1:3. But it is better to buy ready-made dough in the store, its quality is much higher. To prepare the mixture, fine sand, sifted through a sieve, is mixed with lime dough in a ratio of 3:1 and diluted with water until a creamy consistency is achieved. After preparing the mixture, you need to check its plasticity. This is done by stirring the mixture with a wooden bar:
- lean mixture - does not stick to the plank at all, you need to add lime to it;
- normal - after removing the plank from the solution, it remains on it in the form of a film or lumps;
- greasy - sticks to the wood in a thick layer, you need to add sand.
The disadvantages of the lime mixture are the long drying time of the masonry and the negative effect on the respiratory system.
Properties and characteristics
The feedstock for the production of fireclay clay mixture contains highly dispersed hydroaluminosilicates. Such material is formed into shapeless pieces or pressed into briquettes, fired in ovens under high temperature conditions.
There are a sufficient number of recipes for making fireclay. Fired powder is added to a number of fireclay clay solutions, coarse-grained material is added to others, more water is used in some places, etc. Such compositions differ in the duration of firing and temperature conditions, after which masses with different shades and textures are obtained from the furnaces.
When purchasing fireclay clay, it is recommended to make sure that its shelf life has not yet expired, and that all requirements have been met when storing the material. The fact is that during storage, kaolin loses its properties under the influence of humidity.
Clay is produced in accordance with GOST requirements, and the material differs in the following technical parameters:
- The average grain size is about 2 mm;
- high-burnt fireclay has a water absorption level of 2 to 10 percent, for low-burnt fireclay this figure is no more than 25;
- humidity content – not higher than 5 percent;
- The fire resistance of the material depends on its composition and varies between 1,550 – 1,850 degrees.
What does fireclay clay look like?
It is allowed to store fireclay clay material in packaging for three years from the date of manufacture.
It should be added that such clay is characterized by mechanical strength, does not shrink, is considered an environmentally friendly material, is economical to work with, and is not afraid of sudden temperature changes.
Fireclay raw materials comply with GOST 6137-8. Options:
- grain size on average - 2 millimeters,
- moisture absorption - for high-burnt fireclay - 2-10%, for low-burnt fireclay - up to 25%,
- humidity - up to 5%,
- fire resistance - 1550-1850 degrees Celsius.
A 20 kilogram bag of fireclay clay is enough to lay 20-30 bricks. For one cubic meter - 100 kg. For the composition to harden, it requires at least two days and a temperature range from 10 to 25. Full strength is achieved after 28 days.
When used rationally, fireclay shows excellent results. This is a strong natural material, durable and reliable. Choose raw materials for brick production from reliable suppliers to be sure of high quality raw materials and excellent performance
All articles
Heat-resistant mixture for masonry stoves
To give greater strength, concrete is also added to the material. In terms of its performance properties, such a solution will not be inferior to lime. Hardening of the concrete mass begins after 45 minutes. Before mixing the components, they are passed through a sieve. Then sand is poured into the prepared container, and cement is poured on top of it. This mass is mixed until a homogeneous composition is obtained. Then water is added. When mixing, it is necessary to achieve a viscous consistency. The solution should not be too thin or thick. To construct a monolithic firebox, components are used in the following ratio:
- 1 part Portland cement (M400);
- sand – 2 parts;
- brick crushed stone - 2 parts;
- fireclay sand - 0.3 parts.
How to choose a refractory mixture for stoves and prepare it yourself
Types of plaster
A heat-resistant block is used for laying stoves and lining stove fireboxes. You can make your own mortar for fireclay bricks. Since such material is resistant to large temperature changes (up to 1500 degrees during combustion), alkali and all kinds of acids, a fireclay brick stove is considered the most reliable. The fireclay block weighs about 3 kg and has dimensions of 250x120x65 mm.
Peculiarities
Laying refractory bricks does not require preliminary impregnation, but the surfaces must be immediately cleaned of dust and dirt. It is correct to apply a seam up to 3 mm. There are 4 categories of refractory masonry, which differ in seam thickness:
- I - up to 1 mm;
- II - 2 mm;
- III - 3 mm;
- IV - from 3 mm.
The category is selected depending on the calculated temperatures. For the lowest degree - the thickest seam. Refractory material is used for the complete construction of the furnace; it is also necessary for laying out the firebox and lining the furnace. The positive characteristics of the product include not only strength and durability, but also an aesthetic appearance. The precise shape of the block speeds up the laying process, since tiles and tiles fit well on it.
Fireclay clay is soaked before use. The material is poured with water so that it completely covers the clay powder. The ingredients are thoroughly mixed so that there are no lumps or dry clay left in the corners of the vessel. The container is hermetically sealed and left for three days.
To prepare, you will need a large vessel, cold water, a stirrer, a mixer, fireclay clay, fireclay sand (crushed stone) or quartz sand. There are different recipes for fireclay compositions:
- 1 measure of fireclay clay, 2-4 measures of fireclay sand, crushed stone;
- 1 measure of fireclay clay, 3-5 measures of quartz sand.
The amount of water is taken exactly in accordance with the instructions from the fireclay manufacturer. The room temperature is from plus 5 degrees and above (up to plus 60 degrees).
- Clay is poured into the container.
- Fillers (sand, crushed stone) are poured on top of the clay.
- Pour water over the dry ingredients.
- The mass is mixed with a spatula or a construction mixer.
- The container is closed to avoid excessive evaporation of water and left for three days.
- After the specified time, the paste is thoroughly mixed again and the laying begins.
Reference. Ready-made fireclay mixtures are diluted according to the manufacturer’s recommendations. Complex compositions, which include chemical additives, fiberglass, heat-resistant adhesives, plasticizers, cement, do not require long-term soaking. Such solutions are ready for use within 20-25 minutes after mixing.
So, to prepare the “Heat-resistant clay-fireclay masonry mixture” from the manufacturer Terrakot for work, you will need a container, a mixer, a stirrer, and clean cool water. Take 240 ml of water per kilogram of powder, according to the instructions on the package.
- The mixture from the bag is poured into the tank.
- Water is poured into the vessel, the solution is mixed with a spatula and a mixer.
- The paste is kept for 20 minutes, mixed again and used for masonry. If necessary, add a little water to achieve the desired consistency of the solution.
The time for complete drying of fireclay paste in air is 72 hours, inside the brickwork this time increases, it depends on the thickness of the masonry, temperature and humidity of the surrounding air. Petrification of fireclay mortar occurs at 800 degrees Celsius.
Important! Fireclay masonry does not like sudden changes in temperature.
The furnace is heated for the first time three days after construction is completed. Use thin, quickly burning logs. The dampers and vents are fully opened during the first fire. Then the stove is dried for a week, burning small portions of wood daily.
Fireclay masonry dries faster than masonry made from ordinary clay-sand mortar and ceramic bricks, but only the firebox is usually made of fireclay. Therefore, the timing of the start of operation of a furnace with fireclay masonry will be the same as the timing of use of a furnace built on clay and lime mortar. In summer, a new stove is heated to maximum after 10-14 days, in winter - after a month.
How to fire a stove correctly to avoid cracks
Stove masonry and the layer of plaster on the fireplace tend to crack over time
It is important to distinguish between minor cosmetic defects and real problems that require an immediate call to the stove specialist.
- Hair-thin cracks appear on the seams of the stove during heating and disappear when it cools. Such defects are absolutely not dangerous and do not require intervention. If you really don’t like their appearance, just cover the walls with tiles and the problem will be eliminated.
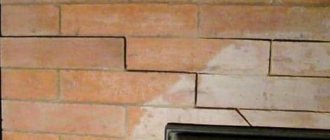
- Cracks of 1 millimeter or more that appear at the seams between the bricks and do not disappear when the stove cools down indicate an incorrectly selected masonry mortar. The different expansion coefficients of brick and clay cause warping and cracking.
- Large cracks and displacement of bricks are most often caused by overheating of the stove or improper air circulation system in the chimney and firebox. If the “overheating” of the stove is the fault of the owner of the house, then improper heat removal, when some areas become hot while others remain slightly warm, is the fault of the stove master.
- Closed, broken cracks that cross the walls horizontally or vertically at the seams are a sign that not everything is in order with the foundation. This problem can affect both new stoves and old ones that have stood for many years. There is no point in covering up these cracks; the stove needs to be urgently rebuilt before it completely collapses.
Violation of the integrity of the top layer or brickwork occurs for several reasons. In general, we can say that this is the result of the master’s mistakes. With proper selection of bricks, mortar, finishing materials and professional performance of the work, the formation of cracks on the stove, and especially cracks, is unlikely.
Most often, cracking occurs due to the influence of the following factors:
- non-use of the fireplace for a long time, especially in winter (due to sudden temperature changes);
- haste, manifested in the heating of a recently made stove;
- performing masonry using a method that creates large temperature differences in different places of the structure;
- inconsistencies in the thermal expansion capacity of bricks and mortar for laying;
- overheating or using fuel that produces significantly more heat than what the stove is designed for (for example, burning a wood stove with coal).
If the stove begins to crack for such reasons, then it is easy to fix the problem with your own hands. You need to properly seal the cracks, coat the surface - and the job is done.
It is much worse if the stove begins to crack due to an incorrectly made foundation or an illiterate choice of refractory materials. In this case, it will not be possible to simply seal the seams; you will need to lay the entire stove again.
Repairs cannot be delayed because cracks can leak carbon monoxide, which can poison residents. In addition, over time, the cracks increase, the stove can let flames pass through and completely fall apart.
Before properly and reliably caulking the stove, in order to prevent repeated malfunctions, you need to know what can affect the integrity of the stove coating:
- during a long break in heating the house and sudden temperature changes;
- the furnace was laid using low-quality mortar;
- Perhaps the reason is the settlement of the building or foundation. In this case, it will be necessary to carry out major repairs to the foundation, increasing its size and strength;
- after laying the stove, the process of normal drying of surfaces was disrupted;
- when plastering the stove, a low-quality solution was used or a thick or very thin layer was applied;
- Perhaps the reason is faulty ventilation and condensation deposited on the walls of the furnace.
Which clays are suitable for mixing yourself?
Regardless of the chosen recipe, when preparing at home, fatty (combined with sand) or medium clay is added to the solution. The reason is simple - skinny varieties do not provide sufficient strength, elasticity, gas tightness and heat resistance of the seam.
Masonry seams
Simple tests help check the fat content of the clay used and the correct proportions:
- Modeling balls, cakes of the same size, followed by dropping them from a height of 1 m after drying (if necessary, the height is increased to identify the best type of clay and optimal proportions).
- Spreading a 3 cm layer of mortar between the wide sides of two bricks, tapping with a hammer and lifting it 5-10 cm. If the quality is high, the mortar holds the bottom brick all this time.
- Rolling, creasing a round ball with a diameter of about 4-5 cm between the boards. If the fat content of the clay is excessively high, the ball is crushed without the formation of cracks; if the clay quickly becomes covered with cracks, the clay is considered lean; after the ball is compressed by 1/3, it is considered normal.