The choice of stoves for baths today is very wide. The industry produces heaters for every taste and color. You can choose a ready-made stove for installation in a bathhouse in accordance with the required heating output depending on the volume of the steam room and choose the desired heating method - from electric stoves to gas and wood-burning heaters. Previously, we have already published reviews of modern stoves Teplodar, Ermak, Harvia, Termofor. But many true lovers of Russian steam prefer laying a brick stove with their own hands to a ready-made solution.
And this is no coincidence. After all, brick stoves have the following advantages: - brick stoves have a large heat capacity and retain heat for a long time; — capable of heating 2-3 adjacent rooms; — heated brick does not give off the smell of scale and overheated metal; — a brick oven helps against many diseases; — the surface of a brick stove does not heat up as much as that of a metal stove. But in order for the stove to serve for a long time, you need not only to correctly select the brick material from which it will be built, and find drawings of the order for laying the stove, but also to correctly prepare the masonry mortar on which the bricks will be laid. Let's figure out what the composition of the mortar for the stove masonry depends on, how to choose the right components and how to mix them correctly so that the stove lasts for many years and delights with its warmth.
How to check the quality of clay for oven mortar?
The quality of the clay that will be used in the mortar for laying the furnace can be checked in several ways. Dilute about half a liter of clay with a small amount of water and knead thoroughly with your hands until the clay stops sticking. After this, roll a ball with a diameter of 5 cm from the clay and make a cake with a diameter of 10 cm from it. Leave the cake to dry for 2-3 days. If during this time cracks appear on the cake, it means the clay is “oily”. If there are no cracks, the clay is normal and you can prepare a solution.
Advantages of using a metal stove in a bathhouse
Today, a metal stove in a bathhouse is already a standard equipment, without which it is difficult to imagine the wellness procedure beloved by many. Compared to other types of ovens, it has a number of advantages:
- Easy to install. It is easy to make with your own hands.
- Easy and simple operation.
- It melts quickly.
- Has good traction.
- High performance.
- Economical in fuel consumption and affordable in price.
But in order to really appreciate all these advantages to the maximum, you need to learn how to use it correctly!
Oven in the steam room
No one, of course, would argue that a stone stove is ideal for a bathhouse. But it needs to be heated for at least 5 hours so that it really begins to give off its heat, imagine how much firewood will be consumed during this time. And this, in turn, does not suit everyone. And the price of a brick building will be many times higher than that of a metal stove lined with stone.
Air mass movement pattern
In addition, in order to build a brick stove for a bathhouse, you need to have the basic skills and knowledge of a stove maker, since in this design you need to take into account many nuances that are invisible, but play a decisive role!
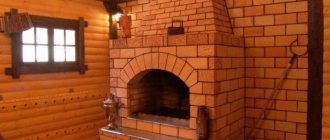
Brick oven
A metal stove can be bought ready-made, and the lining will not entail large financial expenses.
Even if the metal stove itself, purchased ready-made in a store, is already a decoration for the steam room, it is better to make a small stone apron around it. This will significantly increase the efficiency and productivity of the furnace. And people who are in close proximity to a metal structure will be more comfortable, because metal “fries” stronger than stone or brick!
Metal stove without brick lining
What necessary parameters should a metal sauna stove have?
- It should have small dimensions so as not to clutter up the space.
- You should not choose too high a power, since the sauna room is usually small. It will be difficult to control the optimal temperature.
- The characteristics of the stove must strictly comply with fire safety regulations.
In addition, it is necessary to take into account the location where the stove is located. According to SNiP standards, the metal unit must be located at a distance of at least 15 cm from wooden floors.
Sauna stove
The most optimal way to fire a metal stove in a bathhouse is to add small but frequent fuel.
Furnace solution proportions
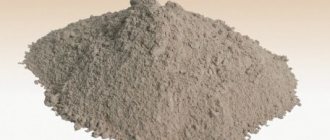
To prepare masonry mortar, you will need high-quality, clean clay without including stones, plant debris and pieces of the soil layer. Dry clay should have a uniform composition and color. To prepare the solution you need to prepare: - a container (tub, tank) with a volume of 20-30 liters; — measuring bucket with a volume of 0.9-1 l; — 10-15 liters of water; - clay; — construction mixer; - sand. The most common ratio of clay to sand is from 1:1 to 1:3. Water will be needed from ¼ to 1/3 of the volume of clay.
Foundation base for lining
The blocks used should weigh 3.8-4.2 kg. The total weight of the structure, together with the metal firebox, will require a solid foundation. Once completed the weight will be about a ton.
The procedure for installing a strip foundation is as follows:
- Cut a square hole in the floor.
- Dig a pit up to half a meter deep into the soil.
- Cover the bottom with a layer of crushed stone (fraction 10-20 mm, filling thickness 10-15 cm).
- Lay film waterproofing (thick polyethylene or roofing felt).
- Install (unfasten) formwork around the perimeter.
- Install a frame made of reinforcement (steel or fiberglass) inside.
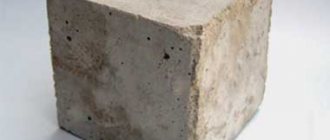
- Fill the cavity with concrete, the grade of which must be at least M200, class B15.
The height of the foundation protruding above the ground surface is 20 cm. It is “brought” below the floor level using a thermal insulation layer. It is laid out of heat-resistant bricks in a “solid” manner. The solution is the same composition that will be used later.
Preparation of furnace solution
After everything necessary is prepared, you can proceed directly to preparing the solution. First you need to prepare the clay. To do this, pour 27-30 kg of dry clay into a bucket, add 10-15 liters of water and thoroughly knead the solution using a construction mixer until a homogeneous consistency is obtained and leave for about a day. Even better - for 2-3 days or even a week. During this time, the clay will “ripen”.
The sand used to prepare the stove solution must first be carefully sifted through a metal sieve with a mesh of 1.5x1.5 mm to exclude possible inclusions of small pebbles, organic residues, pieces of soil or dried plants.
The amount of sand added to the clay depends on the “fat content” of the clay itself. The “fattier” the clay, the more sand will be required to create the required proportion; the “leaner” the clay, the less sand needs to be added to prepare the masonry stove mortar. Too “fat” clay leads to cracking of the solution. Too “skinny” - to the flowability of the dried solution, which easily crumbles under any external influence.
The quality of the resulting solution is checked before starting masonry.
Guide to action
The process itself does not cause any particular difficulties and is quite feasible even for people who do not have construction skills. However, if you force it and disrupt the sequence of technological stages, you can get a result that is far from expected. Therefore, we offer you step-by-step instructions so that, in full accordance with its points, you can efficiently line an iron stove in any bathhouse with suitable bricks and be satisfied with the result.
Foundation design
Usually this stage is performed when the furnace itself is being built. However, if for some reason you lost sight of the need for its construction, then nothing bad will happen. True, for this you will first need to dismantle the stove.
- decide what size the base will have;
- build wooden formwork - for this it is best to use plywood boards;
- cover the boards with roofing felt - this will protect them from moisture and subsequent rotting;
- pour fine crushed stone and sand into the hole, and then fill it with cement mortar;
- It is best to cover the base with a reinforcing mesh and allow time to dry - usually no more than 3 weeks.
Construction of the foundation
- lay out the base of bricks in one row;
- make sure that the masonry has no discrepancies in height;
- lay roofing felt for waterproofing and a sheet of iron - select a size so that it extends beyond the masonry by about 0.1 meters;
- Place the oven and wrap it with plastic wrap so as not to stain it with the adhesive solution afterwards.
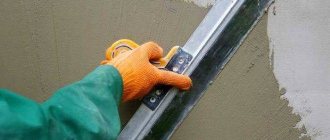
Preparing the mortar for masonry
In order to prepare a truly successful solution, you should make sure that there are no lumps or foreign impurities in it. Ideally, you take equal parts clay and cement and add about a third of river sand.
- carefully stir the solution in the container and add water until an acceptable homogeneous mass is obtained;
- A construction mixer will help speed up the process;
- You can check the density by placing part of the mortar on the brick with a trowel - if it doesn’t drain, then you’re done!
Preparing a brick
True, this is done quite simply: select the required amount and soak in water for about 12 hours. You may ask, why such a perversion? It’s simple: this way it will not absorb the solution during direct installation. If there is dirt and defects on the brick, it is better to get rid of them immediately: doing this later will be very problematic.
Types of masonry
There are two installation options, each of which has its own pros and cons:
- traditional block;
- lattice.
The second option looks much more impressive, but allows too much heat leakage. Simply put, it's not that effective. The first is classic, used everywhere and for good reason: such a heat shield has a minimum of holes that allow air to pass through, which means that such brickwork fulfills its purpose as efficiently as possible.
- you need to start laying from a corner and check the evenness of each row with a level;
- to maintain angles, use a plumb line;
- do not overdo it with the solution - always remove excess with a trowel, especially if it penetrates inside the heat shield;
- The rigidity of the structure is given by the reinforcing mesh; it is advisable to tie the second row with the third immediately after laying with wire;
- do not forget about the need for air circulation - for this you need to provide 2 gaps in the row, which are approximately equal to half of the brick used - but they need to be done only through the row;
- The last row can be laid out arbitrarily, designed in full accordance with your aesthetic preferences.
Also, for a better understanding of the situation, we recommend watching several videos on the topic:
A large collection of photos will also help you, revealing all the styling details. There is no point in explaining them - you will understand everything yourself.
How to check the quality of the stove solution?
You can check the quality and plasticity of the mortar by eye in the following simple way - a small amount of mortar hangs on an inverted trowel without coming off, and slides off the trowel, tilted at an angle of 45 degrees, with the clearly audible creaking of sand on metal.
You can also check the quality of the resulting solution using a ball, which needs to be rolled out of the solution and thrown onto the floor. If the ball crumbles, the solution contains little clay and a lot of sand. If it doesn’t crumble, but is covered all over with cracks, that’s better, but there’s still a lot of sand. If there are no cracks, the solution is normal and can be used.
Choosing a place to build a brick bath
A brick bathhouse, unlike a log house, is more susceptible to moisture.
Therefore, the site for construction must be chosen no closer than 30 m from a natural reservoir, since during spring floods the threat of flooding of the site cannot be ruled out. Before laying the foundation of a bathhouse, it is necessary to take into account fire safety rules, which require the construction of a brick bathhouse no closer than 12 m from your neighbors’ house when firing its stove with wood. If the stove is planned to be electric or gas, the distance between buildings can be reduced to 5 m.
A brick bathhouse as an extension to a residential building is very convenient. There is a saving in building materials and ease of laying utilities. In addition, in winter you won’t have to clear the snow from the passages to the bathhouse and run around the yard with an armful of towels or linen.
Do I need to soak brick before laying?
Despite the fact that solid stove bricks have relatively low water absorption, when laying it is better to ensure against uneven shrinkage of the seams, which can occur when bricks absorb water from the mortar. Therefore, before laying out the next row of bricks, they should be pre-soaked.
When soaking bricks, various types of efflorescence may appear, so before you start laying wet bricks, try soaking 1-2 bricks from the batch and dry them completely. If, after drying, no white or colored stains appear on the surface, the bricks can be wetted. If they appear, you should not wet the brick. It is better to lay such bricks dry.
The most common methods of lining a metal stove in a bathhouse
Considering that stone cladding acts as a heat shield for a metal structure and does not absorb the main heat, there are several cladding options.
- Continuous cladding. This option involves rapid heat transfer, which to a certain extent reduces the productivity of the furnace. This option is not performed often and is more likely to happen for decorative purposes, when the efficiency of the stove does not play a big role.
- The heat shield looks like a small stone fence. It creates comfort for people in close proximity to the stove and increases heat transfer.
- Facing-convector with vents. This option is the most optimal for a bathhouse, as it allows you to adapt absolutely any metal structure. In this case, even the volume of the steam room itself does not matter much.
Breathing in the oven
The cladding scheme largely depends on the functionality of the stove. If the lining has a purely decorative function, then it can be made as thick as a whole brick.
If the stove has the function of a water heater, then the lining is made into a brick floor.
The gap between the stone screen and the metal body of the stove is easy to calculate. For each kW of power, we add 2 cm to the standard 3 cm. If the furnace power exceeds 12 kW, then we add a maximum of 15-20 cm. Otherwise, the furnace lining will not fulfill its direct task.
Ready-made mixtures and solutions for laying stoves
If you do not have the opportunity to order quarry sand of the required fraction and buy clay suitable for laying a furnace, then you can try using the wide range of mixtures produced today. Good reviews can be found on the Internet about mixtures from the Borovichevsky plant based on red clay. This mixture is infused for about 3 hours, after which you can use the resulting solution for masonry. Also on sale today, more and more often, for laying stoves, they buy the clay-chamotte mixture “Terracotta”, which has good reviews and good quality of the resulting solution:
From disks
Are you a car enthusiast? You probably have some worn out old car wheels lying around. Don’t rush to throw them away - they are perfect for making a stove. Especially if you don't want to bother with pipes. In order to make a stove from disks for a bathhouse, it is best to choose wheels from trucks:
- larger diameter;
- thicker metal.
Accordingly, such an improvised stove will last much longer and will be able to withstand very serious loads. But if you only have wheels from a car, you won’t be able to use them to make a reliable stove for a full-fledged steam room. Detailed manufacturing instructions are in the next video.
Kinds
Portals for furnace equipment in a bathhouse are classified depending on various factors. By form:
- arched structures;
- rectangular or square portals.
According to the material:
Brick, natural or artificial stone. Most often, these materials are used for decorative framing. They are suitable for lovers of the classics. They look impressive in baths made of wood. The best option is red brick or clinker. Often the metal elements of stoves are decorated using artificial or natural stone. Tree. Since this material is flammable, it cannot be used as a base for a portal. Wood is suitable only for decorative purposes. At the same time, it must be impregnated with a protective composition against fire. Ceramic tile. A finishing material, the appearance of which is chosen depending on the wishes of the owner. Experienced builders do not recommend using large tiles. Drywall, metal. Sometimes the decorative design of furnace equipment is made from these materials
It is important to choose drywall that is resistant to high temperatures. The frame is made of metal.
Covering bathhouse walls with non-combustible insulating materials
To prevent the walls from overheating, you can use materials with increased thermal insulation properties and inertness to high temperatures. Two types of materials are used:
- reflective;
- fireproof with lining.
The first type includes materials for wall cladding, consisting of thermal insulation with fire-resistant properties and a metal covering in the form of a sheet.
Insulating walls with reflective sheathing
A protective cake with reflective materials is done this way. First, the thermal insulation is attached using ceramic bushings directly to the wooden walls, then it is sewn up with a stainless steel sheet.
Advice! It is better not to use galvanized metal, since heating may release heavy metals harmful to the human body.
Stainless steel with a polished surface reflects the heat flow inside the steam room, reducing heat loss. In this case, reflected heat is more useful than direct heat. For thermal insulation use:
- basalt cardboard or cotton wool, the only material with increased hygroscopicity, non-flammable, environmentally friendly;
- asbestos cardboard, which reliably protects against flames and has a long service life;
- mineralite, an artificial material made specifically for these purposes.
Protective sheathing requires ventilation gaps of 2 cm from the wall to the insulation, 2 cm from the insulation to the steel sheet. If it is necessary to install the stove as close to the wall as possible, make a double skin of non-combustible insulation, use ceramic bushings to maintain gaps of 2-3 cm and sew them up with a steel sheet.
Insulation with cladding
Measures to protect walls with cladding are necessary in order to preserve the interior decoration of the room. They are more expensive, but no one has canceled the aesthetic advantages of the bathhouse. It is based on tile cladding, which is laid on fire-resistant cladding made of gypsum plasterboard, non-deformable gypsum-based cardboard with fiberglass, mineralite, non-flammable cement-fiber material, moisture-resistant and resistant to biochemical influences, LSU, fiberglass material bound with magnesium additives, resistant to high temperatures, high humidity. Heat-resistant glue is used for installation.
Advice! Use heat-resistant reinforced Terracotta glue, made from fireclay dust bound with kaolin additives, intended for tiling stoves, fireplaces, and all heated surfaces.
The recommended facing materials are quite varied, the best of them are:
- terracotta tiles, they are made from specially fired clay, which gives increased heat resistance and durability;
- clinker, denser clay tiles with a surface of various colors, similar to facing bricks;
- tiles, also made from clay, having an original embossed surface;
- porcelain stoneware made from a mixture of clays, kaolins, quartz sand, feldspars by high-temperature firing under a pressure of 400-500 kg/cm², with imitation of stone, wood, durable artificial material;
- soap chloride, a rock mineral consisting of talc, magnesite and chlorite, an environmentally friendly natural material that does not absorb moisture at all, has an attractive appearance, does not crumble, and is not afraid of high temperatures.
Advice! Use soap chloride to finish the steam room, this mineral has a healing effect on the human body, regulates blood pressure, stimulates cerebral circulation, expels viruses and microbes due to the release of vitamin D when heated.
All of the listed tiles are an element of protection that forms a cake, the basis of which is a fire-resistant material. Just like a screen, sheet material is installed on ceramic bushings with a gap of 2-3 cm from the wall. The minimum distance to the heat source from the tile should be 20cm.
Protection with cladding decorates the room, creates a positive mood, and helps to increase the efficiency of procedures. And most importantly, properly installed insulation prevents wooden walls from overheating and catching fire. Have a nice steam!
Features of a wooden partition
The partition in the bath between the steam room and the sink is the simplest and most affordable design option, requiring minimal time and financial investment.
To ensure sufficient thermal insulation between the washing room and the steam room, it is better to build partitions from a wide board or timber. This design does not provide for the presence of technological gaps in the inner part of the wall, which helps prevent the accumulation of excess moisture in the room.
In this case, the refusal to use a heat-insulating layer in the walls is explained by the fact that during operation the bath structure requires maximum heat accumulation in all functional rooms. Since a lower air heating temperature is maintained in the washing compartment, the lack of heat is compensated by the heated steam room.
Insulation
Insulation of a bathhouse is carried out in several stages:
- Exterior walls. The insulation is laid inside lightweight masonry.
For it, you can use sheets of expanded polystyrene, which are cut to the desired shape and filled with them into the space inside the lightweight masonry as the internal walls are built.
Mineral wool is also good for these purposes. External structures must be insulated so that when warming up the bathhouse there is no need to spend money on heating the entire building. The task of a sauna stove is to warm up the air inside the room. Internal walls. Here it is necessary to make a high-quality finish so that the heat does not escape into the walls. To do this, the rough masonry is waterproofed with coating materials (for example, bitumen mastic). Next, a layer of plaster is applied, a lathing is attached to it, and fiberglass is placed inside the resulting cells.
A layer of thermal insulation is laid (expanded polystyrene, ecowool, basalt wool). Next, the wall is covered with a vapor barrier (for example, foil), on top of which the finishing is placed. Experts recommend using lining, which quickly warms up and will become an obstacle to the transfer of heat to the brick.
The wall near the stove is insulated with a denser layer of heat-insulating material, according to the same principle as the internal surfaces of the bathhouse. Foil must be used as a vapor barrier, since the steam room is the wettest part of the bath and is subject to the most dramatic temperature changes.
The steam room must have high-quality ventilation so that when heated the room does not turn into a kind of thermos without air access.
When is fencing required?
The answer to this question lies in the way heat is distributed from any type of furnace. There are 2 such ways:
- Direct heating of the air in the steam room.
- Transfer of heat to surfaces using infrared radiation.
For a bathhouse, the first method is preferable, when in the process of heating the steam room, the air is first heated, and the wooden shelves, walls and floors receive heat from it. If necessary, the hot dry air in the steam room is moistened, this is called “steaming”.
Installation diagram of a protective screen for a furnace.
Infrared radiation is emitted by all heated surfaces, including the hot walls of a sauna stove. Considering that the burning temperature of firewood reaches +600°C, the outer surface of the metal walls warms up to +300°C. It emits such a powerful stream of infrared radiation that people taking bath procedures can get skin burns.
Sauna stoves in the mid-price category are equipped with a steel convection casing, which simultaneously acts as a protective screen. More expensive cast iron products are finished with slabs of natural stone or salt bricks: mineralite, soapstone and other rocks. But budget and homemade steel stoves do not have such a screen.
A screen for a sauna stove is necessary in the following situations:
- when the hot firebox body is not covered from the outside with a steel convection casing, and the stove is located in an open place;
- if the stove is equipped with a casing, but stands close to the wooden wall cladding;
- if the factory screen is made of thin metal and does not protect well from radiant heat.
Not only people, but also wooden walls need to be protected from hard radiation, as stated by fire safety rules. Therefore, a heater installed close to a wooden wall must be protected from it by a fireproof barrier. Brick is best suited for this purpose.
Burning
This is the easiest way when you need to remove insulation to transfer wires. This is also the most effective method if the inside is made of polyvinyl chloride. When a small area needs to be treated, use a lighter or soldering iron. Under thermal influence, the winding softens and it simply comes off the wire. If the winding thickness is small, this option is the most effective.
There is one drawback - it has a smell. Therefore, work must be carried out in a room with access to fresh air. Toxic emissions during the firing process negatively affect the body.
Conclusion
The importance of the above-mentioned bath structure cannot be overestimated, therefore the design of this stage of construction should be carried out at the very beginning. Remember that the safety you provide is precisely the factor that will allow you to enjoy your bathhouse and your work for many years!
During the heating of the bath, the surface of the stove heats up to 300-400°C
At the same time, it begins to emit infrared rays and itself becomes a source of heating. The coming heat is distributed throughout the steam room, but first of all it hits the walls adjacent to the stove. If the walls are wooden, then under the influence of high temperatures their charring begins. And there it’s already a stone’s throw away! The only truly effective way to insulate wooden walls from heat is to create protective screens and cladding from non-combustible materials in the bathhouse.
During the heating of the bath, the surface of the stove heats up to 300-400°C. At the same time, it begins to emit infrared rays and itself becomes a source of heating. The coming heat is distributed throughout the steam room, but first of all it hits the walls adjacent to the stove. If the walls are wooden, then under the influence of high temperatures their charring begins. And there it’s already a stone’s throw away! The only truly effective way to insulate wooden walls from heat is to create protective screens and cladding from non-combustible materials in the bathhouse.
Protective screens around the stove
Protective screens are insulation panels that cover the side surfaces of the furnace and reduce the intensity of thermal radiation. Screens can be metal or brick. As a rule, they are used for metal furnaces.
Method #1 - metal screens
The most common protective screens are factory-made steel or cast iron sheets. They are installed around the stove, at a distance of 1-5 cm from the walls of the firebox. Depending on the need to insulate one side or another of the furnace, you can purchase side or front (front) screens. Many metal furnaces are initially manufactured with protective screens in the form of a protective casing.
Protective screens make it possible to reduce the temperature of external metal surfaces to 80-100°C and, accordingly, reduce the fireproof distance to 50 cm. The total distance from the firebox to the wall (including a gap of 1-5 cm) will be 51-55 cm.
Installing protective screens is not difficult. Thanks to the presence of legs, metal panels are easily bolted to the floor.
Method #2 - brick screens
A brick screen can cover all the side surfaces of a metal furnace, representing its outer cladding. Then the stove will be in a casing made of brickwork. In another case, a brick screen is a wall separating the stove and the flammable surface.
To lay the protective screen, solid fireclay bricks are used. The binder is cement or clay mortar. It is recommended to use half a brick (thickness 120 mm). But, if there is a lack of material, it is possible to make a wall of a quarter of a brick (60 mm thick), although in this case the thermal insulation properties of the screen will be reduced by half.
Small openings (sometimes with fire doors) are left at the bottom of the shield for air convection between the brick wall and the stove.
The brick walls of the screen must end at least 20 cm above the top surface of the oven. Sometimes the masonry goes all the way to the ceiling.
The brick screen is not installed flush against the walls of the stove, the optimal distance is 5-15 cm. The acceptable distance from the brickwork to the flammable wall is 5-15 cm. Thus, the use of a brick screen allows you to reduce the distance from the stove to the wooden wall to 22-42 cm (stove - ventilation gap 5-15 cm - brick 12 cm - ventilation gap 5-15 cm - wall).