Which mortar for laying a stove is better? Varieties, composition, proportions and preparation of solution. Use of various additives.
The quality of the furnace’s masonry, its tightness, heat resistance, and strength over the years depend on a properly mixed solution. A shortage or excess of any component leads to its cracking, loss of integrity, and carbon monoxide leakage. Ceramic bricks are used for the work, and it is the clay mortar for laying the stove that is homogeneous in composition. It provides a unified structure of the structure with the same physical properties of mortar and brick. That is why clay solution is considered the best.
Step-by-step instructions for making the mixture
The stove is made to heat a country house, it is used not as an additional, but as the main heating option. In this regard, the load on the elements increases; at all stages of masonry, the recommendations of professionals must be strictly followed. We have already mentioned that the reliability, duration and safety of operation of the stove largely depends on the quality of the mixture. In the middle zone of our country, clay is everywhere; there is no need to waste a lot of time searching for it. As for the quality of clay, in the vast majority of cases it can be used to make a mixture; the final properties of the solution are regulated by changing the amount of sand.
The best clay is in industrial quarries
But this does not mean that you need to specifically go in search of brick factories; you can dig a hole on your site and collect clay. A few buckets of clay and sand are enough for a stove; the total number of bricks rarely exceeds 600–700 pieces. How to properly prepare a solution from clay?
Step 1. Dig up the clay. This can be done on any site with a suitable soil structure. As we have already said, no one will do any analysis of the clay; there is neither the opportunity nor the need for this. In our case, the clay was harvested in the forest; there were enough traces of previous harvests in it; you can dig clay from old pits.
Clay can be dug up in the forest or on your own plot
For one large rural stove, it is recommended to fill a barrel with a capacity of 200 liters. There is no need to compact it; let the soil lie freely and there will be air gaps between the individual lumps. The fact is that the clay must be soaked for at least a day; the cracks will ensure the penetration of water throughout the entire volume. The longer the material is soaked, the better its quality, the more uniform it is, and the easier it is to make the mixture.
The clay is poured into a container of suitable size.
Step 2. Fill the clay with water. We have already mentioned that the correct technology requires that the soil be wet for at least a day. Immediately prepare river sand and a sieve. The mesh size of the sieve is 0.5–0.6 mm. There is no need to make it smaller - it will be difficult to pass the mixture through. And if you use a sieve with large cells, the stones will interfere with the work. Our seam thickness is about one centimeter, stones of five millimeters do not create problems.
The clay must be filled with clean water and left for at least a day.
Step 3. After the clay has infused, begin stirring the composition. It is recommended to do this for the first time using the following algorithm:
- Mix the clay and water thoroughly in a container. It is necessary to use powerful mixers, the clay is mixed tightly;
- if there are pebbles in the solution, then filter it through the prepared sieve. All large impurities should be removed;
- add sand to the clay at a rate of approximately 1:3 (three parts sand per part clay);
- Stir the mixture and add water as needed. The consistency of the mixture should resemble rich sour cream.
Construction mixer price
Construction mixer
The quality of the mixture is determined by eye. If it hardly slides off the surface of the trowel and large marks remain on it, then there is a lot of clay in such a solution, add sand. If the composition falls easily, the trowel is completely clean, then you need to reduce the amount of sand. This is how experienced stove makers make up the proportions; in addition to finishing experiments, they can learn a lot about the physical characteristics of clay and sand by eye.
Determining the correct consistency of the solution
Masonry mixture
Sand for mortar
The sand must be clean and fine; for this it should be sifted with a fine sieve (1.5 mm x 1.5 mm). Otherwise, debris, small pebbles, and pebbles simply will not provide an even and thin layer of mortar; the bricks will not be at the same level. A thin and, most importantly, uniform masonry seam is required.
If the solution is mixed by hand, then an open, low container with a wide mouth is best. An old trough, a tub, a tub, a large basin, a small bathtub will make it possible to mix the ingredients with a shovel. You can make a wooden trough yourself, the seams will be clogged with a waterproof mixture, and there will be no leakage. If you use a construction mixer, then it is convenient to stir the masonry mortar into metal or plastic barrels of 50 and 100 liters.
So, remove debris, roots, grass, stones from the clay, add water, stir. The water should be clean and soft; rain water is best; it was used in the old days. Soft water is obtained from wells. Leave for a couple of days, stirring occasionally. If you feel that the clay has gotten wet and has taken on as much moisture as it needs, you can start creating the mixture. Stir well, you can knead with your hands, then add sand and stir again. Bring to a dough-like state.
Keep in mind: for 100 bricks you need 2 buckets of the mixture with a thin seam.
Checking the readiness of the solution:
- Dip a spatula into the solution and wet it first. If the mass slides off the metal surface, then everything turned out well. If it does not slide off and lumps remain, then the mixture is greasy and should be diluted with sand. Mix everything and repeat the test again.
- If absolutely nothing sticks to the trowel, everything flies off very easily, then there is not enough clay in this composition.
- Let the mixture sit for a while and then carry out a visual analysis. If water appears on the surface, then this is a signal: the solution is thin, you need to add clay.
Checking the adhesion of the mortar: lubricate a 5-7 mm thick brick, place a second brick on it, and let it stand. Carry out a control measurement - take the top stone, if it holds the second one in weight, then the adhesion will not fail. The clay solution can be reused and has an unlimited shelf life. After work, the remaining clay does not need to be thrown away; it may be useful for repair work.
Clay based
One of the cheapest and most accessible types of connecting stove mixtures. Clay mortar for laying stoves is characterized by increased fat content, which determines the degree of plasticity, heat resistance and strength of the finished material.
Natural clay oven mortar can be:
- Fat – characterized by plasticity, strength, but the rapid appearance of cracks after drying;
- Normal - quite plastic and resistant to cracking, gives a small percentage of shrinkage after drying. Able to withstand high temperatures up to 110 degrees;
- Skinny - non-plastic and short-lived, susceptible to rapid delamination and crumbling.
A refractory clay mortar is prepared using three components: clay, sand and water. This composition is resistant to cracking and drying out and ensures reliable installation of a brick stove.
To build a stove, it is recommended to use fatty and normal compositions, which have increased strength, ductility and resistance to delamination.
The quality of the clay determines the amount of sand needed to mix the solution. Clay and purified water with a low content of impurities are used for work. To lay 100 bricks, on average, up to 20 liters of clean water are used.
To prepare the solution, fine-grained quarry or river sand without additional impurities is used. Before use, it must be sifted through a fine-mesh sieve. If it contains gravel impurities, then it is recommended to use a sieve with a mesh size of up to 10 mm. For fine-grained material, a sieve with 2 mm cells is suitable.
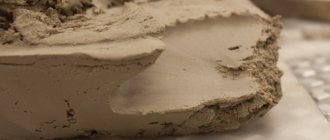
Before adding other components, it is recommended to test the clay base for plasticity. How to do such a check? To do this, a small board should be lowered into the resulting mixture for laying the stove and its thickness should be determined. It should be moderately thick and viscous. If there is excess liquid, then it is worth adding a little binder, stirring periodically and testing the mixture for plasticity.
The optimal thickness of the connecting material is 2 mm, which indicates the correct proportions of all components. The finished masonry mass is viscous and not very dense.
The appropriate density of the mortar for masonry depends on the ratio of the main components in it - clay and sand, respectively:
- Fat mass – 1:2;
- Normal weight – 1:1;
- Lean mass – 2:1.
How to prepare high-quality clay-based connecting mass? There are several proven methods.
Method No. 1
The required volume of clay is soaked for 24 hours, water is added to obtain a thick mass. The resulting material is carefully filtered, then sand is added to it and mixed again
It is important to avoid the formation of clay puddles, which can be eliminated with a small portion of the binder component
Method No. 2
Fireclay sand and clay are combined in a container in equal proportions, purified water is added (1/4 of the volume of clay). All components are thoroughly mixed until a homogeneous mass is obtained.
Method No. 3
The composition is mixed on the basis of loam. This recipe involves preparing 10 different solutions, from which the best one is selected.
For the first: 10 volumes of loam, 1 volume of sand and 1 volume of cement, etc. Descending volume of loam. Ten resulting bases are placed in different containers and left to dry for 5-6 days. At the end of the allotted time, the highest quality composition of the solution with a minimum degree of shrinkage and resistance to cracking is determined.
Method No. 4
Sand and ¼ water are added to the clay. All components are mixed to obtain a thick viscous mass. To increase strength, it is recommended to add rock salt or cement to such a mixture. For a bucket of mixture – up to 250 g of salt and ¾ liter of cement. The salt is first dissolved in water, and the cement is diluted with water to a thick consistency, after which it is added to the finished base.
Types of clay, its characteristics
It comes in different colors: blue, white, red, red, gray, black. White or kaolin was formed during the destruction of granite, juicy red contains metallic impurities, gray consists of kaolinite minerals, the composition of the black mass is the same.
Based on the presence of the main component (clay minerals), there are several types:
- Fat;
- Medium fat content;
- Skinny (non-fat).
In fact, there is no fat in it and it is impossible to determine its presence. But high plasticity allows us to talk about the softness, slipperiness and soapiness of the material, and this almost always correlates with the presence of fat.
Determination of clay fat content
How to determine the fat content of clay yourself? This is necessary in order to know how the finished mass will behave. And how to improve its qualities. Initially, it already contains some amount of sand, and it is this that affects the fat content. If there is too much of it, then the clay is skinny. To check, you can conduct a small experiment.
You should soak it, you can soak the whole mass, because it is pre-soaked to prepare the solution. After a couple of days, roll 2 small balls, leaving fingerprints on them, dry them and carefully look at what happens. If your lumps have shrunk in size and cracked, you have a fatty variety. If the lumps crumble, then this is a skinny version of the material. If the lump has not crumbled, but there are no fingerprints or are hard to see, then the clay is thin. And if your product does not have cracks and has not crumbled, then it is an almost ready-made masonry mortar. Having established the level of fat content, you can independently prepare clay mortar for laying stoves.
Experts say that a mixture oversaturated with fatty clay will not affect the quality of the heating structure. But too much sand in the solution can have a negative effect: the dried solution will crumble and crumble. Clay and sand should be mixed in the required proportions. High-quality clay is the main condition for the durability of the structure being built. One of the main requirements is plasticity. Plasticity is the ability to take any shape, without the appearance of cracks, tears or seams, and the “ability” to maintain these shapes due to aggressive environmental influences.
Plasticity of clay
Each type of clay has plasticity to a greater or lesser extent; due to the presence of this quality, it comes in three types:
- highly plastic;
- medium plasticity;
- low plasticity.
How to determine plasticity at home? By the way, plasticity is directly related to fat content. This means that you can independently increase or decrease the plasticity of the solution. So, knead it, roll it into a tight ball the size of a small fist, then press it between two boards. Press until cracks appear. If cracks appeared under low pressure, then the material is thin and low-plasticity; if cracks appeared after passing half the radius (close to the cake), then it is a highly plastic building material. The appearance of cracks at 1/3 of the compression height indicates medium plasticity.
There is another way: roll up flagella with a diameter of about 20 mm and a length of more than 20 cm and bend them into an arc. Flagella from low-plastic varieties will break when slightly bent. And the fatter the product, the more it will bend without cracking; this type can be bent to the point of a ring or a ball. Based on the experimental results, the composition can be enriched (by adding clay) or depleted (by adding sand). A mixture mixed based on accurate data about the individual components will be of high quality.
Secrets of choosing ingredients for high-quality clay mortar
The basis of the mortar for laying bricks is the following ingredients:
- water. The main requirement for it is the complete absence of all kinds of impurities, the presence of which can negatively affect the quality of the finished solution and lead to a noticeable decrease in the strength of the structure. The durability of the binder also directly depends on the quality and purity of the water, so you should take this issue responsibly and immediately abandon the idea of using water from the nearest body of water;
- sand. You should use clean sand that does not contain crushed stones or stones. The best solution would be to buy homogeneous sand, which should first be sifted through a sieve. The diameter of the holes in the sieve should not exceed 1.5 mm;
- clay. It is the main ingredient that provides excellent astringent properties of the finished solution and the reliability of the furnace design. The correct choice of this ingredient guarantees the durability of the structure and its excellent tightness.
Before making your final choice, perform a few simple tests to help determine the quality of the clay. It is advisable to make several mixtures with different amounts of sand and clay, forming small cakes. Leave them for 10-12 days in a warm room to make sure there are no cracks and the correct proportions of the solution ingredients are selected.
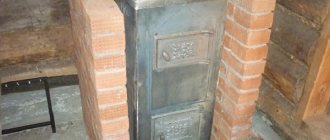
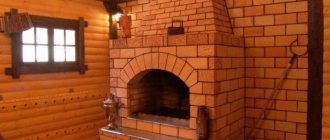
It is important to remember that solutions based on clay and fireclay can only be used for a certain type of masonry, because otherwise you will not be able to achieve the desired results! This mixture is ideal for the combustion and heat storage areas, and can also be used for laying the foundation and chimney. This feature is due to the increased level of resistance to prolonged exposure to high temperatures of the clay mixture and resistance to mechanical damage
But keep in mind that with prolonged exposure to condenser moisture, such structures will not last long, numerous cracks will appear on them and the structure itself will last a short time.
For laying the chimney pipe and foundation, it is better to use solutions based on cement or a mixture of quicklime and sand. They are distinguished by excellent resistance to the negative effects of increased moisture, and will also ensure the durability of the stove design. Use clay solutions in “hot spots” where you need to achieve maximum tightness and impeccable reliability of the structure.
The main nuances taken into account when preparing masonry mortar
When choosing and preparing a mortar for laying a stove, it is important to take into account some features.
- For high-quality construction of a furnace, it is necessary to prepare not one, but several solutions, taking into account the area of their application.
- The furnace solution must be prepared with skill. It will not work to mix clay-sand or cement mortar just as it should, since you need to take into account the conditions in which it will be used:
- temperature and mechanical loads that the stove will experience, as well as the influence of external atmospheric factors on the open section of the chimney pipe;
- temperature difference in different zones of the furnace structure. So, in the firebox the temperature rises to 950÷1000 °C, at the mouth of the chimney - up to 50 °C, and around the foundation, in the surrounding soil, it is only about zero.
Of course, the easiest way would be to purchase a dry compound at a hardware store and make a solution from it. However, it must be taken into account that laying 100 bricks of a standard size, laid flat, will require about 20 liters of the composition - this is approximately two buckets. Depending on the model of the selected stove, its construction will require from 500 to 2000 bricks, excluding the chimney pipe and the arrangement of the foundation. Therefore, after looking at prices in stores and calculating the required amount of materials, many are thinking about making their own solutions.
Traditionally, clay is considered the main ingredient in stove mortar.
Based on this, it is worth answering some traditionally arising questions regarding the masonry mixture:
- Where can you independently obtain the most important component of the mortar for laying a furnace - clay, thereby saving a tidy sum on its purchase?
- How to determine the quality of the material and its suitability for the manufacture of oven mortar?
- How to choose the correct proportions of the mixture, based on the quality of the material that is available?
- How are the components of the solution prepared?
- How to properly knead?
- What ingredients, besides clay, can be used for masonry?
First you need to understand what solutions are used for masonry in different areas of the furnace structure.
The right job with the right solution
The characteristics of plaster are important for the quality of the coating, but without following the application technique, even an expensive solution will certainly crack during use. Therefore, if you do the work yourself, strictly follow the algorithm of actions.
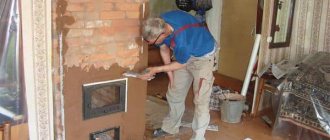
Preparatory stage
After completion of the masonry, the stove should stand for at least a month until the end of the initial shrinkage.
Join the joints, deepening them by 5-10 mm to increase the area of contact with the solution.
Clean the wall from dust and dirt using a brush and heat the oven to 50-60⁰C.
Moisten the masonry thoroughly with water so that the brick does not absorb moisture from the plaster, speeding up its drying.
Reinforcement of the finishing layer
photo from the site https://obustroeno.com
It is necessary to reinforce the surface, and there are several options for performing this stage:
Metal soft mesh. The metal must be galvanized so that the contours of the mesh do not show rust stripes. You need to take care of attaching the mesh at the stage of masonry, leaving wire outlets for it. If this has not been done, then the mesh will have to be secured with screws or nails into the seams.
Burlap or gauze. Opponents of this method of reinforcement point to the flammability of burlap, while supporters talk about environmental friendliness and the impossibility of ignition in clay. Having decided to reinforce the plaster with burlap, it is cut into squares, dipped in a liquid solution and glued to the wall after spraying.
Plastering
photo from the site https://kursremonta.ru
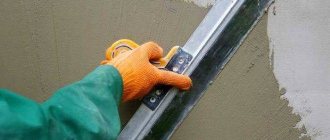
The plastering stage will require work to be performed in the following sequence:
Padding. You need to use deep penetration primers and prime the surface before applying each layer.
Spray. To spray, use a brush and the same solution as for plaster, only diluted with water to the consistency of liquid kefir. This is done to fill small irregularities and roughness, so as not to leave air voids that will lead to cracks.
Plaster. The solution is applied using a trowel and smoothed with a trowel, the thickness of each layer is 2-3 mm, while it is advisable to keep the total thickness of the plaster within 10-15 mm.
Covering. It is also done with a liquid solution, after which it is rubbed with a trowel. In the case of clay mixtures, grouting can be done with a rag soaked in the solution.
The stove cannot be lit for the next three days, and the first heating should not exceed half the maximum power of the stove.
If the finished plaster does crack, the crack must be repaired. To do this, it is expanded with a spatula, the surface is wetted and filled with the same composition that was used during the main work. Don't forget about primer and grout.
Now you know exactly how to make a mortar for plastering a stove, and let it please you with its impeccable appearance and cozy warmth for many years to come.
Recommendations and advice from experts
The work goes faster, and the result is of better quality, if you follow the recommendations from plastering specialists:
- Finishing begins after the walls have settled. In terms of no earlier than 6-12 months.
- The walls inside the building are finished first. Repair work on the façade is being completed.
- Before plastering, calculate the required amount of mixture.
- A test batch allows you to determine the fat content of the clay and calculate the proportions.
- Preparation is a mandatory step. Priming helps the solution adhere better to the base.
- If a thick layer is required, it is applied in two passes, no more than 2-3 centimeters thick.
First, plastering work is carried out indoors
Clay plaster is a high-quality natural material that allows you to create a durable coating with excellent thermal insulation characteristics. The material has a long lifespan and makes it possible for even a novice master to work without haste.
Have you ever dealt with clay plaster? Share life hacks for applying it in the comments.
How to properly prepare clay for laying a stove
Based on the experimental results, appropriate conclusions are drawn. If the fat content is high, the amount of sand should be increased by at least 1.5–2 times; if it is low, on the contrary, it should be reduced.
The ideal proportions of clay and sand for laying stoves are 1:1; this solution is plastic and heat-resistant. But it is necessary to dilute the mixture, focusing on the intermediate result. The classic recipe involves adding ¼ liquid, but depending on the specific situation, the amount of water can be increased.
Clay preparation
Based on the volume of work, the required amount of the base substance is prepared. But before preparing the solution, the material undergoes preliminary preparation:
- The clay is placed in a container and completely filled with water. It could be an iron-lined box or a barrel. If there are pieces or seals, they are first broken off.
- Everything is thoroughly mixed and left for 48 hours. Many craftsmen believe that clay should be kept for at least 5–7 days, constantly adding water.
If after 48 hours small lumps are observed, then everything is mixed again, ground and left for another 24 hours.
Mixing the solution
The finished clay material can be mixed using several methods, each of which takes into account the characteristics of the substance:
- The standard method is to add sand. Its quantity depends on the measurements taken and may vary. Sand is poured into the prepared container, then clay is applied and covered with sand again. A shovel is used to knead the ingredients. If liquid comes out from above, it means a little more sand is required. Clay that is too dry should be diluted slightly with water. The composition is considered ready after it slowly slides off the shovel and has a uniform structure.
- With medium fat content, clay can be diluted without sand. The material is laid on the prepared platform in layers, wetting is carried out each time. When the height reaches 30–35 cm, mixing begins; for this, the back of the shovel is used: it is struck on the clay. The kneading continues until a homogeneous mass is obtained. The readiness of the mixture for masonry is checked as follows: a thin layer of the composition is applied between two bricks and left for some time. Then you need to lift the top piece, and if the second brick holds, then you're done.
You can determine the quality and readiness of the solution using tactile sensations. The resulting material is rubbed by hand: when a homogeneous rough layer is formed on the fingers, the mixture can be used. Externally, the composition should resemble thick sour cream, then the stove will be reliable and will serve for many years.
Supplement Options
Experts often add various components to the plaster to improve its performance characteristics.
The main materials for making the composition are clay, water, sand or sawdust. To increase the thermal insulation characteristics in the case of rough finishing, chopped straw or hay, hemp and flax fibers, shavings of pine, oak, alder, and dung are mixed into the mass. Among modern materials, polystyrene foam in granules or fibers has proven itself well.
Fillers for clay plaster
Asbestos
Fiberglass
Cement
In addition to the listed components, common additives for plaster are cement, asbestos, and fiberglass. These materials help improve strength characteristics. For decorative compositions, pigments and mineral fillers are added.
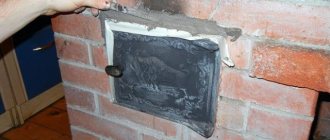
How to coat a stove with clay
The choice of how to seal the stove so as not to crack depends on what mixture you decide to use. But first you need to clean the bricks from the plaster and the layer of finishing material. They are then treated with a solution.
If you decide to use a clay mixture, then you need to follow the instructions on how to properly coat the stove with clay:
- The prepared solution is stirred one more time.
- They check its quality. To do this, roll the mixture into a ball and if it starts to crack, then add water.
- Before coating the stove with clay to prevent it from cracking, the damaged areas are moistened with water.
- The cracks are filled with the solution.
- Then the oven can be plastered.
- Despite the fact that the repair of the brick kiln is completed, you should not rush to heat the unit, since the solution must dry completely.
If you carry out repair work in full accordance with the instructions on how to coat the stove with fireclay clay to eliminate cracks, then you can forget about them for a long time.
Advantages and disadvantages of clay compositions
Clay plaster is not only a decorative finishing material. It has low thermal conductivity, so it retains heat. Clay is used both for basic leveling and to create a decorative surface. The material has become widespread due to its advantages.
The advantages of clay compositions include:
- environmental friendliness;
- fire resistance;
- ease of application;
- low cost;
- soundproofing;
- low thermal conductivity.
An important advantage of clay plaster is its ease of preparation and application.
Clay finishing is suitable for allergy sufferers. The material absorbs odors and binds harmful substances.
Clay compositions have a number of disadvantages:
- Long setting and drying time. It takes at least 5 days to dry a centimeter layer.
- Moisture capacity. Clay absorbs moisture well, so it requires additional treatment with moisture-resistant compounds.
- Low strength. The material is easily scratched and chipped. It is not used in buildings with increased loads.
Minor disadvantages also include the lack of exact proportions for laying out the plaster and the lack of craftsmen who specialize in it.
Clay plaster scratches and chips easily
Preparation of materials for preparing mortar for laying a stove
The easiest way to prepare sand. It is dried because the raw material cannot be sifted. And then they are sown on a mesh with a mesh size of 1.5 - 2 mm. The task is to remove pebbles and impurities.
Clay is more of a hassle. In the classic version they did this. Clay was dug up in advance, ridges about a meter high were formed from it, moistened and left for the winter. Water, penetrating into the pores of the clay, freezing, destroyed the structure of the clay, crushing it. After such exposure, the clay easily dispersed in water, creating a homogeneous suspension - clay milk.
Then the clay was mulched. Stir with excess water in a tall barrel and leave. Heavy impurities (stones and sand) collected at the bottom of the container. Light impurities (roots, grass, other debris) simply floated up. They were easy to assemble and remove. After waiting a little (a day or two), the lightened, settled water was removed from above, and the middle layer with clean clay was collected and used for further preparation. If the clay turned out to be thin or heavily contaminated, the mulching procedure was repeated several times. Today they also resort to it, but in full only in cases of extreme need - when there is no fatty or normal clay.
Afterwards the clay was left to “ripen”. They simply filled it with water and waited for all the organic matter to rot. The process is quite smelly and long - about one and a half to two months. The “rotten” water was not changed. The smell served as a marker for the completion of the process. As soon as the stench disappeared, the clay was considered ready. This meant that all organic impurities in the clay were removed.
Today, rarely does anyone allow themselves the luxury of long clay preparation. Therefore, the preparation process is shortened as much as possible.
First of all, the clay is soaked for several days, stirring daily with a mixer. Any grass and roots that float (or are wound around the mixer auger) are removed. As soon as the water settles, the excess is carefully drained, and the soaked clay dough is scooped out to prepare the solution. The stones are removed from the bottom, and the remaining lumps of clay are again filled with water.
If there are a lot of lumps and foreign inclusions, it is filtered through a sieve with the same mesh as for sifting sand.
The prepared clay milk should have the consistency of thick cream.
No. 6. Cement-lime mortar
Cement-lime mortar is even stronger than lime mortar, and you will need absolutely no cement, and the higher its grade, the less it will be used. You will need a ratio of cement, dough and sand of 1:2:10. First, water is added to the lime dough, mixed and cement is added, without stopping stirring, then sand is added and the solution is mixed. It is better to determine the exact quantities of sand and water in a small test batch.
Removing Impurities
Almost all quarry clays and sands contain impurities and require purification. Remains of plants, roots, grains of sand, pebbles, and pieces of crushed stone are removed from raw materials in various ways.
How to remove impurities from clay
Impurities greatly degrade the quality of the masonry. Purification of raw materials is carried out in three stages:
- manual sampling of plant remains, roots, crushed stone, pebbles;
- sifting through a metal sieve with a hole size of 1.5 mm;
- soaking clay;
- rubbing through a metal fine-mesh sieve.
Photo 2. The process of sifting clay through a metal sieve. You need to press it with your palm so that all the particles pass through the mesh evenly.
In practice, to clean clay for mortar, craftsmen do without the labor-intensive process of soaking the raw materials.
How to remove impurities from sand
The sand is considered prepared when the water passing through it becomes clear. To prepare the material, you need to do the following:
- Plant remains, roots, and large stones are manually selected from the sand.
- After a rough sampling, the material is sifted through a metal sieve with a mesh size of 1.5 mm.
- The sand is placed in a burlap bag (or net) and washed with running water. A hose is used for flushing; water is supplied under pressure.
No. 4. Clay-fireclay mortar
It is recommended to use clay-chamotte mortar for laying the firebox allow the use of ordinary clay mortar when building stoves with a not very intense thermal regime: these are Dutch and Russian stoves, hobs, and barbecues.
In other cases, you will need gray, white or yellowish clay with high fat content. It is thinned with fireclay sand, but more often, to save money, a mixture of quartz and fireclay sand is used in a 1:1 ratio. Soft water must be used, with a hardness of up to 160 mg/l. The preparation is no different from ordinary clay mortar with one caveat - strength tests are not needed, because it is provided by the original raw materials.
How to prepare a solution for plastering a stove?
When preparing the solution, the main attention should be paid to the ratio of the components and the order of their mixing to obtain a uniform consistency. The standard preparation method is to mix the dry ingredients, followed by adding liquid until the required thickness is obtained, but it is worth taking into account the nuances that depend on the type of plaster chosen.
Simple clay mortar for oven plaster
To prepare such a solution you will need the following components:
Clay – 1 volume part.
Sand – 2 volume parts.
Asbestos (fiberglass or straw) – 1/10 by volume.
When preparing clay mortar for plastering a stove, the proportions may change. If the clay you received has a high fat content, the volume of sand must be increased to 3 or 4 parts, based on the results of the Shepelev test or your own experience.
The secret of seasoned masters
Experienced craftsmen advise adding 200 g of salt to a bucket of solution to avoid the appearance of cracks in the future. This advice has a logical basis - salt is hygroscopic and slows down the setting of the plaster, making it dry evenly. Subsequently, when heated, hygroscopicity prevents drying out and cracking of the coating.
Lime-gypsum mortar for stove plaster
photo from the site https://nashaotdelka.ru
The components for this type can be purchased at any construction supermarket:
Slaked lime – 2 parts by volume.
Gypsum – 1 volume part.
Sand – 1 volume part.
Asbestos fiber 2/10 by volume.
Keep in mind that gypsum sets very quickly, and you need to prepare the amount that you can use within half an hour, because it will not be possible to dilute it after preparation.
Do-it-yourself cement-clay mortar for plastering a stove
The addition of cement is intended to give strength to the coating. The following ratio of components is recommended:
Portland cement – 1 volume part.
Clay – 1 volume part.
Sand – 2 volume parts.
Asbestos – 1/10 part by volume.
For mixing, it is convenient to use a drill with a mixer attachment, which will allow you to mix the components evenly without forming lumps.
Lime-clay mortar for plastering a stove: proportions
photo from the site https://myshtukaturka.ru
To prepare this composition you will need:
Lime – 1 part by volume.
Clay – 1 volume part.
Sand – 2 volume parts.
Asbestos – 1/10 part by volume.
As you can see, the differences with the previous composition are small, but thanks to the addition of lime, this clay solution for plastering the stove will be lighter, which means that fewer layers of paint will be needed to give the finished look.
Ready-made heat-resistant plasters
A limited number of manufacturers produce such highly specialized products, but in general, buying heat-resistant plaster will not be a problem, and the cost of domestically produced plasters is quite affordable.
photo from the site https://granstroy.ru
The following brands are available on the Russian market:
Terracotta is a Russian company with a very affordable pricing policy. The prepared solution retains its properties for 60 minutes, giving even novice craftsmen time to develop.
ORTNER is an Austrian brand specializing in materials for the construction of fireplaces and stoves. High quality is consistent with the cost of building mixtures.
Rath HefnerPuts is another representative of Austria, the undoubted advantage of which is the fact that the mixture is not produced in dry form, but in the form of a solution, without requiring dilution.
Plitonite is a domestic plaster that contains reinforcing fibers. The hardening time of Plitonit fireproof plaster is 30 minutes, which is also quite a decent indicator.
The stove is a clay-cement mixture in which the optimal proportions have already been met, and all that remains is to add water. This eliminates the need to think about how to prepare a clay mortar for plastering the stove.
As you can see, the choice is quite wide, and allows people with any financial capabilities to choose their own option. Ready-made fireproof plasters can withstand temperatures of 400-600⁰C, so they can be used for the exterior of a stove without fear.
Types of clay solutions
The stove is in extreme conditions: the base is always cool, the firebox has steep temperature changes, the outer part of the chimney is always cold and damp, but during heating the passing heat of the smoke warms its inner part. Other solution compositions may be needed. They will have to be mixed not only with clay. Depending on the characteristics of each part, several types of fastening agents are prepared for the following work:
- The furnace foundation is installed using a cement-sand mortar. 1 part cement is mixed with three parts clean sand. Or cement-lime (the proportions are as follows: 1 part cement and 2 parts lime paste are diluted with water, then 9 parts sand are added).
- The masonry of the first two rows is made on the basis of a cement-sand mixture, and then - on a clay-sand mixture, the firebox - on a clay-chamotte mixture. Fireclay sand will provide resistance to high temperatures.
- Facing work requires a different mortar; lime-clay or limestone is suitable. Clay mortar for plastering a stove requires the addition of asbestos or gypsum, the proportions will be as follows: 1 part clay, 2 parts sand, 1 part lime, 0.1 part asbestos.
- When constructing that part of the chimney that functions on the street, lime or cement-sand mortar is used. The hygroscopicity of the dried mortar will not allow bricks to be laid on clay in places where moisture is available. The lime mixture is mixed using lime paste, and sifted sand is added to it in a ratio of 1:3.
Concrete and heat-resistant concrete mixtures
Concrete mortar is also used for the stove foundation and chimney above the roof. Its strength is not inferior to limestone, hardening begins after 45 minutes. Before mixing, the components are sifted through a sieve. First, sand is poured into the container, and cement is placed on top of it. Stir until smooth, then add water
It is important to achieve a viscous consistency, not thick and not too runny.
For a monolithic firebox, a heat-resistant concrete mixture is used. Its composition is as follows:
- Portland cement M400 1 part,
- crushed brick 2 parts,
- sand 2 parts,
- fireclay sand 0.3 parts.
Strength increases if you use quartz sand instead of ordinary sand. Refractory concrete is characterized by large fractions (up to 10 cm) and high density. The following proportions are used as standard: 8 liters of water per 20 kg of mixture. Mixing is carried out mechanically, for example, in a special mixer.
In ready-made oven mixtures, all the above procedures have already been done at the factory. There is no need to look for the right proportion of sand and clay. Most heat-resistant mixtures are simply filled with water and mixed. You don’t have to select the amount of water either: it is indicated on the package. Experienced stove makers may not need such mixtures, but for a beginner, when laying a stove with their own hands, a heat-resistant mixture will be useful. The main disadvantage of using a heat-resistant mixture is the higher overall cost of building the stove.
A significant advantage of ready-made mixtures is the presence in their composition of ingredients that are usually not used when preparing masonry mortar with your own hands. Such components include plasticizers and fireclay chips.
Ready-made oven mixtures based on crushed refractory ingredients are called mortars. They are divided into fireclay, semi-acid, mullite and mullite-corundum. When laying home stoves, only fireclay mixtures are used. The rest are used in the production of blast furnaces, cupola furnaces, hog furnaces, etc. Let us dwell in more detail on fireclay mixtures.
Fireclay is a fireproof material that is obtained by firing fireclay clay. The material is exposed to high temperatures until it completely loses its plasticity and moisture. After this, the fireclay is ground into powder, mixed with various types of clay, to obtain different heat-resistant mixtures. Mortars are classified as thermo-hardening, that is, they acquire their fire-resistant properties only after high-temperature firing.
| The brand of the mixture is designated by the letter M, the letter Ш stands for “fireclay.” The number in the marking indicates the size of the proportion of aluminum oxide (Al2O3) in the composition, and, accordingly, the fire-resistant properties of the material. Grades MSh 39 and MSh 36 have a fire resistance of at least 1730 degrees, MSh 31 - 1690 MSh 28 - 1650. |
For all their advantages, ready-made mixtures also have certain limitations. Many mixtures do not provide for re-mixing unless the entire supply of solution has been used up. Masonry cannot be carried out at sub-zero temperatures. The solution from the finished mixture will take longer to dry due to the addition of plasticizers.
Determining the quality of clay
The main indicator is fat content. There are fatty and lean clays. When the first one dries, it significantly decreases in volume and cracks, while the second one crumbles.
Clay can be fatty or skinny
Let us immediately note that there is no strictly defined ratio of sand and clay to obtain a good solution. Proportions are determined experimentally, by selection depending on the fat content of the rock.
The fat content of clay rock can be determined in the following way. Roll out ropes of clay, taking a thickness of 10–15 mm and a length of 15–20 cm. Wrap them in a wooden mold with a diameter of 50 mm. If the clay is oily, then the rope stretches gradually, without cracks appearing. Normal ensures smooth stretching of the bundle and breaks, reaching a thickness of 15–20% of the original diameter.
Kiln mixture consumption when laying bricks
Materials for stoves and fireplaces
Paving stones
Other
In this section you can download the price list in PDF format
Lode (Latvia) Don Zori KS Keramik (Russia) Warehouse program of imported bricks Hand-molded Daas Baskteen Hand-molded Caprice (Holland) Heylen Bricks Clinker Daas Baksteen Kerameya (Ukraine) Facing brick Kerma LSR
Osnovit Facade solutions (Osnovit) Solutions for paving stones (Osnovit) Solutions for facing stone and tiles and tiles (Osnovit) Solutions for leveling floors and walls (Osnovit) Perel Terta Warm solutions (dry mixtures with special Quick-mix fillers
All materials for stoves and fireplaces Figured elements Cast iron Halmat (Poland) SVT (Finland) Chimneys and ventilation ducts
Large-format ceramic blocks KERAKAM (SSKM, Russia) KERATERM (Lode, Latvia) POROTHERM (Winerberger) LSR (St. Petersburg) Warm summer mixtures (with perlite)
Paving stones LODE Paving stones LSR Systems for laying stone and paving stones Osnovit
Brickwork accessories Baut Ceramic fence caps Lode Brick tiles Sale from stock
Lode (Latvia) Don Zori KS Keramik (Russia) Warehouse program of imported bricks Hand-molded Daas Baskteen Hand-molded Caprice (Holland) Heylen Bricks Clinker Daas Baksteen Kerameya (Ukraine) Facing brick Kerma LSR
Office and exhibition hall: Moscow, 109542, Ryazansky prospect, building 86/1, office 316.
Warehouse: Lyubertsy, st. Initiative, no. 16. (Projected passage 4037)
Warehouse coordinates: Latitude: 55°40′42.5″N (55.678471) Longitude: 37°54′26.77″E (37.907436)
Working hours:
The group's warehouse is open on Saturdays from 9:00 to 15:00.
Exhibition hall: Mon - Fri: 9:00 - 19:00, Sat: 9:00 - 15:00, Sun: closed
Warehouse: Mon-Fri: 9:00 - 18:00, Sat: 9:00 - 14:00. Sun: closed. (last shipment one hour before the end of working hours).
Directions:
The MDS exhibition hall is located in the last building on Ryazansky Prospekt. These are two pink buildings (10 and 3 storeys), connected by a passage, located behind a black lattice fence.
By public transport you need to get to the Vykhino metro station. Exit the first carriage on the right side. On the square near the metro, bus stops: No. 169 and 731 (only on weekdays) run on schedule very rarely. The second stop from the metro is directly opposite the building where the company’s office is located. Bus number 177 - one stop, then walk 3 minutes along the bus to the traffic police post, then to the other side of the perpendicular street - Samarkand Boulevard.
By personal vehicle: from the center you must turn immediately past the traffic police post onto a perpendicular street (the next turn after 30 meters is the exit to the Moscow Ring Road!). In order to get to the exhibition hall, coming from the region (or from the Moscow Ring Road), you need to enter Moscow along Ryazansky Prospekt, drive to the nearest turnaround (about 2 km), turn around and then proceed as described above.
Directions to the MDS warehouse for cars and trucks
The MDS Group of Companies includes: LLC “ TIN 7721594201 KPP 772101001 OGRN 1077758743600
IP Shamonin Anatoly Sergeevich INN 772132026972 OGRNIP 307770000629932
CJSC INN/KPP 7723117042 / 772301001 OGRN 1027739665062
MBC is also a member of the non-profit organization “Association of Independent Sellers of Construction Ceramics”. No other companies are affiliated with the MDS Group of Companies.
Phones:
Showroom:
Sales department:
+7, +7 Fax
What is fireclay clay
Fireclay is the most environmentally friendly refractory raw material. Before you figure out how to work with it, you need to find out what this building material is and what advantages and disadvantages it has.
Fire clay consists of elements such as quartz, alumina ceramic, calcium oxide, iron oxide, sodium oxide and magnesium oxide
What does it consist of and what does it look like?
The primary basis of fireclay is kaolin clay, which is formed as a result of the settling of particles of destroyed rocks. A mass of gray kaolin clay is subjected to heat treatment at high temperatures - about 1300-1500 C o, as a result of which it loses almost all the water that holds its molecules together, and the clay sinteres. After this treatment, kaolin acquires a brown tint and, in terms of physical properties, becomes similar to stone. Fireclay is brought into its finished form using metal rollers, which crush pieces of burnt kaolin.
The higher the firing temperature of kaolin clay, the less water remains in the fireclay composition, due to which the material loses its plasticity and does not undergo dramatic physical and chemical changes when exposed to heat. In other words, due to the loss of water, fireclay practically does not expand when heated. Based on moisture absorption, fireclay is divided into:
- Highly annealed. Water absorption – from 2 to 8%.
- Low-burnt. Water absorption – from 20 to 25%.
Water absorption is the amount of moisture that a material can absorb and retain in its pores. This characteristic is expressed as a percentage as the difference in the mass of dry material and that saturated with moisture. For example, if a dry material has a mass of 1 kg, and a fully saturated material (it is unable to absorb more liquid) weighs 1100 grams, then its water absorption is 10%.
All types of fireclay clay can withstand approximately the same temperature, at which they are not subject to its destructive effects - 1800 C o. The maintained temperature depends on the final material in which the fireclay powder was used: the concentration of clay, water, retaining agents and other chemical reagents in it. Manufacturers may (but are not required to) list the exact maximum operating temperature of the clay on the bag, along with detailed mixing ingredients.
Results
- For furnace structures, you need a solution that can withstand temperatures of at least 1100–1200 C.
- To build the furnace itself, solutions are prepared from red clay. For the combustion chamber and chimney you need an option made of fireclay and sand. There is no difference between the use of quartz sand and ordinary river sand.
- The ratio of components in the material depends on the indicators of the components. Fat clay is mixed with 5 parts of sand, lean clay with 2.
- During production, verification tests are performed. If the solution is sticky, add sand; if it separates, add greasy clay.
- Other options for masonry - cement, lime-sand, are suitable only for the foundation or the outer part of the chimney.
How to find sand
Sand is sold packaged or in bulk, already sorted into fractions. But it is possible to obtain it yourself and use it for stove mortar. So, white quartz sand is perfect for laying any areas of the stove; yellow sand cannot be used for the firebox.
On a note. If you decide to buy sand, then it is better to take the mountain or lake version; such a building material is best suited for constructing a furnace and will bind the components of the solution well.
It is recommended to make the seams of the stove masonry about 2-3 mm. Therefore, sand is suitable with a fraction no larger than 1.6-1.8 mm. Craftsmen purchase sand of different grains. It is believed that it grips better.
Where can you dig up sand yourself? In abandoned quarries, ravines, river shallows, along steep river banks. The purest sand is not at a depth of one meter or one and a half meters. Otherwise, you will have to wash it for a long time.
If the sand has foreign inclusions, it needs to be cleaned. To do this, sand is poured into a trough and filled with ordinary water. After this, the mixture is thoroughly shaken. The turbidity and dirt that floats out are drained. And so on until the water is clear. For sifting, take a metal construction sieve with cells of 1x1.5 mm.
How to clean clay from sand at home - how to separate
Before making a solution from loam, the components for it need to be prepared - cleaned. They do this in 2 ways:
- Dry cleaning - select twigs, debris, leaves from the material. Then it is crushed and filtered through a sieve with a cell diameter of up to 2.5 mm.
- Wet - the clay is not free-flowing, so they often do it differently: they soak the material, and when it swells, rub it through large cells - up to 3 mm.
Wet cleaning method.
The difficulty of preparing the mixture yourself
During independent laying of the firebox, foundation part, chimney, external wall panels and facing work, it is necessary to mix different types of compositions. The underground part is laid using a standard cement mixture. For walls that are exposed to elevated temperatures, a clay composition with the addition of plasticizers is required.
It is important to determine the required fat content of clay - the main component of the composition. It is necessary to test the material; the presence of compression cracks indicates an excessive amount of sand. Seams made of unsaturated clay crumble over time and the structure becomes deformed. Too fatty material leads to shrinkage.
Adding cement to the composition will increase the strength of the seams. But it is worth considering that the substance will increase the adhesive ability of the mixture, so the solution must be diluted in small proportions.
It may take several days to independently prepare different types of mixtures. The clay must be soaked in advance; some of the components need to be thoroughly sifted.
Main components
To prepare a heat-resistant stove solution you will need sand, water and clay. The clay should have medium fat content. In professional language, clay is called fatty, skinny and normal. The fat one has a risk of cracking, while the skinny one does not hold its shape well and will begin to crumble over time.
| The suitability of clay for masonry is determined by squeezing a ball between two wooden planks. The material must shrink and not crack (compression of at least 30% of the volume before cracks appear). |
Another important ingredient is sand. For laying the firebox, white quartz sand is used (the proportion of clay in it is no more than 2%), yellowish sand is not recommended for preparing a fire-resistant mixture. Sand should have a fraction of up to 1 mm. It is advisable to use monofraction raw materials; such sand consists of identical round quartz grains. Polyfraction sand has a mixed grain size - choosing the right amount for the mixture will be more difficult.
A shovel is suitable for working with sand.
Sand can be mined on your own if there is a suitable source nearby. If the sand is taken from a river bank, it should not contain large organic particles such as silt or algae. Small organisms will still be present in it, so your own sand must first be prepared. In production, it is usually subjected to heat treatment. The sand mass must be washed with water using your own efforts. First, the sand is passed through a sieve with cells of 1 - 1.5 mm.
The sieve can come in a variety of shapes; the most common option is a rectangular construction sieve.
The proportion of sand is selected based on the fat content of the clay. Typically the ingredients are mixed in a ratio of one part clay to three or two parts sand. For self-control, you can mix a test portion of the solution. To test, cylindrical sausages are rolled out of clay with different amounts of sand, which, after drying, are wrapped around the handle of a shovel or other cylindrical object. A normal mortar for masonry cracks on the surface, leaving the sausage damp inside. The absence of breaks indicates that the solution is too oily; in a lean solution, large breaks appear throughout the entire depth. It is better to take slightly acidic water with an average level of hardness for the mixture. The liquid must not contain algae or other organic elements. If it gets into the solution, even a small proportion of organic matter will contribute to the destruction of the masonry in the future
Crack repair work
This process can be divided into several stages:
- Diagnosis of existing damage.
- Preparation of the solution.
- Plastering the heating structure.
Stage one – damage diagnosis
Before coating the stove, you should assess the extent of the existing damage in order to find out the scope of the work to be done. If the cracks are minor, then surface measures will be sufficient. To do this, the bricks are cleaned of finishing materials and plaster, the damage is repaired and the stove is plastered.
Stage two - preparing the solution
Regardless of the size of the damage, you need to prepare a special solution to putty the oven. Depending on financial capabilities and the availability of materials, certain types of mixtures are used when carrying out repairs.
They are:
- from fireclay clay;
- from sand and ordinary clay;
- in the form of grout for the stove - you can make it yourself or buy it ready-made;
- from oven glue.