The method of drainage from the bathhouse must be thought out before its construction, at the project development stage. Even for a small building, it is important to determine in advance how the drainage and disposal of water will be organized - into the soil or into the sewerage system. It is important that the drain is organized correctly and functions without problems. How to make a floor in a bathhouse with a drain? Today's material is about this.
Construction of a pouring floor on a concrete base
Basic drainage scheme
A fairly complex floor arrangement allows you to avoid the destructive influence of water on the floor base.
How to make a floor slope to drain water from a bathhouse with your own hands? Before you begin the process of pouring floors with a drain system, it is worth familiarizing yourself with some technical nuances. According to many experts, installing a floor base with a hydraulic apparatus is advisable exclusively in the washing department. There are several reasons for this:
- Pouring concrete floors in a steam room leads to strong dust formation at a time of increased dryness of the atmosphere;
- Concrete surfaces tend to get very hot, unlike wood. Therefore, the presence of concrete in the steam room cannot be called appropriate;
- Cement screed has low ductility, so during thermal expansion or compression it will crack very quickly.
What should the base structure be like for the water drainage system to work like a clock? In order to evaluate the advantages of one or another method of laying a hydraulic apparatus, we will consider the process of assembling and draining water from the bathhouse. Sloped floors in most cases “work” using the following technology:
- The slope at the base allows you to collect all the liquid at one point in the room;
- A ladder is installed in the corner of the water assembly, through which “waste” water is removed from the room;
- From the drain, the liquid through the background pipe enters the sewer system or a crushed stone filter, which is installed under the bathhouse.
To make a really high-quality system for draining water from a bathhouse with your own hands, you need to take into account many points:
- foundation type;
- type of ladder;
- “seasonality” of the bath;
- floor type (concrete, wood).
A fairly complex arrangement of floors allows one to avoid the destructive influence of water on the floor base. If you make the base with a slope, the liquid will be quickly evacuated from the room during water procedures, which will prevent damage to the concrete screed or wooden boards.
Necessary materials
To create a drain in the concrete floors of a bathhouse, the following finished products are required, as well as basic and consumable materials :
- Flared PVC pipes with a diameter of 50 mm, designed for wastewater drainage.
- Fittings – 90 and 45 degree angles, tees, transitions.
- Water intake grid with a block tank and a pipe for connection to pipes.
- A waterproofing gasket that is installed around the perimeter of the drain funnel.
- Cement-sand mortar that fixes the position of the pipe.
- Polymer sealant for sealing joints between concrete screed and drainage parts, protecting the base from moisture penetration.
- If the pipe is laid in a tray, use crimp clamps with fasteners to reinforced concrete structures.
- To protect the structure in case of leakage, use a drainage layer of coarse sand or crushed stone.
- Polymer membrane to create a drainage layer and prevent the spread of moisture throughout the base under the concrete floors of the bathhouse.
Tools required:
- equipment for mixing concrete, nylon lace;
- bubble or laser level.
After installing the drain, but strictly before pouring the floors, the reliability of fixation of the outlet manifold is checked, as well as the permeability of the pipes and compliance with the required slope.
Floor requirements
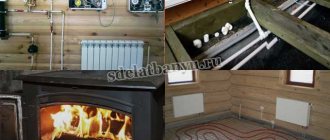
If you plan to use the steam room throughout the year, the base must be insulated.
In order to correctly carry out the hydraulic technical part of the work when constructing a frame bath, you need to pay attention to many technical nuances. The service life of the floor base depends on the quality of the drainage system. Therefore, special attention is paid to this stage of construction work.
The construction of sloped floors can be different, so when laying a hydraulic system with your own hands, it is worth considering several construction technologies. If you do not have any experience in carrying out installation work, you should give preference to the simplest but most reliable water drainage system. But before you begin the process of arranging the base, it is worth considering the following requirements for floors in the bathhouse:
How to make a leaky floor in a bathhouse secured to joists?
- The surface of the floors must be hard and non-slip;
- If you plan to use the steam room throughout the year, the base must be insulated;
- Floors must be quickly dried and cleaned of dirt;
- To prevent the development of pathogenic microflora in the bathhouse, it is imperative to install a water drainage system.
Available materials for building a drainage pit
The choice of suitable material for the construction of a drainage pit under a bathhouse depends on the design features of the structure, the volume of wastewater and the financial capabilities of the owner of the site.
Barrel pits
Tanks can be constructed from barrels, metal and plastic, of various sizes. Such a system involves the use of one or two drainage containers:
- One container. The bottom of the prepared pit is covered with a drainage mixture of crushed stone and gravel, then a plastic container without a bottom and with a perforated surface is lowered into it. The distance between the barrel and the pit is filled with drainage. A waste pipe is connected to the barrel at an angle. Some of the liquid will flow through the drainage holes into the soil for further cleaning.
- Two containers. Such a system involves the use of two barrels, with the first being installed 25 cm above the second. The containers are connected to each other by an overflow pipe. The wastewater enters the first container, in which foreign impurities and solid waste settle. Next, the purified liquid is poured into a second tank, to which perforated pipes are connected for drainage. Drainage elements are installed in trenches filled with drainage material and a dense layer of soil.
Brick pits
To construct drainage pits, ceramic bricks are used, the masonry of which is carried out with small gaps - they ensure the drainage of wastewater into the drainage pad and soil. The operating principle of such a drainage system is no different from the previous one, the difference lies in the material used. The distance between the brick reservoir and the earthen base is filled with drainage material designed to clean the wastewater and distribute it around the perimeter of the pit.
A brick pit is considered more durable and practical compared to a structure made from plastic barrels.
Concrete pits
Given the technical equipment and financial capabilities, it is possible to build a drainage pit from concrete rings with a perforated surface, which are mounted in a prepared pit. After the installation of the rings is completed, the bottom of the structure is covered with a drainage cushion of gravel and crushed stone.
In the case when the depth of the pit is at least 2 meters and the bottom of the tank is concreted, such a structure can be used both for drainage of wastewater from a bathhouse and for sewerage of a residential building.
Tire pits
Cesspools made from used tires are designed to drain liquid waste, so they are well suited for the needs of a bathhouse.
The arrangement of a drainage system when installing tires can be carried out in various ways, including lateral perforation of the walls, maintaining a technological gap between the installed slopes, cutting off the outer walls while maintaining the internal structure of the tires.
This is the simplest and most popular option for organizing drainage under a bathhouse, according to which the work can be done with your own hands.
Water drainage methods
Diagram of a filtration system for draining a bath.
The design features of the base and methods of arranging the hydraulic apparatus directly depend on what types of materials the floor will be constructed from. As a rule, wood, cement screed or combinations of materials are used to finish the base. For any type of construction, a system for draining water masses from the bathhouse is prepared in advance.
The design of the drain mechanism can be different and depends on many factors:
- For a bathhouse for three to four people, it is advisable to make a cesspool under the foundation of the structure. The walls of such a pit are edged with brick and covered with sand. As the tank fills with water, the liquid is pumped out of it using a cleaning machine;
- If you are building a bathhouse for a large number of people with your own hands, it is better to make a drain pipe connected to the central sewer system or a separate well;
- To purify wastewater from dirt, it is advisable to install an underground filtration system. It is equipped with a special sump, distribution well and waste pipe;
- A simpler option for water purification would be to install a filter well. Filter material (crushed stone, brick fragments, expanded clay) is poured under the bathhouse. In the process of irrigation with water, the mineral bed is covered with silt, which purifies the wastewater before entering the ground.
What type of sewage system to choose for a bathhouse
In private buildings and country cottages, central drainage in the form of a centralized sewer network is not often found. Perhaps in cottage villages, with development according to some kind of pre-approved (general) plan. Basically, all types of drainage of water used in the household are limited to a septic tank (factory-made or home-made), a more open version of it - a drain well or even a pit where the water goes thanks to loose soil - the latter option assumes a very low groundwater level and soft, almost frost-free water. , winter.
Criteria for choosing a sewer system
When choosing the optimal sewage system for a bathhouse for a particular area, we are guided by the following points:
- the absorbency of the soil in the area where the bathhouse is being built, the tendency for this soil to swell, the characteristics of its flowability;
- how far is the natural water intake located and how deep does the groundwater lie;
- intensity of use of the bathhouse and the associated possible volume of drainage;
- the difference in the height difference between the location of the bathhouse and the point of discharge into the well;
- budget.
Arrangement of a drain well or reservoir
To properly arrange a drain well, its location and operating principle must be figured out already at the bathhouse design stage. The main task in such a design is to correlate the location of the steam room and washing compartment with the well itself and with the slope of the drainage pipe through which the used water will drain.
For families who use the bathhouse only on weekends and in which the number of family members is 3-4 people, and the volume of the drainage pit may be small. So that the drain water had to be pumped out every 4-6 months. And taking into account the fact that during the washing process, detergents that are aggressive to the environment are used (no matter how they are positioned in advertising regarding safety), drainage wells for bathhouses must be as airtight as possible in the sense of the penetration of used water into the soil surrounding the well.
To do this, the walls of such tanks are concreted or waterproofed from the ground in some other way.
Drain well
Drain wells are considered to be reservoirs (pits) completely isolated from the environment. That is, the used water does not go anywhere, settles with solid fractions settling to the bottom, and only after some time is removed (pumped) out of the well.
They are made by digging a hole with earth-moving equipment; waterproofing is ensured by lowering concrete ends into the hole with a sealed bottom on the bottom and sealing the joints between the rings.
Drainage well
A drain option, but without a sealed bottom. Instead, a sand cushion is made at the lowest level, on top of which fine gravel is poured. It is installed in soils that do not have loamy and clay layers, which allows wastewater to undergo deep filtration. If there are such layers, then the drainage well on them serves as a storage well.
Such wells are constructed after assessing the absorption properties of the soil and its throughput per unit of time. the assessment is made after test drilling on the site selected for construction.
Pit under the steam room
If the bathhouse will be used exclusively in the summer (or during the period when the air temperature is in the range of +4⁰С and above), a simple pit located directly under the floor of the steam room can serve as a storage and disposal tank for drain water under the steam room.
Absorption pit
It is a hole dug in the ground in advance, even before the construction of the bathhouse, filled with at least 60% filter material (sand, crushed stone, ceramic or brick chips). Used only for columnar foundations. In winter, in the middle zone and to the north, operation is impossible - the pit freezes and will not absorb and filter drain water. Frequent use of a bathhouse with a steam room, in which such a pit serves as a container for draining water, is also not allowed, since it will not have time to absorb water.
Autonomous sewerage system with settling well
If it is impossible to connect the bathhouse to a centralized sewer system, the best and environmentally friendly option would be to create settling wells - single- or double-circuit.
In the first case, the inlet pipe-tee is located above the same drain (outlet) pipe-tee. In a double-circuit settling well, which ensures even greater purity of settled water, a bypass hole is made between the second and first chambers. Water purification occurs under the influence of gravity, due to which suspension and solid particles of dirty water gradually sink to the bottom and form sludge. And already in it, under the influence of anaerobic bacteria, the decomposition of harmful components into simple non-toxic compounds occurs, which are cleaned from the bottom of such wells at a certain frequency.
Video description
Selection of sewer pipes
Choosing the diameter of the pipe depending on the level of the slope
A correctly made slope at the base of the drain does not yet guarantee the rapid evacuation of water masses from the room. In this matter, the choice of sewer pipes is not the least important. Since the bathhouse uses a non-pressure liquid discharge system, it is advisable to use the following pipes to install the hydraulic apparatus:
- The minimum diameter of the pipe should be 50-60 mm, and the thickness of its walls should be at least 3-4 mm;
- It is advisable to assemble the external pipeline from PVC materials, since they are more frost-resistant;
- During the installation process, pipes are laid in the soil at a level that is below the freezing point.
The article presents some of the stages of installing a sewer pipeline with your own hands. To ensure the system is tight, all structural elements are assembled using high-quality seals. Any holes in the water supply will lead to airing and retention of water masses in the system.
Adviсe
In order for the process of installing the floor in the bathhouse to go “without a hitch,” experts recommend following a number of instructions.
- For insulation, you should choose materials that are least responsive to elevated temperatures and humidity. That is, it is better to simultaneously organize not only heat, but also hydro and vapor barrier.
- The bars should be laid correctly so that the liquid can flow down along the joint line.
- If there is a possibility that the space under the floor will fill with moisture, it is necessary to create a gap from the internal backfill on top of the soil to the wooden base. Its size reaches 15 centimeters.
- Fiberglass underlays on the waterproofing floor will make movement on the floor inaudible. They are produced in the form of a thick tape, which is extremely convenient.
Wooden materials must be treated with an antiseptic. It is advisable to use a composition that can destroy all microorganisms and prevent damage to boards and beams. In addition, all wooden parts are pre-dried or purchased already in this form.
If this is not done, the material will curl during use, cracks will appear and the shelf life of the floor will be significantly reduced. If it is necessary to install ventilation, it is important to organize its correct output. Usually a separate pipe follows the path along the wall to the attic
If the foundation is monolithic, then it is recommended to make holes that will connect the ventilation gaps with the air outside. If the steam room area is large, then one drain will not cope with all the water. It will be necessary to think about several so that the material does not rot too quickly. Dry floors not only eliminate moisture, but also lead to heat loss. In this situation, it is necessary to insulate the foundation and base of the log house, and place the sauna stove below the floor level.
- The floor in the steam room rises relative to ground level. And in a separate washing room, on the contrary, it should be lower than in other rooms.
- It is necessary to leave a ventilation gap under the floor. It can be installed at a height of 10–15 cm.
- It is worth installing the finished floor so that there is an angle of inclination in the direction that is directed along the length of the boards, and not in width. This will help extend the service life of the products, since the direction of water is also one of the reasons in the rotting process.
- To prevent the board from bursting when screwing in the screw, you need to work at an angle of 45 degrees.
- Under no circumstances should you use linoleum, laminate or other synthetic coverings in bathhouses, even in the rest room. In any case, such materials will begin to heat up and release substances that can poison the body. In the dressing room, such a covering should be placed on top of a special flooring that allows the floors to dry.
- The selected boards must be edged or tongue-and-groove. Their thickness varies from 25 to 30 mm.
Ladder arrangement
Options for installing drainage drains in a bathhouse
What is a drain? The drain is a plumbing device that plays the role of a water intake. It is equipped with a siphon or water seal, which prevents the spread of unpleasant odors from sewer pipes. The drain performs one important function - it quickly redirects wastewater into the sewer system.
When laying a sewer system with your own hands, the drain must be installed in compliance with certain rules:
- The drain must be located at the very bottom of the floor base, otherwise complete evacuation of water from the bath will be difficult;
- For rooms with high levels of humidity, it is advisable to choose drains or polymer materials, since they are not subject to corrosion;
- In order for the ladder to “work” correctly, during its installation it is advisable to raise the pipe 10 cm from the bottom.
If necessary, you can assemble the sewer with your own hands and without organizing a water seal. To do this you need:
How to make a floor in a bathhouse from tiles?
- Raise the base of the structure by 3 bricks and install a drain pipe connected to the drainage well;
- From the inside, attach an elbow with a diameter of at least 5 cm to the pipeline, with its upper part located 4 cm below the level of the base;
- Fill the base with a cement mixture, and then make a finishing screed with grooves through which water would easily flow into the drain;
- At the final stage of the work, a rubber ball is placed on the drain elbow, which acts as a shutter valve that prevents the spread of odor from the sewer.
Is it possible to do it in a bathhouse?
Draining in wet rooms of a bathhouse is necessary, since the accumulation of water not only causes discomfort during the operation of the space, but also contributes to the proliferation of insects, pathogenic bacteria and the formation of persistent mold.
The drain is a simple engineering solution :
- On the floor. At the lowest point, a water intake grate is installed, which can be located either in the center of the room or in the corner.
- The water inlet pipe is connected to a sewer pipe with a diameter of 50 mm.
- The pipe is laid under the floor or in the ground and communicates with the collector.
- The main collector, in turn, drains the accumulated water downhill to a cesspool, septic tank or other drainage structure.
When designing and installing a drain, you should take into account the basic requirements for the installation of a domestic sewage system - the grate must be equipped with a coarse filter, and the pipeline must be located at a slope to the horizontal from 1% to 3% for the gravitational movement of wastewater.
Installation of leaking floors
Diagram of a leaky floor with a drain
Leaky floors are the simplest option for arranging a floor base in a bathhouse with your own hands. In such a system, it is not necessary to slope the floor, since water easily seeps through the boards and ends up in a drainage hole or well. Leaky floors, unlike solid ones, have one advantage - the absence of sewer pipes.
It should be noted that such a base device is suitable for a frame bath, which is used exclusively in the warm season. If the structure is planned to be used all year round, it is advisable to pour a concrete screed before laying the boards. However, in this case, it is better to make the flooring made of boards removable so that they can be dried if necessary.
When installing a leaky wooden floor, you need to consider the following points:
- To organize the flooring, you need to take well-processed planed boards without a locking system;
- The boards are secured to the floor beams using nails that are driven in at a slight angle;
- The gaps between adjacent boards should be the same and be 5-6 cm.
Despite the fact that there is no slope in the floor, water escapes very easily through the holes between the boards. As a rule, tanks are installed under such a bathhouse to collect water, from where it is discharged through a drain pipe into the sewer system.
In order to prevent the appearance of mold in the bathhouse, during the process of finishing the base, attention is paid to the following points:
- It is best to assemble a wooden floor from coniferous wood boards, since they are less hygroscopic;
- To ensure normal drying of the floor, holes need to be drilled in the foundation for better movement of air masses;
- There must be an air gap of at least 0.5 m between the base and the ground.
Installation of a drain hole in different baths
There are not very many drain designs. They differ rather in the place of application. The design of the drain may be different for different types of baths.
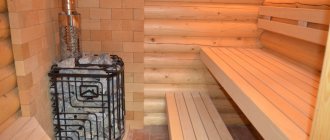
Sauna drain
The floor drain in a sauna may not have the same throughput as in a steam bath: there are no water flows from the tubs, and the font has its own drain. In addition, as a rule, the sauna itself does not need a drain, and the sauna washing area does not need a tiled floor. This means that a classic drain with a drain is used there.
In a sauna with a tiled floor, you can use a classic drain with a drain and a water seal
It is not much different from a sauna drain.
Viega Advantix drain for installation in hammam and sauna
Drain in a Russian bath
Draining in a Russian steam bath is necessary in two rooms - the steam room and the washing room. Bath drains are different, which primarily depends on the design of the floor in the steam room and washing room. They are no different in design if the floors are the same in both. Let's look at different floors and different drains for these floors.
A steam drain can also be ordinary, with a drain
Dependence of the design on the floor of a Russian bath
The floors in a Russian bath are different.
- Leaky or torrential wooden floors - horizontal boards are not laid tightly, but with cracks for free flow of water over the entire floor area. This is a traditional design that has long been used in Russian baths. The main disadvantage is the need for thorough initial and subsequent regular treatment of boards with hydrophobic impregnations.
- Leak-resistant wooden floors - the boards are laid closely at a certain angle of inclination towards the drain hole so that water flows freely. The slope is carried out using slightly wedge-shaped logs.
- Tiled (only possible in the washing room). They are also laid with a slight slope towards the ladder. The slope is carried out either by creating a concrete base, or by using different thicknesses of mortar.
The drains for different genders of a Russian steam bath are strikingly different in design. But the largest variety of drains is found on pouring or leaky floors.
pouring floor
With the simplest method of water seeping through the entire floor into a drainage pad located under the entire bathhouse, there is no drainage device at all.
Drain through the pouring floor into the drainage pad; no drainage device
A more complex subfloor design: it slopes towards the concrete channel, preferably with insulation and screed. There is also no drain.
When draining into a concrete channel, there is also no drainage device
When draining into a concrete pit, the role of a water seal is performed by the pipe itself, located in a special way - with the possibility of air access.
The pipe in such a pit plays the role of a water seal
If the underground has a drain into the sewer, then in addition to insulating and waterproofing the underground, you need a simple drain with a water seal to prevent unpleasant odors from entering the underground, and from there into the bathhouse through the cracks in the floor.
When draining into the sewer from under a pouring floor, a simple drainage device is required
Non-leakage floor
The only possible solution here is a classic drain. It can be of different designs - from a complex modern drain to an ordinary, familiar siphon. The ladder is a compact and reliable design.
The drain will last a long time and is easy to clean
The siphon is cheap and familiar.
Scheme of drainage on a non-leaky floor in a bathhouse using a siphon
The question is your financial capabilities and the availability of space under the floor.
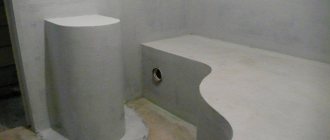
Pouring a concrete floor
Installing beacons and creating a screed with a slope towards the drain.
How to pour concrete floors correctly? It is worth considering that non-leaking floors must have a slope. Otherwise, the water will not go down the drain without “help.” What should be the structure of the concrete base in the bathhouse? To properly pour the cement mortar and make the desired slope in the floor, you should adhere to the following recommendations:
- In the case of arranging the foundation on a strip or pile foundation, first of all, floor joists are laid;
- The subfloor is subsequently attached to the joists. Skull blocks are nailed to the bottom of the joists, onto which boards are thrown;
- Heat-insulating materials (foam plastic, polystyrene, mineral wool) are placed in the sections between the joists;
- Then a sewage system with a siphon is installed in the washing department;
- After installing the hydraulic component of the floor, the wooden sheathing is sheathed with DSP sheets;
- The slope of the base for normal water drainage should be approximately 30 mm per m2;
- Cement mortar is poured onto the prepared subfloor;
- After the screed has hardened, a drain ladder is installed and a finishing coating (wood, tile) is laid.
Step-by-step instructions for the device
Installing a drain in a bonton screed for a bathhouse floor is not an easy job, which is best left to professionals.
If this is not possible, when installing a utility network with your own hands, strict adherence to the following technological map is required (using the example of a standard drain in a screed).
A sewer drainage and drainage design is being carried out with the determination of slopes, connection points and elevations for each element.- The base is prepared for the pipe - if the screed is placed not on a reinforced concrete slab, but on a soil foundation, it is compacted or partially replaced with a layer of ASG.
- On the wall, in the form of a mark with a marker, or using a string, the required drainage mark is fixed, as well as the direction of laying the pipe with the required slope.
- The horizontal section of the pipeline is assembled on a compacted base, according to the design.
- At the location of the funnel, a branch is made, which ends with a vertical section of pipe that exceeds this level by 10-40 cm.
- The sewer network is checked by spilling it.
- The area around the future funnel is fenced off with a small box made of wooden flanging.
- The screed is poured, observing all layers - hydro- and thermal insulation, reinforcement, as well as slope. Wait time for the concrete to harden.
- In the void intended for the installation of a funnel, the pipe is cut so that the future grate is strictly at the level of the planned final floor covering.
- The funnel is mounted in a layer of high-strength cement-sand mixture with the connection of the pipe to the vertical outlet. A layer of polymer waterproofing is also placed under the drain. Wait time for the solution to set and dry.
- The seam between dissimilar materials is treated with sealant.
After installing a finished floor, for example, porcelain tiles, a drain grate is installed on the funnel. At the final stage, the seam between the tile and the grate is sealed with silicone compound on a dry surface.
Laying tiles
In bathhouses, bathrooms and kitchens, previously familiar tiles are now being abandoned. The tile has only a few types of colors. It is being replaced by porcelain stoneware. Porcelain stoneware, thanks to semi-dry pressing technology, can have complex patterns and almost any color on its surface.
Porcelain tiles have a large area (the length of the side is always greater than that of tiles). When laying, the screed should be very even, without voids between the tiles and the screed. Only in this case will the floor be reliable and durable. In this regard, it is better to entrust the installation to a specialist. Professional installation of tiles for baths and saunas is very important. A separate article on our website is devoted to this.
Description of plank floors
Plank floor - photo
Wood is a special material that has not only a number of technological advantages, but also one significant drawback. It is not static, therefore, even after installation work is completed, it “behaves” according to its own laws, peculiar only to it. Changes in temperature and humidity cause lumber to shrink, increase/decrease in volume, stretch or contract. By the way, it is for this reason that after the construction of the log house, finishing is carried out about 2 years later.
Features of installing a wooden floor
But even after a two-year period of shrinkage, wooden structures are still moving, albeit not as intensely. For example, a wooden floor with underfloor heating moves every time the heating system is turned on.
The graph shows the direction of change in floor dimensions depending on humidity (RH)
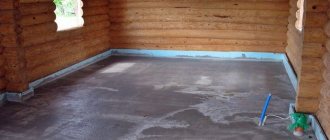
Floor for any season
Screeding the floor in a bathhouse under tiles is a type of work aimed more at the aesthetic side. But when you plan to use the bathhouse at any time of the year, or the climatic conditions are characterized by harsh winters, it is recommended to install a floor that has a ventilated space.
This method will require a slightly larger amount of work and additional funding. But it has maximum thermal protection and can last a long time. If all work is carried out in accordance with technological specifications. The entire process differs from a floor poured onto a ground surface by excluding the first two activities from the list of works. A drainage pit is not installed; it is replaced by a point at which water collects and a drainage system that drains water beyond the boundary of the foundation. The pillow is also missing. In its place, a ventilated underground space is installed.
You will have to complete the following work steps:
- Level the soil base.
- Install logs from the surface of the earth at a height of twenty centimeters.
- They are covered with boards.
- The wood elements used are completely treated with antiseptic compounds.
- A film is laid on the subfloor, which acts as a waterproofing agent.
The working moment differs in some features. The fact is that the soil level in the bathhouse and on the street should be the same. The basement area is ventilated through special vents, which are installed in the foundation walls. Air flow circulates through them, removing moisture. This ensures dryness of the logs and extends their service life. The rest of the works are known to us. To create a screed in a bathhouse with a slope, it is recommended to fill it along beacons made of bars packed at the required level. And if the floor was installed with protruding joists, then the screed is laid along their edge.
How to fill floors
Casting a waterproof screed is the main stage in the construction of floors with a drain. Afterwards, all that remains is to make a light wooden flooring or lay tiles. Before pouring the screed into the bathhouse under the drain, formwork must be made.
If conventional screeds are cast from liquid concrete (its fluidity is used to level the front surface), then for a floor with a funnel-shaped recess or slope this is unnecessary. The solution is mixed to become thicker. It is permissible to use various lightweight screeds with porous filler if the manufacturer of the mixture provides this.
Important! Pay attention to the finishing grouting of the inclined screed. Water will not stagnate on a smooth surface. This will protect you from the appearance of an unpleasant odor in the bathhouse.
This will protect you from the appearance of an unpleasant odor in the bathhouse.
The slope of the floor in the bathhouse for water drainage should not be made too large. This is a common mistake that results in unnecessary loss of height in the room (increasing the distance between the number floor and the drainage screed). A slope of 1-5 degrees is sufficient. To measure, use a two-meter ruler (the rule for leveling screeds) and a funnel surface template.
The values are calculated in advance.
For example, for a 2x2 m sink, the recess in the center of the floor will be about 7 cm.
The thickness of the screed will be 14 centimeters.
You should not make the screed too thin in the center, but if you lay a reinforcing mesh (for example, a plaster mesh made of thick wire), then the thickness of the concrete in the thinnest place can be 3 cm.
Concreting a bathhouse drain using these methods implies that a wooden flooring will be placed on top of the concrete.
A leaking floor is made in the same way as a regular floor, only the boards are laid with a small gap. Too large gaps make the floor uncomfortable and increase heating costs.
Information. To fill the waterproof screed, you can use ready-made factory-made formwork elements. Shields are used for the floor. Leveling the front surface with a slope is carried out using a vibrating screed and manually.
Drainage device in a non-leaking wooden floor
A system that can be used all year round, but is somewhat more complex than the previous one.
Step-by-step instruction
- When performing foundation work, install a drain pipe.
- Raise the pipe to the level of the clean floor.
- Waterproof the foundation, then lay the beams, and carry out work on the foundation with a hole provided in it for the pipe.
When installing a subfloor, lay the boards with an inclination angle of 4-6 degrees, organizing a drain to the pipe.
- When laying heat-insulating material, provide a hole for the pipe.
- Install a finishing board covering and install a receiving ladder at the outlet of the pipe.
DIY sewer system
Before organizing a drainage pit for a bathhouse, you need to remember that the entire pipe system is interconnected. Both external and internal. The system includes 3 water inlets.
- Drain ladder in the sink.
- Water inlet in the steam room.
- Tee for toilet and ventilation network.
What is a trap? This is a regular siphon with a waterproofing seal. It does not allow unpleasant odors to enter the bathhouse. It also plays the role of a grid that prevents large debris from entering the pipe system.
The process of constructing an internal drain in a bathhouse has the following sequence.
They make trenches for pipes. They need to be dug to a depth of 1 meter in relation to the top of the foundation. The side parts of the bathhouse are conventionally designated by points A and B. In them, a trench should be dug to a depth of half a meter. Gradually from both points to the center of the bathhouse room, a trench is laid in such a way that for each square meter its slope is 3 cm. Sand is poured to the bottom of the trenches to a depth of 7–12 cm and compacted
It is important to ensure that the slope is even. Now the foundation can be poured and the necessary holes for the pipes can be made. Drain pipes are mounted vertically. To install them, you need to drive meter-long piles into the bottom of the trench, to which these pipes are tied
For vertical drains, you need to provide a small margin along their length. Such a pile structure will reliably hold all communications, which will significantly extend their service life. After installation, you need to check how the drain works.
What is a bathhouse, what floors can be used in it and why?
A bathhouse is a kind of object in which high humidity constantly accumulates and the temperature thermometer goes off scale, cold or hot water flows, creating an additional load on the materials with which the room is decorated, so their choice should be approached especially carefully.
Within the scope of this article, we will pay special attention to gender, which can be represented by the following materials.
Concrete (most often it is used as a base for boards, tiles, etc.).
The service life of such a floor is very long (at least 50 years), but it is very cold, and in order to make it suitable for the bath room, you will need a lot of money and expenses.
Brick.
Due to the fact that fairly high temperatures prevail in the bathhouse, so as not to create conditions for discomfort (due to high heat capacity and low heat transfer, brick can even lead to burns), this material is used only as a base for a wooden or concrete floor.
Tree.
An ideal option for a room equipped for a bathhouse, it is environmentally friendly, warm, and the smell after heating the bathhouse is natural and very pleasant. It is believed that aspen is the best option. In addition to its good woody qualities, it also drives away all evil spirits and evil, restoring health and strength. At least, this is what our ancestors believed, which means that the judgment has a legitimate place to be taken into account.
Now let's get down to business. Due to the greatest popularity of wooden floors on a concrete base, we will focus on them and give a detailed description of their installation.