Hello, dear readers!
A concrete screed on the floor in a bathhouse is considered the best option. It is durable. No matter how you look after the wood, after 5-10 years the floors need to be re-laid. Do you understand the humidity...
Concrete does not rot, does not deform, does not require special care, and lasts for more than 40 years. Today we’ll talk about how to fill the floor in a bathhouse with a slope for drainage. It is not easy to do the work of arranging such a floor with your own hands, but it is possible if desired.
Pouring the floors in the bathhouse can be done both in the washing room and in the steam room. A concrete floor is essentially a concrete screed on top of which a waterproof, non-slip coating is laid. Typically, tiles are used for these purposes. When laid on the ground, the slope of the floor is ensured by creating a slope of the very base of the ground. For small areas - due to changes in the thickness of the underlying layer.
Features of the drainage system
First of all, I would like to draw attention to the fact that the installation of sewerage in the bathhouse should be carried out even before the work on laying the floor https://techengroup.ru/pomesheniya/dlya-parkovok/.
At the same time, it does not matter much what material the floor in the bathhouse will be made of. Regardless of your choice of drainage device, before creating a sewer system, you must perform certain preparatory work.
Many people mistakenly hope that all the drainage from the bathhouse will be absorbed by the soil. However, this option for wastewater disposal leads to the soil being polluted and the soil being eroded. If you abandon the idea of creating a water drainage system, then after a short time from the moment the bathhouse begins to operate, you may encounter shrinkage of the structure, its main structures will begin to deform.
If the erected structure for paired procedures is intended for a family of three, and it is used only once a week, then in this case you don’t have to worry about installing a sewer system in the building if the bathhouse is built on sandy and sandy loam soils. In this case, a leaky floor is created to drain water. This work involves fixing the floor boards loosely. They are laid freely with a gap of 5 mm.
This allows you to lift the floor and dry it at any time. The drains that pass through such a floor are absorbed into the ground. If the amount of drainage from the bathhouse is large enough, then in this case it is worth installing a leak-proof floor in the building and creating a sewer system.
Beautiful examples
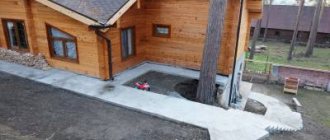
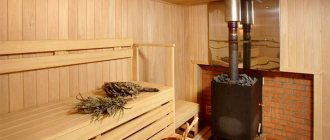
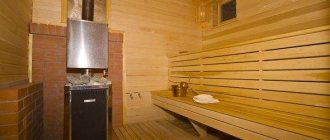
A high-quality concrete screed on the floor will go well with wooden walls and ceilings. The materials for the latter can be boards and lining, forming an original combination. A large window, a laconic stove and simple wooden shelves will ideally complement the interior.
The tiled area under the heater can become a bright accent of the steam room and, echoing the washing room, combine two interiors into one. You can add brutality to the room if you replace it with natural or artificial natural stone. He, in turn, will require inserts on the walls of the steam room itself.
The contrast of light wood on the floor and dark wood on the walls will create a very unusual, memorable room. Benches, flooring and the stove must continue this kind of confrontation.
To learn how to properly make a floor in a bathhouse, see the following video.
We fill the floors in the bathhouse with our own hands
The technology for pouring floor screed in a bathhouse, in general, is no different; it is quite simple and accessible to anyone who decides to do it themselves with their own hands. A regular aluminum profile can be used as beacons. It must be remembered that in the bathhouse the entire floor from beginning to end is sloped, in the direction of the intended place of concentration and discharge of water. The guide beacons are set by measuring the slopes with a long rule and a level. Beacons are placed with a meter interval from each other. A pair of trowels of mortar are placed on the base, a guide beacon is installed on them and, measuring with a level, gradually pressing on the desired side, the inclination of each beacon is set to the same level. After the solution has hardened, the beacon settings will no longer be lost and you can safely begin applying the screed. As with most decorating projects, it's best to start at the far corner. The solution is poured directly between the beacons and, if necessary, leveled along them. Professionals, as a rule, do not do these types of work alone, because the solution must be constantly poured and immediately leveled. Therefore, if you are pouring the floor in a bathhouse with your own hands, it is recommended to call someone for help, this will speed up the whole process significantly.
Waterproofing the floor in a bathhouse: general information about floors in rooms with high humidity, the nuances of waterproofing wooden and concrete bases
General leveling of the screed is carried out using a long rule, which is carried out along the guide beacons, smoothing out all the unevenness. If necessary, you will need to add mortar somewhere with a trowel so that there is no hole, and remove the excess somewhere so that there are no bulges in the floor.
Strengthening of the screed occurs in about 2-3 days, but it will finally take place only after 2 weeks. To avoid the occurrence of cracks during this period, the screed should be wetted 2 times a day. This is done so that light spots do not appear - areas in which the cement for some reason dries faster than the rest of the floor, which can lead to cracks. After wetting, the floor is covered with a film so that the water does not evaporate immediately.
Laying methods
There are two types of wooden flooring for the steam room:
- leaking;
- leak-proof.
The second design option is more expensive.
Preparing the soil base:
- For leaky floors. If the soil is sandy, the ground needs to be leveled, a 20 cm layer of crushed stone is poured over it. Moisture will pass through it unhindered, and various debris will linger on the crushed stone. If the soil is clayey, you need to arrange a special tray in which water will accumulate. A drain is created from it, through which the liquid is removed from the bath.
- For non-leaking floors. The ground is leveled and a layer of expanded clay is poured on top of it. The insulation should not reach 15 cm to the beginning of the joist. A hole must be made in the wall of the strip foundation, near the drain point, through which a pipe will be drawn to remove the used liquid. Secure a special sleeve or casing into the hole and pass the tube through it.
Laying non-leaking flooring
Features of the work:
- First you need to prepare the subfloor.
- The flooring must be sloped in one direction so that water flows along it on its own.
- There should be a drain point with a grate at the lowest point of the flooring.
- It is necessary to lead the pipe from the drain to the sewer or drainage well.
Foundation preparation process:
- Erect columns of brick or concrete blocks that will hold the joists.
- Lay the logs on top and secure them at a slope in one direction.
- Secure the logs with metal corners to the first strapping crown, and with anchors to the support posts.
Features of laying lags for non-leaking floors:
- You need to start laying from the walls at an angle of 10°.
- Make the outermost joists higher than the rest.
- To ensure better ventilation, a gap of 3–4 cm should be left between the outer joists and the walls.
- Lay a layer of waterproofing. For this it is better to use roofing material.
- Treat the joists with an antiseptic.
Work on arranging the floor with rough, floorboards:
- Under the joists, secure a subfloor made of unedged boards and bars.
- Lay a layer of roofing felt.
- Lay the insulation over the waterproofing. For this, it is better to use expanded clay, since it is not afraid of moisture. Mineral wool will not work.
- Cover the insulation with another layer of waterproofing.
- Stuff the tongue and groove board.
If you need to strengthen the flooring, you can use self-tapping screws.
Laying leaking decking
Arrangement of a leaking floor:
- Prepare unedged boards, sand them, and cut them with a miter saw.
- You can start laying leaking flooring from any wall. Place the first board 2 cm from the adjacent vertical surface. Stuff the next ones at a distance of 2 cm from each other. This is easier to do with a ready-made template.
There is no need to maintain a slope, since water will pass between the joists.
All that remains is to apply the protective coating. Do not use paint or varnish.
Specific features of wood flooring:
- You can fasten the boards with self-tapping screws or nails. Hats need to be pushed in as deep as possible. If there are grooves and tenons, they must be coated with glue in advance.
- The process of acclimatization. The tree must be acclimatized to the conditions in which it will be used. It is necessary to bring the lumber into the steam room 5 days before use.
- Treatment. Wooden surfaces must be coated with antiseptics to protect them from rotting.
The floors inside the baths can be made of concrete or wood. The second option is considered more popular. Wood decks may or may not leak. The first designs are the simplest, but are not suitable for cold climates. Solid wood bases can be installed in any steam room, but you need to provide a drain for water.
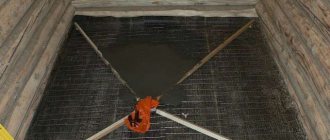
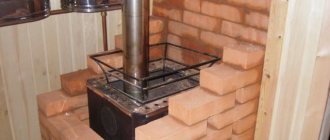
Floor with drain over concrete screed in a timber bathhouse
Here a drain hole has already been installed in the concrete screed and the floor beams have been installed. All that remains is to insulate the underground with sheets of extruded polystyrene foam.
Prev 1of1 Next
Prev 1of1 Next
Prev 1of1 Next
Prev 1of1 Next
The insulation boards are fastened together with sealed foam and laid with a slope towards the drain. A layer of roofing felt waterproofing is laid on the crowns of the log house, on top of which a reflective vapor barrier for the walls of the steam room will be installed in the future.
Finally, the simplest elementary technology for draining a wooden floor from our ancestors. The floor is divided into two parts by a wooden channel running down the center. It is made of three boards and has a cross-section of an inverted letter P. This design with three walls resembles a square pipe without one plane and is installed in the center of the steam room with a slight slope towards the drain. The remaining floor boards on one and the other side of the gutter are mounted so as to form a slight slope towards it. The floor is made solid, without cracks, and all the water flows to the center and exits through the gutter into the sewer system.
Installation of a concrete floor with a drain in a bathhouse
Before pouring the floors in the bathhouse to drain the water, let's look at the sequence of installation of the entire floor structure in the washing compartment.
If your bathhouse building is built on a slab foundation, then you can start pouring the screed directly on the concrete base. Naturally, the slab must have a hole for the fan pipe equal to its outer diameter.
If your bathhouse is on an MZFL foundation or on a columnar / pile foundation, then the floor pie design will be relatively standard for this option.
First of all, floor joists are installed, which will perform three functions at once in this scheme:
- The logs will serve as the basis for the finished floor, which will be concrete in the washing area and wooden in the steam room.
- A subfloor will be attached to the joists, which will support the insulation underneath.
- The insulation you have chosen to insulate the bathhouse floor will be laid between the joists. For example, if you chose standard mineral wool slabs with a width of 60 cm, then it is worth making the distance between the logs 59 cm to simplify the installation of insulation in the bath floor.
After the logs are installed in place, a drainage system from sewer pipes is installed. Pipes with a cross section of 50 mm run from the washing compartment. If you are making a toilet in a bathhouse, then pipes with a cross-section of 110 mm will go from the toilet. After the toilet, wastewater should go either to a cesspool or to a septic tank - a house one or a separate bathhouse.
Should wastewater from the toilet and washing compartment be combined in a bathhouse? You can and should combine them. In this case, wastewater from the washing compartment will clean the pipe coming from the toilet and provide enough water for the operation of the septic tank, if it is equipped separately for the bathhouse.
After the pipes are installed, you can begin installing the subfloor. The subfloor in the bathhouse can be made from either boards or any suitable slab material. It can be DSP, plywood, OSB. If plywood is used, it will need to be impregnated with bioprotective compounds such as Senezh Bio.
After this, a floor insulation is installed between the floor joists, which will rest on the subfloor. As mentioned above, it is better to install the insulation between the joists.
Next, let's look at how to pour a screed in a bathhouse under the drain so that water is guaranteed to collect in one corner near the drain. For this purpose, any slab material is mounted on wooden logs. DSP is best suited for these purposes. Of course, cement particle boards are very susceptible to deformation if they swell from moisture. However, under a concrete screed this material will feel quite tolerable.
The slope of the floor in the washing compartment can be 0.3-0.5 cm per meter. In this case, moderately polluted water will be drained, so there is no longer any reason to make a slope.
After the screed has been made and the drain has been installed, you can begin installing the final floor covering. The best options for this scheme would be to use ceramic or porcelain tiles.
As you can see, a poured concrete floor in a bathhouse with a drain can be made with your own hands and according to a very simple scheme.
Recommendations
Adviсe:
- Before choosing a material, you need to carefully examine it for the presence of fungus, mold, and rotten knots.
- If the bathhouse will be used in winter, it is not advisable to make a leaking flooring.
- Before installing the floor, you need to dry the boards.
- The drain must be discharged into a waste well, which can be located 1–3 meters from the bathhouse.
Assembling a floor in a frame bathhouse is not difficult, but to do this you need to take into account the features of such a building, know how to properly insulate it, and protect the base from moisture. It is easier to make a wooden floor, since laying a concrete floor requires a lot of investment.
Features of wooden floors
Despite the strength and durability of any wooden structure, over time, under the influence of humidity and ambient temperature, it changes its linear dimensions, which causes shrinkage. In addition, wood is a “breathing” building material, so cracks begin to “spread” along the wooden beams. That is why you should never pour screed onto a fresh wooden floor immediately after building a house. Leveling can begin no earlier than 3 years after the wood base has completely dried and settled.
It is recommended to lay a monolithic concrete slab on wooden joists (on which the floorboards are supported) if the beams are installed on brick columns with a height of at least 300 mm. If the logs are laid directly on the floor slabs (which is most often the case), then you can only install a “floating” screed. In this case, some advise removing the floor boards and pouring the concrete slab in the traditional way, but in this case the screed will be fastened to a wooden base, and at the slightest deformation the flooring will crack. Therefore, we will consider the most reliable technology for laying a “non-cohesive” screed that will not connect to the walls and ceiling.
Preparatory activities
To make a poured floor in a bathhouse, the base is prepared as carefully as possible. Otherwise, the base will not have the necessary strength characteristics, which will significantly reduce the service life of the finished floor. The work is performed in the following sequence:
- Removes a layer of soil 40–45 cm thick. This allows you to get rid of organic residues present in the soil;
- The surface is carefully leveled. A pit is installed in the center of the room, in which water will collect during the operation of the bath;
- A drainage pipe with transverse dimensions of 10–20 cm is installed. The pipe is placed at a slope to ensure the outflow of liquid under the influence of gravity. To prevent accidental clogging of the drain pipe, cover it with a lid or simply plug it with a rag. A fence made of boards or pieces of roofing material is erected around the drain pipe itself. This will allow, if necessary, to replace the installed element if the pipe head does not meet the requirements for it;
- The quality of the work done is controlled. For this purpose, a regular or laser construction level is used.
The soil is removed to a depth of 0.5 mSource googleusercontent.com
Before pouring the concrete solution, the base is thoroughly compacted. To sufficiently compact the soil, a vibrating plate or manual tamper is used, depending on the area of work and the configuration of the bathhouse. A layer of sand 5–10 cm thick and gravel is poured onto a carefully compacted base. The thickness of the second layer is 10 cm. The pillow is carefully compacted.
Pipeline slope calculation
Scheme for calculating the slope of the pipeline depending on the diameter of the pipe
To achieve normal drainage of water from the room, it is not enough to lay the tiles at an angle to the drain hole. Designing floors with a ramp also involves calculating the optimal slope of the water supply system. This parameter determines whether the water will flow into the sewer by gravity or not.
During the construction of a bathhouse, the degree of inclination of the sewer pipe is often determined by the values recommended in SNiP. However, in some cases, the standard proposed by SNiP is not suitable for arranging floors. In such situations, additional calculation and design of the pipeline slope is required.
The required parameter is determined using the following formula:
D*√L/H ≥ M, where:
- M – slope coefficient;
- D – speed of water movement through the pipe;
- L – liquid filling level of the pipeline;
- H is the diameter of the sewer pipe.
We fill the floors in the bathhouse with our own hands
The technology for pouring floor screed in a bathhouse, in general, is no different; it is quite simple and accessible to anyone who decides to do it themselves with their own hands. A regular aluminum profile can be used as beacons. It must be remembered that in the bathhouse the entire floor from beginning to end is sloped, in the direction of the intended place of concentration and discharge of water. The guide beacons are set by measuring the slopes with a long rule and a level. Beacons are placed with a meter interval from each other. A pair of trowels of mortar are placed on the base, a guide beacon is installed on them and, measuring with a level, gradually pressing on the desired side, the inclination of each beacon is set to the same level. After the solution has hardened, the beacon settings will no longer be lost and you can safely begin applying the screed. As with most decorating projects, it's best to start at the far corner. The solution is poured directly between the beacons and, if necessary, leveled along them. Professionals, as a rule, do not do these types of work alone, because the solution must be constantly poured and immediately leveled. Therefore, if you are pouring the floor in a bathhouse with your own hands, it is recommended to call someone for help, this will speed up the whole process significantly.
General leveling of the screed is carried out using a long rule, which is carried out along the guide beacons, smoothing out all the unevenness. If necessary, you will need to add mortar somewhere with a trowel so that there is no hole, and remove the excess somewhere so that there are no bulges in the floor.
Strengthening of the screed occurs in about 2-3 days, but it will finally take place only after 2 weeks. To avoid the occurrence of cracks during this period, the screed should be wetted 2 times a day. This is done so that light spots do not appear - areas in which the cement for some reason dries faster than the rest of the floor, which can lead to cracks. After wetting, the floor is covered with a film so that the water does not evaporate immediately.
Concrete floor in a bathhouse - drainage diagram
It is possible to install a drain concrete floor in a bathhouse, through which water will be drained during bathing procedures, only in the washing department. Why there?
Because if you install a concrete floor in a steam room, the following disadvantages of this material will immediately manifest themselves at high temperatures:
- The floor will become dusty with cement dust during heating, while the atmosphere in the steam room is extremely dry.
- Concrete will become extremely hot, and unlike wood, this heat will not be pleasant to the feet of steam room visitors.
- Concrete screed does not have the same plasticity as wood. As a result of sudden cooling when water spills, the screed will crack.
As you can see, there is a place for a concrete floor in the bathhouse, but it is located in the washing section of the bathhouse.
So, how to fill the floor in a bathhouse with a drain in the bathhouse compartment so that the drainage system works flawlessly?
Before making a screed in a bathhouse to drain water, let's look at how water collects in a bathhouse sink and how it is discharged.
Concrete floors in a bathhouse with a drain work according to the following scheme:
- The floor is arranged with a slope, which allows you to collect all the water in one of the corners of the washing compartment.
- An assembly ladder is installed in this corner through which the water will leave the sink. The ladder is at the lowest point.
- From the drain, wastewater is transported through a drain pipe, which can have a cross-section of 32 or 50 mm. It is not worth making a drain pipe with a cross-section of 110 mm, since no solid fractions flow from the washing compartment into the sewer, but only moderately contaminated water with residues of soap and shampoos.
- The wastewater flows through the pipe into a pit or container under the bathhouse, where a crushed stone filter is usually installed. The crushed stone fraction taken for these purposes is 40-80.
Why is it necessary to use this particular fraction of crushed stone to purify soapy water? Small crushed stone will become washed out too quickly and will stop cleaning wastewater from the bathhouse. Large crushed stone will not provide a sufficient degree of cleaning from the very beginning, since waste water from the sink will “spill” between the large stones.
Installation of a drain hole in different baths
There are not very many drain designs. They differ rather in the place of application. The design of the drain may be different for different types of baths.
Sauna drain
The floor drain in a sauna may not have the same throughput as in a steam bath: there are no water flows from the tubs, and the font has its own drain. In addition, as a rule, the sauna itself does not need a drain, and the sauna washing area does not need a tiled floor. This means that a classic drain with a drain is used there.
In a sauna with a tiled floor, you can use a classic drain with a drain and a water seal
It is not much different from a sauna drain.
Viega Advantix drain for installation in hammam and sauna
Drain in a Russian bath
Draining in a Russian steam bath is necessary in two rooms - the steam room and the washing room. Bath drains are different, which primarily depends on the design of the floor in the steam room and washing room. They are no different in design if the floors are the same in both. Let's look at different floors and different drains for these floors.
A steam drain can also be ordinary, with a drain
Floor layout and basic requirements
The main thing in organizing a wooden floor with a drain is, oddly enough, not the technology for making the finished floor layer, but the proper preparation of the underground space. It is errors in the organization of the underground that become the most common reason that the tree begins to rot ahead of time.
Particular attention should also be paid to ventilation of the space under the floorboards; there must be either special holes for ventilation, or the possibility of raising the boards in order to dry them faster
In addition to the fact that a wooden floor is not as cold to the touch as a tiled floor, it is also noticeably cheaper and easier to organize than a tiled floor, which requires the obligatory arrangement of a layer of concrete screed at least 5-7 cm thick. If necessary, construction the most budget-friendly construction, it is wooden floors that are laid most often, and a small drainage hole is installed directly under the bathhouse as a space for water drainage.
Scheme of organization of design details:
Prev 1of1 Next
The second option using roofing felt:
Prev 1of1 Next
Option number three from an old Soviet book:
Prev 1of1 Next
Next, we will look at examples of various schemes for installing a wooden floor in a bathhouse with water draining through the cracks between the floorboards, the so-called “flow floor”. Also, using the example of finished structures, you will be able to see different approaches to the implementation of the three basic principles of durable wooden floors with a drain:
- The presence of a slope at the surface of the underground so that the water does not linger anywhere, but completely flows into the drain hole.
- A properly organized sewer system that ensures the flow of water without its accumulation in places not intended for this purpose.
- Take measures to ensure ventilation in the underground space in order to effectively dry out the floor wood and support beams.
How to choose the right material
Modern pipes for organizing a drainage system are made of high-strength plastic. Its service life is 50 years. Pipes are used from:
They are not afraid of water, do not rust or rot. They are easily assembled into a system, attached to each other simply and without much effort. They come in different sizes, among which there is sure to be one that is necessary for specific conditions.
And although cast iron pipes are stronger and more reliable, they are practically not used to create bathhouse drains. They are difficult to transport and install; installation requires special equipment, additional tools and specialists. The result is a costly event that can be avoided.
Asbestos-cement pipes are not recommended for use. They have an uneven surface inside that catches debris. This is especially dangerous if the drainage system is more than 10 meters.
The diameter of the pipes for a steam room with an average degree of use is 11 cm, for small baths 7 cm is enough.
Source
Main stages of floor construction
Upon completion of the arrangement of the drainage and sewer system, we begin to form the foundation for the future floor. For this:
We create a cushion for pouring concrete mortar, which allows us to limit heat loss. We deepen the soil by 50 centimeters. Three quarters of the total volume is filled with construction waste that is not subject to rotting processes. We cover the resulting surface with clay and, after drying, pour a fifteen-centimeter shock-absorbing layer of sand with fine gravel or crushed stone. This level will allow the absorption of moisture that results from temperature changes. We carefully compact the layer, maintaining the slope specified by the project. Pour the first layer of concrete mortar. If possible, we use perlite additive - an excellent heat insulator.
When working with perlite, pay attention to its properties - especially fine fraction and minimal weight. When mixing the concrete solution, use a room protected from the wind to avoid increased dust formation.
The thickness of the first layer of concrete when pouring the base should not exceed 4-6 cm. We isolate the joints between the base and the walls from moisture penetration with bitumen. We wait for the solution to dry. It depends on weather conditions, the period ranges from several days to 2-3 weeks. We lay thermal insulation material. To prevent it from being damaged by moisture, it is advisable to additionally use roofing felt for insulation.
The next stage is pouring the floor in the bathhouse with a second layer of concrete mortar. At this stage of work, a reinforcing mesh is used to protect the cement base from cracking during operation. We compact the concrete, trying to get rid of air cavities as much as possible. Leave the surface alone until completely dry. To ensure that concrete sets evenly during the hot season, we moisten the base using a sprayer.
The final stage is applying the cement mixture to the entire surface and leveling the concrete according to the rule. Make sure that the slope of the covering is correct towards the drainage hole. Apply deep penetration waterproofing impregnation to the finished base.
We would like to focus your attention on the fact that if you do not plan to use the bathhouse during the cold season, then when mixing the concrete solution, you can exclude perlite from the recipe. Use the usual cement-sand composition of one to three, adding 1/10 of lime
This will reduce financial costs without reducing the strength of concrete.
Primary screed
In order to provide additional thermal insulation, it is advisable to make the solution for the first layer of screed based on perlite. This material shown in the photo is an excellent insulator and therefore the floor covering will be warm and pleasant to the touch.
Since perlite is light and consists of small fractions, work with it should be carried out in a place well protected from drafts.
The solution is made with it in several stages:
- Pour 2 buckets of perlite into a concrete mixer and add 1 bucket of water.
- The mixture is thoroughly mixed, and its volume is significantly reduced.
- After the mass is made homogeneous, cement is added to it, which is poured gradually. The mixture continues to be stirred.
- When the mass becomes uniform in color and consistency, pour 1 bucket of perlite into it and pour in several liters of water.
- The mixture should ultimately be free-flowing.
- For perlite to react with cement and water, you need to wait some time - about 10-15 minutes with the concrete mixer turned off.
- Then they continue to knead until the mass is plastic.
If you don’t want to use a bathhouse during the cold season, you can do it simpler and use a mixture of 3 parts sand, 1 part M400 cement and 0.1 parts lime. These components are mixed by adding water until the color is uniform and the solution has the consistency of thick sour cream.
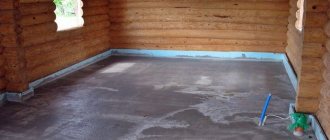
The finished mass is laid out on the subfloor and leveled. You don't have to use guide beacons at this stage. But at the same time, it is imperative to ensure that the floor in the bathhouse is poured correctly with a slope in the direction of the location of the drainage hole.
Well with a filter at the bottom
The design of a drain pit with a filter bottom is used primarily to purify wastewater from dirt and chemical elements, as well as to retain bacteria. Subsequent filtration of water is carried out directly by the soil layer. But at the bottom of the well, crushed stone, crushed brick or sand are used as a filter.
To ensure the outflow of water from a bathhouse designed for 3-4 people, a well with a diameter of 1.5 m and a depth of 2 m is sufficient. It can be either rectangular or round in shape - the latter option is preferable due to the uniform distribution of pressure on all walls. The cylindrical design will need correction much less often.
Since it is necessary to drain the bathhouse at the dacha without damaging the building itself, it is advisable to retreat from it at a distance of about 3-5 meters. Such a gap will ensure, first of all, the safety of the bathhouse foundation from being washed away, and will also prevent the penetration of unpleasant odors from the well into the bathhouse. But if you locate the drainage hole further, you will inevitably have to purchase additional pipes for water drainage. In addition, it is difficult to ensure the correct angle of inclination over a long distance.
If the soil on your site is dense enough, then simply dig a hole for drainage and lay filter materials at the bottom - sand, crushed stone and broken brick. Additional strengthening of the walls is not required.
According to the drainage diagram in the bathhouse, a trench can be dug from it to the pit, through which water will randomly flow by gravity into the well. However, it is best to equip the drain with pipes made of asbestos, metal, plastic or ceramic, with a diameter of 50-100 mm. In this case, a trench is also necessary, but its depth will depend on the depth of soil freezing, but not less than 50 cm. The pipes are laid at a slope of 20 mm at every meter of distance.
At the design stage, the future design of the drain and the features of the floor organization are thought out in detail. An economical option for draining a bathhouse in a country house is to make the floor sloping towards the drain hole. With this design, wastewater enters the pipes and is discharged directly into the drainage pit.
An alternative to a drainage pit is to use a sealed septic tank, such as one made of plastic. Such a device will be especially relevant in cases where the bathhouse is equipped with a toilet, that is, the nature of the wastewater will require more thorough cleaning.
Water drainage methods
Diagram of a filtration system for draining a bath.
The design features of the base and methods of arranging the hydraulic apparatus directly depend on what types of materials the floor will be constructed from. As a rule, wood, cement screed or combinations of materials are used to finish the base. For any type of construction, a system for draining water masses from the bathhouse is prepared in advance.
The design of the drain mechanism can be different and depends on many factors:
- For a bathhouse for three to four people, it is advisable to make a cesspool under the foundation of the structure. The walls of such a pit are edged with brick and covered with sand. As the tank fills with water, the liquid is pumped out of it using a cleaning machine;
- If you are building a bathhouse for a large number of people with your own hands, it is better to make a drain pipe connected to the central sewer system or a separate well;
- To purify wastewater from dirt, it is advisable to install an underground filtration system. It is equipped with a special sump, distribution well and waste pipe;
- A simpler option for water purification would be to install a filter well. Filter material (crushed stone, brick fragments, expanded clay) is poured under the bathhouse. In the process of irrigation with water, the mineral bed is covered with silt, which purifies the wastewater before entering the ground.
Bath design
It all depends on what kind of soil is used under the building itself. If these are materials that easily absorb moisture, for example: sand; then you can build a house right on the ground
It is worth paying special attention to the place where you plan to install the shower, since twice as much water will drain there as in the steam room itself. You also need to make sure that your floor can heat up quickly and retain heat for as long as possible.
This is important because the most important thing in a bathhouse is warmth. If the floor reflects the cold from the ground, the heat will not be sufficiently saturated
This is especially important during cool seasons, because at this time the earth cools down as much as possible.
Some mandatory points during floor construction:
- Construction of a drainage pit. It is necessary in order to pump out accumulated drained water from time to time.
- Creating a cushion on your soil for the primary screed.
- Filling, filling the first layer of your floor covering.
- To preserve heat, you need to lay special insulation and waterproofing of the floor.
- The wording of the second screed.
- A tightening table is installed.
Next we will describe all the points in more detail, so if you are interested, stay on this article.
Construction of a drainage hole
In fact, there will not be as much water in the steam itself as in the shower, but, naturally, although in small quantities, it will be present. Typically, the water receiver is located in the corner of the building. It looks like a grate in the floor, but sometimes people just dig a hole to save money. If you have dug a hole, you must line it with clay or concrete. As you already understood, according to the simple design, there will be a slope towards this part of the bathhouse so that all the water flows there.
Water removal can occur in many ways. The most common of them, which we advise you, is to lead an exit from the pit itself to the central sewer system, using sewer pipes. To prevent an unpleasant and unexpected odor from penetrating into the bathhouse through this pipe, you can simply block the access with a specialized shutter. But the holes and pipes don’t end there. Our pit will need not only a pipe that will drain water from time to time, but also a pipe facing the street, so that it will, as it were, ventilate our pit. Thus, ridding it of unnecessary excess odor and moisture.
If your sauna was installed not on the street, but, say, in the basement of your house, which is quite rare, the drainage hole is a small depression on the floor, from which you simply remove water with a bucket after using the sauna.
In fact, to prevent the drainage pit from looking too terrible and out of the style of the bathhouse, people often decorate it with stones, or use it as a small well to give it beauty.
Cushion for primary screed
This stage takes place so that as little heat as possible goes into the ground. A small depression is made about 50 cm from the ground level, which you must fill with materials such as bricks and various large stones. Trees should not be used, as after backfilling they may simply rot due to moisture. Backfilling occurs in the following way: it is necessary to cover it all with durable clay, and pour a little fine crushed stone and sand “about 15 cm” on top. Afterwards it is necessary to level the entire surface, thereby preparing it for the first pour.
Pit
A pit is nothing more than a container for wastewater, installed directly under the washing room. It is worth considering that the use of this system is rational only for small baths that are rarely used.
The construction of the pit must be carried out in the following sequence:
- We dig a hole of the selected volume.
- We reinforce the walls with any of the materials: brick, slate, wild stone.
- A filtration cushion is poured onto the bottom: first, a layer of crushed stone, broken brick or expanded clay, after which a layer of sand is poured.
- Next, logs are installed on top of the pit. The floor under the bathhouse is laid on top for drainage. In this case, there should be small gaps between the boards to allow waste water to flow between them.
To install such a system, you will need to perform a number of works:
- First, you need to dig a small hole under the floor, similar in shape to a cube. The length of the rib must be equal to or exceed 50 cm.
- The base and walls of the pit must be insulated from water. Any waterproofing material will do, but it is best to use cement mortar.
- Next, a pipe is laid to the pit, which is located at a height of 10 cm from the floor. It should go out onto the street at a slight slope so that the water can leave the pit on its own.
- Now you can install the hydraulic valve. It is needed in order to prevent unpleasant odors coming from the sewer from entering the bathhouse. The easiest way is to use a homemade hydraulic valve, which is a metal plate installed with a slope. We fix it to the pipe at three points, without fixing only its lower part. It is worth noting that the distance from the base of the pit to the bottom of the plate should be 5 cm. There is another way to make a homemade water seal - you can take a rubber ball and secure it above the pit drain. After filling the tank to a certain level, it floats up, opening the drain. After draining excess water, it lowers, closing the pipe.
Installation of a drain hole in different baths
There are not very many drain designs. They differ rather in the place of application. The design of the drain may be different for different types of baths.
Sauna drain
The floor drain in a sauna may not have the same throughput as in a steam bath: there are no water flows from the tubs, and the font has its own drain. In addition, as a rule, the sauna itself does not need a drain, and the sauna washing area does not need a tiled floor. This means that a classic drain with a drain is used there.
In a sauna with a tiled floor, you can use a classic drain with a drain and a water seal
It is not much different from a sauna drain.
Viega Advantix drain for installation in hammam and sauna
Drain in a Russian bath
Draining in a Russian steam bath is necessary in two rooms - the steam room and the washing room. Bath drains are different, which primarily depends on the design of the floor in the steam room and washing room. They are no different in design if the floors are the same in both. Let's look at different floors and different drains for these floors.
A steam drain can also be ordinary, with a drain
Dependence of the design on the floor of a Russian bath
The floors in a Russian bath are different.
- Leaky or torrential wooden floors - horizontal boards are not laid tightly, but with cracks for free flow of water over the entire floor area. This is a traditional design that has long been used in Russian baths. The main disadvantage is the need for thorough initial and subsequent regular treatment of boards with hydrophobic impregnations.
- Leak-resistant wooden floors - the boards are laid closely at a certain angle of inclination towards the drain hole so that water flows freely. The slope is carried out using slightly wedge-shaped logs.
- Tiled (only possible in the washing room). They are also laid with a slight slope towards the ladder. The slope is carried out either by creating a concrete base, or by using different thicknesses of mortar.
The drains for different genders of a Russian steam bath are strikingly different in design. But the largest variety of drains is found on pouring or leaky floors.
pouring floor
With the simplest method of water seeping through the entire floor into a drainage pad located under the entire bathhouse, there is no drainage device at all.
Drain through the pouring floor into the drainage pad; no drainage device
A more complex subfloor design: it slopes towards the concrete channel, preferably with insulation and screed. There is also no drain.
When draining into a concrete channel, there is also no drainage device
When draining into a concrete pit, the role of a water seal is performed by the pipe itself, located in a special way - with the possibility of air access.
The pipe in such a pit plays the role of a water seal
If the underground has a drain into the sewer, then in addition to insulating and waterproofing the underground, you need a simple drain with a water seal to prevent unpleasant odors from entering the underground, and from there into the bathhouse through the cracks in the floor.
When draining into the sewer from under a pouring floor, a simple drainage device is required
Non-leakage floor
The only possible solution here is a classic drain. It can be of different designs - from a complex modern drain to an ordinary, familiar siphon. The ladder is a compact and reliable design.
The drain will last a long time and is easy to clean
The siphon is cheap and familiar.
Scheme of drainage on a non-leaky floor in a bathhouse using a siphon
The question is your financial capabilities and the availability of space under the floor.
Why is tilt necessary?
If the degree of inclination is too small, not all the water accumulating on the surface will enter the drainage system.
Tilt of the base towards the drain allows you to quickly remove water from the washing room or steam room in the bathhouse. A rather complex design performs several tasks:
- Prevents fluid accumulation;
- Prevents damage to floor materials;
- Provides quick drying of floors;
- Significantly reduces the chances of developing fungus and mold.
The design of a rough foundation with a slope must be carried out taking into account many technological nuances. If the degree of inclination is too small, not all the water accumulating on the surface will enter the drainage system. If you make the floor slope too large, this will affect the material component of the issue, since it will lead to unnecessary expenses.
Choice of insulation
In order to insulate the floor in a bathhouse, the following materials can be used:
- mineral, fiberglass or basalt wool;
- expanded clay;
- expanded polystyrene;
- construction felt;
- aerated concrete.
The insulation is laid between a layer of steam and waterproofing, which are located between the rough and finishing concrete floor. If the floor is made on joists, then the insulation is installed between them.
To ensure normal thermal insulation of the floor, the thickness of the insulation layer must be at least 150 mm, it all depends on the material used and the climatic conditions of your area.
If you use expanded clay, then it must be laid carefully, since those granules that are broken lose their high thermal insulation characteristics. Despite the layer of insulation, such a floor in a bathhouse will still be cold, so now many people decide to make heated floors.
Briefly about the main thing
A concrete floor in a bathhouse is the right and economical solution. Such a foundation is not afraid of negative external influences. If the work is performed correctly, the foundation can last for many years. This base is fireproof, has sufficient strength and is easy to install. Not hygroscopic. Withstands significant temperature fluctuations. Doesn't rot.
The last factor makes a concrete base more preferable than its natural wood counterpart. This is explained by the fact that the stone base is not so favorable to the development of fungus. In addition, it does not impose any special requirements for care.
Preparing the base
Alignment
Before starting work, remove a layer of soil from the base along with any remaining organic matter. Usually 40-50 centimeters is enough. Then the surface is leveled, making sure to make a pit in the center of the room where the water from the bathhouse will go.
Drainage from the pit is carried out beyond the foundation and is realized through a drainage pipe with a cross-section of 10-20 centimeters dug in the corner under a slope. Thanks to this design, it will be possible to ensure maximum comfort in the operation of the bath and avoid the accumulation of large volumes of water.
Gain Setting
Reinforcement allows you to increase the strength of the concrete screed at an angle, provide better adhesion to the base, and will not allow the layer to deform and slide off this surface. Strengthen inclined surfaces using steel reinforcement with a cross-section of 4-5 millimeters. First you need to cut the blanks to the size of the future concrete base.
Then the reinforcement frame is assembled from the blanks using knitting wire, connecting the rods located perpendicularly. The result is a grid with a cell of 50-80 centimeters. You can also use a ready-made mesh for reinforcement.
The structure is laid between the beacons, on prepared non-metallic pads, which will ensure the required distance between the concrete and the reinforcement. The concrete will be evenly distributed under and above the reinforcement, which will protect the frame from corrosion and the effects of external negative factors.