Regardless of what type of mixture is used to lay the stove, it must be effective, because this means structural strength, good appearance, and safety during operation. There are several main compositions: clay, cement, lime. Each type of mortar is used at different stages of construction, so it is impossible to determine a universal option.
Absolutely all experts agree that bricks should be laid on clay.
Only this material has the necessary characteristics:
- When heated, the volumetric expansion of a normal mortar will coincide with that of a brick. This prevents the occurrence of cracks during operation.
- The material does not emit harmful substances at high temperatures.
- The strength when heated remains the same.
- The necessary adhesion between the bricks is ensured.
To prepare the correct mixture, you need to follow a number of steps.
Choice of solution
Nowadays, there is a choice to determine how to heat your home. Using a stove for this purpose has a number of positive aspects. One of them is the absence of the need for additional communications. The stove creates a unique feeling of comfort that central heating radiators or electric heating devices can hardly provide.
But when laying a stove yourself, it is important not to lose sight of several important points. First of all, you need to remember that the oven is constantly at a very high temperature. The stove must be placed in such a way that this feature does not increase the risk of fire.
Further, the high temperature also affects the furnace itself, so the material from which it is made and the solution used must retain their qualities in such conditions. What are the requirements for bricklaying mortar?
One of the main ones is that it does not crack over time. Experienced craftsmen create a seam between bricks with a thickness of no more than three millimeters, which increases resistance to high temperatures. Another important characteristic of the mortar is the adhesion strength of the bricks in the masonry. Its plasticity will allow you to fill all the gaps between the bricks.
Plastering with clay and cement. Flaws.
In general, any properties can be called neutral. Under certain conditions they can become advantages or disadvantages.
- Moisture capacity. Saturation with water molecules changes the structure of the clay. This entails a change in its technical characteristics:
- Strength and hardness are reduced;
- Swelling leads to an increase in volume and mass;
- Soaking violates the integrity of the formation, which changes its geometric configuration - it becomes deformed;
- Shrinkage is a consequence of swelling. The clay is so plastic that it shrinks gradually and does not break. However, sudden drying can cause destruction (cracks, craquelure). Clay mortar for plastering walls is used with filler, which increases the strength of the layer.
- Thermal conductivity. For comparison: cement-sand plaster – 1.2 (W/m2K), cement – 0.93, lime plaster – 0.698, gypsum – 0.3. Clay – 0.7-0.9. A little “warmer” than cement. However, this property is used when finishing heating panels - the better the plaster conducts heat, the higher the heat transfer of the stove.
Mixture composition
The solution consists of:
- binding components.
- filler.
- water.
They are selected in such a way as to meet the necessary requirements. Sand is used as a filler. The most important thing is the correct choice of binding components and compliance with the required proportions when creating a solution. Each such component has its own important features.
For example, clay will allow you to later move the stove if necessary. In addition, this material’s composition is suitable for high-quality bonding of bricks. If we talk about laying a foundation or the base of a furnace, then cement is more suitable as a binding element.
Specifications
In terms of thermal conductivity, clay-sawdust coating ranks second after gypsum-perlite mortar - its thermal conductivity is 29 W/m ×°C. In its pure form, the thermal conductivity of clay is 69 W/m × °C, that is, almost 1.5 times lower than that of a cement-sand mixture.
Another important indicator for plaster is vapor permeability . After all, moisture must be removed from the premises to avoid condensation. Vapor permeability coefficient for clay = 0.11-0.15 mg/(m*hour*Pa). This is more than that of log walls. Therefore, clay is excellent for plastering wooden houses.
The density (ratio of mass to volume) of clay is 1700 kg/cubic meter. m. Brick has a similar density.
The consumption of clay plaster with a layer thickness of 1 cm is 15 kg per 1 sq. m.
For clay mortar
Let's consider the process of preparing the solution. To do this, you need to first prepare all the components of the solution. Let's start with water. It should not have a muddy or any other odor. The sand should be uniform and not coarse. In order to make ordinary sand suitable for mortar, there are two ways.
If you have a sieve with one and a half millimeter cells, then you can simply sift the sand. Otherwise, you can use a wooden frame and burlap stretched over it. Then filter the sand. When preparing clay, its fat content is important. Before using it, you need to determine this characteristic of it.
The simplest way to do this is to make a ball of clay, dry it and throw it onto the floor from a height of one and a half meters. If it remains intact, then the quality of the clay is good; if it cracks or crumbles, then it is not greasy enough.
There is a more accurate way to do this. If you roll a ball out of carefully kneaded clay and squeeze it between two boards, it will get to such a state that cracks will appear on it. If this required squeezing more than a quarter, then the clay is not fat enough.
If by a third, then the material is of high quality. If the cracks are more than half the diameter, then the clay is too oily. Using thin clay may cause the masonry to crumble. Oily clay in mortar can cause significant shrinkage.
When preparing the solution, sand and water are gradually added to the clay until the consistency of thick sour cream is obtained. Sand may be needed from half the volume of clay to double the amount.
The solution can be stored for up to two days, stirring it before use. Additives can also be used to increase its strength. To do this, you can use 150 grams of salt or one kilogram of M400 cement per ten kilograms of solution.
Sequence of work:
- Clay is poured into the trough and allowed to soak. Leave for a period of six hours to two days. During this entire time, the mixture is stirred regularly. Water will be needed in the amount of a quarter of the weight of the clay.
- Add sand in small parts, mixing thoroughly. The mixture will be ready when it slowly slides off the shovel.
- The final readiness of the solution is checked as follows. A flagellum is made (one and a half centimeters thick, twenty centimeters long). They connect it into a ring with a diameter of about five centimeters and evaluate the appearance. If there are no cracks, then the solution is too greasy and you need to add sand. If there are a lot of cracks, then you need to add clay. The solution is ready if there are small cracks.
How to clean clay from sand at home - how to separate
Both materials belong to sedimentary rocks, but their properties are literally opposite. Sand absorbs moisture - up to 10%, but does not change its physical characteristics and does not form true solutions or suspensions with water. It serves as a filler for the building mixture and provides it with density and structure. Read about the density of construction sand.
After drying, the clay object becomes waterproof and does not change configuration. Clay acts as a connecting link.
Clay swells in water, increasing in volume and acquiring another property - plasticity. It can be given any shape.
A variety of compositions are used for bricklaying. The most famous is cement - a mixture of cement and sand. It hardens in conditions of high humidity, which makes it indispensable for the construction of buildings made of brick or stone. Clay-gypsum has different properties: gypsum reproduces complex and subtle shapes, but is afraid of moisture. Gypsum plaster is used to finish walls only in dry residential areas. This material will tell you about the dry universal mixture M 150.
A stove is a special structure. The bricks and the mortar connecting them are subject to heavy load: in the firebox the temperature reaches 950–1000 C, and in the upper part of the chimney it is only 50 C. The materials must withstand such changes, so they are selected carefully. Read about clay mortar for laying brick stoves here.
For the walls of the furnace, a composition based on red clay is used. For the combustion chamber and chimney you need a fireproof fireclay composition made from fireclay sand and clay.
| Options | river sand | Fireclay clay | Red |
| Specific gravity, kg, cubic m | 1,5 | 1,6–1,9 | Not determined |
| Grain size, mm | From 0.16 to 2 | 2 | From 2 to 5 |
| Mineral composition | Silica | Quartz, kaolins | Kaolinite, illite, other minerals |
| Impurity content, % | 0,7–1 | Up to 1 | From 5 to 9 |
| Plasticity number | – | – | 0,1–0,27 |
| Melting point, C | 1700–1800 | 1550–1580 | 1100 |
Compound
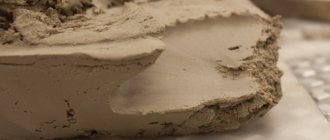
Clay acts as a binder in mortar. Its main property is plasticity, determined by such an indicator as the plasticity number or fat content. This is a changeable parameter. The composition of the mixture depends on what material is used.
- The fat content of a clay mixture can be assessed without special measuring instruments. A handful of the composition is moistened and kneaded. If the material acquires the consistency and elasticity of plasticine, the clay is fatty. If the lump crumbles, it’s skinny.
- A more accurate method is this: add 100–150 ml of water to 500 ml of clay, stir until smooth so that the material does not stick to the skin. Roll the mixture into 2 balls 50 mm in size and one is flattened into a flat cake. The samples are left to air dry for 2–3 days.
If cracks appear on the test lumps after drying, the clay is oily, it is mixed with a large amount of sand. If a ball thrown from a height of 1 m breaks into pieces, it is too skinny. It is mixed with fattier varieties.
The proportions of the oven mixture are determined by the plasticity number: for 1 part of clay take from 2 to 5 parts of sand. Depending on the fat content of the material, the masonry solution is prepared as follows: add 2 to 5 parts of clean river sand to 1 part of clay.
The quality of the mixture is constantly checked as it is produced:
- When kneading, the ingredients quickly form a homogeneous mass, since both components are capable of absorbing moisture. But if, after standing for half an hour, the composition separates - the clay is thin, swells little and contains a lot of sand.
- Delamination is also caused by excess water. It is simply drained. Another test: remove a layer of mass with a trowel. If the surface is cracked or torn, there is too little water.
- If the mixture has the desired consistency, but sticks to the shovel or to your hands, the clay used is too oily, you need to add river sand.
- Before constructing the furnace, a test laying of 2-3 bricks is performed. If the seams between the stones are not filled completely, the composition is too thin. It is enriched with the addition of a fatty variety.
Heat capacity of the mixture
The furnace structure is built from clay brick, since it can accumulate heat and release it slowly. The solution must have the same properties.
This parameter is very important, since the task of the furnace is uniform and long-term heat transfer.
Before making a solution from loam, the components for it need to be prepared - cleaned. They do this in 2 ways:
- Dry cleaning - select twigs, debris, leaves from the material. Then it is crushed and filtered through a sieve with a cell diameter of up to 2.5 mm.
- Wet - the clay is not free-flowing, so they often do it differently: they soak the material, and when it swells, rub it through large cells - up to 3 mm.
Wet cleaning method.
Lime
Clay mortar is not suitable for all parts of the stove. It is not suitable for a chimney where condensate collects because the latter contributes to the formation of cracks. For a foundation, clay mortar is not strong enough. In these cases, it is customary to use lime mortar.
How it is made:
- Lime paste is prepared by mixing one part quicklime and three parts water. It is not recommended to do this yourself. It comes into contact with the skin or the respiratory tract. It is better to purchase it in a specialized store.
- Sand is mixed with the resulting lime paste in a ratio of three to one. It is recommended to first sift the sand through a sieve and rub the mixture through cheesecloth.
- To increase the strength characteristics of the solution, you can add cement. The composition of the resulting mixture is as follows: one part cement, two parts lime paste and ten parts sand. First, sand and cement are mixed, then diluted with water until a viscous state is achieved. Then add this to the lime dough and mix. If necessary, you can add additional water.
Arbolit
In the 60s of the last century, a building material called wood concrete was patented. Currently, slabs made from it are actively used for ceiling insulation in private homes. This type of material is nothing more than ordinary lightweight concrete. Such panels, 100 mm thick, can be prepared at home, using a homemade method, if you dry the mass in special flat molds.
To make them, they are used for sawdust and shavings. All wood-based materials contain sugary substances that contribute to the destruction of the concrete structure. To neutralize them, the shavings are treated with lime milk before use and then dried. After such preparation, it is an ideal filler for the manufacture of insulation boards.
Using cement mortar
For the chimney and for the foundation of the stove, you can also use cement mortar along with lime.
Its distinctive features are:
- High strength.
- Fast hardening.
In this case, the ratio of sand and cement depends on the brand of the latter. Just as in previous cases, the sand must be thoroughly sifted before use.
The manufacturing process is as follows.
- Thoroughly mix sand and cement in the required proportions. Make sure there are no lumps.
- Before use, add the required amount of water. The solution should be mobile, but should not slide off the shovel. In this case, it can be considered ready. It must be used within one hour, otherwise it will harden.
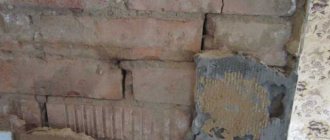
Crack repair work
This process can be divided into several stages:
- Diagnosis of existing damage.
- Preparation of the solution.
- Plastering the heating structure.
Stage one – damage diagnosis
Before coating the stove, you should assess the extent of the existing damage in order to find out the scope of the work to be done. If the cracks are minor, then surface measures will be sufficient. To do this, the bricks are cleaned of finishing materials and plaster, the damage is repaired and the stove is plastered.
Stage two - preparing the solution
Regardless of the size of the damage, you need to prepare a special solution to putty the oven. Depending on financial capabilities and the availability of materials, certain types of mixtures are used when carrying out repairs.
They are:
- from fireclay clay;
- from sand and ordinary clay;
- in the form of grout for the stove - you can make it yourself or buy it ready-made;
- from oven glue.
Using standard mixtures
The domestic industry offers ready-made mixtures for creating mortar for laying furnaces. They can be divided into two types:
- Simple mixtures.
- Improved mixtures.
In the first case, we are talking about dry mixtures of clay and sand. You need to add water to the desired consistency and the solution will be ready. The consumption of such mixtures is approximately 25 kilograms per ninety bricks. It allows you to make a seam with a thickness of no more than three millimeters.
In the second case, we are talking about mixtures that include various additives using the achievements of modern technologies. They create additional resistance to high temperatures and moisture. Increases the strength and durability of masonry. Consumption is approximately twenty kilograms per hundred bricks.
Let's talk about their main varieties:
- Dry fire-resistant mixture (mortar). It is used for internal elements of the furnace where exposure to high temperatures occurs.
- Mixture for laying external elements.
- Special plaster mixtures for stoves.
- Heat resistant adhesive. It is usually used for lining the stove with ceramic tiles.
Fireclay sand
Fireclay sand should have fractions of 0 15 - 5 mm. Fireclay crushed stone should have fractions of 5 - 20 mm.
Fireclay sand is also produced by crushing broken fireclay bricks.
Fireclay filler 50 - 60%; This is the so-called fireclay sand with a maximum grain size of up to 5 mm.
Portland cement concrete (per 1 m3 of concrete): Portland cement - 300 kg, chamotte crushed stone - 700 kg, chamotte sand - 700 - 500 kg, finely ground chamotte - 100 - 300 kg, Portland cement - 250 kg, chromite crushed stone - 1200 kg, chromite sand - 850 kg, finely ground chromite - 750 kg.
To repair the linings of trolleys, heat-resistant concrete on liquid glass with sodium fluoride of the following composition is used: liquid glass (specific gravity 1 38) 400 kg, sodium fluoride 50 kg, finely ground chamotte 500 kg, chamotte sand 500 kg and chamotte crushed stone 750 kg. Concrete hardens within 24 hours and does not require moisture.
Concrete on alumina cement (per 1 m3 of concrete): alumina cement - 300 kg, chromite crushed stone - 1200 kg, chromite sand - 1200 kg, alumina cement - 300 kg, chamotte crushed stone - 750 kg, chamotte sand - 750 kg.
Concrete on liquid glass (per 1 m3 of concrete): liquid glass - 300 - 350 kg, chromite crushed stone - 1300 kg, chromite sand - 800 kg, finely ground chromite - 650 kg, liquid glass - 300 - 350 kg, fireclay crushed stone - 750 kg , fireclay sand - 500 kg, finely ground fireclay - 500 kg, liquid glass - 360 kg, expanded clay - 640 kg, finely ground fireclay - 640 kg, liquid glass - 500 kg, expanded vermiculite - 300 kg, finely ground fireclay - 100 kg.
Heat-resistant concrete is prepared from soluble glass with a density of 1 38 - 1 40, sodium silicofluoride, fine and coarse refractory aggregate. Consumption of individual components per 1 m3 of concrete designed for service at temperatures up to 1100 C: soluble glass with a density of 1 38 350 - 400 kg, Na2SiFe 40 - 50 kg, finely ground fireclay 500 kg, fireclay sand 500 kg and crushed fireclay 750 kg. When used as a finely ground additive and crushed magnesite brick fillers, the resulting concrete can last up to 1400 C. Heating refractory concrete to 500 C does not reduce their strength; in the temperature range 600 - 900 C, the strength of most concrete decreases slightly and at higher temperatures increases and often exceeds the strength of the original concrete.
Heat-resistant concrete is prepared from soluble glass with a density of 1 38 - 1 40, sodium silicofluoride, fine and coarse refractory aggregate. Consumption of individual components per 1 m of concrete designed for service at temperatures up to 1100 C: soluble glass with a density of 1 38 350 - 400 kg, Na2SiF6 40 - 50 kg, finely ground fireclay 500 kg, fireclay sand 500 kg and crushed fireclay 750 kg. When used as a finely ground additive and crushed magnesite brick fillers, the resulting concrete can last up to 1400 C. Heating refractory concrete to 500 C does not reduce their strength; in the temperature range 600 - 900 C, the strength of most concrete decreases slightly and at higher temperatures increases and often exceeds the strength of the original concrete.
The ceiling is made of lightweight lining. Thus, vertical combustion screens have the possibility of free thermal expansion upward. A layer of roofing material is laid on top of the combustion screen collectors and ceiling screen pipes to prevent adhesion of the pipe part and fastenings to the concrete. Then a solution of refractory concrete is poured (composition: fireclay sand and crushed stone, aluminous cement) in accordance with the drawings.
Additives to the solution
To improve the characteristics of the solution, various additives are used. The use of salt or cement can significantly improve the adhesion strength of clay and lime mortar.
In those mixtures that are on sale, the range of additives is much wider:
- Water-retaining additives make it possible not to soak the bricks when laying them.
- Reinforcing heat-resistant fibers increase resistance to heat and prevent possible cracking of the seams.
- Other additives may also be used.
Why is sawdust not used for insulation in its pure form?
Despite the fact that clean sawdust reduces heat loss well in any building, it has three serious drawbacks:
- They cake over time, which is why voids appear in the insulating layer, which have a higher heat transfer coefficient.
- Wood sawing waste is a very attractive place for various rodents that settle in it.
- Pure sawdust can only be used to fill a clearly limited space, so it cannot be used to insulate walls without voids.
Design and dissolution of limestones
The precipitation of limestones is determined by the transition reaction of calcium bicarbonate, which exists only in solution, carbonate, which exists only in the solid state; precipitation or dissolution of calcite does not occur as precipitation, e.g. Halite NaCl, as a result of a change in concentration, but in a chemical reaction
| Ca(HCO3)2 | CaCO3 ↓ + | H2O+ | CO2 |
| Calcium bicarbonate | calcite | water | carbon dioxide |
The progress of the reaction is determined by the degree of solubility of carbon dioxide in water, and the balance moves in one direction or another depending on pressure or temperature.
If the ambient temperature increases, it reduces the solubility of carbon dioxide in water and therefore calcite: in the case of a beach, warm sea granules and calcite are deposited to form layers and coral reefs. In cold seas, sea bubbles should cover the calcite shells with a bumper cap and save them from decay.
When heated, a calcite scale is formed in the teapot, which is why it is located on the spindle.
This is interesting: Choosing cement for concrete - read all the nuances
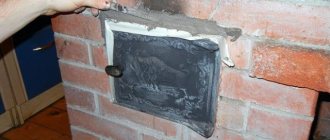
Finishing
The ideal finish largely depends on the accompanying criteria, where one of the first places is occupied by surface preparation and step-by-step execution of work. The first and main stage is preparing the work area, clearing it of old finishes.
Wall cleaning
If the base is loose, at least two layers of primer must be applied to it.
Primer
Concrete or brick surfaces only need to be primed once. The solution is then mixed with a low-speed drill to obtain a homogeneous mass.
Preparing the mixture
It is advisable to do only two stirrings. Plaster is applied in two ways:
machine;
Machine method
manually, but massive potholes are pre-filled.
Manual method
For this, a solution is used that is thicker and more viscous, and it only needs to be dry before applying the main ball.
The material described in the article is applied with a spatula or a rule, and it is important to work within the permitted temperature range, which is indicated by the manufacturer on the packaging
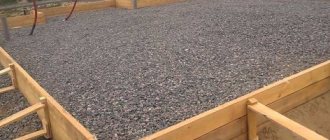
Freezing depth
Regardless of the type, in order to prevent extrusion, movement and destruction, the base of the foundation must be located at a depth below the freezing depth of the soil.
The soil foundation of the foundation can be bulk. Often this solution is used in so-called floating foundations for light buildings with high groundwater levels. A trench is dug 60 cm deep, and a layer of crushed stone is laid there - 10 centimeters. The rest is filled to the top with sand. The resulting base is compacted - rammed. On the resulting sand “ribbon”, concrete platforms are poured for the pillars, onto which brick pillars one and a half to two bricks thick are laid through a layer of waterproofing.
Preparing walls before plastering
Clay mortar, due to the lack of chemical bonds with the plastered surface, does not adhere well to a smooth base. Therefore, when facing bricks, the joints must be jointed before plastering.
To reinforce wooden surfaces finished with clay plaster, shingles are used . The use of plaster mesh in this case is not very convenient. Since clay is not as flexible as gypsum, it will not bond well to the mesh.
Shingles are narrow boards 3-5 mm thick, which are nailed onto the wall. The wooden planks are positioned at an angle of 45°. Moreover, the nails should not go into the wall completely, but only halfway. The rest of them are bent and recessed into the wall. In this case, the shingles will hold up better.
Components used
The composition of a conventional solution includes fillers, various binders and water. Depending on the components used, there are lime, cement, clay and combined lime-clay, lime-cement mixtures. Let's take a closer look at each of the components used.
- The most common filler contained in plaster is sand. It, in turn, can be river, quartz, ravine, mountain and sea. The highest quality of them is considered to be river quartz sand. In plastering mixtures, sand with medium-sized grains is usually used. Coarse-grained material is used less often. Fillers must be clean, free of soil and dirt. The sifting method depends on the type of work. So, for a small amount of work, a mesh sieve is usually used, in other cases - an inclined sieve.
- One of the components of the plaster mortar is lime. Today there are gray, white, slaked, carbide, ground, quicklime. Each of them is distinguished by its strength, poor water resistance and poor resistance to moisture.
- A filler such as cement is much stronger than lime. Its complete hardening takes up to four weeks. In addition, it is resistant to moisture and various atmospheric conditions. Cement mortar can withstand severe overloads.
- As for gypsum, it has low strength, hardens quickly, does not tolerate moisture well, and has poor resistance to the external environment. Gypsum should not be mixed with cement. Typically this filler is used for small plastering jobs. Sometimes it is added to lime for quick setting.
- Another popular plaster filler is clay, which when mixed with water produces a viscous dough. In its raw form, it is very plastic, so it can take any shape, which remains even after drying. The clay becomes very durable after firing.
Plastering adobe walls inside. Plastering on adobe, how to plaster adobe, technology
Plastering on adobe, how to plaster adobe, how to prepare an adobe wall for plastering.
Adobe, or as they are also called, adobe houses, are quite common in the southern latitudes of our country.
Since clay is a fairly cheap building material that lies right under your feet.
In addition, clay buildings are practical and convenient. Adobe buildings are the most environmentally friendly buildings in the world. Houses made of adobe retain heat well in the cold season. And on hot days, they delight the owners with coolness and freshness.
As a result of this, clay, as a basis for the construction of residential premises, was and remains a fairly common building material.
It is clear that this technology will not solve the housing problem on a planetary scale. However, it was and remains the basic basis of all modern technologies.
Because clay was the first building material that allowed humanity to build its own, comfortable housing.
The adobe houses basically consist of a single-layer, fairly wide wall. To improve technology and increase performance properties, the following can be added to adobe:
- Brushwood;
- Straw;
- Reed;
- Manure and so on.
Any additive reduces the negative property of adobe - loss of geometry when the wall is waterlogged. Today we will look at issues related to the finishing of adobe buildings. Let's find out which plaster on adobe will help maintain the microclimate in the room and extend the life of the building.
Material requirements:
1. Water - must be completely clean, no moldy odors, and, importantly, it must contain a minimum amount of mineral salts. If you have problems with clean water, the column does not work, or well water contains a lot of dirt, take care of the water supply in advance. The calculation is simple: on average, laying 100 bricks will require a little more than one and a half buckets of water. (15-20 liters).
2. Sand - you need to work only with fine sand, which must be carefully sifted. For this we need a sieve. It is convenient to sift fine and clean sand through a fine-mesh sieve (one and a half millimeters).
3. The main component is clay. First of all, we are interested in its adhesive properties and its fat content. The amount of sand that we will add to the solution will depend on this; we will consider this in detail in the next paragraph.