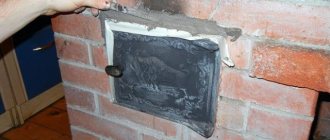
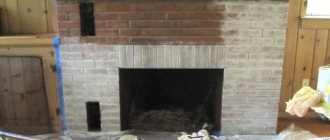
The stove has long been a reliable, and sometimes the only, source of heat and energy . In the modern world, it has not lost its significance: many people strive to settle outside the cities in a cozy and warm home. If it is impossible to use the services of a professional stove maker, don’t worry!
In this article we will tell you in detail how and what is the best way to bring your good old “heater” into proper shape, after which you can try yourself as a stove maker and restore your stove.
Why plaster the stove?
The answer to the question of when and why it is necessary to plaster a stove is very important. Having understood it, you can accurately decide whether this process is really necessary or whether decorative finishing from ceramic or fireclay tiles is sufficient.
There are several reasons that necessarily require plastering of surfaces:
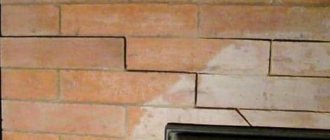
- The stove was built a long time ago, and the old plaster was partially cracked and began to peel off. As a result, bare areas look unattractive.
- There is a risk of carbon monoxide leaking into the cracking masonry joints of an old stove.
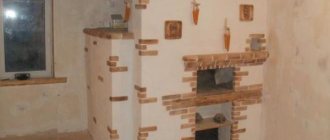
- During the renovation process, it is necessary to change the style of the overall interior, as a result of which the stove needs to be given a more neat appearance or completely transformed.
- There was a need to treat the seams between the rows of bricks, in which settlements of various insects were found. This happens when solutions based on natural materials are used for laying the stove. Plastering the stove prevents the appearance and reproduction of insects.
- The masonry of the stove is not done carefully, which spoils the appearance of both the structure and the entire room. With the help of plaster you can completely solve a problem of this kind.
If we compare plaster with other types of finishing materials, we can note several advantageous points:
- Plastering is the simplest and most affordable way to put the stove in order.
- The mixture for plastering the surface is much cheaper compared to ceramic tiles or stove tiles. This allows you to significantly save material resources.
- The plaster mixture can be used to finish a newly built stove or to reconstruct an old building element.
- The applied layer of plaster makes the walls of the furnace thicker, therefore, the heat capacity coefficient of the structure increases. As a result, the furnace takes longer to cool down, resulting in reduced fuel costs.
- A plastered stove becomes less fire hazardous, and the risk of carbon monoxide entering the room is also reduced.
- After the plaster mixture has dried, you can use various materials to finish the oven. This can be water-based paint, lime mortar or decorative plaster.
Features of the problem
Why is it recommended to plaster a brick oven? In terms of increasing the reliability of the entire structure, it is necessary to note the fact that the plastered brick is protected from the direct influence of aggressive bath factors (temperature changes, moisture, steam). The brickwork itself increases the strength and tightness of the seams. The bonding material is less susceptible to cracking. 2 important reason - improved appearance. After plastering, the stove has a smooth wall surface, which gives it neatness and makes it possible to create a specific interior.
//www.youtube.com/watch?v=kXcpeiwD3dw
Brick oven plaster has its own specific characteristics. First of all, this is due to the high temperature on the walls during its operation. The plastered layer must withstand the following influences: prolonged heating and open flame, temperature changes, mechanical influences, smoke and steam, oil splashes during cooking. As the oven heats up, the brickwork tends to expand significantly, and therefore the plaster solution for ovens must have increased elasticity in order to withstand such loads without cracking.
One of the functions of the stove is to heat the room. This condition dictates one more requirement for stove plaster - good thermal conductivity. If additional significant energy is required to heat this layer, then the efficiency of the entire structure will significantly decrease. In addition, when heated, the material used for plaster should not release substances harmful to the human body.
Tools - how to plaster a stove in the house
The service life of a plastered surface largely depends on the adhesion of materials, and for this it is necessary to correctly apply the plaster and distribute it evenly on the surface of the stove.
You can solve the question of how to plaster a stove without cracking using special tools, which include the following:
- Putty knife. Several types of spatulas are used; with the help of some tools the solution is collected from a container, while with others it is applied to the surface.
- Plastering hammer. This tool is used to drive plaster nails.
- Trowel. Using this tool, the solution is evenly distributed on the stove wall.
- A hammer-cam is necessary for working with a chisel or a trojan.
- Scissors are ordinary and for cutting metal. If you use fiberglass mesh in the process, you will need ordinary scissors; you need to cut the chain-link mesh with metal scissors.
- A grater is necessary for leveling and smoothing a plastered stove wall.
- Using a smoother, the surface is brought to perfect smoothness.
- A chisel is used to make notches on the surface of the stove, this promotes better adhesion of the plaster and the working surface.
- Brushes. It is necessary to purchase several types of this tool, since some are used to apply primer, while others can be used to apply textured plaster.
- Using a building level, check the vertical and horizontal level of the working surface.
- Using a plumb line, the evenness of the walls and the applied plaster solution is controlled.
- As a rule, the mixture is distributed between beacons, which are installed on the walls for even plastering of the surface.
Covering
The last layer of plaster is necessary in order to completely level the surface of the stove. The primer needs to be moistened quite generously before applying it. The solution in this case should be used even less thick than for the first two layers. The mixture should fill absolutely all cracks and irregularities remaining on the surface. The thickness of the covering layer can be from 2 to 5 mm. It is impossible to level the stove in planes with plaster. Ultimately, the total thickness of the finishing layer should be no more than 1-1.5 cm. When laying out brick stoves for your home with your own hands, this should be kept in mind. When performing this work, you should initially try to make the walls as even as possible.
Types of mortar for plastering stove walls
The stove is one of the building elements that regularly heats up and cools down, so the chosen plaster composition must be resistant to this phenomenon.
Mixtures for preparing plaster mortar are divided into two types:
- Simple compositions that include only two components, sand and clay.
- Complex formulations contain more than two ingredients.
Plastering a stove with clay and sand requires preliminary preparation and cleaning of the materials from various impurities. In particular, sand must be sifted through a fine sieve, clay should be rubbed through a fine mesh to remove roots and small stones.
It is recommended to make the plaster mixture using fatty types of clay, this promotes better adhesion of the solution to the surface. If the clay is too oily, the amount of sand used can be increased.
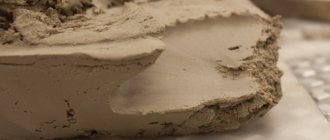
You need to know how to dilute clay for plastering a stove. To begin with, it should be soaked in a small amount of water and left for several hours, adding liquid in small portions if necessary. The process is repeated until a 10-15 cm layer of water remains above the clay. After mixing the finished clay mixture, the consistency of thick sour cream should be obtained.
In some cases, asbestos, finely chopped straw or fiberglass are added to the mixture for plastering the stove. These reinforcing components make it possible to obtain more durable materials.
When preparing plaster mixtures, special attention must be paid to the environmental side. During the heating process, the materials used should not emit substances that pose a danger to human health and life.
Separately, it should be said about salt; it is also sometimes added to the solution for plastering the stove. It should be noted that the opinion that salt makes it stronger can be considered erroneous. In fact, salt increases the hygroscopicity of clay, making it more flexible and resistant to cracking. Also, a plastering solution, to which a certain amount of salt is added, prevents the proliferation of various insects in masonry joints. For owners of private houses, this fact is of great importance.
Another component that can be added to the plaster mixture is gypsum powder. This material is used as a fixative. However, plaster must be used very carefully, as it hardens very quickly. The initial setting of the solution with the addition of gypsum powder occurs immediately after application, and after 10-15 minutes the surface hardens completely.
Adding lime along with gypsum makes the solution more durable and able to dry in a short time. But when choosing such mixtures, you should remember the properties of gypsum, so it is better to prepare a small portion immediately before plastering the stove. It is very important to understand that it is impossible to dilute the gypsum mixture with water.
Which material is better
The plaster composition for the stove must meet certain requirements. General construction cement-sand mixture is not suitable for preparatory lining of heating equipment:
- When the oven heats up, the material with which it is plastered expands. The cement mixture is not elastic. Therefore, at high temperatures it will begin to crack. Full information about the composition and characteristics of cement can be found here.
- Some additives used to improve the characteristics of cement mortar release toxic substances when heated.
- In order for the stove to quickly and efficiently heat the home, its preparatory lining must have sufficient thermal conductivity. For pure cement it is too low.
The best solution for plastering stove walls is a clay-based mixture. This composition can be simple or complex. You can make the solution yourself or purchase ready-made dry mixture in bags on the construction market.
To increase thermal conductivity and resistance to high temperatures, the following ingredients are added to the plaster composition:
- fire-clay;
- asbestos fibers;
- fireclay;
- glass fiber;
- salt.
The optimal composition for cladding should have the following qualities in hardened form:
- environmentally friendly, it should not contain synthetic and toxic substances;
- resistance to high temperatures, not chipping or cracking;
- high thermal conductivity.
How to plaster a brick stove with your own hands
You can finish the stove using plaster mortar yourself; you need to know how to properly plaster the stove and follow the sequence of actions.
Preparatory stage
The quality of plastering in most cases depends on how correctly the preparatory work on the surface is done. Good preparation of the stove walls is the key to better adhesion of the plaster mortar to the surface.
The preparation process involves performing the following actions:
- To reconstruct a stove or fireplace, it is necessary to remove old plaster from the surface using a chisel and hammer. Then the wall is cleaned of dust using a regular or iron brush.
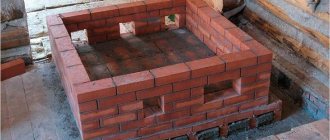
- The newly built stove is cleaned of any remaining masonry mortar. Neglecting this step may cause poor adhesion of the plaster to the working surface. As a result, after some time the plaster will begin to lag behind the walls of the oven.
- After cleaning the surface, it is necessary to deepen the masonry joints. Moreover, this step is necessary both for the structure being restored and for a new stove. It is also recommended to remove dust from the seams.
- The next step is to apply a primer to the stove walls. It is best to work with a thin brush so that the buried seams are not left untreated.
- The process of plastering uneven walls should always be accompanied by surface reinforcement. To strengthen the furnace walls, a metal or fiberglass mesh with cells of 1.5 * 1.5 or 2 * 2 mm is used. Reinforcement helps strengthen the plaster on the surface, making it more resistant to temperature changes. The use of reinforcing materials makes it possible to apply a thick layer of plaster, thereby increasing the heat capacity of the furnace. To fix the metal mesh, use nails with a wide head. When using fiberglass mesh, you need to apply a thin layer of plaster to the wall, embed the mesh in it, apply additional mortar and level it. It is recommended to use fiberglass on walls with slight unevenness.
- To preserve or restore corners, it is recommended to use steel or perforated aluminum corners, which are attached to an adhesive solution.
- For large differences, surface evenness is achieved by installing beacons. They are fixed to a gypsum mortar, which allows you to carry out work almost without stopping. If you have enough free time, you can attach the beacons to the clay solution, but it is better to do this with the reinforcing mesh in close contact with the wall.
- The preparatory layer of plaster can be perfectly smooth or rough. The first option is used for whitewashing or painting, the second – for decorative relief plaster. It should be remembered that ceramic tiles and decorative plaster do not require a very thick preparatory layer.
General rules for carrying out work
Before directly plastering the stove onto the work surface, the following work must be completed.
- The plaster must be stirred to achieve a homogeneous mass and the consistency of thick sour cream.
It is important to remove all contaminants from the working surface of the stove (dust, remnants of the previous plaster that were used when laying the stove). To improve the “grip of the mortar”, you need to clear the masonry seams to a depth of about fifty millimeters
Before application, it is important to heat the oven a little in order to achieve 20–25 degrees of heat; On warm walls, the plaster will lie more evenly, and an excellent level of quality will be achieved.
After all the preparatory procedures, you need to proceed to the main part:
- Additional surface cleaning.
- Treatment of cracks.
- Surface primer.
- Installation of reinforcing mesh.
- Plastering the stove
Applying plaster to the walls of the oven to prevent cracking
Before plastering the stove in the house, you need to familiarize yourself with the methods used.
Method No. 1 is most often used to level walls that have large distortions. In other words, when a layer thickness of 5-8 cm is required, the process proceeds as follows:
- They set up beacons that allow you to maximally level the surface with large differences. During the installation process, a building level is used, with its help you can achieve perfect evenness.
- Next, the stove is heated so that its walls are warm.
- Using a roller or wide brush, moisten the furnace wall with water to hammer fine dust and dry mortar into the masonry joints.
- The entire surface is covered with a primer and left until completely dry. Priming promotes good adhesion of the working solution to the surface.
- The first layer of plaster is applied using the sketch method; its thickness should not exceed 4-5 mm. In this case, the solution should not be very thick. Throwing the mortar must be accentuated in order to ensure that it gets into the seam between the bricks. After sketching the entire surface, leave the solution for plastering the stove until it dries.
- After this, they begin to apply the next layer; it should protrude 1 cm above the beacons. Work begins in the lower part of the oven, throwing the solution between the beacons to a height of 40-50 cm. By pressing the rule against the beacons, the applied mixture is leveled. After this, move on to the next section and repeat the entire process. Without waiting for the plaster to dry completely, grind the work surface using grout.
To prevent cracks from forming on the surface of the plaster layer during the drying process, stove makers with many years of experience advise covering the stove walls with damp burlap after applying the mixture for plastering the stove. If the fabric dries quickly, you can moisten it.
The burlap is removed from the dried surface, and the surface is rubbed and smoothed using a trowel with a rubber surface.
- For the third layer, it is necessary to prepare a more liquid solution for plastering the stove; its thickness should be 1.5-2 mm, since it is used to smooth the plastered surface. The third layer is applied only before painting or whitewashing.
- Making corners, even those reinforced with a metal corner, is considered a rather complicated process even for experienced craftsmen. To simplify the work, use an angled spatula. With this tool, the solution is easily applied and leveled well. If it is impossible to purchase such a spatula, use a wooden strip. It is fixed on one side of the corner and the solution is applied. After drying, the lath is removed and moved to the other side, and the solution is applied to the other side of the stove corner.
- In some cases, the edge of the corner is rounded. This makes it safer for small children and avoids chipping.
Method No. 2 of solving the question of how to plaster a stove with your own hands involves putting it in order using a metal mesh netting. This material is intended to reinforce the surface and give the required thickness to the plaster layer.
The surface is leveled as follows: pieces of wire no more than 25 mm thick are placed under the fixed metal mesh in the right places, hooking it onto the mesh or pre-installed metal slats.
The plaster is applied in several layers, similar to the first method, but the mesh must be completely covered with a plaster layer.
When applying the first layer, you should make sure that the solution passes through the oven plaster mesh and adheres to the wall. After spraying, the surface is left to dry. When the plaster dries, the mesh becomes motionless, so subsequent leveling layers are applied more easily and easily.
The last layer is leveled, allowed to dry, and the cracks that appear on the surface are covered and rubbed (read also: “How to cover up cracks on a stove - options for solving the problem”).
Finally, the decorative coating is installed.
Plastering stove walls in this way allows you to obtain a durable finish that is securely attached to the surface.
Method No. 3 is used for smooth stove walls that require minor cosmetic repairs, so the solution is applied once or twice, maintaining a total thickness of no more than 5-6 mm.
Surface preparation is carried out by analogy with the first methods, always applying a layer of primer for a brick oven.
It is allowed to use metal slats-beacons, which allow you to control the thickness of the plaster layer. However, when plastering smooth walls, guides do not need to be used.
The plaster mixture for cosmetic repairs of the furnace must contain fireclay clay and crushed asbestos. In this case, you can get a more durable solution and, accordingly, a high-quality finish.
It is best to apply the mixture for plastering stoves from the bottom up, using a wide spatula. It is best to level the plaster using a rule, pressing it against the metal slats. If they are absent, the solution is evenly distributed over the surface, checking the evenness using a building level.
It is also recommended to use a corner spatula to remove corners.
After applying the plaster mortar to the entire surface of the stove wall, carefully level it with grout.
This finish can serve as the basis for ceramic or fireclay tiles, as well as decorative relief plaster.
Purchased heat-resistant mixtures
Ready-made stove plaster can also be used for finishing. There are many varieties of such mixtures. But the most popular are “Pechnik” and “Terracotta”. The advantage of such plasters in comparison with those prepared by hand is a high degree of heat resistance. “Pechnik” and “Terracotta” are able to withstand temperatures up to 200 degrees.
Whatever mixture is used for plastering the stove, purchased or homemade, there is no need to prepare a large amount of it at once. The volume of a single serving should not exceed 8-10 liters. In any case, the solution needs to be developed in a maximum of 2-2.5 hours.
Decorative finishing
The decorative design of the stove walls is carried out in accordance with the taste preferences of the owner. An evenly plastered surface can simply be whitewashed; by the way, whitewashing is a traditional finishing method that has been used since ancient times. The whitewashed surface was often painted with imported paints, giving the room originality and emphasizing national traditions. In most cases, the ornament was selected according to local traditions.
Modern technologies and materials make it possible to create an imitation of natural stone or a uniform relief structure on the surface of the stove wall.
Quite often, craftsmen with a wide imagination decorate stoves with elements of three-dimensional designs, using various available means for this purpose. In particular, we are talking about plastic film, brushes, brushes and other materials and objects.
Creative people create relief compositions from decorative plaster, allowing them to protrude slightly beyond the stove walls. Subsequently, all this is covered with paints. Moreover, applying the coloring composition to wet decorative plaster promotes deeper penetration and increases the service life of the decorative finish.
In some cases, the dried surface is additionally painted, which allows for a brighter design.
Terracotta or ceramic tiles can be used as decorative finishing for stove walls. The additional purchase of corner finishing elements makes the installation of tiles and decoration simpler and more convenient, allowing you to obtain neat and aesthetic corners. The tiles are installed using a special cement-based adhesive composition, which is resistant to temperature changes.
Defects and their prevention
The components are carefully measured.
Cracks occur due to incorrectly selected concentrations of the plaster components. Measure ingredients carefully to avoid this. When drying the layer, heating with a small amount of fuel is allowed. Overheating leads to layer shedding.
Cracks appear when the stove shrinks. The foundation parameters are correctly calculated so that the heater does not move in height over time. Sometimes the integrity of the plaster suffers due to improper technology for distributing internal hot flows. This can be avoided if you correctly design the location of channels and caps in the body of the hearth.
What not to plaster a stove
Asbestos cannot be used in Russian sauna heaters or in living rooms, since the substance releases harmful substances into the air. The material is replaced in solution with other fibers and threads.
Cement-sand mortar, which is used for other construction work, is also not used to cover stove masonry. The plaster will be durable, but will lack plasticity, so it will not last long.
You cannot use ready-made Rotband mixture. In the instructions for it there is a point where it is indicated that the operating temperature has an upper limit of +30°C. The furnace wall heats up higher.
Some subtleties of plastering a stove with a mixture of sand and clay
When plastering stoves with your own hands, it is important to take into account several main points, on which the quality of the work largely depends:
- It is not recommended to plaster a newly erected stove. The structure must go through the drying and shrinking stage. For this purpose, the stove must be heated regularly for 2-3 months, after which finishing work can begin.
- It is best to paint plastered stove walls with water-based paints. The use of other formulations may cause the release of harmful substances and unpleasant odors.
- All materials used to decorate stove walls must have a natural base so as not to pose a danger to human health.
All the methods described for plastering a stove cannot be called simple for independent use. Therefore, in the absence of initial knowledge and experience, it is better to entrust the plastering of a brick stove to professional craftsmen. In this case, you can get a high-quality result and avoid unnecessary consumption of materials.
Advice from professionals
To ensure quality work when plastering a stove, professionals recommend:
- Proper mixing of the solution. To do this, you can take a small amount of the mixture and roll it into a ball in your palm. If cracks form on it, you need to add a little water.
- The mixture should be viscous so that it can be easily applied.
- Before starting work, all cracks must be repaired.
- To strengthen the plaster, use reinforcing mesh.
- After plastering, you cannot immediately heat the stove, otherwise the coating may crack. You need to wait until it dries completely.
For high-quality plastering of the stove, the main thing is to mix the solution correctly - it should not be too liquid or thick. Following the instructions will allow you to avoid common mistakes and get a durable and aesthetic lining for your home stove.
Compound
There are many recipes for preparing a solution; the composition of the mixture for plastering a stove can be combined into one formula - a fastening material (clay, sand, cement, gypsum) and water. At the same time, clay is a fundamental component of any mixture, since it costs a penny and is easy to work with.
- Clay. It is recommended to soak the clay for 24 hours before use so that it swells and is saturated with water, then remove debris and other impurities. And after that add dry mixtures. Check the finished clay for fat content. There is a special Shepelev test for this. You need to roll a small ball of this clay, the size of a walnut, and press it with your fingers. According to the standard, when you press only 1/3, cracks will appear, and if the fat content is high, then pressing requires more force.
- Sand. Fine river sand is recommended. Before use, you need to sift it through a sieve, clean it of debris and impurities, and rinse it so that large grains of sand dissolve. It is difficult to say exactly the amount of sand used, since it depends on the fat content of the clay. The larger it is, the more sand will be required.
- Water. Only clean and good quality water is suitable for preparing solutions. The quality of the plaster depends on this. You cannot use rotten or old water; the iron content must be within normal limits. If the settled water has turned yellow, it cannot be used, there is a lot of iron.
- Binders. Asbestos fiber is often used, but some craftsmen use straw, as they are environmentally friendly and do not require large financial outlays.
