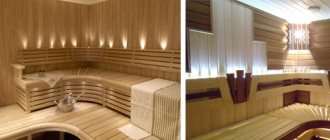
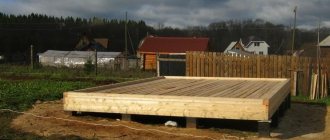
Your own bathhouse is a source of positive energy and health. In order for it to please its owners for many years, it is necessary to take care of choosing suitable insulation and finishing. High-quality thermal insulation allows you to save fuel, and proper cladding creates a favorable microclimate and mood. Wooden lining is the best option for finishing the interior of a bathhouse. The material has healing phytoncides released when heated. A wide range of shades and textures of wood allows you to create a unique interior.
Beginning of plating
A bathhouse is a room in which the temperature rises quickly and lasts a long time, so here you need to create the so-called thermos effect.
We insulate the bathhouse from the inside using any type of insulation. Then you need to install a hydrobarrier and a reflector that returns heat to the steam room.
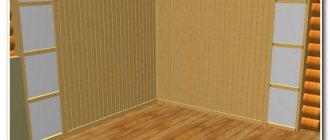
The next stage of work: installation of sheathing under the lining. If you do not plan to attach shelves to the walls, then you can use ordinary slats for the sheathing. Otherwise, purchase beams for the sheathing that can support the weight of a human body. Of course, the slats must be installed horizontally.
Wall upholstery elements placed vertically on horizontal bases
When the sheathing is ready, we begin to cover the bathhouse with clapboard, and you need to start from the corner. Eurolining is becoming increasingly popular. To install it, use clamps that allow you to attach the lining to the sheathing without making holes.
Claimer functioning
Experts advise that when covering a bathhouse with clapboard, use only the vertical type of installation, which eliminates moisture retention on the wood.
Installation of sheathing and insulation
To protect the insulation from moisture, you need to lay a double layer of vapor barrier foil. The first layer of material is attached to a pre-leveled clean wall.
Then the sheathing is installed from the dried, even beams. The structure is attached to the guides according to the principle: first, corner bars-posts, then intermediate ones. The entire structure is secured with metal corners. The gap is needed for subsequent deformation of the wood and additional ventilation of the bath.
After securing the main posts, smaller beams are installed. This type of sheathing installation is called “floating”; it is used for hot, humid rooms and helps protect the frame from deformation.
The next step is to level the sheathing using wooden supports. It is recommended to treat the beams with a special antiseptic composition. For example, linseed oil is excellent for any type of wood, it is environmentally friendly, penetrating deeply into the wood, and perfectly protects against pests, microbes, and other parasites.
Insulation is mounted on a flat frame, a second layer of foil is laid, which is secured with a construction stapler.
Thermal requirements for a bathhouse building
The bathhouse building must warm up quickly and retain heat for a long time, but at the same time use fuel economically. Such conflicting requirements force builders to think carefully about solving the problem. Fuel for the stove must be high-calorie. All heat produced must remain indoors. All routes for its leakage must be blocked.
From the point of view of a heating engineer, heat in a bathhouse is distributed by convection (the movement of hot air), heat transfer (from one heated body to another with close contact) and infrared rays (low-frequency electromagnetic waves).
Foil is proposed as a heat reflector (infrared transmission) back into the bathhouse. But the foil itself turns out to be shielded from the stove, and infrared rays almost do not reach it. So it reflects only a small fraction of the heat produced by the stove. But foil, when laid correctly, can cover all the cracks and prevent hot air from escaping. The joints of the foil sheets are glued with special foil tape. It is also good.
PHOTO: stroy-banya.comUsing foil as a heat-reflecting surface
What is better for a bath
Construction stores offer many types of finishing materials, and it is quite difficult to decide which clapboard is best to cover a bathhouse without knowing the characteristics of the wood.
Each type of wood differs not only in cost, but also in characteristics. In addition, the lining is divided into classes.
Regardless of the class, it has the same processing, goes through all stages, and differs only in quality.
Thus, the “Extra” class is boards with a perfectly smooth surface without any defects. As the class decreases - A, B and C - the quality requirement also decreases. Knots and small holes may appear.
In the lowest and, accordingly, the cheapest class “C”, the holes can be through. Such boards are not suitable for finishing premises. It is optimal to use “extra” or “A” class.
As for the type of wood, here you can proceed from your own preferences and financial capabilities.
- Aspen. Durable, rot-resistant. Often used for lining baths. The disadvantage is the rather high cost.
- Linden. The most popular lining for finishing a steam room. It does not change its color over time, does not emit resin, and releases a pleasant aroma when heated. Linden does not heat up very much, so it is ideal for making canopies and seats.
- Ash resembles oak in its properties. It is massive, dense, durable, and has an unusual texture.
- Birch. Panels made from this wood are not suitable for cladding a steam room, as they tend to collapse when exposed to moisture.
- Oak. Heavy, massive, durable and very expensive. It has an incredibly beautiful wood texture.
- Larch has high density and strength, but is difficult to process and has low thermal insulation.
- Cedar. This tree has healing properties; when heated, it emits a pleasant pine smell. Lightweight, attractive in appearance, durable. Among the disadvantages, it is worth noting the high cost.
- Pine is very often used in sauna lining, due to its low price and durability. Easily tolerates dampness. The disadvantage is that it changes color over time and releases resin when heated.
- Spruce. This wood retains heat perfectly, however, under the influence of moisture it tends to collapse.
Also see the comparison in the table:
Video - how to choose lining in a store:
The principle of fastening the casing
The premises are finished from the inside with clapboards in two ways: the planks are placed vertically or horizontally. Each fastening method has its own characteristics:
Vertical installation. It is fast and easy to install, condensate easily rolls down the slots on the back side of the planks (but also easily rises through the capillaries of the wood), the tongue-and-groove lock is protected from moisture penetration.
Due to the vertical arrangement of the slats, it is easier for heated air to circulate inside the steam room. Horizontal laying. When fastened with the tenon facing up, the lock is also protected from moisture; air circulation between the sheathing and insulation is better due to the fact that the sheathing slats are located vertically. With a horizontal lining, if necessary, you can replace water-damaged planks located near the floor without touching the rest of the lining.
Vertical fastening of the lining is suitable for saunas with dry steam, horizontal – more functional for Russian bathhouses with high humidity. But in general, the choice is determined by personal preferences.
Recommendations for choosing the direction of fastening the lining
The finishing panels can be fastened vertically or horizontally
The finishing panels can be fastened vertically or horizontally. You can find basic information about each method in the following table. The data obtained will help you make the right choice.
Table. Options for fixing the lining
Finishing direction Illustration Basic information Vertical
Vertical fastening of the lining
Vertical fastening of panels has a big drawback - the boards heat up unevenly along their length, which negatively affects their service life. Vertical cladding is optimally suited for steam rooms operated primarily in conditions of high temperature and low air humidity, i.e. in sauna mode. To ensure more efficient air circulation in the space between the insulation and the lining, several holes are usually drilled in the sheathing. Horizontal
Horizontal
In the case of a horizontal arrangement, temperature deformations of the lining material will be much less noticeable. Horizontally oriented finishing allows you to visually expand a small steam room. When the panels are fastened horizontally behind them, more efficient air circulation will be ensured - in this situation, the sheathing will be attached to a vertically oriented frame, as a result of which the gap will also be vertical. In addition, with this orientation of the frame it will be much more difficult for rodents to get into the space behind the skin. Horizontal lining is attached much faster and easier than vertical
Important! If you decide to orient the trim panels horizontally, make sure that the groove “looks” down.
Thus, the optimal direction of the casing elements is determined by the operating features of the steam room. If this is a real Russian bathhouse with splashes and steam, it is better to mount the boards horizontally. In saunas, the option of vertical orientation of the cladding elements demonstrates itself well.
Cladding from the inside with clapboard from a to z
The interior lining of the bathhouse starts from the ceiling and ends with the walls.
We calculate the area of the internal lining. How to take measurements correctly?
To completely cover the lining in the bathhouse, it is necessary to calculate the total area of the walls and ceiling minus the window and door openings. Correct calculations will help you save your budget on the costs of basic and consumable materials:
- The ceiling area is calculated using the formula Spot = LxW, where L and W are the length and width of the room, m².
- The area of the walls is calculated using the formula Sst = 2x(L1xH1)+2x(L2xH2), where L1.2 and H1.2 are the length and height of the long (1) and short (2) walls, respectively, m².
- The obtained values are added to the total value Stotal = Spot + Sst, m².
- The area of the window and door is calculated: Sok = WokxHok; Sdv = WdvxHdv, where Wok, dv and Hok, dv are the width and height of the window and door, respectively, m².
- The net area for the cladding is calculated: Snet = (Stotal – Sok – Sdv), m².
Preparation of lining and beams. Treating wood with protective agents
It is recommended to first dry the room, then bring in lumber and open it for a day to allow it to warm up and get used to room temperature.
After a day, the lining can be coated with a water-based antiseptic, after which finishing work can begin.
Preparation of materials and tools
In order to sheathe the inside of the bathhouse, you will need:
- beams for sheathing with a cross section of 50x50 mm;
- fasteners (screws, clamps, dowel-nails);
- thermal insulation material;
- foil for vapor barrier;
- tape for fixing the foil;
- construction stapler;
- drill for working with concrete and brick surfaces;
- screwdriver;
- building level.
Conducting communications
Before you start fixing the lining in the bathhouse, you need to think through and mark the location of utilities on the walls and ceiling: power supplies, switches and lighting.
Installation of the frame under the lining
The lathing for the lining in the bathhouse must be durable and of high quality, since it is subject to such requirements as fixing the heat and vapor barrier layer, supporting the weight of lamps and shelves, as well as the finishing material itself. In addition, properly installed sheathing will allow the walls to “breathe”; condensation will not accumulate on the inner surface of the lining and the main wall and mold will not form.
If the lining is vertical?
Vertical markings are applied along the entire wall indicating the installation locations of the beams for the frame and the places of their fastening in increments of 0.5 m, then the beams are attached to the pre-waterproofed surface with self-tapping screws.
If you want to line the inside horizontally?
The technology for installing the frame is the same as for vertical cladding, with the difference that the main beams are attached vertically.
The same work is performed for mounting the frame on the ceiling.
Laying insulation and vapor barrier in a bathhouse
The insulation should be placed tightly into the cells of the sheathing, the vapor barrier should be secured with an overlap stapler, starting from the bottom row. Lining the inside of the bathhouse with foil is additionally accompanied by fastening the joints with tape. Then you need to stuff thin slats onto the frame - the lining will be fixed on them. The thickness of the slats is sufficient to form an air gap that prevents the formation of condensation.
The same work is done on the ceiling.
Installing lining on walls
With horizontal cladding, the lamellas are fastened with clamps to the sheathing from the bottom up, with the grooves down. In vertical finishing, fastening begins from the corner, evenness is also checked by level. Each panel is tightly packed into the previous one.
Lining the lining on the ceiling
The ceiling in the bathhouse should be covered with clapboard in the same way as the walls, but there are some nuances here:
- Installation of panels begins from the entrance, using only clamps.
- A hidden nail is used for the last board.
- The ends of the lining should be placed at a distance of 4-5 cm from the walls for air circulation and the possibility of panels moving due to temperature changes.
Decoration of doors and window slopes
Slopes for doors and windows are made of lining, cut to the required length, and covered with decorative corners and platbands. It should be remembered that it is not advisable to stick decorative elements. To fix them, finishing nails are used with final grinding of the installation sites to avoid accidental injury.
Preparatory work for wall cladding
Before quickly sheathing the inside of the bathhouse with aluminum foil and wooden clapboard, it is necessary to insulate the walls. Before laying the insulation, install the counter-lattice and sheathing. A layer of vapor barrier is laid on top of the insulation.
Thermal insulation device
The best material for insulating baths is basalt wool. This material has good thermal insulation and a high degree of fire resistance. Basalt wool does not rot. This type of insulation does not burn and does not emit harmful substances. Basalt can withstand temperatures up to 1500° C.
Experts recommend using Rockwool brand “Light Butts” mineral wool. The mineral wool of this company is of high quality, increased density and affordable price.
To cut basalt wool sheets, large, sharp knives with a high-quality blade are used. When cutting, the knife blade is held at an angle of 30-45° to the surface of the blade. When tilted, the blades dull much more slowly.
The width of the canvas is taken to be 2 cm greater than the distance between the vertical posts of the sheathing. The increased width helps to fix the blades in a constant position.
Thermal insulation sheets are laid in 3 layers with overlapping joints. The amount of overlap is equal to half the length of the canvas.
All layers are laid in height within one span of the sheathing. The laying direction is from floor to ceiling. They move to another span after laying all the layers of the previous span.
Laying the first layer begins from the floor. First, the whole canvas is laid. After laying all the canvases of the first layer, the second layer is laid.
Laying the second layer also begins from the bottom. For overlapping joints, the length of the first web of the second layer is taken equal to half the length of the standard web.
At intersections with obstacles, elements of the required shapes and sizes are cut out.
Before covering the bathhouse with clapboard, care should be taken to protect the walls from dampness and rotting. Therefore, after installing thermal insulation, they begin to install the vapor barrier material.
Vapor barrier device
The vapor barrier layer is designed to protect walls from condensation and increase the heat-reflecting properties of the insulation.
The work of laying vapor barriers is the most critical when constructing bathhouses. The efficiency of steam use depends on the quality of vapor barrier work.
Aluminum foil with a thickness of 50-80 microns is used as a vapor barrier. Attaching the foil begins from the corner of the room in the direction from bottom to top.
Vapor barrier sheets are sewn with metal nails or staples to the vertical posts of insulation cells. To attach the foil, use a pneumatic gun or a special construction stapler.
The foil is laid with an overlap of 2-3 cm of vertical seams. All seams are taped with aluminum adhesive tape.
In places of transition from the walls to the floor and ceiling, the foil is laid with an overlap of 5-10 cm in each direction. The free ends are sewn to the ceiling and floor with nails or tacks.
At the junctions of walls and ceilings, gaps often appear in the foil. To eliminate these gaps, use foil corners. To make such a corner, a piece of foil is placed on the corner of a table or chair.
The resulting shape is carefully beaten with a light object to soften the foil. Broken corners are glued with aluminum adhesive tape
The manufactured corner is inserted into the corner and carefully taped.
After completing the work, check the quality of the vapor barrier installation. Any damage found is covered with adhesive tape.
After installing the vapor barrier, the installation of the counter-lattice begins.
Counter-lattice device
The counter-lattice serves as the basis for the main sheathing. Designed to ensure air exchange in the space between the foil layer and the lining.
To construct the counter-lattice, wooden blocks with a cross-section of 20x20 mm are used. The bars are nailed to the vertical posts of the insulation cells. The distance between the slats is taken to be 400-500 mm. Installation of counter-lattice slats is carried out according to level and plumb.
When installing a counter-lattice, a hole with a diameter of 80-100 mm is drilled in the ceiling for the exhaust duct pipe. A sealing cap (valve) is inserted into the hole. During bath procedures, the hole is closed. To ventilate the bath after washing procedures, the hole is opened.
Periodic ventilation prevents the appearance of dampness and rotting of the lining. To ensure air exchange, a gap of at least 2 cm is provided between the lower end of the lining and the floor.
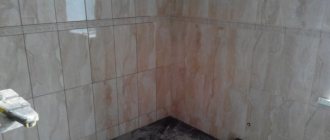
Tile installation technology
If we are talking about laying tiles on the floor, then the floor area is first filled with cement mortar at a slight slope towards the drainage system. The perimeter of the sauna is framed with construction twine. The tilting technology depends on the first tile from which the further floor angle is measured.
When laying, you can use a special tile adhesive, but a prerequisite for ensuring no subsidence is the addition of sand granules
If the tile is laid on a cement-sand mortar, then before laying it is immersed in water for 10 hours.
When installing ceramics on the screen around the furnace, heat-resistant thick glue is used. If the mastic is runny, it is better to make it thicker by adding sand. Wall tiles are laid in rows from bottom to top level.
Regardless of the purpose for which the bathhouse is being built - personal use or business, the task of properly equipping the steam room is considered the main one on the to-do list. Compliance with the necessary standards will guarantee a long, safe, pleasant use of the Russian bath.
Rules for visual inspection of boards and assessment of their condition
The following must be taken into account:
Pay attention to the quality of the chips. The boards must have a flat and smooth surface. This directly affects the economic benefits of finishing work. If the front side of the lining is rough, finishing will be complicated by the increased consumption of antiseptic and paint materials. The moisture content of the boards should not exceed 12-16% (GOST requirement). It is visually impossible to determine whether the material offered by the manufacturer meets this criterion. Therefore, it is necessary to request documents confirming compliance with GOST. If the wood is not dry enough, there is a high risk that it will suffer during the first years of operation of the finished premises. Pay attention to the depth and evenness of the groove. These indicators determine the quality of installation
And it doesn’t matter how it will be done: using clamps, nails or staples. If the groove is shallow, there will be nothing for the fasteners to grab onto.
An important characteristic of boards is width. Often there are lamellas on sale that are wider than standard ones (more than 88 mm) and managers assure that it is more profitable to buy such lining. This is not true, since such a finish will be less durable and there is a high risk of wide boards bending when exposed to moisture.
Material selection
Work begins after installation and testing of the functionality of all engineering systems. Before covering it is necessary:
- Determine the type and volume of materials;
- Make a list of necessary tools;
- Perform heat and vapor barrier;
- Install the sheathing.
Previously, edged boards from various types of wood were used for interior cladding. The lack of necessary equipment and technology sharply reduced the range and quality of manufactured products. New production technologies have made it possible to increase the range and quality of modern lumber.
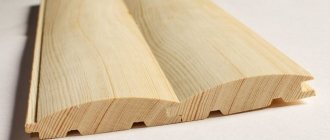
The main material for covering modern bathhouses is lining. The lining is a thin edged board with a special profile.
This is interesting. The name of the paneling comes from the thin wooden strips that were used to cover railroad cars.
The difference between lining and edged boards is the presence of recesses (grooves) and protrusions (tenks) along the long side. These elements ensure a tight connection of the panels during installation.
The widespread introduction of lining as a finishing material is facilitated by:
- Increased thermal insulation;
- Durability of the material;
- High installation speed;
- Ease of maintenance and repair;
- Beautiful exterior design.
Decorating the rest room
The bathhouse is always perceived as a place of relaxation from everyday worries. Each room in it is intended for its own purposes. The name of the relaxation room speaks for itself: this is where you relax after water treatments
Therefore, it is important to create a cozy and relaxing environment in it.
Proper finishing of a relaxation room in a bathhouse is not an easy task, the implementation of which can be entrusted to specialists: designers and artists.
A cozy environment is created through the correct choice of facing materials, furniture, accessories, organization of lighting and illumination of various zones and architectural elements of the room.
Typical steam room finishing device
To begin with, it’s worth “taking a look at the cross-section” of a typical wall or ceiling in a timber bathhouse, or rather, in its steam compartment. This will help you understand in general terms what tasks the decoration performs in a given room. How and where the heat moves from the stove, what happens when there is a temperature difference between the layers of cladding, and why the steam room in the bathhouse is finished in this way.
Article on the topic: How to make a fence from pallets
In the classic design, the section of the walls in the steam room consists of the following elements:
- The front finish is kiln-dried linden and aspen lining. Performs two main functions. The first is purely decorative. The second is accumulative. That is, the lining partly reflects and partly accumulates heat from the stove, so that later it can be transferred back to the steam room.
- A ventilation gap is needed so that moisture that gets behind the finish can evaporate freely and be removed into the exhaust duct to the street.
- Sheathing - used for installing lining. Sometimes additional thermal insulation is installed between the beams of the sheathing - made of foil wool.
- Foil - made of aluminum. Its functions in the paired department are discussed below.
- Insulation - in modern baths it is basalt wool, as it more resistant to accidental ingress of moisture. As a rule, it is mounted in the space between the sheathing under the lining.
- Main wall - if the house is wooden, then it can be timber or frame pie.
If most of the elements of a steam room in a bathhouse are more or less clear, then why you need foil - you need to figure it out.
Features of lining installation depending on the bathhouse material
Brick or foam concrete baths must be insulated from the inside without fail. The exception is the use of a bathhouse only in the warm season.
Mineral and synthetic raw materials are used as insulation in the form of individual slabs or in rolls (mineral wool, expanded polystyrene).
The floor will also have to be insulated. It will be cheaper and more reliable to use expanded clay backfill.
A brief procedure for finishing a bathhouse made of bricks or foam blocks:
- On the ceiling and walls we make lathing from wooden slats of average thickness 5-10 cm (the exact figure depends on the thickness of the insulation).
- We place insulation in the recesses of the sheathing. To prevent it from falling out, we fix it with temporary strips. If desired, fix the glassine on top.
- If the heat insulator is covered with a foil layer, then this item can be omitted. If the foil is attached separately, this should be done with an overlap of 20-25 cm, so that the overlap from the ceiling extends onto the walls, and from the walls onto the floor.
- To obtain an airtight coating, we go through all joints with metallized tape.
- We nail slats on top with a thickness of 2-4 cm, on the ceiling the thickness increases to 5 cm.
- We leave gaps for ventilation and fasten the lining.
If the exterior finishing is carried out in a brick bathhouse, if sand-lime brick was used, then for a structure made of foam blocks, exterior cladding is required. This is due to the porous structure of foam concrete. If it is constantly exposed to moisture without protection, it will begin to crumble. It would not be superfluous to insulate the outside of the room with expanded polystyrene.
In bathhouses made from fresh logs, it is possible to simply attach foil without using additional insulation, put the sheathing on top and install the lining.
In frame baths made of boards and timber, the finishing and insulation of walls occurs according to the same scheme as in brick structures.
Final recommendations
Now you know how to insulate a bathhouse from the inside under the lining and how to do it correctly. Let's summarize some small but important results:
- It is not worthwhile to insulate wooden buildings from the inside, including bathhouses; if possible, do only external insulation
- It is simply necessary to insulate the steam room, the main thing is to follow these rules: To insulate the walls, we use stone wool with a vapor barrier made of foil.
- For the ceiling we use expanded clay or stone wool with a vapor barrier in the steam room area made of foil and in other areas from a high-quality vapor barrier roofing membrane. It is better to insulate the ceiling on both sides, from the attic and from the inside.
- For the floor we use insulation: for wooden subfloors we use stone wool with the organization of waterproofing in the steam room and sink. For floors on the ground in the steam room, it is better to insulate them with expanded clay; in other rooms we use EPS.
Mounting options
Next, you need to choose how the lining will be attached. The planks are connected to each other by grooves, but they must also be attached to the sheathing.
You can do this in 2 ways:
- Using a clamper. This is a mounting bracket with 2-3 holes. It is put on the lining and fixed with nails, screws or staples. Installation begins from the center of the wall. Its main advantage is that the kleimer does not damage the lining.
- Using self-tapping screws or nails: the first ones are screwed in at an angle, the second ones are driven in. To avoid rust, it is better to choose galvanized or copper nails. Unfortunately, the metal will begin to rust, and leaks may also appear at the fastening sites.
Claymer for liningSource mainavi.ru
You can easily see how to properly line a bathhouse with clapboard from the inside with your own hands. The lining can be mounted horizontally or vertically. The first method is more suitable for saunas, where the humidity is low, the second - for Russian baths, where there is high humidity.
Features of installing eurolining inside a concrete, brick or boiler bath
Before deciding which clapboard to cover the steam room, shower room and dressing room, you must first insulate the walls of the bathhouse - you can use mineral wool or basalt, but it is better to abandon the foil surface. Another insulation material is cork glomerate, however, along with anti-allergenic, antifungal and antiseptic properties, it has a significant drawback: high cost.
After insulation, the frame is assembled. It is recommended to use dowel nails to fasten the beams.
The technology for how to properly line a steam room and other rooms in concrete, brick and boiler baths is the same as for wooden ones.
Lining in a bathhouse: how to make...
Let us continue the description of technological processes. The article mentioned above gives an idea of installation methods, but we will still briefly repeat here the basics that you need to know.
Covering bathhouse walls with clapboard
The process itself is not difficult even for beginners, but it is full of nuances.
As already mentioned, you should start covering the walls of the bathhouse with clapboard from the top sub-ceiling strip. For this purpose, the thorn is cut off from it, because it goes with the thorn upward. Fasten the first board through the front side.
However, the upcoming expansion, firstly, and the need for uniform moistening and drying of the reverse side for less warping, secondly, suggest not making the first board close to the ceiling. And so that the gap is not visible, it is covered with a plinth or flashing, preferably with some indentation from the wall.
BUT! Don’t consider this a common practice—the Internet is full of videos whose authors make boards end-to-end. You can do as they do, we proceed from the expansion of the wood, and in linden it is minimal. So it’s better to know the properties of your lining and proceed from them.
The last two or three boards from the floor are usually done like this: it is difficult to insert the last one, so the boards are knocked together into a block in advance and it is this block of 2-3 boards that is inserted into the groove of the last one fixed to the wall. It is attached from the front side using the same fasteners that were used above - these are either finishing nails, or self-tapping screws, or staples.
Headlining
The direction of laying the boards when covering the ceiling in a bathhouse with clapboard is determined by the direction of the battens of the sheathing and perpendicular to it.
The process itself is no different from wall mounting.
This video not only advertises the best (from the point of view of the author of the video) method of fastening, but also demonstrates the process of covering the ceiling in a bathhouse with clapboard. Listen to the advice of the master, they may be useful in your work.
How to sheathe correctly
In articles about insulating a bathhouse, we describe in detail the layers of the “pie” from which it is composed. Go through the materials in this section, everything is listed there in groups - ceilings, walls, the latter, in turn, according to material: brick, wood, block.
Here we will remember the basics and give more specifics on the question “how to properly line a steam room in a bathhouse with clapboard.”
Steam rooms are often insulated using specialized heat insulators, for example, special mineral wool for baths and saunas, which contains few binders that can evaporate when heated and harm human health.
In addition to heat insulators, foil is also popular. The “pie” diagram is as follows:
- first of all, a steam and waterproofing membrane is attached to the walls;
- then a sheathing is erected over it;
- then a heat insulator is inserted into its gaps;
- everything is covered with vapor and waterproofing, which can be used as foil or foil material - paper or polyethylene foam;
- a new layer of sheathing is packed to form a ventilation gap;
- The clapboard is attached to the last sheathing.
Now we will not give arguments for and against foil; enough has been written about this too. Let's just say that instead, you can cover the heat insulator with a membrane film.
And now the details of working with the lining.
There are two common ways to attach its slats - vertically or horizontally. In the first case, the lathing on the insulation is made in the form of horizontal strips, in the second - vertical ones.
The pitch of such sheathing is 50-60 cm vertically (depending on the width of the insulation minus a couple of cm, so that it holds on itself and does not fall out), horizontally - optional, but in general the range for both is 40-80 cm.
The lining is fastened directly to the sheathing beams, and since no one wants to see nails on the front side of the lining for both aesthetic and practical reasons (they will rust), it is fastened through the groove in any of the following ways:
- for small finishing nails or screws;
- on clamps;
- for staples up to 40 mm long.
Here's a video showing how to fix the paneling using staples and a pneumatic gun. Very fast and very high quality work:
The advantages and disadvantages of vertical fastening are as follows: if you have a Russian bathhouse with high humidity, each of the lamellas is heated and moistened unevenly along its entire length, this is not good for the wood and leads to its damage. In addition, the connections are unprotected if water is directly spilled on the walls - it flows into the grooves.
But there is no high humidity in the sauna (no more than 15%), so a vertical set of linings is quite acceptable. It is usually done for aesthetic reasons - to make the steam room look more “slender” - illusoryly stretched in height.
A horizontal set of lining can be called more traditional in every sense - and the original railway lining was fastened this way, and it looks like laying a log or beam, in general, it’s more common this way. But there are also advantages: each lamella is located in its own temperature “zone” and heats up evenly.
IMPORTANT! To properly sheathe a steam room in a bathhouse, turn the lining on the walls with the groove down and the tenon up. This will eliminate problems with water flowing into the grooves. You can sheathe the steam room and sauna and Russian bath horizontally
Horizontally you can sheathe a steam room, a sauna, and a Russian bath.
ADVICE! When installing the lining, do not forget to use a level, especially for grade B, but grade A may also have problems. Check the evenness every 5 lamellas; if there is any misalignment, compensate for it by pressing or loosening the tongue-and-groove connection.
Types of suitable insulation materials
In our opinion, it makes sense to divide the types of thermal insulation materials for baths into sheet, roll and backfill. In addition, there are insulation materials that are applied to the walls in the form of foam or a moistened mass - these are polyurethane foam and ecowool, which are sprayed using special equipment.
Mineral wool can be purchased in rolls or sheets. It all depends on its density and the binders used.
BY THE WAY! We rarely name specific brands, but do you understand that the names Rockwool or Isover hide the same mineral wool produced by different companies?
Basalt wool is a type of mineral wool, a literal reference to the similar mineral used. There is practically no difference.
Basalt wool for baths
But you should not confuse mineral wool and glass wool - these are different insulation materials, made of different materials and with different properties.
Glass wool should no longer be used anywhere, because it is extremely unpleasant for humans - if it gets on the skin, it causes itching, and is hazardous to health if it gets into the eyes or respiratory organs. Yes, and fiberglass crumbles during operation, turns into dust, and it penetrates through the cracks, and you breathe it.
Does not like fiberglass insulation and elevated temperatures typical of a bathhouse.
Polystyrene foam and extruded polystyrene foam are good insulation materials, especially the latter, but using them in a bathhouse is dangerous. They are absolutely not suitable for a steam room, but could (theoretically) be used in other rooms, but we will not recommend them, since they are a fire hazard.
ADVICE! In the bathhouse, polystyrene foam and penoplex can be used in floors under concrete screed - there they do not pose any danger.
So, sheet insulation is mineral wool, foam glass (excellent, but expensive insulation), calcium silicate and magnesium silicate sheets, non-recommended polystyrene foam and extruded polystyrene.
Foam glass
Roll insulation is again mineral wool (lower density), glass wool. foamed polyethylene, with or without foil (penofol, isolon, etc.).
We have already spoken about fiberglass, now about foamed polyethylene. It is often used as additional insulation in residential buildings, but polyethylene does not tolerate high temperatures, so it should not be used instead of foil to insulate a steam room.
Foil insulation Penofol
IMPORTANT! Polyethylene already melts at a temperature of one hundred degrees. By the way, it supports combustion.. In general, it is quite possible to insulate other rooms of the bathhouse with it (as a second layer)
In general, it is quite possible to insulate other rooms of the bathhouse with it (as a second layer).
We will divide bulk insulation for baths into those that can be moistened and “glued” to the wall, and those that cannot. Expanded clay and vermiculite belong to the second category, ecowool - to the first.
Expanded clay and vermiculite can be used to insulate floors and ceilings, where they adhere perfectly and retain heat indoors. In order to insulate the walls of a bathhouse with them, it is necessary that between the two layers of the main wall material there is a gap, a cavity that can be filled with insulation.
Expanded clay
Ecowool is waste paper (cellulose) crushed into dust, impregnated with fire retardants so that it does not support combustion. And it really doesn’t support it - this is a good material for insulating baths where it is on sale. Ecowool is used in dry and wet form. In dry conditions - for insulating floors and ceilings, as well as for filling cavities. When wet - for application to walls.
Insulating the roof with ecowool using the wet method. Cromwell Photos
Also on our website you can read two articles that provide a more complete overview of insulation materials that can be used in a bathhouse:
- review of bath insulation;
- choosing the best of natural and artificial insulation for a bath.
Which thermal insulation product is better?
Due to their characteristics, bath insulation has different properties; with foil they will cost more, but this is a justified expense. It is difficult for the average person to figure out at first what product is better, more reliable, what are the properties of thermal insulation foil, how much does 1 sq.m. cost. product for insulation. The table below will help you save time when choosing foil for your bath.
| Foil insulation | Price RUR per sq.m | Reflectivity | Environmental friendliness | Easy to install |
| aluminium foil | From 60 | 95%-97% | + | – |
| kraft foil | From 35 | From 95% | + | + |
| "folgoisolon" | From 25 | From 95% | + | + |
| "penofol" | From 60 | 0.97 | + | + |
| mineral foil insulation | From 80 | From 95% | + | – |
Installation of foil thermal insulation cannot be called too labor-intensive. If the steam room is made of logs or wooden blocks, then the foil can be attached directly to the wall in the bathhouse. The whole process is carried out in several stages: Rules for installing foil insulation
Thermal insulation is attached to the wall with special construction brackets
It is important to monitor the integrity of the canvas and avoid tears. If it was not possible to avoid damage, then metallized tape will help correct the situation. The insulation is attached with an overlap, the width of which should be at least 20 cm
Each joint is taped with special tape. The better this work is done, the less heat loss there will be in the future. A frame is mounted on top of the insulation for finishing. It is important to pay attention to one point: it is necessary to maintain a gap between the finishing panels and the insulation to ensure air circulation.
If the walls are made of brick, then, as a rule, installation is carried out on top of mineral wool. To complete this process, the procedure changes slightly. Then, first of all, you will need to assemble the frame of the future partition, and mineral wool is laid inside this frame, on top of which foil is mounted in the usual manner.
The process of insulating any room, including a bathhouse, is an important stage in the work. Not only the consumption of energy sources, but also the safety of building structures, as well as indoor comfort, depend on how well the work is done and how effective the materials are selected. Nowadays, materials for thermal insulation can be chosen from a huge number of products on the market.
It is important to know that foil for insulating baths is an integral part of the process of creating optimal operating conditions in the future
When building a bathhouse, the main task is to create a structure that will quickly warm up and retain heat for as long as possible. For this purpose, the walls and ceiling are insulated. Aluminum foil for baths is most often used as insulation. There are several types of this material, differing in strength, ease of installation, durability and service life. When choosing a specific type of foil insulation, you need to focus on the characteristics of the building.
Types of wood for making bath trim
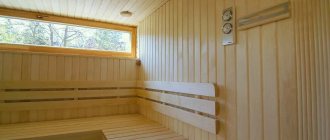
The steam room finished with aspen paneling looks attractive
It is important what type of wood the product is made from.
For the bathhouse, wood trim with the lowest thermal conductivity is used: linden, aspen, abashi, cedar, alder. Moreover, you can take not any cedar, but only the northern one. It contains less resin and when heated, the walls and ceiling will not begin to cry.
Larch species have a lower wood density and with tactile contact in the bathhouse, the lining will be more pleasant, even at high temperatures in the steam room. Such lining costs more, but the costs will be justified. Each of the types under consideration is better suited for different bathhouse areas.
Aspen: has a beautiful reddish tint and increased moisture resistance. In terms of its durability, aspen can only be compared with larch.
When in contact with water, aspen wood does not collapse, but rather hardens. It is better to use it to decorate a rest room or washing area. The only negative is the high price, due to which it is not recommended for use in the steam room and dressing room.
An original version of a steam room trimmed with linden clapboard
Linden: Lining has become traditional for finishing the inside of a bathhouse. Linden does not heat up at high temperatures and has a pleasant whitish color. But linden has a serious drawback - if it is not treated with antiseptics and protective compounds, it quickly begins to darken and rot.
Cedar lining in combination with linden looks great
Cedar: This is a coniferous tree, but its structure is of low density, so it is often used for baths. Cedar has excellent antiseptic properties and emits a pleasant odor when heated. But it is not recommended to use it in a steam room, since it still contains some percentage of resin.
Alder lining in the interior of the bathhouse looks original and modern
Alder: has a pleasant pinkish tint with a pleasant velvety texture. Holds temperature well and is not afraid of moisture. In baths can be used in any part.
When choosing lining for finishing a bath, it is better to take chamber drying Extra or AB grade. Since changes in temperature and humidity in the bath occur constantly, it is impossible to use material with inaccurate or curved shapes. But in the highest grades this is unacceptable.
We choose the canvas, features and characteristics.
Taking into account the special microclimate of the room, the material is selected of a certain quality. Cladding of internal walls requires such qualities from the lining as: durability
- To high temperatures and sudden changes.
- To high humidity.
- To direct contact with moisture.
The market is filled with construction varieties and to make the right choice you need to know what to look for. The lamellas may differ in the back and front sides, the shape of the entrance grooves and its dimensions, and the type of wood
Types of lining profiles
- Eurolining. With visible seams after covering.
- Soft-line. With externally rounded shapes, with closed seams
- Calm. With various external shapes, without seams.
- Landhaus. With drawings on the front side.
- Eurolining is two-sided. Equally suitable for cladding on both sides. But this type does not have a ventilation groove, and is not entirely suitable for bathhouses.
- American. It has a sharp bevel on the front side.
- Block house. Or imitation timber, convex front part.
Manufacturers use different markings, both according to GOST and their own, so you should not rely only on them; when choosing, you must pay attention to external quality. The material is manufactured using the same technology, and the difference in grade is noticeable externally; you can also use the European DIN standard to distinguish the grade of products
The material is manufactured using the same technology, and the difference in grade is noticeable externally; you can also use the European DIN standard to distinguish the grade of products.
For a bath, choose a smooth texture, those profiles that have smaller profiles and no sharp cuts; it can be calm, softline, and so on.
Differences by lining classes
- Extra or premium. High quality products, even, smooth on the front side, without knots or cracks. The most expensive variety.
- And class. It differs from the premium class in the permissibility of knots up to 1 cm, and may have small cracks
- To class. The knots on them are no more than a third of the board and in any quantity, possibly through cracks.
- C class. The cheapest of all the classes presented, the lowest quality, many knots on the board, poorly planed front side. Rarely used as a topcoat.
For saunas, you can use any variety, and the first three options are better. For better comfort, it is desirable that there are no nicks or other defects to avoid scratches and splinters; the texture should also be pleasant to the touch, smooth and without roughness.
Let's consider what kind of wood is used in the manufacture of lining
The concept of a bathhouse combines a sauna with a dressing room, a shower room with a swimming pool, and a relaxation area, and here you can combine the use of the material, both for the sake of economy and to improve the appearance, for this you need to know what kind of wood the board is made from, and what properties each of them has.
- Coniferous species, cedar pine, etc. Coniferous species are cheaper and are more often used in dressing rooms, relaxation rooms, swimming pools, and showers. It is also acceptable to use it in a steam room, but if you have a Russian sauna, the board will get very hot, which will create some inconvenience. Conifers get very hot and burn at high temperatures.
- Hardwood, aspen, linden, etc. An excellent material for cladding saunas and steam rooms. Resistant to aggressive temperature changes and direct contact with moisture; the most common materials for saunas are linden and aspen. The boards do not overheat and you do not have to get burned, which is an important property and very convenient.
Particular preference is given to hardwood, especially in sauna finishing. They do not burn or release resin, making them uncomfortable in hot environments.
Basic finishing methods
The construction of a bathhouse frame is permissible from wood, aerated concrete and foam blocks, and brick. If building standards are observed, the building will be functional. The choice of material depends on the personal considerations of the developer. In central Russia, preference is given to wood in 50% of cases. A log or beam. Another 25% falls on frame structures, the basis of which is also wood. The last quarter remains for other materials.
The interior decoration of a bathhouse built from logs, using frame technology or bricks and blocks, does not depend on the material of the box
It is important that it meets the specific requirements imposed by the functionality of the building. The most stressful conditions are in the steam room, where the humidity reaches 70% and the temperature reaches 90°C.
For the washing room and dressing room, a humidity of 40% at a temperature of 30 - 35°C and low humidity at 20 - 25°C are recommended, respectively. The given numerical values are indicative and justified from a medical point of view. In life, differences happen. When it comes to steam rooms, the rule of thumb is: higher the temperature, lower the humidity.
Choosing a lining: with what lock and what length?
Good, high-quality lining helps the walls of the bathhouse to “breathe,” prevents the appearance of condensation and fungus, and uniquely regulates the humidity in the bathhouse. The main requirements for these materials are environmental safety requirements. It is worth clarifying that at one time all the lining was made “in tongue” and “in quarter”, but the slats often shifted during operation, and the density of the joints was violated. That is why today almost all lining on the market is made with tongue/groove profiles.
A little secret for those who like to save money: clapboards up to 1.5 meters long in warehouses are much cheaper than those that are more than 2 m long. And figuring out how to cover a bathhouse with clapboards of this length is not difficult. You just need to make a rail in the middle. But the benefits will be quite tangible.
List of tools
As mentioned above, sheathing a bathhouse is not a difficult task, you just need to prepare the necessary tools:
- Beam for frame 40*50 mm. It may be uncouth, it will still not be visible, and such beams are much cheaper;
- Self-tapping screws for sheathing;
- Insulation. It is best to use mineral wool;
- Aluminum foil or a special vapor barrier;
- Scotch tape for attaching foil;
- Construction stapler and staples;
- Small nails or special clamps;
- Building level;
- Hammer;
- Drill or hammer drill;
- Screwdriver.
Frame installation
Before covering the bathhouse with clapboard, it is necessary to secure the lining.
To do this, the beam is attached to the wall using self-tapping screws. If the walls are uneven, they can be secured using brackets for metal profiles for drywall. It is necessary to use a building level to determine a straight vertical line and install the sheathing beam directly along it.
You should start from the corner. Then, moving along the wall to another corner, in increments of 50-60 cm, install all subsequent slats in the same way as the first.
- The frame is installed on the ceiling in the same way as on the walls.
- If you are going to mount it vertically, then install the sheathing bars perpendicular to it, that is, horizontally, starting from the floor.
- The sheathing must be fastened to a wooden surface using galvanized screws, and to a concrete surface using dowels.
Insulation and vapor barrier
Mineral wool is the best thermal insulation option for a bath.
it should be inserted tightly into the spaces between the beams, without forming gaps through which heat can escape. The sheathing slats must be higher than the layer of wool so that after installation of the lining an air gap will form.
Don't forget about safety rules. When working with insulation, wear a respiratory mask and safety glasses. Fine dust from it irritates the mucous membranes.
Sheets of vapor barrier material should be laid starting from the bottom, overlapping each other and secured with special tape and a stapler.
Video - this is how the process goes:
Covering the bathhouse with foil and clapboard
Despite the fact that this material can be used in all rooms inside, covering the bathhouse with foil and clapboard is used only in the steam room.
The reason is that, in addition to excellent vapor barrier properties, foil has the ability to reflect infrared radiation, and therefore retain heat in the room, and in an amount that would be excessive, say, for a rest room.
Usually this property is called a “thermos” - the principle is the same, only without a vacuum, more precisely, it is replaced by an air layer, which, although it conducts heat, but weakly.
For more information on using foil, see this page.
In bathhouses, foil is used not even in cases where the heat does not hold, because here it would be more correct to eliminate leaks and increase thermal insulation, but when the owner would like to create the conditions of a Finnish sauna in the steam room.
Foil is also suitable for these purposes because it is not afraid of high temperatures, but polymer films that can be used for vapor protection are.
The use of foil in a Russian steam room is questionable, but there is no point in speaking categorically against this material, because the bath consists of many factors that influence each other. We admit that the conditions of a Russian bath are achievable in a steam room with foil.
As for the technology, the foil is placed on top of the insulation, overlapping, attached to wooden boards separating the insulation; All joints and fastening holes are sealed with aluminum tape.
Then a lathing (at least 3 cm thick) is nailed on top of the foil. And the lining itself is attached to the sheathing. If you need information about fastening, see this article.
Principles of insulation depending on the type of building
The choice of insulation depends on the material from which the bathhouse is built. We need to talk about each type of building in more detail.
Made of brick
Sheathing with foil and clapboard is usually done in brick baths. Carrying out work:
- Without additional insulation of walls, ceilings, and in brick baths, it is impossible to achieve an optimal level of comfort.
- All brick surfaces are covered with foil. The individual sheets are glued together with metal tape.
- The sheathing needs to be secured over the reflective sheets. It must be independent so that there is good ventilation between the wooden frame and the foil layer.
If there is no ventilation, condensation will accumulate inside, which will cause the wooden frame to rot.
Made from concrete
To insulate concrete surfaces, ordinary foil will not work. You need to choose a material that has a backing. It is fixed on top of the waterproofing layer.
Made of wood
It is not necessary to cover wooden beams with foil. To achieve an optimal level of comfort, it is enough to correctly caulk the seams between the logs. You can cover the ceiling in the steam room with foil. It needs to be secured with the reflective layer down, the sheets overlapped, and glued with aluminum tape.
Advantages and disadvantages
Lining is an excellent option because it has a good appearance and has all the qualities that are necessary for the finishing material of a steam room. There are many options for how to process it without harming your health.
Due to the fact that there are many types of lining, you can decorate the steam room in the style that you like best. When choosing this or that tree, you should think carefully about what you would like the bathhouse to look like in the end. In addition, you need to calculate the price, since the cost is different for each type of wood. There are, of course, other types of finishing materials, but they are more expensive and require much more attention during installation. In addition, the lining is easier to dismantle in case of damage.
Typically, a bathhouse consists of a steam room, a shower and a dressing room. Each of these rooms has specific requirements. That is why the material that will serve as interior decoration must have specific technical characteristics and be of high quality.
The main advantages of lining over other materials include:
- value for money;
- high moisture resistance;
- resistance to high temperatures;
- variety of types in stores.
Lining can be called an environmentally friendly material that is safe for human health. Since the temperature in the steam room is quite high, the material with which the room will be decorated should under no circumstances be heated. In addition, in order to know how to choose the right material, you need to inquire about the characteristics of the wood species from which the lining can be made. Some types of wood can release resins when heated, which sometimes cause allergic reactions. The lining has no obvious shortcomings, so you can safely purchase this material for finishing.
Treatment of lining with protective agents
Sheathed walls are subjected to protective treatment.
Solutions that are water-based or contain wax are considered the safest to use. They are environmentally friendly and harmless to health. A waterproof film is formed on the surface of the lining, which prevents moisture from penetrating into the wood, extending its service life.
Before application, it is important to read the manufacturer's instructions. Often, even one layer of product is enough.
Using wooden paneling to cover the bathhouse, the owners create a special microclimate inside the room, which has a positive effect on the health of vacationers. Plus, wood is a natural material that fits perfectly into the interior decoration of the bathhouse, looks beautiful and smells nice.
Covering depending on the material of the bath
Covering the bathhouse with clapboard, as well as attaching foil in the steam room, was invented primarily for the purpose of preserving heat inside the room. Additional thermal insulation can be placed under the lining, and the film reflects up to 95% of the heat back into the room, creating the effect of a thermos and reducing the cost of heating a bathhouse or sauna.
In order to properly sheathe a bathhouse to solve practical problems, and not to give the room an attractive appearance, you will have to take into account the material from which the structure is made. Some baths do not require additional insulation, others are more capricious and are subject to increased moisture formation
For long-term service of the steam room, you will have to take into account all its features.
Is there a difference between a bathhouse and a sauna?
In a Russian bath, the temperature is maintained below 100 degrees, but the air humidity reaches 70%. The Finnish version of the steam room, the sauna, is characterized by dry air, but at the same time its increased temperature. Therefore, it is allowed to use the vertical method of laying lining in the sauna, but you should avoid using coniferous wood in the finishing. The Russian bathhouse is less capricious in the choice of material, but requires more careful installation of the finishing - horizontally with the possibility of replacing several planks if necessary.
Finishing a brick or block bath
Such a bathhouse is sheathed from the inside not only to give it the appropriate style, but also for the purpose of additional insulation, as well as to comply with the requirements of the law on silence. First, they install the sheathing, between the rods of which insulation is laid - mineral wool or ecowool. After this, the foil is installed on top and a counter-lattice is made. The lining is attached to the slats of the latter.
It is advisable to cover such a bathhouse with clapboards on the outside, but such finishing is carried out at the request of the owner. If you make external cladding and place insulation underneath it, you won’t have to lay mineral wool on the inside - just install a vapor barrier, a counter-lattice and secure the lining to the walls and ceiling.
Frame building
The walls in such a bath are made in the form of a “sandwich” of two boards or panels, between which insulation is placed. If the thickness and material of the insulation are selected correctly, additional thermal insulation for such a bath will not be required. In this case, it is enough to install the sheathing, attach the foil to it, mount the counter-lattice and install the lining panels.
If the thermal insulation of a frame bath is poor, you will have to additionally cover it with insulation either outside or inside under the lining. In the future, you have to foil and decorate the bathhouse according to the generally accepted algorithm.
Do you need cladding for a wooden bath?
A bathhouse made of wood does not need additional cladding, because initially it contains the most suitable material for such a room, and the appearance is preserved as traditional as possible. The exception is situations when the owner of a wooden bathhouse did not calculate the thickness of the walls and the room turned out to be too cold. A wooden bathhouse will also have to be lined with clapboard if you plan to lay foil in order to create a “thermos” in the steam room and reduce heating costs.
What to do with a log house
The expediency of finishing a log house is similar to a bathhouse made of boards. But in a log house it is more difficult to install sheathing and lay insulation due to the unevenness of the walls. Even before foiling or finishing such a bathhouse, you will have to carefully caulk it and seal all the cracks.
Step-by-step instruction
Before lining the inside of the bathhouse with clapboard, you should decide whether the ceiling or just the walls will be covered.
We cover the bathhouse with clapboard with our own hands, starting from the ceiling. However, before you start covering, you should take care of thorough thermal and waterproofing.
We start with insulation
Before covering the steam room with clapboard with your own hands, the room needs careful thermal insulation.
Every bathhouse needs an insulating layer, especially in the steam room. An exception is a small summer bathhouse made from a log house, since in this case only the steam room is insulated.
Fire-resistant and environmentally friendly basalt wool is chosen as the insulation material. You should not choose insulation materials like polystyrene foam, as this is completely unsafe for your health.
Before laying the insulation, a sheathing is installed under the lining in the bathhouse, relaxation room and other rooms that need finishing. A vapor barrier is attached under the sheathing, then insulation, on top of which a waterproofing film is attached. For better reliability, you can cover the entire pie with foil. It is attached between the sheathing using buttons or a special construction stapler.
Preparing panels
The fact is that after drying, the finished material is immediately placed in a sealed package. That is why, immediately after opening, the lining absorbs moisture from the air, which can cause it to swell.
You should also take care of the impregnation of the panels. We recommend choosing special impregnations for baths, which contain antiseptics and fire retardants that prevent fire and the appearance of various microorganisms.
How to nail it correctly
As mentioned earlier, decorating a bathhouse with clapboards with your own hands starts from the ceiling. Before attaching the lining to the ceiling in the bathhouse, you should measure the length of the ceiling and cut the lining to the required size.
The first panel is attached opposite the door in one of the following ways:
- Using small nails at a forty-five degree angle. In this case, the nails will not be visible, and the ceiling lining will look like a single whole;
- To the sheathing, right through the wood panels. This method is most often used for eurolining; at the end of the work, the nail heads are closed with wooden plugs.
Just as the lining in a bathhouse is attached to the ceiling, it is placed on the walls. You should start from the most visible corner of the room, moving further along the perimeter.
Before lining the inside of the bathhouse with clapboard (as in the case of the ceiling), you need to measure the height of the room, then adjust the panels to the required dimensions.
More about the mount
How to nail lining in a bathhouse is a question that interests many developers.
The first thing to remember is that covering a bathhouse with clapboard is done with your own hands using hidden fasteners.
There are a number of reasons for this:
- If the fastenings are made through, then when the room heats up it will also heat up, and this can lead to burns;
- The metal fastening on the surface of the lining may succumb to corrosion, which will subsequently damage the panels;
- The aesthetic aspect, because the fastenings that are open to view look quite sloppy.
What is the best way to mount the lining in a bathhouse:
- Nails;
- Kleimers;
- Self-tapping screws.
Methods for attaching panels to walls
Using nails or self-tapping screws is the traditional option for attaching panels to walls. A more modern method is the use of clamps. It does not damage the panels, but requires additional costs of both time and money when installing the lining.
Using nails or screws
This method will require a screwdriver or hammer, as well as special nails or self-tapping screws - galvanized or made of copper alloy. Such fittings are more expensive, but if you save on them and buy ordinary nails, they will begin to rust over time. This will lead to the appearance of red streaks on the lining, which will spoil the appearance of the finish and stain the skin and things when touched. The fasteners are driven or screwed into the lining tenon at an angle of 45 degrees. The fastening points will have to be sanded so that there are no burrs or other defects left. The disadvantage of this method is that holes will have to be created on the planks when fastening them with nails. And when you try to remove the lining, the fastening points will be further damaged, which precludes the reuse of the panels if necessary.
Fastening with clamps
Do-it-yourself installation using clamps is safe for lining strips because it does not damage them. A clamp is a special bracket that is attached to the lower half of the lining groove - a recess into which the tenon of the next plank is inserted. The fastenings of the bracket are covered with the next strip in the row. Fixing the staples to the sheathing beams is carried out with nails or self-tapping screws.
With this installation method, the lining is not damaged, and there are no nail heads or screws left on the outer surface of the cladding, which eliminates the risk of getting burned or getting a rusty drip on your clothes after visiting such a bathhouse.
It is also easier to partially replace the lining mounted in this way - just pull the boards out of the grooves and pull out the fasteners. If you do not work carefully, it will be the staples that are damaged, not the boards.
Execution of work
Sheathing device
A timber with a thickness slightly greater than that of the insulation used is used (mineral wool is usually used as a heat-insulating material). It is installed perpendicular to the selected direction of the lining in increments of approximately 45-55 cm. If the walls are uneven of significant size, it is necessary to use pads made of the same type of wood or some material of sufficient density. The sheathing is attached to the wall with screws and dowels made of plastic or self-tapping screws made of galvanized metal.
Laying insulation
In most cases, as mentioned above, mineral wool is used, which is available on the market in a wide variety of types and modifications. The main rule for laying insulation is that there are no gaps between the materials to avoid the formation of cold bridges.
Video instruction:
Sometimes mineral wool is not installed at all - if there is no need for additional insulation, and the lathing is done only to secure the lining.
Vapor barrier device
Glassine, roofing felt or simple plastic film can be used. The strips are fastened with a stapler for furniture work with an obligatory overlap of at least 5-7 cm. For greater reliability, the joints are additionally glued with adhesive tape or tape as wide as possible.
Ventilation device
A favorable microclimate in a bathhouse largely depends on proper ventilation. For its normal functioning, when installing insulation, it is necessary to provide ventilation holes.
Installation of lining on the walls of the steam room
Fastening must be done using a hidden method, using self-tapping screws, clamps or nails.
This is necessary in order to:
- avoid the possibility of contact with heated hardware;
- prevent it from coming into contact with steam or water, and as a result, prevent corrosion, which can ruin the surface of the lining
Coating bath walls from clapboard
Standard technology is used, during the production of which the following points must be taken into account.
- The lining is fastened with self-tapping screws made of galvanized steel into a tenon, and the holes must first be drilled to avoid chipping. It is allowed to use fastening with nails or clamps (special staples for wood).
- The coating device starts from the corner, access to which is most difficult. This is explained by the fact that the last board will need to be adjusted both in length and width, which is almost impossible to do if there is insufficient access to the place of its installation.
- The corners are finished using a wooden plinth, which is secured with stainless steel nails.
- We should not forget that all wooden structures must be treated with an antiseptic compound.
Installation of a ceiling covering for a steam room made of lining
The installation of a lining ceiling covering, as a rule, starts from the entrance. Only clamps or nails are used for fastening. This is due to a fairly serious load from the mass of the material. When installing the last boards, a hidden nail without a head is used, which is driven in using a hammer. To give a pleasant appearance, the place where this nail is driven is treated with sandpaper. It is necessary to take into account the need to leave a gap of 4-5 cm between the ends of the lining and the wall of the bathhouse for normal ventilation. In addition, it is necessary to provide the structure with the opportunity to “play”, since the temperature under the ceiling will be the highest.
Correct gap between boards
The coating looks most attractive when all joints are made of the same type.
This can be easily achieved by marking the boards when installing them, and also using a level to ensure that the boards are level or vertical. The wall covering must be closely adjacent to the ceiling covering.
Covering door and window slopes with clapboard
When finishing doors, you must first prepare boards of the required length. Doorways are trimmed with platbands.
Covering a log bathhouse with foil
We carry out the work in the following sequence:
- Attach the sheets of aluminum foil with the reflective coating on the inside using small galvanized nails, with a 20 cm overlap.
- Ensure that the integrity of the material is maintained. If it is damaged, you can glue these places with tape.
- We seal the joints with metallized tape, ensuring tightness.
- We fill the lathing from slats with a cross-section of 5 cm2 in the direction opposite to the installation of the lining.
- We attach finishing material to the sheathing on top of the foil.
- During the installation of the lining, we ensure that the air gap between the reflector and the finish is maintained.
Step by step guide
To do the work correctly, it is important to observe some nuances. Before proceeding directly to the sheathing, wooden planks are fixed along the vertical surface
Subsequently, they will play the role of a frame for attaching the material. A layer of insulation is placed between them. Thermal insulation is laid, aluminum tape must be glued at the joints
Before proceeding directly to the sheathing, wooden planks are fixed along the vertical surface. Subsequently, they will play the role of a frame for attaching the material. A layer of insulation is placed between them. Thermal insulation is laid; aluminum tape must be placed at the joints.
You can attach the lining to the foil with a fifteen-centimeter air gap. This step is necessary for efficient heat transfer.
Thanks to the air gap, the thermal conductivity of aluminum decreases; infrared rays hitting the foil sheet will reflect heat into the steam room.
You can also consider more detailed instructions for covering.
Log steam room
If the walls are built from logs, covering with foil is pointless. In this case, the quality of caulking is much more important. The thermal insulation layer on the log house will not play a role. In a log steam room, foil may only be used to cover the ceiling surface. In addition, aluminum foil is used to decorate the walls around the heating device. This way the heat will be reflected into the room rather than heating up the back wall.
When working with the ceiling, the foil is attached with the reflective layer down, overlapping, extending up to 5 centimeters onto the walls
It is important to seal the joints with special tape. The work should be done efficiently, without creating loopholes for steam
If desired, cover the top of the foil with clapboard, but you can leave it like that.
Brick steam room
When using frame technology or brick, it is important to follow a step-by-step guide, which includes covering the entire area of the ceiling and walls with material. Creates a thermos effect
- The master marks the wall onto which the sheathing bars are attached, the thickness of which must correspond to the thickness of the insulating layer, since it will be laid between the beams. If the lining is subsequently attached in a vertical position, the planks are secured in the same way.
- The width between the beams should be equal to the width of the insulation product. If there is ventilation or windows on the surface, bars are attached around them, onto which the foil will subsequently be attached.
- The insulation material is placed.
- It is covered with foil and secured to the sheathing with a construction stapler. Material with a small thickness should be laid with an overlap, but if it is thick, the material is attached end-to-end. Around windows and ventilation, the work is done more carefully.
- The joints are covered with metallized tape. They must be hermetically sealed.
- Slats with a thickness of about 25 mm and a width of 4 cm are attached to the sheathing. They will act as a retainer for the foil with insulation, create a gap and become a support for further installation of the lining.
- At the final stage, the lining is attached to the sheathing. When attaching the planks horizontally, you need to start from the bottom; they are placed with the grooves down. For vertical fastening, installation is performed from the corner, leveling the first element.
Work with the ceiling is done in the same way. You need to fill the baseboard around the perimeter.