28.10.2012
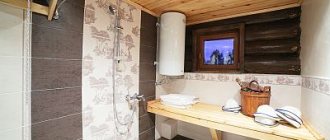
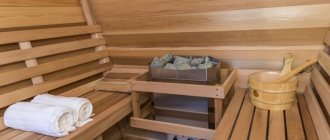
The interior decoration of the bathhouse, and
the lining of the walls of the steam room in particular, is of great importance.
Without doing this, you cannot count on the durability of the structure itself. After all, heat loss, especially in a steam room, will not add to the pleasure of visiting it. Therefore, the presence of thermal insulation of the walls is a necessary condition when building a bathhouse with your own hands. All this fully applies to non-log buildings. But what to do if the bathhouse is a log house, the material of which is an excellent natural heat insulator? Let's try to figure this out together.
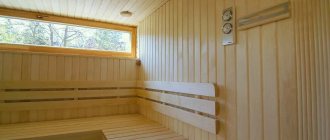
Is it necessary to sheathe a log bathhouse?
This question is asked by many log bathhouse owners. Ideally, there is no point in insulating such a bathhouse and sheathing it with clapboard. After all, wood itself is an irreplaceable natural heat insulator. In addition, it has been proven that a steam room with log walls has a beneficial effect on the human body - steam from the heater is reflected from them without a shock wave, creating a more favorable internal environment.
The useful area of the steam room is also important. Whether we like it or not, covering a room will inevitably entail a reduction in its area. And financial costs have a certain, and often primary, significance.
If, nevertheless, you decide to insulate and sheathe the steam room with clapboard, then it is recommended to take into account the following thermal insulation characteristics of log walls depending on its diameter:
- 200 mm or more - no insulation required;
- 150 mm – insulation can be omitted, but warming up the steam room will take considerable time;
- 100 mm – insulation is required.
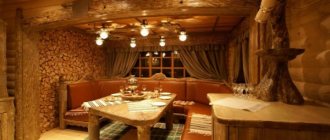
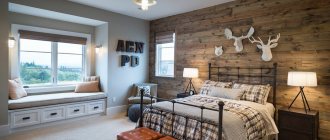
In any case, the decision is up to you. It all depends on individual preferences - some people like the traditional style of a Russian bath, while others will like a modern design.
You can read about fastening methods in the article on how to fasten the forcing.
Return to content
1.Rates and finishing work calculator for 2021
Check out the prices of facing works. Prices for Moscow and the Moscow region are shown in the table. If you have any questions about the project and payment methods, please contact the manager by phone. He will tell you about everything in more detail. Also read reviews about the company. Contact phone number –
| Name | Unit change | Price in rub. |
| Caulking of a log house made of rounded logs | m.p. | from 75 |
| Sanding walls made of rounded logs | m² | from 300 |
| Thermal insulation (5cm) | from 120 | |
| Installation of sheathing | from 200 | |
| Steam and waterproofing | from 80 | |
| Finishing the bathhouse with clapboard | from 400 | |
| Finishing the bath with ceramic tiles | from 1500 | |
| Finishing the bath with porcelain tiles | from 1700 | |
| Bathroom finishing with clinker tiles | from 1800 | |
| Finishing the bath with terracotta tiles | from 1900 | |
| Finishing a bathhouse with a block house | from 460 | |
| Finishing the bathhouse with siding | from 300 | |
| Finishing the bath with imitation timber | from 400 | |
| Finishing the bath with salt stone | from 8500 |
Use the built-in calculator to find out the cost of finishing a bath.
Work price RUR/m²
Sum:
0₽
Necessary tools and accessories
- Electric drill with a set of wood drills.
- Electric jigsaw.
- Wood saw.
- Set of wood rasps.
- Hammer.
- Hatchet.
- Mallet.
- Furniture stapler with a set of staples.
- A device for sawing bars at an angle.
- Level.
- Roulette.
- Yardstick.
- Carpenter's square.
- A ruler for drawing the outline of a log house.
- Plumb.
- Rope.
- Metal clamps for lining.
- Pencil.
Additional materials on the tool can be found here and here.
Return to content
How we are working
Leave a request
We will contact you and give you a free consultation
We coordinate the departure
Our specialist will visit your site to make the necessary calculations and take measurements.
Commercial offer
Based on the data collected by a specialist, we prepare an estimate for you and send it for your approval.
We conclude an agreement
If you are satisfied with everything, we conclude an agreement and carry out all the necessary work.
Each client can receive a guarantee certificate valid for at least 2 years for a turnkey project of any complexity. We hold promotions where we offer various services on favorable terms and guarantee transparent cooperation. You can view the company’s portfolio in the field of construction on the website or on social networks. Contacts - +7 (495) 258-93-97
Selecting materials for cladding
| Pine or spruce beams for sheathing | Sections 45 x 120, 40 x 50 |
| Skirting boards and corners for finishing trim | Hardwood |
| Windproof waterproofing membrane "Tyvek Housewrap" | Protection of thermal insulation from moisture penetration from the outside. On the insulation side it freely allows steam and moisture to pass through, while simultaneously preventing moisture and wind from entering the insulation. |
| Self-adhesive tape "Isofix" | |
| Waterproof basalt wool “Rockwoll”, mats 100 x 600 x 1200 (thickness x width x length, mm) | Made from natural basalt rocks. Has a high environmental indicator. |
| Glass mesh reinforced aluminum foil "Armofol" type B | Designed for temperatures from -60 to +200 °C. High coefficient of thermal reflection and low vapor permeability |
| Aluminum self-adhesive tape LAS | Temperature range: -30 to +150 °C. Has increased strength |
| Eurolining 14 (12.5) x 96 (thickness x width, mm) | Abashi, alder, black alder, linden, aspen. Divided into classes Extra, A, B, C depending on appearance (presence of knots, texture, etc.) |
| Metal clamps for fastening lining |
Return to content
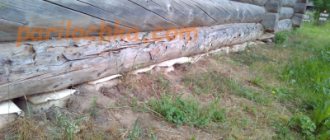
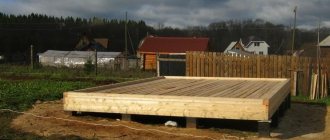
What is a chopped log?
Chopped logs are a wood material for the construction of a bathhouse, which is least subject to mechanical impact during processing. After cutting the log to dry, only the rough layer of bark is removed with an ax, thereby laying down the fibers and leaving a protective thin layer of wood. Such a log usually does not have ready-made cuts, locks and grooves, so during construction all this is done manually, based on the design. Due to such a small impact on the log, it has a natural appearance and a thin surface protective layer. Even after grinding, a chopped log looks natural, which cannot be said about a rounded log, which requires grinding even after machine processing.
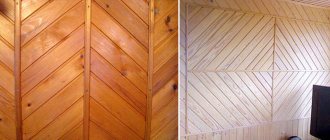
Covering the walls of the steam room with clapboard
Choosing a cladding method
There are two types of lining arrangement - vertical and horizontal. In our example, the lining is positioned vertically. If desired, you can also orient it horizontally. In this case, there is no need to install horizontal slats (planks) on top of the vertical posts. In this case, the width of the racks must be taken in such a way that the thermal insulation wool is recessed by 20-30 mm relative to their longitudinal end. This will ensure ventilation of the air space between the insulation and the inner surface of the wall sheathing.
It is important to know that when viewed horizontally, the sheathing must be done from the bottom up, placing the tenon at the top. This will subsequently prevent water from getting inside the joint grooves when it flows down the walls of the steam room.
Return to content
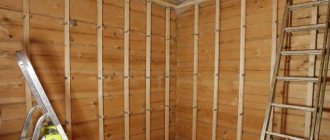
Laying the first moisture-proof layer and vertical posts
- First, we make markings for installing vertical posts, starting from the corners of the steam room with a step of 590 mm between their inner edges. These dimensions will allow you to tightly lay basalt wool with a thickness of 100 mm.
- The decoration of the walls of a bathhouse built from logs has its own characteristics. The fact is that fixing the sheathing slats strictly vertically is not so easy. To achieve this, it is necessary to process the vertical posts from the side where they contact the logs. For this purpose, a special copier is made, which is a thin ruler pointed on one side and holes drilled along it for a pencil. Having attached the stand to the log wall, the copier is passed along it and lines are drawn that repeat the profile of the log house. Further actions boil down to processing the racks along the drawn lines. It is enough to ensure a tight fit of the rack to the logs in several places with a step of 600 mm, maintaining a strictly vertical level. The length of the contact surface of 20-30 mm is quite sufficient. Don't forget to treat with an antiseptic.
- We lay the protective membrane from bottom to top. The top film is overlapped with the bottom film by 20-30 cm. We level and fasten the top edge to the protruding parts of the logs with staples using a stapler. We glue the overlap areas with self-adhesive Isofix tape.
- We align the protective film under the posts, which we install in the corners according to the previously made markings. Using a level or plumb line, set them strictly vertically. Fastening to logs is done with galvanized nails or screws. In order not to use long screws, we drill a blind hole in the rack 2-3 mm larger than the diameter of the screw head.
- We stretch the rope between the outer posts in two places: below and above. It will serve to base the internal racks.
- We install all internal racks according to the example in step 4.
- Align and carefully staple the protective film. Where necessary, additionally glue with self-adhesive Isofix tape. This operation should be performed with particular care. It is important to completely eliminate the possibility of air entering the area of open logs.
- Note: during the installation of corner posts, it is necessary to simultaneously lay thermal insulation wool in the corners.
Return to content
Installation of thermal insulation and vapor barrier film
- Before laying thermal insulation mats, you should provide yourself with personal protective equipment: work gloves, goggles, a respirator, a hat and appropriate clothing. Getting cotton wool on parts of the body or in the eyes will cause a lot of trouble. Inhaling air filled with volatile cotton wool particles will not improve your health.
- We carefully place the mats in the spaces between the racks in the direction from bottom to top and in the same plane with the outer longitudinal ends of the racks. We carefully press each upper mat to the lower one, avoiding gaps and cracks.
- We cut the top mats with a mounting knife
- We lay the vapor barrier foil in the same way as indicated in paragraph 3 of the above section. The only difference is that it is attached to vertical posts. Each strip should be connected with self-adhesive aluminum tape LAS. The new layer of tape must be glued overlapping with the previous one. You should also make releases of 70-100 mm foil both at the top and bottom of the wall.
Return to content
Fastening horizontal slats (planks)
At this stage, we fasten the horizontal slats for mounting the clapboard sheathing on them. We nail or screw the slats over the vapor barrier at the bottom and top of the future sheathing. The internal slats are spaced at 600 mm intervals. We use a level to give them a horizontal position.
Return to content
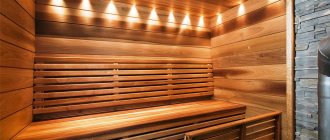
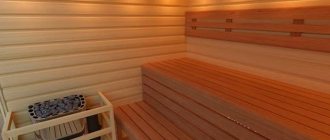
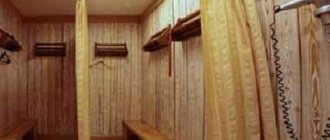
Cladding walls with clapboard
- Before covering, you should make sure that the lining is dried and has lain in conditions close to the place of work for at least one day.
- We place the first board strictly vertically with its tenon in the very corner of the wall. At the same time, its groove should look at us. The quality of the entire cladding depends on how you secure it. After all, the first board is the main reference point for all the boards in the row. Using nails or screws from the edge, carefully secure it to each horizontal rail. It is important to ensure that the fastener caps are completely closed during subsequent lining with decorative corners. We place the clamps (clamps) into the protruding edge of the lining groove and carefully nail them to the slats.
- We carefully insert each subsequent board all the way into the groove of the fixed lining, tapping it with a mallet through a wooden block, which will protect it from unnecessary damage. We also secure it to the slats with clamps.
- The last piece may need to be trimmed and secured like the first board. We sheath all the remaining walls, attach the baseboards to the sheathing, and caulk all corners with decorative corners using copper-plated small-head finishing nails. Such nails are practically invisible and will not spoil the appearance of the steam room.
- Important: to ensure unobstructed ventilation in the space under the cladding, the lower end of the lining is installed with a gap of 10-15 mm from the floor. This scheme will also protect the lower ends of the lining from exposure to water during the operation of the steam room.
Return to article content
By cooperating with us you get
Guarantee of meeting deadlines
- Delivery of the project is always on time
- In case of delay, we incur a penalty of 3% per day
Transparent, fixed estimate
- No hidden extra work
- You pay only for what you need, and you choose what you need yourself!
Daily photo and video reports
- Work progress reports via WhatsApp or email
- You will be in the know, even if you cannot be present on site.
We consult clients free of charge, coordinate a home visit, carry out the necessary measurements and calculations, draw up an estimate, and begin work after concluding a contract. During the implementation of the project, we make detailed photo reports, record videos, and send them to clients. This way, customers will be aware of what is happening if they cannot be present on site during construction work.
Tips and tricks
- It should be taken into account that a bathhouse built from a log house has the peculiarity of settling during the first one and a half to two years. Therefore, it is better to do the cladding after this period, otherwise it may become deformed. And the cladding itself will interfere with the normal shrinkage of the log house.
- To attach the shelves, install strong additional bars under the sheathing where they are attached to the wall.
- All internal wooden structural elements must be dry and thoroughly treated with an appropriate antiseptic.
- And the last thing you should definitely pay attention to. Do not forget to lay electrical wiring with heat-resistant insulation under the wall cladding of the steam room. Of course, if it is provided.
- The above method of insulating a bathhouse is also suitable for thermal insulation of brick walls. The difference can only be in the materials used and their main characteristics. But this will be in subsequent articles.
- Below are the main sketches of the completed work:
Go to the main article-contents: interior decoration of the bathhouse.
Return to content
More articles on the topic of how to build a sauna with your own hands:
- How to attach drywall to a log wall
- How to make a ceiling in a bathhouse
- DIY bath floor
- How to make a door for a bathhouse
Dear friends! If it’s not difficult, share it on these social networks with your friends. Thank you!
Unforeseen expenses when finishing a house or bathhouse
As construction practice shows, there are always unforeseen expenses: either a truck gets stuck in the field and you have to look for a tractor, or there aren’t enough boards... When working out a detailed estimate, 5 to 10 percent is set aside for unforeseen expenses. If the calculation is done “by eye”, set aside 20-25%. We include unforeseen expenses in the estimate initially, so the amount that is agreed upon when calculating the finishing will be its final cost (adjusted for the cost of purchasing materials, as discussed above).
When negotiating directly with the workers, be sure to draw their attention to unforeseen expenses, discuss in advance what they may be and assume the final cost of finishing the turnkey log house BEFORE starting any activity.