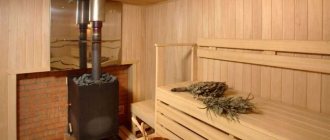
In our country it is rare to meet a person who has a “cool” attitude towards the bathhouse. Therefore, when building a house or cottage, the bathhouse is often the first to be built on the site. Let's figure out how to build a sauna heater with your own hands. After all, many people prefer traditional stoves, although now an electric heater can also be purchased.
DIY sauna heater
Advantages of a brick stove
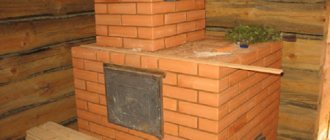
Brick stove-heater
A stove made of brick has a large closed heater; designs of other materials cannot compete with it in terms of the quality of the steam produced. The advantages of this design are:
- Fire safety;
- long-term heat retention;
- the ability to heat a large area;
- ease of operation and no need to add fuel during the washing process;
- uniform heating of the room;
- lack of contact between stones and combustion products.
The disadvantages of a stone stove include its impressive weight, which requires laying a separate foundation, and the need to preheat the bath.
Metal heaters: pros and cons
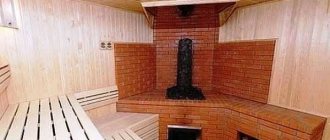
Made of metal
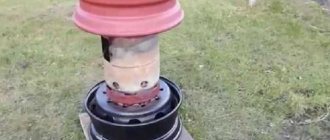
If desired, you can weld a steel stove for a bath. A container for stones is installed above its firebox. This option is cheaper and can be manufactured faster and easier than a brick structure. Cast iron cannot be used for metal heaters; cracks will occur when water gets on it. Among the advantages of a steel heating device:
- compact size;
- light weight;
- fast warm-up.
When choosing how to make a heater for a bath, the disadvantages of the stove are also taken into account; rapid cooling after combustion stops, uneven heating of the bath, fire hazard.
The brick stove is installed so that it heats all the rooms. Its front part with the combustion door and ash pan goes to the dressing room. The location for the structure is chosen when designing the bathhouse, because you need to take into account the required distance from the wall to the stove and build a solid foundation.
Popular manufacturers
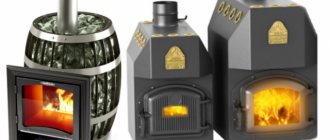
You can purchase a finished heater only in a certain design. These can be steel or cast iron models, since brick heaters are built directly on site and are not found on sale.
Among the most famous manufacturers of cast iron stoves are the following companies:
Hephaestus
Etna
Inzhkomcenter VVD
Vesuvius
These are domestic manufacturers offering models with the optimal combination of price and performance characteristics.
Among the companies supplying steel furnaces to the market, the following should be highlighted:
Termofor
Teplodar
Ermak
Varvara
The stove models manufactured by these companies are durable and made of thick metal. They do not burn out for a long time and allow you to heat rooms quickly and efficiently.
As you can see, only domestic companies are listed. This was done deliberately, since these companies offer very high-quality, competitive products. At the same time, the cost of their stoves is significantly lower than that of imported analogues, which determines the choice of buyers.
Heater location
Depending on the area of the steam room, a stove of a suitable size is designed. If, as a result, the heater takes up space up to 2 m2, then it can be installed in a specially made niche in the wall. Due to this, heat loss can be prevented, since its combustion will be carried out directly from the steam room. Although in most cases the heater is designed in such a way that its firebox is carried out from the next room.
A sauna stove should be installed so that the heat from it spreads into the dressing room, washing room and steam room. Thanks to this, it will be possible to make a common chimney with three separate chimney channels for a gas boiler, fireplace and heater stove.
Useful properties of steam
It is impossible to imagine a real Russian bathhouse without steam. Steam expands skin pores and removes harmful toxins from the body. The skin becomes more elastic and firm.
Heat dilates blood vessels, stimulating metabolism. The human brain is freed from mental and emotional stress, bringing the entire body into a peaceful state.
The heat of a steam room is an excellent cure for joint disease. It was not for nothing that our ancestors loved going to the bathhouse, mercilessly whipping themselves there with brooms, and to get steam, you would need a sauna heater. Let's figure out how to choose a heater for a bath or make it yourself. Most often, a traditional wood stove is used, although an electric one can be installed.
Water container
Immediately before building the stove, it is important to determine the volume of the tank in which the water will be heated. The volume of the tank will depend on the intensity of visiting the steam room. So, the calculation is made based on one liter of hot water per person. It is best to use an open container. Although there will be evaporation, there are a number of positive aspects:
- Convenient when filling the container.
- The ability to carry out maintenance or repair of the internal part if necessary, for example, remove scale, clean and dry.
- In winter, completely remove water, protecting the tank from freezing the water in it.
Water tank
The size of the container for heating the liquid is determined based on the maximum number of users of the sauna. If we consider that up to 10 liters should be enough for one person, then the volume of the container is calculated by multiplying this number by the expected number of users.
By choosing an open type tank, you definitely get the following advantages:
- ease of filling the container with water;
- free access to the oven;
- ease of cleaning the tank from scale;
- easy removal of liquid residues to prevent it from freezing without the need to kindle the bath in winter.
When using an open container, only a small amount of evaporation is allowed.
Foundation for a brick stove-heater
If you want the stove you made to last for many years, you should take care of making a reliable foundation for it. In this case, be sure to take into account the following nuances:
- The foundation of the bathhouse and heater must be different, especially if the total mass of the stove exceeds 700 kg. There must be a distance of at least 500 mm between them.
- The foundation for the heater must have a depth below the soil freezing level of an average of 700 mm. In different regions of Russia, the level of soil freezing is different.
- The size of the foundation should be half a brick larger than the stove itself on each side.
So, let's look at the step-by-step process of making a foundation for a stove:
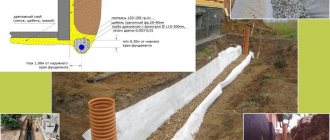
- To begin, dig a pit with a depth below the soil freezing level, on average 700 mm. The size of the pit around the perimeter should be 100–150 mm wider. This will allow you to easily install the formwork, and fill the resulting gap with sand or gravel.
- At the bottom of the pit we make a sand cushion. At the exit it should have a thickness of 150 mm. After pouring a layer of sand, water it with water to compact it. As water is absorbed, the sand will settle, so you will need to add it to the desired thickness.
- When the water is completely absorbed, a layer of stones or broken bricks is poured on top of the sand. It needs to be compacted. The resulting gaps between the stones should be filled with sand and watered. It is very important that the sand fills the space between the battle and the stones as densely as possible. The thickness of this layer, in our example, will be 250 mm.
- If the sand has stopped settling, then the next layer of crushed stone can be backfilled. It also needs to be compacted well.
- Now you need to make formwork from boards 40 mm thick. The internal size of the formwork must correspond to the size of the foundation. The top of the formwork must be leveled. It should be securely fixed in the pit and a reinforcement cage should be placed inside it. There should be 50 mm between the formwork walls and the frame.
- At the next stage, perform concreting. In this case, it is necessary to tamp with a piece of steel reinforcement or a wooden beam. The upper level of liquid concrete must be brought to the edges of the formwork. The surface of the screed should be smooth. As a result, the formwork should be on the same level as the subfloor of the bathhouse. The poured concrete must be left for several days to set.
- When the concrete has acquired sufficient strength, the formwork must be removed. The surface of the concrete is covered with two layers of molten tar. After this, fill the space between the walls of the soil and the concrete with sand or gravel. After this, cover the concreted area with plastic film and wait 7 days. Then you can start laying bricks.
Rubble concrete foundation
There is also another option for making a foundation for a heater. The sequence of its manufacture is as follows:
- A pit is also dug to indicate the level of soil freezing. Its size should be wider around the perimeter and 100–150 mm deep.
- If groundwater does not seep into the pit and the walls do not crumble, then you can begin to lay a rubble concrete foundation.
- Fill the bottom with a thickness of 150 mm with crushed stone. It should be compacted well. In this case, the platform must be horizontal.
- After this, formwork is done. It looks like a box without a bottom. Its size must correspond to the foundation design plan.
- The inner walls of the formwork are covered with hot bitumen or roofing felt for waterproofing.
- Next, immerse the formwork into the pit.
- Place the first layer of large stones up to 15 cm in diameter at the bottom.
- The resulting voids between the stones must be filled with crushed stone.
- A layer of cement-sand mortar is poured on top. The consistency of the solution should resemble thick sour cream. It is prepared as follows: Portland cement M400 or 500, one part and 3 parts sand. Water is added until the consistency of the solution resembles thick sour cream.
Foundation for a stove with waterproofing completed
After these steps, you can follow one of the following paths:
- Spray the first row of stone with the solution. Leave it for a day. Then pour the second row of stone also at intervals of a day. And so on until you reach the desired level.
- If the volume of the foundation is small, then concrete can be poured in one go.
The foundation level should not reach the level of the finishing floor by 60–70 mm. Be sure to check the top layer of the screed for level. After this, the surface is smoothed and covered with plastic film. In a week, the foundation will be ready for masonry construction.
The drying speed of concrete will depend on weather conditions. Therefore, in some cases you will have to wait more than one week.
Foundation slab on piles
Foundation screed
Let's consider another option for making a foundation for a stove-heater. A reinforced concrete slab with a thickness of 150 mm is laid at its base. Its lower layer must be reinforced. The larger the area of the installed slab, the more reliable the entire structure will be. But what if the predominant soil is moist clayey and loamy? Such a slab will not be able to balance the force of frost heaving when the soil freezes. Among other things, even in sandy and dry soils, seasonal movement of the foundation can be observed. To get out of this situation and increase the stability of the foundation, several piles are laid under the slab, on which the slab will later rest.
You can make such piles as follows:
- Using a garden drill Ø20 cm, drill a cylindrical hole 1000 mm deep.
- The bottom of the pit is covered with a layer of crushed stone 150 mm thick and compacted.
- After this, take the roofing material and roll it into a tube that will serve as formwork in the pit. This tube is immersed in the hole.
- Next, pour concrete into the hole to the level of the slab installation.
- After an average of 10 days, it will be possible to install a reinforced concrete slab on the piles.
The foundation must be waterproofed along the top edge. This will prevent groundwater moisture from penetrating the brick structure of the furnace. For this purpose, lay 2 overlapping layers of roofing material on the installed slab, which is coated with hot bitumen. In this case, the roofing material should extend beyond the foundation by 50 mm. The second layer of roofing material is laid perpendicular to the first.
Laying waterproofing
Step 1. After 14 days, we can begin laying bricks, although the foundation must first be waterproofed. For these purposes we will use a simple roofing material. We cover the base with two layers of this material.
Step 2. To do this, we need to cut strips of roofing material so that they protrude beyond the perimeter of the base by about 5 centimeters on each side. We lay the second strip of material with an overlap of at least 10 centimeters over the previous one. Similarly, we continue to cover the foundation with strips.
Step 3. Now we begin laying the second layer of roofing felt. We do this in the same way as described above, but perpendicular to the stripes of the first layer.
Step 4. Quite often, bitumen or other mastic is used to fix waterproofing. But we will not do this, since the first level of the furnace will consist of a solid brick layer, therefore, it will reliably fix the strips of roofing material.
Masonry bricks
For laying a stove, it is important to purchase well-fired and high-quality bricks. It should not have chips or cracks. Its edges must be smooth. The quality of a brick can be checked very simply. If, when dropped, it falls apart into several large pieces, then the brick is suitable. If, when dropped, it crumbles into many small pieces, then such a batch of bricks is not suitable for a heater.
For masonry, the best option is a stove (ceramic refractory brick). Ideally, the size of such a brick should be 125x250x65 mm. However, it is extremely difficult to find a batch of bricks in which the dimensions do not differ from each other. Therefore, choose your brick carefully.
Before starting masonry, many stove makers lay the bricks dry, leaving the necessary gaps at the seams. This way you can avoid a large number of mistakes.
There is another type of brick in which only 3 sides are fired. One side is not burned. This side is placed out. But such bricks are rare, so red ceramic bricks are most often used.
Red and refractory bricks
As for the fuel zone, fireclay brick Ш5 is used here. It comes in light pink, white or yellowish color. This brick can withstand high temperatures. It differs in its dimensions, since in most stoves the fireclay firebox is not connected to the main masonry of the stove body. Moreover, there is no need to adjust their rows to one level. But if the situation requires it, then the brick can be cut to the desired size.
It is not recommended to use fireclay bricks for laying the furnace itself. This is explained by the fact that fireclay does not accumulate heat; it cools quickly. Its main advantage is that it can withstand high temperatures.
Possible mistakes
It is recommended to choose basalt stone for the heater.
The heater in the bathhouse will function for a long time and correctly if you follow certain recommendations when arranging it.
- For laying the body, it is better to use red clay bricks. Only fireclay is suitable for the firebox; replacement is not allowed.
- It is important to choose the correct consistency of clay mortar for masonry. If it is too dry and liquid, the masonry will crumble; if it is too greasy, the joints will be loose.
- Not every stone is suitable for a heater. Choose basalt, soapstone, and andesite.
- The stones are selected to be relatively flat in shape and placed in a vertical position. When placed horizontally, heat is distributed unevenly.
Test ignition is carried out after the masonry has completely dried, it lasts no more than 5 minutes. For 3 days, the procedure is repeated several times a day. Only after this do they begin to fully heat the steam room.
Masonry mortar
For laying fireclay bricks, a mortar prepared from white fireclay clay is used. You can also purchase a ready-made composition for laying fireclay. You cannot place the entire oven on this solution. Why? This solution is sintered into a monolith at a temperature of 700–800°C. There are no such temperatures in external masonry. Therefore, after a short time it will crack and spill out, which will lead to the destruction of the masonry.
For external masonry, a solution of quartz sand and clay is used in a ratio of 1 (clay) : 5 (sand). The sand must be of river origin or quarry. River sand is somewhat worse, since its grains of sand are round and round, and the solution itself will have worse characteristics. Therefore, preference is given to quarry sand. The sand is sifted through a mesh with cells of 2–2.5 mm. This will prevent large particles from getting into the solution.
As for clay, it can also be obtained from a quarry from a depth of at least two meters. The quality of the clay should be checked. To do this, soak 200 g of clay in water for a day. Then roll the clay into a “bun” and leave it to dry under a canopy in the open air. After 2 days, drop it onto a stone slab from a height of 170 cm. If the “bun” has crumbled into several large parts, then clay is suitable.
The selected clay must be soaked in water to a paste-like state and ground through a sieve. First through large cells, and again through small ones.
Masonry
The masonry process is very painstaking and complex. There are a large number of subtleties and nuances here, understanding some of which comes only with experience. Therefore, to make this work easier for you, this section contains several videos that tell you step by step and show how to lay row by row.
As an example, consider the manufacture of an open small stove-heater. The size of such a stove is 102x62 cm. It is capable of heating a steam room with a tank, while the tank itself is located separately. It uses an interesting water heating system - an open siphon. So, a pipe is welded into the tank at a slight angle, which is sealed at the end. It should be under an open fire in the firebox. As soon as the water in the pipe boils, it rises into the tank, and cold water comes in its place.
The diagram below shows an example of a stove with an open heater:
Diagram of an open heater
And also a diagram of the arrangement of the firebox of an open heater:
Firebox order
Below in the diagram is the order of laying bricks for the stove:
Brick laying order
If you want to make a closed stove, keep in mind that this is much more difficult to implement. There are many nuances that must be taken into account when laying it. It is quite difficult to describe the entire technological process, so we suggest you watch an introductory video. The peculiarity of such a furnace is that the reservoir for stones is lined with fireclay bricks:
Video about making a closed stove:
It is worth noting that upon completion of the masonry, drying should be 10 days. At the same time, drafts are unacceptable. Only after this time can the first fire be fired.
Photo instructions for ordering the heater stove
Stage 1-4
Stage 5-8
Stage 9-12
Stage 13-16
Stage 17-21
Stage 22-25
Step-by-step instructions for installing protective screens on walls and heaters.
Let's look at the option of installing a stove with a remote firebox:
1. On the surface of the wall, mark the passage of the combustion compartment extension. The groove should be 200-300 mm larger than the natural dimensions of the part. Holes are drilled in the corners with a large drill and a cavity is cut out along the marking line.
2. At the place where the chimney passes through the roof structure, a groove is made for installing a coupling through passage. You can lead the pipe directly through the wall to the street, but this is not always possible or convenient.
3. Separate parts of the stove are placed in the marked places and the holes in the wall and roof are adjusted. Then they mark the attachment points of the firebox and the chimney coupling, and drill them with a thin drill to insert the screws.
4. The stove is set according to the level, and the receiving part of the remote firebox with the door is secured in the rest room with self-tapping screws. The individual parts are fastened together. The hole in the partition is lined with ceramic or simple bricks and the remaining space up to the metal is filled with a layer of thermal insulation. It is not recommended to use asbestos boards - when heated and high humidity, the material releases harmful substances to human health.
5. Using wood screws, fix the sheathing on the surface of the walls and partitions, fill the free spaces with basalt wool and attach protective screens with a mirrored outer surface or lay simple ceramic tiles. The mirror surface will reflect heat and promote rapid heating of the steam room. But you can simply line the walls with bricks, tiles, fiber boards and other materials - the main thing is that they are not afraid of dampness.
Important! When building a brick heater, work is carried out according to the scheme - order, but a minimum distance from the walls of 40 mm is required. This helps to ventilate surfaces and does not cause deformation of wooden parts.
Construction of a firebox and ash pit
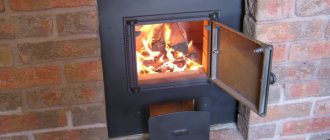
It is very important to correctly calculate the dimensions of the firebox. In this case, it is worth taking into account various factors, starting from the presence of a collector for heating water and ending with the type of fuel for heating the bath. The average depth of the firebox is 800 mm. 250 mm is allocated for the hot water system, and 550 mm is the usual length of firewood. The height of the firebox can reach 350 mm and the width 400 mm. With such dimensions, 8 to 10 logs of firewood can be placed in the firebox.
An ash pan with a tray and a ash pit is intended to collect fuel combustion products. They also provide air flow into the firebox, which enters inside through the grate. To regulate the intensity of firewood combustion, a valve or ash tray is used. If you need to warm up the steam room quickly, the tray is moved almost completely away for a while. When the firewood has flared up, the pan can be pushed in.
In this video you can see the process of installing a blower door with a locking cover:
Chimney
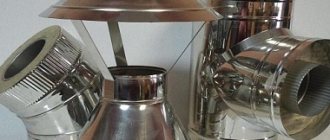
The heater stove differs from its analogues in that natural stones are used to accumulate heat. The first segment of the pipe passes through just such a compartment with stones. The chimney can also pass inside a container of water to heat it. In all other respects, there are no special differences in the construction of the chimney. It can be assembled from sandwich pipes or ceramic blocks. The manufactured chimney must be insulated.
As for the lower part of the chimney, it is made of steel, right up to the ceiling. It is necessary to install a damper when passing through the ceiling pipe.
The gate is designed to improve combustion intensity, as well as to regulate draft.
If a sandwich pipe is used, then it has two walls, between which there is a heat-insulating material. They can be installed in the area from the ceiling to the fungus on the roof. Basalt mats are used to insulate a brick chimney. They wrap the pipe. Wire is used to secure the mats. An umbrella or fungus must be installed on the chimney. This will protect the chimney pipe from sediment entering it.
When arranging a chimney, you should decide what type it will be: external or internal.
You can learn about other subtleties of arranging a chimney pipe from the video:
Finishing
Most often, the stove-heater is left without finishing. Red brick is laid out for jointing, and all bulges and irregularities are sanded. At the same time, it is also practiced to enhance the color of bricks with a solution of sulfuric or hydrochloric acid. However, the stove-heater can be plastered or tiled.
If you decide to plaster, then the layer should be made up to approximately 15 mm. For this work, you can use the following compositions with proportions:
- clay (1) – asbestos (0.2) – sand (2);
- lime (2) – sand (0.2) – asbestos and gypsum (2);
- sand (3) – clay (1) – cement (1) – asbestos (0.2).
Immediately before plastering, the oven is heated. After this, the first continuous layer is wetted and applied. When the first layer has set, the next layer is applied. As a result, the surface of the wall should be rubbed so that the wall is smooth and looks neat. Finally, whitewashing can be done.
Commissioning
Before you are going to light the stove, you should let it dry thoroughly. To do this, open the doors, vent and vents open for 7 days, this way the oven will dry out faster. If the stove does not smoke when lighting, it means the draft is good.
You should not rush to light the stove. Otherwise, if there is insufficient drying, cracks may form in the masonry.
Selection of stones
river stone
Based on the name of the stove, it uses special stones that undergo sanitary and geological examination. As for the specific choice of stone, there are several options:
- Soapstone chlorite.
- Jade.
- Gabbro-diabase.
- Raspberry quartzite.
- Porphyrite.
For baths, sea stones are considered to be the best option. However, such an opinion is unfounded. As practice shows, river stone can withstand high temperatures much better. Sea stone is destroyed very quickly, as it does not have sufficient strength.
Types of stones
But in addition to the type of stone, you should choose the right size and shape. For example, these could be medium stones with a smooth structure. Remember that there must be enough stones, as this affects the quality of heating and steam release.
So, when deciding which stone is best to use for a stove, remember not only practicality, but also the beauty of the room. Beautifully shaped stones will be a real decoration of a Russian bathhouse.
In this article we familiarized ourselves with the most common type of stove that is used to equip a Russian bath. As you can see, the process of its construction is quite complex and responsible. Therefore, there is no need to rush to start work. Carefully study all the recommendations in this article, diagrams, photographs and video material.
Is it worth buying inexpensive sauna stoves?
No, because goods with a suspiciously low price tag are fake. Such furnace equipment is produced in multiple violations of existing standards and norms. Therefore, the offer to purchase cheap sauna stoves is a common fraudulent scheme. You will buy a stove of poor quality, which is dangerous to use. It will quickly burn out and rust. In addition, cheap sauna heaters often weigh very little. And this is one of the factors that shortens its service life.
As soon as you have found a suitable stove for a Russian bath in the VashiBani catalog, load it into the online cart. You can pay for your order in cash, through an electronic payment system or by bank transfer. If you have questions about the purchase and delivery of goods, please call our operators.
