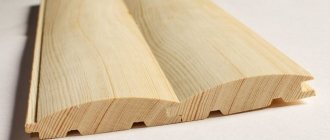
Wooden lining is ideal for decorating a modern home. This is an environmentally friendly, reliable and beautiful material for interior and exterior decoration. The best part is that installing it will not be difficult, and attaching the lining to clamps will help reduce work time and extend its service life. How is the lining installed on clamps, and what is the advantage of such a fastening element?
Installation of lining on clamps
After you have chosen the clamps for the lining, it’s time to start installation work.
Installation tools
Prepare all the necessary tools in advance so as not to be distracted by searching for them directly during the finishing process. Refer to the following list:
- screwdriver;
- building level;
- roulette;
- square;
- hammer;
- screwdriver;
- marker or thread for marking.
Preparation of materials
Installation of lining on clamps requires proper preparation of both the base and the panels themselves. Perform this step as follows:
- Carefully level the surface of the base on which you intend to attach the lining. Be sure to use a building level for this work, preferably a modern laser device - it gives perfect accuracy.
- If necessary, install a flat sheathing, metal or wooden frame with a suitable pitch - no more than 50 cm.
- Treat all lumber with an antiseptic.
- Maintain a technical pause until the solution is completely absorbed and dry.
- Follow the dimensions for attaching the clamps:
- for vertical finishing - plan installation at a distance the width of the board from the wall;
- if horizontal, determine the distance of 1-2 mm from the base of the floor, that is, so that you can drive a nail or tighten a self-tapping screw.
Technology for installing lining on clamps
The process of installing clamps itself does not take much time, but has some peculiarities. When mounted horizontally, they are as follows:
- Insert the starter panel into the bracket.
- Secure the clamp with self-tapping screws.
- Insert the next panel, connecting the groove to the tongue.
- At the same time secure with the next clamp.
- Repeat the last 2 steps until the entire surface is completely finished, maintaining the pitch of the fasteners. The optimal distance is 50 cm.
If you are installing lining with clamps on walls, consider the following recommendations:
- Press the end with the comb firmly against the wall.
- Secure the clamp with self-tapping screws.
- Install the bracket into the groove on the opposite side.
- Continue these steps sequentially until the surface is completed.
Additional recommendations for working with wooden lining
If you prefer wooden lining, take note of a few more expert tips so as not to damage the material and get a truly high-quality result:
- Control the temperature in the finishing room - the difference with the street should not be more than 10 degrees.
- Make sure to purchase quality fastening hardware that will not rust over time.
- Do not use liquid sealants to seal wood board joints. The best option for protection against moisture leakage in this case is a substrate of polyethylene film directly under the facing layer.
- After completing all installation work, cover the lining with varnish, oil or wax to protect it longer from moisture and sunlight.
Rules for calculating gluers and their use when fastening
Experience in using clamps shows that for reliable and durable fastening of one square meter it is quite enough to select about ten pieces.
- For a more accurate calculation, it is necessary to measure the length of one panel. After this, we measure the pitch of the sheathing frame. Typically this distance ranges from 40 to 60 centimeters. Divide the length of the panel by the pitch of the sheathing and add one. We multiply the result by the number of panels. This will be the required amount for fastening.
- When choosing the type of product used for fastening the panels, it is necessary to take into account that each element must be fastened with two or three self-tapping screws. It is not worth saving on their quantity, as this may affect the reliability and quality of installation as a whole. To fasten heavy panels, thicker reinforced elements with a large number of attachment points are used.
- After calculating the number of gluers, you can begin installing the panels. The wall on which installation is planned is pre-treated with special antiseptic solutions to eliminate the possibility of fungus formation. Subsequently, clamps are installed on the wall or installed sheathing using nails or self-tapping screws. In this case, nails are used only if lathing is used.
- Since the use of lining requires a flat surface, if there are uneven walls, you should calculate the best way to level them. Perhaps leveling the wall surface using a special solution or installing sheathing.
- Very often in such cases, lathing is used, which is installed on the wall surface quickly, and installation can be carried out on it immediately. Usually the sheathing is made of wooden beams of the same thickness, which are fixed at a distance of about one meter from each other. When installing wooden lining, this distance is somewhat smaller and is about 50-60 cm.
- When installing the sheathing beam, you need to constantly monitor the plane of the resulting surface, which should be flat. If necessary, to obtain a flat surface, plates of the required thickness are placed under the beams.
- Applying leveling solutions takes a lot of time, after which they also need time to dry. Therefore, this option is used much less frequently and when such work is necessary.
- Having installed the fasteners for the first panel, they begin to install it and then attach the clamps for the next one. The first board is tightly inserted into the hooks of the clamps, the rest are mounted in the same way. This method ensures that each panel fits accurately and securely against each other.
- To ensure high-quality installation with natural further ventilation, it is necessary to take into account that the boards should not touch the wall surface. Otherwise, this will lead to limited ventilation, moisture accumulation, and the formation of mold and mildew.
- When working with lining and clamps, it should be noted that work should be carried out at an ambient temperature of at least 10 degrees, since deformation of the panels may occur at lower temperatures. The clamps must be made of stainless materials and are treated with a special protective coating, since rust can spread over the surface of the lining.
- Liquid sealant cannot be used at the joints of wooden panels, but it is better to choose a moisture-proof film for this. Its use during temperature changes can lead to cracking of the panels. After installation is completed, the surface of the lining should be treated with special protective antiseptic materials that increase its resistance to precipitation and ultraviolet radiation.
- Taking into account all the requirements for choosing clamps for lining will ensure reliable and durable installation, as well as a long service life of the installed coating.
To learn how to attach clamps for lining, see the following video.
Advantages of using clamps
In the case where the wall of a building is covered with clapboard, it is much more convenient and safer to install building materials using clamps. The use of nails for these purposes is fraught with the formation of cracks on the surface of the building material, into which moisture can penetrate, which will cause damage to the cladding. If you secure the lining with clamps, the risk of such harmful consequences is significantly reduced.
Another significant advantage of this type of fastening is that it is completely invisible, and the wall has a rather pleasant appearance due to the absence of unnecessary metal objects on it.
Fixing the lining panel using plates is quite simple, because it does not require the use of special tools. In this case, dismantling the casing is also not difficult and the likelihood of damage to the building material is very low.
Considering that the metal staples that are the clamps do not rust and are not afraid of corrosion, they will last for quite a long time.
Installation of lining using clamps
Before you start installing the lining on the plates, you need to take care of the availability of tools, and also clarify the required number of fasteners. In the case when the lining will be installed on clamps using nails, you will need a hammer, a building level and a square, and a tape measure. If self-tapping screws are used, you need to have a screwdriver or screwdriver with you, and the other tools are the same as in the first case.
The number of fasteners must be no less than 20 pieces per square meter of building material.
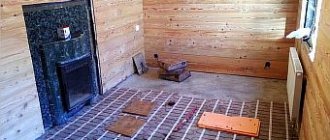
When installing this building material, it is very important that the wall is free of any irregularities, because the curvature will not allow the panels of the building material to be properly secured. The quality of the skin will be spoiled by the depressions and bumps formed on it
An example of such cladding is shown in the photo.
In order to avoid the above troubles, a necessary condition when installing the lining is the construction of a frame. It is made from metal profiles or wooden beams. Wooden sheathing is quite short-lived, but if it is treated with anti-rot substances, it can last much longer.
The gluers must be secured thoroughly, placing each one on two or even three self-tapping screws (nails). If you do not adhere to this rule, you may subsequently encounter a problem such as surface deformation.
You can learn how to prepare for installing the lining with your own hands, using gluers in the process, from this video.
It is also necessary to mark the surface. The marking of brackets is carried out taking into account the direction of the panels. If the lining is mounted vertically, then the fastening elements are placed at a distance equal to the width of the panel. When the planks of building material are directed horizontally, the gluers are fixed almost to the floor. This location of these parts makes it possible to screw in a screw or drive a nail without any difficulty.
Horizontal fastening of building materials is carried out as follows:
- The starting strip of building material is inserted into the clamping hook.
- The second bar is inserted into the ridge of the first and secured with a clamp.
Vertical installation has the following algorithm:
- The end where the ridge of the plank is located is pressed against the wall.
- The plates are inserted into the groove and secured with hardware.
Regardless of the direction of laying the lining, the last strip can be cut to fit the required size
It is important that it fits tightly enough into the gap
You can learn more about how to lay the lining with your own hands, using plates to fasten it, from the video.
Installation of sheathing
Do-it-yourself installation of the lining begins with the installation of the sheathing.
If the room has smooth wooden walls and ceilings, then the lining can be attached directly to them, but in 99% of cases this is not the case. Therefore, it is impossible to do without installing the sheathing, which will become the supporting structure.
First you need to choose the direction in which the panels will be mounted. In the frame, the beam should be located perpendicular to this direction. Horizontal installation will visually expand the room, and vertical installation will raise the ceiling.
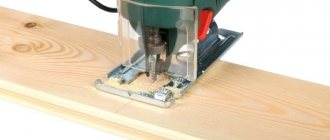
The lathing can be made of metal profiles or wood. For lathing, slats with a cross section of 20x40 or 25x50 mm are used; they can be easily purchased at specialized retail outlets or, if you have one-inch wooden boards, you can make them yourself by cutting them using an electric saw.
It is better to use coniferous wood; it is not so affected by changes in humidity and temperature.
We proceed directly to creating the supporting frame. If the wall is sheathed vertically, we fix the first beam horizontally under the ceiling:
- using a level, draw a line parallel to it; mounting brackets will be installed along it;
- using an impact drill and anchor screws, we install brackets at a distance of half a meter;
- we form a connector under the beam, bending part of the fastening inward;
- We fasten the timber, fixing it with wood screws in the side holes of the brackets, and screw the rest of the fastenings to the wall.
All beams in the frame must lie in the same plane and be set strictly level. To do this, having installed the first beam, plumb lines are attached to it, which will help determine the location of the remaining slats.
Insulation
Before installing the lining, you can additionally insulate the wall.
Most often, mineral wool in rolls is used for this. It is cut into segments of the required size, which are then placed under or between the sheathing beams.
For additional fixation of the insulation, you can use mounting fasteners or glue.
After laying the insulation, the joints of the segments need to be filled with polyurethane foam (do not use “extra” foam, it can deform the insulation).
There is a second option, in which the insulation is laid before the frame is installed, it is strung on fasteners for the slats, after which the sheathing is completely installed.
Video - insulating a balcony with penoplex under the sheathing:
Installation
The first thing you need to do is choose one of 5 ways to attach the lining.
- This method is characterized by its simplicity, high strength of fixation and the possibility of dismantling if necessary. Installing the lining on the clamps is easy to do yourself: they are inserted into the internal projections of the grooves on one side, and the other is attached to the wooden frame.
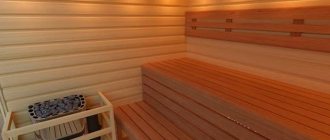
- A hole equal to ½ the diameter of the screw is drilled in the panel, after which, using a screwdriver, the screws are screwed in until they are completely immersed in the wood. The holes are closed with a wooden pin and sanded. The method is often used in cladding rooms in bathhouses.
- A method for professionals: a nail is carefully driven into the groove at an angle of 45º, then driven into the sheathing. To fix a 2.5 m panel, at least 6 nails are used.
- A hole for a screw is drilled in the panel tenon, and then the board is screwed to the slats. The process must be carried out flush with the board.
- Using a construction stapler, the staples are installed diagonally into the groove of the panels and secured to the sheathing.
Video - a non-standard, but proven method of fastening:
We begin to install wooden lining with our own hands. Vertical cladding is made from the corner of the room.
Horizontal cladding involves fastening the panels from above, and the groove should be directed downwards, so moisture and debris will not get into the grooves, therefore, it will last much longer.
If the panel is not tightly pressed to the previous one, it can be tacked using a piece of lining, so as not to damage the connecting system.
Before fixing it on the sheathing, the last panel is adjusted with a hacksaw, the gap between it and the floor is closed with a plinth, and the joints and corners are decorated with special slats and corners.
Video - DIY installation:
Installation subtleties
Installation of clamps is carried out using a screwdriver, building level, tape measure, square, hammer, screwdriver and marker. The first stage of work should be the preparation of the working base by leveling the surface or, if necessary, installing lathing. The evenness of the base is determined using a laser or a building level. All protruding parts must be removed, and large cracks, chips and deformations must be eliminated using a cement-sand mixture.
After this, you should perform an antiseptic treatment of the base and wait until the surface is completely dry. Then you can start marking the places where the clamps will be installed. It should be taken into account that when the slats are positioned vertically, the installation of hardware should be planned at a distance of the width of the board from the adjacent wall. When positioned horizontally, you should retreat 2-3 mm from the floor, which is necessary for screwing in the self-tapping screw.
Particular attention should be paid to the clarity of the location of the first element, since the correct installation of all subsequent planks and the appearance of the cladding as a whole will depend on it
The installation of clamps and lining slats occurs alternately, so the main thing is to strictly follow the installation order and ensure the parallel arrangement of the elements. The use of nails as fastening elements for the bracket is permissible only when installed on a wooden sheathing. In all other cases, you should use screws or dowels, depending on the size of the bracket and the weight of the wooden planks. Then you should begin installing the clamps, and you must ensure that the board lies evenly: without moving to the side or disturbing the general laying order.
In order to facilitate screwing in the screws, you should first mark the necessary places with dots. After installing the first brackets, you need to begin installing the lining, simultaneously fixing the next brackets. The first lamella is installed into the hook of the bracket, and then subsequent strips are inserted into the ridge with a groove. The next bracket should not be secured until the first panel is completely level. The end part of the lamella, equipped with a ridge, must be pressed tightly to the base, and at this time, insert a clamp into the groove from the back side and secure it with self-tapping screws.
Following this installation method, you need to complete the installation of the material, periodically checking the readings of the building level. After installing the last board, you need to cover the metal fastening elements with a wooden side.
Kleimers
One of the ways to install eurolining is secret fastening using clamps.
They are invisible from the outside and do not interfere with the expansion or contraction of wood, and galvanized steel does not corrode.
Claymers are sold in packs of 100 or 200 pcs. together with zinc-coated steel nails or self-tapping screws. Do not neglect such qualities as the elasticity of the clamps, the quality of the steel and coating.
Video - more information about clamps:
Wall and ceiling mounting
How to attach eurolining to the ceiling? It's quite simple if you have all the necessary tools and desire.
Naturally, the room must have its own main ceiling and conditions for installing the frame.
The main roof should not leak. Frames for fastening eurolining can be iron or wood. The boards are installed using clamps. The junction of the ceiling board and the wall can be masked using wooden baseboards or baguettes.
Video - how to properly attach the lining to the walls:
How to attach eurolining to the wall? If you decide to mount it directly to the wall, make sure it is perfectly level. Otherwise, you will need to first assemble a special wooden frame on which you will mount the boards. There are many ways to lay eurolining.
For example, to visually expand a room, attach the boards horizontally, and to make it taller, attach them vertically. Laying it diagonally or in a herringbone pattern will help you add creativity to the room and show off your individuality.
Finishing touches
When the finishing is completed, it will not hurt to treat the surface of the boards with an antiseptic. This will help protect them from rotting and fungus.
To make the texture brighter, you can use stain or wax. A matte varnish finish will also look good.
Fixation of clamps
At this stage, the sheathing or smooth surface of the wall should be prepared. If you plan to fasten the staples with nails, then you should arm yourself with a hammer and a level; in the case of self-tapping screws, a screwdriver or screwdriver. To understand how to fasten the lining with clamps, it should be noted that the fixation of fasteners and wooden panels will be carried out alternately
The operations are simple, but it is important to maintain accuracy in the calculations and position of the fastener
Particular attention is paid to the first part, which sets the direction for all subsequent planks
Nails can only be used with existing sheathing. If it is not there, then you need to install it with dowels or self-tapping screws. For this, bars with a cross-section are used that will provide approximately a 5-centimeter gap. Then the clamps are installed. Each element is nailed so that the lining board lays flat on it horizontally or vertically.
If a self-tapping screw is used, then, again, it would not be superfluous to provide a sheathing. This will make it easier to fix. Next, you can either prepare holes that are thinner than the diameter of the screws, or screw them in at the designated points. When the first clamps are secured, you can begin installing the lining and simultaneously fixing subsequent brackets.
Peculiarities
The clamp is ideal for fastening lining. Its configuration and design are made in such a way that the lining is securely fixed to the sheathing. The fastening form factor is perfectly combined with the shape of the lamellas, which have a special tongue-and-groove system.
The bracket is attached to the sheathing or rough base using two holes. To fix it on different surfaces, different types of fasteners are used:
- self-tapping screws;
- screws;
- nails.
Deep hooks on the brackets help strengthen the board. There are models that are additionally equipped with spike hooks. They serve to strengthen the fixation of the material and give additional strength to the fasteners.
Today, all kinds of clamps for lining are produced: sizes, models, materials can be different. This allows you to select hardware building materials for different types of work.
Let's start installation
Instructions: how to fasten the lining with clamps looks something like this:
- You need to calculate how many parts you will need to create a completed structure;
- If fastening is done with self-tapping screws or nails, you will need the following tools:
- Nails: square, tape measure, hammer, level;
- Self-tapping screws: screwdriver (screwdriver), square and level.
Installation is possible on any panel made of wood.
Clasps for lining are supplied for sale in packages of 100 or 200 pieces. It is not difficult to count the number of fastening elements; an approximate calculation will be as follows - per square meter of the structure you will need 20 elements of the fastening type, that is, if the area being sheathed the surface will be equal to 20 square meters, you will need only 400 fasteners.
Installing the sheathing
In order for the structure to have an ideal appearance and serve you for a long time, it must be completely flat, since in 99% of cases in the premises the walls and ceiling are not flat surfaces, it is necessary to erect a structure such as a sheathing, on which, subsequently, it will be the lining itself is attached.
Pay close attention to creating the sheathing
Installation of a special frame is necessary to obtain a smooth structure made of wooden panels.
It is important to know:
- If you do not treat the bars from which the sheathing will be made, the structure will not be durable, as it will begin to rot, which means that antiseptic treatment of lumber is mandatory for their durability and strength;
- To create the sheathing, it is possible to use the same metal profile as for installing drywall;
- In order for the lining to be installed level, throughout the entire installation process, it is necessary to use a level, preferably a laser one;
- The distance between the bars should not be more than 55-60 centimeters.
Surface markings
There are only a few types of fasteners that are used depending on how the panels are located:
- In the case of horizontal lining, the element is mounted close to the floor, at the very bottom, but so that you can hammer in a nail;
- Vertical arrangement of panels - installation of a clamp at a distance from the wall itself to the size of the board and its width.
Installing the lining
Fastening the lining to clamps on panels located horizontally:
- Lining insert. More precisely, its first board with a groove in the bracket, on its hook.
- The next panels will be inserted into the ridge with a groove and fixed with a clamp.
Fastening clamps with self-tapping screws by tightening with a screwdriver
Installation of lining on clamps in the vertical direction is carried out as follows:
- We press the end on which the comb is located to the wall, and press it closely;
- The staples are secured with hardware.
Vertical arrangement of panels
Marking the base
In order to install each panel evenly, it is necessary to make markings on the base in advance.
Installing wooden lining on clamps requires perfect precision to make it easier to monitor the level of the panels. The marking method will depend on the direction of the panels. If the lining panels are placed vertically, the distance of the outer plank from the wall should be equal to its size. In the case of a horizontal installation method, the clamp should be located 1-2 mm from the floor.
To highlight the interior of a room, a mixed type of installation is often used, when a simple pattern is built from panels. Sometimes they are placed diagonally. Both methods require a certain skill, and if the vertical and horizontal methods do not require special skills, then difficulties may arise with the combined options.
The choice of panel placement may depend on the purpose of the room. Combined methods are more often found in living rooms, where decorative design is important. The vertical placement of the panels plays rather a practical function.
How the lining is attached
To ensure high-quality installation of panels with your own hands, you need to choose the right fasteners for them.
In this case you can use:
- Galvanized nails with a small head. They are driven in one row, separately into each board. This method of fastening is the most reliable, but nails can ruin the aesthetic appearance of the material.
- Thin nails. They are hammered through each facing board, which allows the slats to be fixed from different sides, and the fastening itself is less reliable than with galvanized nails. In addition, this method is more difficult to install. Its advantage is that the appearance of the lining is of good quality.
- Clamping fastening for lining.
Fastening the lining with a clamp
To do this, special staples or clamps are inserted into the groove of the previously laid board and connected to the frame with small self-tapping screws. This is a rather labor-intensive process, but as a result the lining is securely fixed, and its aesthetics are very attractive. Self-tapping screws can be replaced with staples or small nails, but they will not hold the clamps as well.
How are clamps made?
Products are made from metal strip or strip aluminum. The cost of aluminum clamps is higher than those made of steel. But when installing plasterboard partitions over lathing (see Lathing under lining according to all the rules), this option may become the only possible one.
This is due to the fact that wooden lining, when installed using steel clamps, sharply increases the load on the drywall sheets, and they lose their stability. Typically, the thickness of the parts is no more than 0.5-1 millimeters, and only reinforced clamps have a thickness of 1.5 millimeters.
Fixing the lining with clamps
The manufacturing process consists of sequential cold stamping on automatic presses, with the material supplied automatically.
Stamping sequence:
- Mounting holes are punched.
- The protrusion is cut and at the same time the bracket is pre-bent.
- Final bending of the part.
- Cutting along the contour when stamping an element with waste or a piece of a finished product from a strip.
Features of using clamps
Fastening the lining with clamps is used for hidden installation of panels.
Its advantages:
- There is no risk of damaging the material during installation and the need for dismantling. After using nails and screws, small holes remain on the panel, which over time can lead to the formation of cracks in the parts. In addition, moisture can get into the holes, and the tree will rot from the inside.
- Hidden or invisible fasteners. The walls in such a room will look like a single whole, without visible metal caps that spoil the appearance of the wooden panels.
- Easy to install. This does not require the use of special tools: the lining is fastened with clamps according to the dimensions of the panels.
- If necessary, the slats are easy to dismantle. At the same time, the likelihood of damage to wooden surfaces is practically eliminated.
- Reliability of the design. The bracket, made of galvanized steel, shown in the photo below, is not subject to rust and corrosion.
- Fastening the lining to clamps will last a long time. Such a hook is quite difficult to bend; considerable physical strength will be required; the wooden paneling has little weight for this.
Claymer for galvanized steel lining
There is no need to putty or mask the ends of the fastener heads.
The only drawback compared to other hardware that is visible during installation: screws and nails, is the high price. It is insignificant, but it increases the cost of covering a room (see How to cover a room with clapboard: everything in order) or the facade of a house with clapboard.
This is especially inconvenient for previously planned budget repairs, which may affect the choice of fasteners.
Fasteners for lining - kleimer, has several varieties:
- To fix the eurolining, the dimensions of the products are 20x90 millimeters, which corresponds to panels of standard height.
- The lining, which imitates a flat beam, is distinguished by a large number of holes for fastening.
- Reinforced panels fix the panels in corners and other problem areas. They differ from the usual version by the presence of a contact surface with teeth, which enter the material of the rail during installation and strengthen it against possible shift from its original position.
Reinforced clamp
Under plastic lining. Characterized by their mobility, such clamps are installed in the U-shaped grooves of the fastening slats and can be moved along them, which depends on the individual installation features.
Recommendations for finishing the ceiling
Ceiling made of lining
The ceiling is sheathed with the material in question in the same order as the walls. The only note is that the lining should begin to be attached from the window opening to the opposite wall. With this placement, the shadows between the cladding elements will be less noticeable.
Ceiling made of lining
Thus, there is absolutely nothing complicated about installing the lining yourself. To extend the service life of the cladding, re-treat it with an antiseptic and fire retardant every 2-3 years. Otherwise, follow the instructions and you will create the highest quality, durable and aesthetically pleasing finish.
Good luck!
Useful tips
And finally, a few tips that will ensure the reliability, durability and aesthetic appeal of wood cladding:
- Before installation, it is advisable to treat all wooden surfaces, including sheathing, with antiseptic impregnation, especially if clapboard is used to finish a wet room or external walls. This will prevent the spread of mold.
- When finishing interior spaces, materials must be kept in them for two to three days for acclimatization.
- The lined surface can be painted, coated with oil, wax, varnish, or stain. Pre-priming will reduce the consumption of varnish or paint.
Kleimer product description.
Clamps are universal brackets made of galvanized steel, firmly attached to the frame, and the lining is placed on the hook of the bracket. This is a fairly rigid product that provides reliable fixation of the lining panel.
There are a variety of brackets with tenon-type hooks; they enter the side of the paneling, firmly engage it and protect the panel from deformation. Installing clamps is so simple that any novice craftsman can handle it.
Advantages of clampers:
- No holes in the panel that damage the product;
- Preservation of the material from cracking, water ingress and wood rotting;
- The fastening is hidden from view, the surface of the wall or building looks more beautiful and solid;
- The clamps are easy to install and dismantle without special tools;
- The clamps are reliable and durable, not subject to corrosion, as they are made of galvanized steel;
- Fasteners are selected according to the size of the panels;
- The clamping hook is durable and will not bend under the weight of the lining;
The price of clamps is slightly higher than the cost of conventional fasteners (nails and screws), this is their only drawback, but it pays off due to the obvious advantages of this fastener.
Important addition!
Carefully select the size of the clamp in accordance with the thickness and class of the panels. Two is used for plastic, three and four for euro lining, five and six for products made of linden and aspen.
Rules for fastening the clamp
Now let's begin describing the fastening of the lining using clamps. We will prepare the required number of clamps - 20 pieces per 1 square of lumber and prepare all the tools. If desired, you can calculate the required number of clamps more accurately.
To do this, we will make simple calculations: divide the length of the board in centimeters by the distance between the frame profiles in centimeters, add one to the result and find out how many fasteners are required for one panel. Then we multiply the result by the number of lining packages and the number of panels in each package. The end result will be the answer to the question: how many clamps need to be purchased in total.
Combined fastener
The use of all possible types of fasteners is relevant in cases where the geometry of the room plays against the builder. A large number of protrusions, inclined surfaces, recesses or niches in the walls can become a problem for attaching the lining to clamps. In such cases, it is possible to use traditional lining fasteners.
A common problem is the finishing of door or window openings. Often there is not enough space on the door jamb to place a clamp, or the lining lamella has to be cut lengthwise. In such cases, two solutions are possible: fastening with screws and nails or modifying the clamp.
Self-tapping fasteners can be hidden under plastic plugs; galvanized nails will not be visible under the lining sheet on the adjacent wall. In addition, special corners made of plastic or MDF are available for sale - their function is similar to the function of a plinth, only for hard-to-reach or problem areas - external or indirect corners, recesses.
Modifying the clamp involves bending the tongue to the side. In this way, you can move the fasteners beyond the wall to an adjacent one. Often, in such cases, part of the clamp is cut off with a hacksaw or metal scissors.
It is important during the modification process not to damage the integrity of the clamp - it may break. It should only be bent at right angles