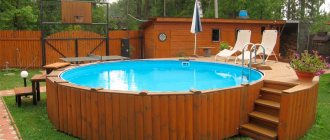
If in the past swimming pools were available only to wealthy members of society, today they can no longer be called an exotic phenomenon. Increasingly, people are taking on the task of arranging reservoirs with their own hands and getting an excellent result: a high-quality pool for relatively little money. Constructions made of polypropylene are especially common these days. Why them? Firstly, reviews from owners of such pools prove that, due to its performance properties, polypropylene is an ideal material for ponds. And secondly, if you look at the photos and videos of the installation of the structure, there is no doubt that anyone who has at least minimal construction skills can do it. Want to make sure of this? For your attention, step-by-step instructions for arranging a polypropylene pool.
Stage 1: Preparatory work
Even before the construction of the pool begins, you will need to decide on several important points and perform a number of preparatory procedures. First, it is necessary to draw up an installation project. In fact, it should be a plan diagram of the structure with detailed markings of all elements, joints of polypropylene sheets and an indication of the exact dimensions of the bowl of the future pool.
Important! Do not forget to add to the dimensions of the bowl a margin of 1 m in width and 50 cm in depth - this space will be needed for constructing a pit and placing auxiliary equipment.
Secondly, you need to decide on the location of the reservoir. The pool should be located close to the water supply, but away from the garden, so that the root system of trees does not destroy the structure and leaves do not clog the water.
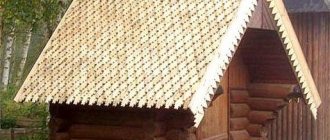
Thirdly, you need to buy polypropylene. The optimal material thickness is 10-15 mm. Select the number of sheets based on the data of your pool project.
Sheet polypropylene
Fourthly, you need to acquire welding tools. Specifically, you will need an extruder and a heat gun. The remaining working tools are traditional for all construction work.
How to choose a material to create a structure?
To correctly decide on the choice of polypropylene profile for making your own pool, you need to familiarize yourself with the types of this material:
Homopolymer is a material with a hard but flexible structure.
It contains molecules that have identical links and is characterized by high strength in places of bending.- Metallocene, resembling rubber in its composition and properties.
- A copolymer presented in the form of transparent or white granules. It is characterized by high elasticity, strength, and resistance to low air and water temperatures.
- Statistical copolymer is a material with a crystalline structure, most in demand in the production of laminating films and food packaging.
Polypropylene homopolymer is used for the production of swimming pools. To make the walls of an artificial reservoir bowl, you should use polypropylene sheets up to 15 mm thick. For the bottom, they can be a little thinner - within 8-10 mm.
When using sheets thinner than 5 mm, deformations and noticeable irregularities are likely to occur.
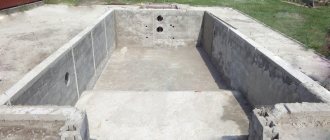
Stage 2: Digging a pit
After completing the preparatory procedures, proceed to the actual construction. First, dig a pit for the pool:
- According to the markings in the project, drive pegs into the area and stretch ropes between them to mark the boundaries of the future pit.
- Dig a hole of the required dimensions.
- Arrange drainage - it will protect the bowl from pressure: level the bottom of the hole, lay geotextiles on it and fill it with crushed stone to a depth of 30 cm. Carefully compact the resulting drainage.
- Create a screed: lay one row of bricks on the bottom of the pit and firmly fix the reinforcing mesh on top.
- Prepare the concrete solution. To fill it neatly, construct a trench from wooden boards.
- Start pouring concrete. You should end up with a slab with the following parameters: width - 50 cm larger than the bowl, thickness - at least 20 cm, but not more than 50 cm. After this, let the solution harden and set properly.
- Finally, lay thermal insulation material on the dried surface of the pit. It could even be regular foam. The main thing is to secure it well.
Pit preparation
Where and at what cost can I order this turnkey work?
The installation of a polypropylene pool should be ordered from specialized organizations with qualified workers and the necessary equipment.
It is necessary to check that the organization operates officially and provides a guarantee for the work. This is an important point, since there are many unofficial brigades operating.
The cost of installing a polypropylene bowl costs an amount approximately equal to the price of the material. It is difficult to name specific amounts, since the final price depends on many factors.
For most organizations, prices start at 35,000 rubles and increase in accordance with the volume and scope of work.
Stage 3: Making the bowl and installing the equipment
Assembling a pool bowl is the most difficult procedure in the entire construction process, therefore, in order to get a high-quality result, you need to do everything according to a clear algorithm in compliance with proven rules:
- Lay out sheets of polypropylene on the area and cut them into component parts for all elements of the bowl: bottom, walls, side and steps of the stairs.
- Make the bottom of the bowl: connect the sheets together into a structure of the required shape and dimensions, and then weld them on the outside using an extruder. Place the resulting polypropylene bottom on the concrete slab of the pit.
- In the same way, that is, by welding the prepared sheets together, build the walls of the pool. Gradually place them towards the edges of the bottom and weld the elements from the inside.
- Assemble the stairs and sides from polypropylene parts. By welding, attach the ladder to one of the walls and the bottom. Then place the sides on the upper edges of the walls and weld them.
- Weld stiffeners to the outside of the bowl in increments of 50-60 cm.
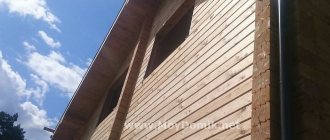
Installation of polypropylene
If you assembled the bowl in the place where it is directly located, that is, in a pit, you can immediately begin installing additional equipment. If you simply built the structure on a free area, first carefully place it on the concrete slab of the pit, and only after that take care of the auxiliary devices. For the pool to function, you will need to install and connect to communications:
- hydraulic system with pipes for supplying and draining water;
- pumping device;
- filtering equipment;
- bottom plums;
- backlight
Briefly about the main thing
An alternative to a classic concrete pool is increasingly becoming a structure made of sheet polypropylene. The option is popular due to its practicality and low cost; polypropylene is safe for health, it is easy to form a product of any shape, depth and size.
During the construction process, a pit is dug under the pool bowl and a reinforced concrete base is made. Then a bowl is welded from plastic, the sides of which are reinforced with stiffening ribs, reinforced and the outside is filled with concrete mortar. At the last stage, equipment is installed and the area around is landscaped.
Question
Write in the comments what you think - is it worth additionally smoothing the seams on the sides using a heat gun (hot air gun)?
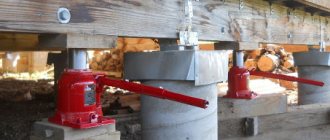
Step 4: Securing the bowl
The next stage of pool construction is filling the space between the walls of the bowl and the pit. This procedure is not so much complicated as it is long-term, so you will have to be patient. The sequence of work is as follows:
- Install spacers inside the bowl. They can be made from wood or chipboard. The main function of the spacers is to hold the walls of the bowl so that it retains its shape during the process of concreting the space around it.
- Wrap absolutely all communications that approach the pool from the outside in special protective sleeves.
- Place formwork around the bowl and reinforce it.
- Prepare a concrete solution.
Installation of spacers and installation of the pool bowl
- Start pouring the solution into the gaps between the walls of the bowl and the pit. First, pour the first layer of 20-30 cm and let it harden - leave the solution for at least a day. The next day, pour a new layer of 30 cm and leave the concrete to dry again. Repeat the procedure until the entire space between the bowl and the foundation pit is completely concreted.
Advice. In order to avoid sagging of the bowl during the concrete pouring process, fill the pool with ordinary water. But do not fill the entire structure at once: before the first layer of concreting, pour 30 cm of liquid and with each subsequent layer increase the water level proportionally.
- If after pouring the concrete there is still free space around the pool, fill it with soil that was dug when constructing the pit, and then thoroughly compact the area. But this can only be done after the formwork is completely dry. Then remove the spacers - the construction of the pool is almost complete.
Possible mistakes
When installing polypropylene bowls, various mistakes can be made:
- assembling the bottom on a fragile, loose platform: this will cause cracks, ruptures and leaks;
- poor-quality soldering of seams;
- pouring the sides without water in the bowl, creating deforming forces on the walls of the pool.
As a rule, the cause of errors is a lack of experience in performing such work. If you assemble the bowl yourself, without the necessary preparation, it is very difficult to avoid mistakes.
In order to eliminate undesirable consequences, specialists from specialized organizations should be involved in installation.
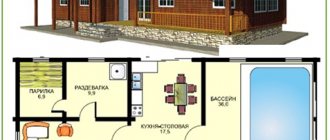
Stage 5: Design and maintenance of the pool
The final stage is the design of the pool and the area around it.
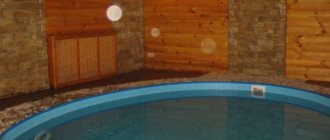
Walls made of polypropylene do not really need finishing, since they themselves are smooth and pleasant to look at, but if you want to transform them somehow, you can use butyl rubber or polyvinyl chloride film. The materials are not afraid of temperature changes or moisture, so they are perfect for a swimming pool. Working with films is quite simple:
- spread the material over the entire inner surface of the pool, covering the bottom, walls, and sides;
- secure the film around the edges with stones;
- Use mounting adhesive to secure the finish to the surface of the pool;
- seal the seams and edges of the material with regular silicone compound to prevent water from flowing inside.
Install paths around the pool
The area around the pool is best decorated with paving slabs.
And in order for the pool to remain functional and aesthetically pleasing for as long as possible, after the installation of the structure, do not forget about the simple rules for its maintenance. Firstly, at least once a month, completely clean the bowl of dirt mechanically - with special brushes and a vacuum cleaner. Secondly, to clean the pool, use only substances neutral to polypropylene, for example, gentle sodium hypochlorite. But do not use chlorine in its pure form, as it will cause discoloration of the structure.
Thus, to build a polypropylene pool with your own hands, you will not need large finances or special installation skills, because the building materials are quite affordable, and the technology used is simple. The main thing is to do everything according to the instructions and strictly adhere to the rules.
Alternative options
Initially, friends considered different methods of building a pool. Thus, the ease of implementation attracted the option in which the frame for the pool was made of plastic pipes. There is no need to dig a pit for it; it is installed on a prepared site. The advantage of this option is that it is economical, since ordinary plastic water pipes are used for the frame, and the sides and bottom are made of stretch film.
However, a frame made of pipes (or pallets) with film was rejected, since such a design can hardly be called reliable and durable. The express pool will serve until the first puncture, and organizing its full cleaning with filtration is unprofitable.
Source stroy-podskazka.ru
About the technology of cooking polypropylene sheets using a manual extruder in the following video:
Pool made of polypropylene: photo
Required inventory
Building a swimming pool is a serious undertaking that will require the use of a lot of different equipment and tools. Most likely you will need:
- Equipment with a bucket for digging a pit
- Various shovels (scoop, bayonet)
- Concrete mixer
- Extruder for welding PP sheets with accessories and nozzles
- Hot air gun for welding correction
- Wooden stops
- Ladder and containers for storing liquid and bulk substances
- Level, measuring tape
- Pencil and knife
Laying the foundation
When the pit is completely ready, all measurements have been taken again and no errors have been found, you can begin laying the foundation for the future bowl.
The so-called pool cushion
The first layer of crushed stone is laid in order to level the site. We level it using a flat board with an attached level. Next, we compact this layer with special equipment. If you don’t have this at your disposal, then you can try to stamp it down as tightly as possible.
Some limit themselves exclusively to the first layer, but we strongly do not recommend this, as this will seriously affect the life of the pool.
Next, along the perimeter we prepare formwork for pouring concrete 15-20 centimeters high. The concrete layer can be installed without reinforcement, but if possible, then the extra rigidity of the foundation will not hurt. We pour the foundation and let it dry and completely harden for 3 days.
The third and last layer is polystyrene foam 3-4 centimeters thick. After laying it, you can consider laying the foundation completed successfully.
Features of operation
The duration of operation of the pool and the preservation of its attractive appearance directly depend on compliance with the operating rules. First of all, do not forget about scheduled cleanings performed by:
- physically - manual waste collection;
- pump;
- automatically - use of underwater vacuum cleaners;
- chemically - treating the walls and water with special compounds designed to restore the pH of the water;
- electrophysically, using ozonizers, UV lamps, ionizers.
Water changes are carried out at least once a season. In cases where the water becomes cloudy, it is advisable to drain the tank and clean the walls, bottom, and filters.
Tips for choosing a location
For a pool that will only be used in summer, any location is suitable. Inflatable pools are a cheap option that does not require major changes to the site.
If you have decided on a stationary pool, before digging it, you need to choose the right location on the site. After all, it will not be possible to move such a structure after completing all the work on its creation.
There are several important points to consider:
Trees. They shouldn't be near the pool for two reasons. The first is the root system, which negatively affects the waterproofing of the pool. The second is foliage that pollutes the water surface. If the leaves are not removed in time, the water “blooms” and the pool loses its attractiveness.
Soil type. Ideal if your site has clay soil
It does not allow water to pass through, which is important if the waterproofing suddenly becomes damaged.
- Direction of the wind. The pool will one way or another become clogged with wind-blown debris. It will be nailed to a certain side. Therefore, make sure that this is where cleaning the pool is as convenient as possible and you can quickly remove the brought leaves, blades of grass, etc. This is also where you should place the drainage system.
- Water pipes. By placing the pool close to the water supply, you will ensure that filling the bowl is easy and quick.
If you decide to install a frame pool, try to ensure that the surface allocated for it is absolutely flat. Potholes, irregularities, dents, remains from tree roots - all this should not exist. Ideally, the site is concreted, creating a smooth base for the pool.