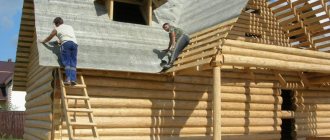
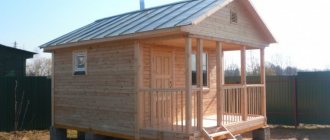
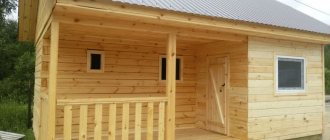
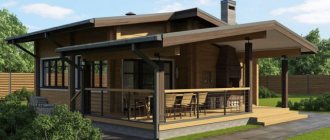
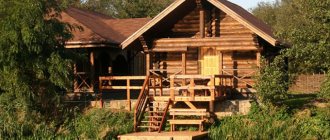
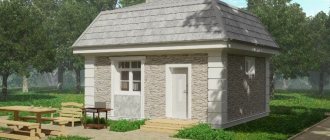
For those who like to take a steam bath, the bathhouse is one of the most important structures in the yard, and, accordingly, everyone approaches its construction individually. When designing a future building, first of all you should pay attention to the cost of the future structure, since large financial expenses will not always be appropriate.
The least expensive and at the same time functional solution is a budget bathhouse - built with your own hands on a summer cottage.
A bathhouse is a useful building!
Unfortunately, almost all budget projects are characterized by rather low quality of material and, accordingly, fragility, since the low cost of the design initially implies this drawback. Not many people will like this circumstance, since, despite the reduced cost, the price of construction still remains quite significant and few people will want to throw money away.
Another significant drawback of budget projects is the inferiority of the interior furnishings - the most striking example is the sauna tent. However, there are also analogs that can accommodate almost everything you need at a relatively low overall cost.
In this article you will be given instructions on how to build a bathhouse from scratch with your own hands. Below we will look at several budget projects that are characterized by maximum functionality.
Technology
Oleg admitted to me that this sawdust bathhouse cost him 8,000 rubles! Let me tell you why this happened.
This bathhouse was built in the Kirov region in the outback. Here there is a lot of material such as sawdust, all that remains is to make a frame and pour the sawdust there.
- The poles come first, fortunately our forestry enterprise offers forest cleaning for a modest fee. Or rather, 150 rubles per 1 cubic meter. dead wood. Arriving at the forestry enterprise and taking the treasured receipt there, the owner went into the forest. I collected the necessary logs there with a diameter of 20-24 cm
- These logs were sanded and coated to a height of 1.2 meters with bitumen mastic, roofing material was wound on top and dug into the ground.
- Between the pillars I dug a foundation the depth of a spade so that sawdust would not fall on the bare ground.
- Next, on the outside, in the visible part of the bathhouse, I covered everything with clapboard, and in the back, where nothing is visible, I covered it with the remains of boards that I found from dismantling an old barn. (I took the lining from a woodworking plant as substandard, the asking price was 2,000 rubles)
- I also lined everything inside with clapboard.
- I made one log for laying the ceiling, or matnitsa in our opinion, put old boards on it, which I also found around the yard, and hemmed the ceilings with clapboard.
- I started pouring in sawdust, regular raw sawdust from the sawmill. I pressed them a little with a homemade board.
- I ordered the door from a carpentry shop for 2,000 rubles
- The floors and canopy were painted with ordinary paint; by the way, they are also made of ordinary thick boards. Regular oil-based paint.
- The stove came for free, since his father is a level 50 welder, he welded this stove for him from his own materials. They lined it with bricks and laid the tray with cast iron and stones
- I drained it outside the bathhouse; it took no more than a bag of cement.
This is such a miracle bathhouse.
Push
- I recommend mixing sawdust with slaked lime; it is not expensive and is sold in almost every district of Kazan.
- To ensure the floors dry well, I would add ventilation in the bathhouse. The inlet must be from the street and behind the stove, but the exit would be through the Bastu ventilation in the opposite corner. So the floors will always be warm, and the bathhouse will dry out in no time.
This is the kind of bathhouse “without showing off” that Oleg ended up with. If you need a similar inexpensive bathhouse on your site, you can order it from us. The price of the bath will be very inexpensive.
Home page » What is the best material to build a bathhouse from » Insulation of a bathhouse » Insulation of the ceiling in a bathhouse » Insulate the ceiling of a bathhouse with clay and sawdust or sawdust with cement? Which is better and is there a difference?
An integrated approach is important in everything: when every detail receives due attention. The process of insulating a bathhouse was no exception.
Proper insulation of the ceiling is of no small importance. Not the roof, but the ceiling: its thermal insulation not only prevents heat from escaping, but also protects the ceilings from damage as a result of the formation of excess moisture. (For insulation of bathhouse roofs, when necessary, see here).
Work progress
When a place has been chosen, the future premises are marked, the turf is removed and after that you can start digging a pit. This may take several hours or several days - the volume is about 30 cubic meters.
Next, drainage is performed, where the water will flow, and roll waterproofing is installed.
Then we begin to build a “shed” inside the pit. You can use dead wood and dead wood for it. First, corner pillars and load-bearing pillars are installed under the roof, then logs are laid around the perimeter. The waterproofing is fixed, and the void between the logs is filled with earth. External walls can be treated with clay.
Next, the rafter structure is assembled, the ceiling and roof are installed.
The top is covered with waterproofing material, the chimney is removed and the surface is covered with turf - the underground bathhouse is almost ready!
A window is very desirable, even necessary, for fire safety and natural light. Diesel lamps are often used as light bulbs in such a bathhouse.
Next, internal partitions and structures are erected to the owner’s taste, and a stove is installed. This could be a stove or another option.
Any design is possible inside, but wood looks best.
Outside, it is recommended to organize a ladder from boards.
You can build doors between rooms with your own hands, or you can buy them to better retain steam.
This is what a real forest bathhouse that has been in use for many years might look like inside and out:
How to fold a stove-stove:
Insulating a bathhouse ceiling with clay
Despite the cheapness of clay, you should not think that it is quite simple: dig up clay and fill the ceiling with it.
In this case, it will crack and have less thermal insulation properties. Therefore, since ancient times, clay has been used in combination with other materials. For example, these include:
- sawdust;
- ground straw;
- tree bark;
- sand;
- expanded clay
The combination with sawdust, straw and sand is considered the most common. The use of expanded clay is advisable when laying clay in layers.
Any of the above additional components will provide increased layer strength and better thermal insulation.
How to start building frame baths with your own hands
Before you begin, you need to prepare a project. But first of all, do the following:
- Select the optimal bath design option.
- Determine the location for construction.
- Identify the main properties of the soil at this site.
Based on the above, foundation requirements may change. Nevertheless, in most cases, columnar bases are used to build a bathhouse with your own hands. This foundation is suitable for absolutely any soil.
Insulation of a bathhouse ceiling with sawdust
Quite common methods include insulating the bathhouse ceiling with sawdust. This material is especially recommended for use where the bathhouse will be used by elderly people and children. It is the safest.
However, you should know that using sawdust exclusively can also be fraught - uncovered scattering of sawdust:
- fire hazard (any spark can cause a fire);
- too dirty (a draft can scatter sawdust throughout the bathhouse).
It is best to use sawdust mixed with clay or cement. The advantages of clay are described above, and sawdust combined with cement provides a reliable and strong screed on the ceiling.
Common options include a layer of sawdust covered with a layer of earth on top. This guarantees protection from possible fire, and the layering guarantees high insulating properties.
Insulation of a bathhouse ceiling with clay and sawdust
It is important to remember that the “pie” of ceiling insulation requires compliance with the established regulations:
- preparing the ceiling for filling with clay and sawdust (preparing a flat ceiling or creating formwork);
- it is advisable to divide the ceiling into sections (this will facilitate the insulation process in the future);
- mandatory use of waterproofing (you can limit yourself to covering the ceiling cracks with clay, but it is best to use rolled waterproofing materials);
- laying a mixture of clay and sawdust;
- It is possible to add an additional layer of sand after the clay has completely dried.
The most difficult part of this process: creating the mixture itself. It is important to maintain the required proportions of the substance and choose the right consistency, as well as choose the right clay and sawdust. With clay, everything is quite simple: any clay will do, red is considered the most common. But the sawdust must be dry; fresh will not work. The ideal choice would be oak sawdust, but they are rare, so you can go with coniferous wood.
Stage two. Hemming the floor beams
Start work by filing the ceiling. The algorithm of actions is given below.
Step 1. To hem the ceiling beams, use boards about 2.5-3 cm thick (the specific figure depends on the pitch between the beams). Ideally, the board should be tongue-and-groove or with a quarter, and it must be planed and dry, even if it costs more than an unplaned edged one.
Step 2. On top of the fixed vapor barrier, nail the boards completely with nails 10 cm deep or screw them with screws 5-6 cm long (2 pieces at each fastening point).
False ceiling installation
Treat boards and beams with an antiseptic and fire retardant before starting installation work. This will protect the wood from pests, fungi, and also reduce its flammability.
Bioprotective tinted antiseptic
Where to order or buy
You can order bathhouse ceiling insulation from specialists. Employees of the enterprises, which are collected in a separate section of our website, perform insulation with high quality and in a short time.
In addition, it is possible to carry out thermal insulation work yourself. In this case, it is recommended to familiarize yourself with the list of insulation suppliers.
The ceilings of a bathhouse or residential building have long been insulated with natural, eco-friendly materials: clay, earth, sawdust, moss and others. Anyone can independently insulate a bathhouse ceiling with sawdust . The technology is simple, and the material will cost a penny. In fact, you can even get sawdust for free if you contact a woodworking company. For a small surcharge they can even bring sawdust home to you.
Some people read articles on the Internet about how much it will cost to insulate the ceiling and start saving money. After all, construction progress does not stand still, just as prices do not stand still. However, if you look at this impartially, it turns out that old-fashioned methods of construction and insulation are no worse .
The bathhouses of our grandparents still stand and serve excellently. In addition, it is not yet known how the same now fashionable polyurethane foam will behave in 15-20 years. But the behavior of ordinary sawdust is quite predictable.
Make your steam room completely safe
The best option for low ceilings is heat-resistant LED strip for sauna or flat lamps.
It is better not to use massive shades and lamps, because a drop of sweat getting inside can easily lead to a short circuit, and drops from a broom get anywhere. If you are steaming in the dark, screw in at least one “smart light bulb” with a battery. If there is no voltage in the network, it can be turned on as a flashlight.
Make sure that the door closes and opens easily (outward only) and moves freely on its hinges.
It definitely does not need upholstery, the handle is exclusively wooden, even a small child should be able to open it. Also leave a gap at the bottom for constant air circulation. Translucent doors with heat-resistant glass are best suited to let in maximum light. But keep in mind that the thickness of such a door must be at least 8 mm; it is made of tempered glass. It won’t close like a lock, and if someone in the steam room “overdoes it,” others will notice it through the glass.
What to remember
- Build a sauna with special LOGICPIR Sauna slabs.
- Think about proper planning.
- Provide proper ventilation.
- Protect yourself from potentially dangerous elements.
- Think over to the smallest detail the central place of the bathhouse - the steam room.
Methods of insulation using sawdust
The insulation technology is simple. The main thing is to do everything step by step and act strictly according to plan. The sawdust must be dried before starting work so that it does not rot later. It is best to take sawdust of the middle fraction. It will be much easier to work with them. Small sawdust generates dust and scatters, while large ones have much worse thermal insulation properties.
To avoid rotting, sawdust must be mixed with ash. It would be ideal if the sawdust rests for six months or a year before starting insulation. During this time, the content of sugars, which provoke putrefactive processes, will decrease.
To prepare insulation, sawdust is usually mixed with clay, cement or lime. There are 2 options for preparing the mixture for insulation .
First:
- 1 part lime;
- 1 part cement;
- 10 parts dry sawdust;
- 5-10 parts of water;
- copper sulfate as an antiseptic.
And the second one :
- 1 part lime;
- 5 parts clay;
- 10 parts sawdust;
- 7-14 parts water.
Insulation with sawdust occurs only from above . Before starting work, the floor beams are stitched with wide boards. The pipe must be insulated with a metal sheet. A layer of vapor barrier is laid on the attic side, which should extend 10-25 cm onto the walls.
Next, the prepared solution is laid out in neat layers. At the same time, it must be constantly leveled and compacted. For a summer bath, the insulation layer must be at least 5 cm, and for a winter bath – 15 cm. The solution must be allowed to dry completely. In the case of clay, the drying process can take up to a month. If cracks have formed on the surface, then it simply needs to be covered with the same solution.
And here is an article about the depth of the foundation for a bathhouse.
Use special foil insulation
LOGICPIR PIR panels for baths are one of the thinnest insulation in the TECHNONICOL line of thermal insulation materials with a uniquely low thermal conductivity of 0.022.
Why is it important:
You will save space when installing a thermal circuit on the walls and ceiling.
The thermal circuit is a sealed box made of low thermal conductivity materials, on which the internal climate of any room depends. It is important to eliminate gaps in the insulation along the entire perimeter, otherwise a freezing wind will blow in from somewhere.
You will also save money.
Panels consume half as much compared to classic insulating materials. The foil layer in the structure simultaneously works both as a heat reflector and as a vapor barrier.
Your bathhouse will not rot, burn, or change its geometry over time.
LOGICPIR will last more than 50 years, and due to the low coefficient of water absorption, they are not susceptible to the destructive effects of water, mold, fungi, and rotting in conditions of high humidity.
During a fire, the outer layer of the slab is charred, forming a porous carbon matrix and thereby preventing the spread of fire. During the combustion process and in general under any operating conditions, the material does not emit any harmful substances for humans, which is confirmed by international certificates and the conclusion of the National Medical Research Center for Children's Health of the Russian Ministry of Health.
You can build a bathhouse anywhere.
With the special properties of LOGICPIR, it can be organized not only in a specially erected building, but also in an existing structure of suitable dimensions and configuration. The main thing is a flat and solid base. It can be a brick wall, reinforced concrete, aerated concrete or even a wooden beam.
For example, look at what a cool brick bathhouse one of TECHNONICOL’s clients built: youtube.com
You will save your nerves during installation.
The slabs are mounted to load-bearing walls and ceilings with offset end joints using the adhesive method using LOGICPIR adhesive foam. The slabs have ideal geometry, weight up to 500 g and a special L-edge at the joints, so they connect easily and smoothly.
Block composition
For the production of wood concrete, wood waste, as a rule, is taken from coniferous species - they are less susceptible to biological destruction. Cement is used as a binder (sometimes, to reduce the cost, part of it is replaced with clay and lime). There are quite a lot of recipes, but as a rule, they take an amount of cement with water equal in weight to the weight of dry aggregate.
To increase the strength of chip concrete, sand is added to it, but one should take into account the fact that with an increase in the amount of sand, the weight of the wood concrete increases and its thermal insulation properties decrease.
Also, the composition of chip concrete (and other materials with wood waste) necessarily includes special salts that make wood waste non-flammable, and they are practically not affected by fungi and bacteria.
d) Fire resistance (fire safety).
Arbolite does not support combustion. It would seem that it consists of 60% sawdust, which is a flammable material, but this material was made using a certain technology. Namely: the cement-sand wall reliably covers all wooden sawdust, in other words, each wood plate is hermetically packed in a cement shell.
As a result, when the material is heated, organic fibers self-extinguish. The fire resistance limit, at a temperature of 1100-1200 C, is more than two and a half hours, and the load-bearing capacity is maintained even after more than three hours of exposure to high temperature.
Wood concrete is significantly superior in fire resistance to the popular building material expanded polystyrene concrete, which meets fire resistance requirements. The expanded polystyrene concrete filler is foam balls. Cement-sand walls protect the foam from fire, but in case of prolonged temperature, what do you think will burn “better” - foam balls or sawdust?
Conclusion: although wood concrete contains a large amount of sawdust (about 60%) it is a non-combustible material, thanks to the production technology. The use of wood concrete is appropriate in the construction of any object. The fire resistance of wood concrete is higher than some modern building materials.
Selection of building materials
If you decide to build a building made of wood, then you will need the following materials:
- A square beam with a standard size of 15x15 cm or 18x18 cm. Also suitable with dimensions of 20x20 cm.
- Floor covering board with parameters 15x5 cm, length – 4 m.
- Cladding board for arranging ceilings and walls. A lining with a width of 10 cm and a thickness of 2 cm is suitable.
- Vapor barrier material. Films are usually used. They come in two types: polyethylene and polypropylene. They are also divided into single-layer and multi-layer. It’s up to you to decide which type to use in building a bathhouse.
- Waterproofing material. The rolled variety is suitable for baths. For example, roofing felt.
- Insulation for the ceiling. This can be basalt or glass wool, slag wool, ecowool, expanded clay, sawdust, sprayed polyurethane foam, cork boards, extruded polystyrene foam. Mineral wool is considered one of the most common options.
- Sheet asbestos. It will be needed to sheathe wooden walls next to the stove structure and chimney. Thanks to this, high temperatures will not be able to destroy the wood.
- Cement, crushed stone, sand and water are all that is needed to build a reliable foundation.
- Material for roof installation. The choice depends on personal preferences, financial capabilities and the need to maintain a certain style. For roofing, you can use slate or euro slate, metal tiles, flexible bitumen shingles, rolled material, shingles, polycarbonate and even straw. The main thing is that the finished roof fits into the overall appearance of the site.
- Insulation for the space between the rows: jute, tow, moss.
There is no need to purchase materials in advance. If stored improperly, timber can deteriorate: mold, rot, and fungus will appear. It is better to purchase it immediately before starting work.
We build a frame bathhouse with our own hands using additional components
You can significantly simplify the process of building a frame bathhouse with your own hands, provided that you use a house kit, which is a kind of construction kit. It usually consists of beams and panels. If you have a ready-made foundation, then you can safely give preference to a house kit to facilitate the process of building a frame bathhouse with your own hands. All components have the necessary parameters, then they are assembled and fixed to the base.
Ready-made house kits for small baths have a number of advantages, such as:
- The compactness of the products allows you to install the structure even on a small plot of land.
- The ability to quickly disassemble the structure and move it to a new location.
- Internal communications wiring ensures quick connection and operation of the bathhouse.
These factory-made house kits are sold together with drawings and diagrams necessary for installation. A specialized company has the opportunity to obtain the necessary permits for the operation of electricity, water and gas supplies, if the customer expresses such a desire. This documentation is attached to the standard project.
As a rule, the lowest cost is found in house kits from those companies that are directly involved in the manufacture of all components of the kit. Due to the factory assembly and adjustment of the panels, the price of installing a bathhouse on the ground drops significantly. The customer just needs to build a light foundation, select the best project for him and buy a ready-made sauna house kit, which was made in a factory setting.
Helpful advice! If you do not yet have experience in this matter, we recommend that you read the step-by-step instructions on the Internet: how to build a frame bathhouse with your own hands. This way you can learn about all the main stages of work and installation features.
You can purchase a ready-made house kit for a 6x6 m frame bathhouse, consisting of a foundation, mineral wool insulation, finishing, electrical, plumbing and water supply for only 400 thousand rubles. You can also buy a project containing all the necessary drawings for installation, costing from 7 thousand rubles.
d) Formula of higher strength wood concrete M-50, D-1100 kg/m3. For making blocks.
— Cement (M 400) 20 kg/16.6 l; -(1 bucket).
— Sand (Mk 2.0 2.5) 59 kg/39.3 l; - (2.4 buckets).
— Softwood sawdust 20 kg/80 l; -(4.8 buckets).
— Calcium chloride and other additives 500 g/0.45 l.
— Water about 10 liters (depending on the moisture content of the materials used).
The method of volumetric vibrocompression using high-quality equipment ensures significant compaction of the material.
Example: for the construction of residential buildings - one-story, two-story - we mainly use Crimean shell rock grade 35. All buildings are frameless. The floors - reinforced concrete round-hollow slabs - are laid on a reinforced concrete belt, and under it is shell rock (M-35), which perfectly supports the load of the slabs and overlying structures.
If you are far from Crimea and it is too expensive to bring shell rock, you can completely use wood concrete blocks. They are also warm, like shell rock, and have a higher grade (M-50).
Perhaps there is a production of such blocks near you, because sawdust is found almost everywhere. Feel free to purchase. Since sawdust costs pennies, the price of such blocks should also be low.
Soon there will be a new article with objective criticism of the cinder block, if you don’t want to miss it, subscribe to the free newsletter in the upper right corner of the BEST SUBSCRIBERS, or at the end of the article.
Types of sawdust concrete
Depending on the purpose, sawdust concrete can be produced in the form of the following blocks:
- partition – used in the construction of partitions;
- wall – suitable for the construction of external and internal walls.
Blocks can be solid or hollow. The latter have voids of a certain shape in varying quantities. At the same time, they are lighter, their thermal efficiency is higher, and their strength and density are lower. Blocks can also be blind or through.
According to another classification, sawdust concrete is divided into 3 groups:
- Thermal insulation (grades M5-M10). The average density is 400-800 kg/m³, thermal conductivity is up to 0.11 W/m*OC. Used for wall insulation.
- Structural (grades M15-M20). The density is an order of magnitude higher - 800-1200 kg/m³, thermal conductivity - from 0.32 W/m*OC. The material is suitable for building walls.
- Monolithic. It is used for screeding and filling the frame.
