If you read this article and understand the correct technique for laying cinder blocks, then the work will turn out to be skillful and of high quality. And this despite the fact that it will be made with your own hands and, perhaps, for the first time in your life.
Types of cinder block masonry
There are four ways to lay cinder blocks:
- Laying cinder block in two stones.
Often used for the construction of foundations or plinths. Walls with such masonry will be warmer due to their thickness.
- Laying one and a half stone cinder blocks.
This type of masonry is used for laying load-bearing and external walls of a house..
- Laying cinder block in one stone.
Both the exterior walls and the wall partitions inside the house are built using one cinder block stone.
- Laying cinder block in the stone floor.
It is recommended to build only internal wall partitions into the stone floor. They are quite thin and cannot perform a load-bearing function in the structure.
masonry in one, one and a half and two blocks
Advantages of the template
The advantages of using a form at work include:
- Significant savings in masonry mortar used.
- Maintaining the same thickness of the applied layers.
- Facilitation and increase in productivity of the labor process.
- Simultaneous use of the frame during the laying of facing works.
- Obtaining straight lines along the horizon and vertical.
- Affordable price of the design (especially homemade).
Judging by the reviews on construction forums, builders do not note any disadvantages of using templates, although not everyone uses them. Many people are more accustomed to working the old fashioned way. Forms are recommended for inexperienced craftsmen to gain experience and skills .
Cinder block laying tool
To carry out cinder block laying work you will need the following tools:
- Cord - mooring for marking.
It is desirable that the color of the marking cord be bright and conspicuous, for example red. Some people use graph paper to mark the line. But it is not particularly practical, since it is transparent and difficult to see during operation.
- Building level and plumb line, tape measure.
It is advisable to also stock up on a hydraulic level (water level) and a metal building rule. A must-have tool for any repair and construction work. Using a level and plumb line you will control the evenness of the masonry, both vertically and horizontally.
- Construction pencil or chalk.
- Tool for preparing the solution. These are containers and buckets for mixing and carrying mortar, a concrete mixer, and a construction trolley. The listed equipment is necessary for delivering sand, cement, water to the container for mixing the solution. If you have the opportunity to use a concrete mixer, this will make the process of preparing the solution easier. But a couple of metal buckets are definitely needed to transfer the solution to the masonry site. Plastic containers will suffice for water. It is advisable to use metal containers, since plastic buckets can be quickly damaged by a metal trowel and shovel.
masonry tool
- Construction trowel (trowel). Necessary for collecting and applying the solution to the cinder block. There are three forms of the metal part of the trowel. A trapezoid-shaped trowel is considered the most convenient for masonry.
- Hammer or pickaxe.
A cinder block is a heavy stone and it is not always possible to lay it perfectly straight in a row. Using a hammer, the stone can be leveled with a level and string. In addition, the geometry of an ordinary cinder block is not always perfectly smooth and may arise.
- Grinder with a circle of at least 150 mm . A grinder is needed to cut a cinder block; otherwise, it is almost impossible to cut a cinder block. See the article below for how to cut a cinder block.
- Perforator with mixer attachment. Necessary for mixing the solution if you do not have a concrete mixer.
- Shovels: shovel or bayonet. Ideally, have both shovels. They are needed to load sand and cement into buckets, a mixture container or a concrete mixer. In the absence of a concrete mixer, shovels are needed to mix the solution.
- Template for laying cinder block. It is not required, but its presence will greatly facilitate and speed up the laying if you plan to lay out a large area. The template can be easily made independently from lumber, metal corners, or purchased at hardware stores.
- Overalls and construction gloves. Gloves are a must since your hands are constantly working with mortar and cinder block. When laying or carrying blocks, you can inadvertently damage the skin of your hands, legs and abdomen. It is recommended to protect body parts with durable used clothing or construction clothing.
blank for laying mortar
Features in construction technology
Let's consider the features in the masonry of individual buildings. There are nuances that you need to know in advance.
Porch
The standard parameters of the porch are 60*30*20 cm , where 20 cm is the height of the steps, and 30 cm is their width.
The height of the structure itself can vary, depending on the height of the structure itself and the soil underneath it. There are 2 ways to create a porch from cinder blocks:
- A platform is formed from blocks according to the size of the future porch. Then they retreat from the outer edge by 1 element and plant the next area on the solution. This is how the first stage is formed, the rest are done according to the same principle.
- If you want to save money, use cinder blocks to create the perimeter of the future porch; on the outside, the elements should form the first step. Inside, where the void has formed, gravel, crushed stone, sand or granite chips are poured and compacted thoroughly. Afterwards, a second row is formed around the perimeter with an indentation to the first step. And again the voids are filled with other, cheaper material. The final platform is made entirely of cinder block.
If the house is residential, the porch is covered with finishing material. For utility units, you can leave it as is.
Veranda
Additional external space can change the stability of the main structure. Before forming the veranda, you need to prepare and create a design plan. The foundation for it is poured first, an expansion joint is formed (the gap between the base of the building and the veranda is approximately 5 cm), which compensates for the movement of the soil and the shrinkage of the veranda. The foundation is being waterproofed.
The veranda often has an open appearance, the roof is installed on columns . How to create cinder block columns:
- The first blocks are placed along the mooring beacons, observing the geometry of the solution. To attach the blocks to the wall of the house, use a hammer drill and reinforcement pins. Drill a hole at an angle, insert a pin, and hammer it with mortar. That part of the reinforcement that remains on the street is placed in the seam of the future column.
- Holes for the reinforcement are formed on a horizontal plane, pins are inserted into it, and filled with mortar. You need to wait for the mixture to dry completely and then lay the next block.
- A layer of connecting mixture is also laid between the wall and the columns.
Columns that face the outside of the street should protrude 3-5 cm above the base so that precipitation rolls down them to the ground.
Extension
The additional building is attached to the main one on a separate foundation, observing the expansion joint. Laying the walls is carried out according to the same principle as that of the main building :
- first row on solution;
- every 2-3 rows reinforced with mesh;
- in compliance with the order;
- a template for the solution is used.
The peculiarity here is how to tie the extension to the main building.
Possible options:
- Rigid connection . Drill a hole in the wall of the main house. Take a reinforcement rod and insert it with one side into the hole, with the other it goes into the seam of the new cinder block masonry. After installing the rod, fill the hole in the main house with mortar.
- Flexible connections . Using anchors, attach thin, L-shaped metal plates to the wall of the main building. Part of the connection should be on the wall, the second part lies in the seam of the cinder block masonry.
The mortar is placed tightly between the walls of the main building and the extension.
Supporting wall
For the retaining structure you will need to create a separate foundation . Construction features - additional reinforcement will be required, which is produced directly from the base of the wall. To do this, when pouring into concrete, reinforcement bars are sunk vertically. They should be curved in an L shape, with the lower part being at the base and the upper part remaining free above it.
The main masonry is no different from the usual for walls described above. Horizontal reinforcement is also carried out. The reinforcement stem is mounted inside the masonry; for this, in some hollow cinder blocks you will need to drill a hole in the bottom.
Alcove
Such structures can be built with or without a foundation. In the second case, you will need to raise the cinder blocks above the ground and carry out thorough waterproofing. Concrete slabs or gravel can be used as support if the structure is small. The connection between the base and the walls must be covered with a protective material. Masonry is carried out in a standard way.
A private house
For private construction, high-quality material is required .
If there are several floors in a building, it is recommended to build the first one from a solid cinder block; it can easily support the weight of the entire structure. Partitions inside need a foundation and waterproofing. It will be necessary to carry out facing work, insulate the walls and protect them from moisture.
A blind area must be built near the walls made of cinder blocks in a private house and a storm drainage system must be installed. It is recommended to create drainage near the foundation.
How to build a private house from cinder block is described in more detail in our material.
Cellar and basement
Underground premises are more susceptible to the influence of groundwater than others . Before starting work, a reliable waterproofing cushion is created, drainage is carried out around the perimeter, and the walls are strengthened. After construction is completed, the walls of the cellar are covered with coating waterproofing; it is recommended to carry out injection for reliable protection.
You will learn more about building a cellar and basement from cinder block in this article.
Garage and shed
Construction of a garage will also require special attention to removing precipitation from the walls of the building. A blind area is installed in front of the gate at an angle from it, and storm drainage is installed. Like a shed, the walls of the garage should rise above the ground level by about 70 cm for safety.
More detailed information about building a garage and shed from cinder block is in our material.
Bath
Moisture-sensitive cinder block tolerates temperature changes well. For the durability of the building, protection from water, vapor barrier and high-quality ventilation will be required. Gaps are left in the walls - vertical seams not filled with mortar . Natural air circulation will occur through them.
Read how to build and insulate a cinder block bathhouse here.
Fence
Each post sits on a base that lifts the cinder blocks off the ground. It will be necessary to create protection from precipitation, for example, by lining the fence with brick or metal.
From this article you will learn the details of constructing a cinder block fence.
Preparing the foundation for laying cinder blocks
- Elimination of foundation unevenness.
Before starting masonry, the surface of the foundation should be cleared of excess debris and dust. Knock down and eliminate existing irregularities as much as possible in those areas of the foundation where the masonry will be done. This can be done with a pick, hammer, or special spatula. Then thoroughly sweep away all debris and dust from the surface of the foundation.
- Foundation waterproofing.
If your foundation has not been waterproofed. Then the places for masonry need to be covered with mastic or a layer of waterproofing material. This protects the cinder block from excess moisture from below.
- Height and width of the foundation. Ideally, the width of the foundation on which the cinder block will be laid should be 40 cm wider than the width of the wall itself. And the height of the foundation under a cinder block wall should be at least 70 cm from the ground level. This height is necessary so that the cinder block, which absorbs moisture well, is as high as possible from the ground. In practice, such proportions are often not observed. If the facade of a cinder block building is additionally protected from the external environment, then the proximity to the ground will not cause harm to the cinder block, or it will be insignificant.
- Provide easy access to cinder block laying areas. Access to the perimeter of the masonry must be free both from the inside and from the outside of the foundation. This will make it easier to bring the cinder block and mortar to the masonry areas, and will make it easier to work with masonry on both sides of the wall.
waterproofing the foundation before laying
DIY construction technology
Let's consider where to start laying and how the subsequent stages of work occur:
- On the base of the building, beacons are placed in the corners, lines are marked where the walls will be laid. A mooring thread is pulled between them.
Be sure to check all corners; a height difference of no more than 3 cm is allowed. The difference can be compensated for by the thickness of the seam.When working in the hot season, cinder blocks are watered so that they do not absorb water from the solution. After finishing the work, continue to water for another 2 days until the joint mixture completely hardens.
- The installation process begins from the corners. The wall is raised 2-3 rows, the geometry is checked, and the mooring line is moved along with it a row higher. The first cinder block is placed on the solution.
- Subsequent rows are performed according to the same principle. During the work, it may turn out that some cinder blocks will not fit in size. In order to fit an element into the middle of the row, it will need to be cut according to the principle indicated above.
Learn about the basics of cinder block laying in this video:
Cinder block is sensitive to moisture; experienced builders recommend covering it with waterproofing, insulation and facing material after preparing the wall.
Read more about the technology of laying cinder blocks with your own hands here.
If you want to leave the masonry uncoated, the joints are unstitched.
How is jointing done?
A special feature of working with hollow blocks is the unusual jointing . For convenience, it is recommended to make templates that will fit a specific material. It makes no sense to lay the solution in a continuous layer, since it will simply fill the voids inside the material and will not perform a useful function. Therefore, they place it only on the part where the blocks are connected closely and vertically, in order to avoid waste of material.
For more details on wall paneling, watch the video:
Mortar for laying cinder block
Making your own mortar is the cheapest masonry option. Purchasing ready-made families, to which you just need to add water, will make the masonry noticeably more expensive.
We will take the size of one bucket per measurement portion.
Composition of masonry mortar
- One bucket of cement
- Three buckets of sand
- Half a bucket of water. The indicated amount of water is not strict. The amount of water is regulated by the viscosity and liquid of the resulting solution. If the sand is wet, less water may be needed.
- Strength plasticizers. Additional fastening liquids and mixtures can be added to the solution. But they are not required.
- It is recommended to add one cap of dishwashing detergent along with water for one batch of cement mortar. This additive will make the solution elastic and stretchy, which will make it easier to work with.
If you mix the solution manually, using a shovel, then pour the cement and sand into one container and mix them well until the mass is as homogeneous as possible.
Before adding it to the dry mixture, add a portion of dishwashing detergent and a plasticizer to the water. After mixing everything until a homogeneous liquid, the water can be poured into the central part of the container with the dry mixture.
Requirements for mortar for laying cinder block:
- Uniformity of color. The solution must be stirred until it reaches a uniform gray color.
- The solution should be of medium viscosity, not too thick, but not too liquid, so that it adheres ductilely and well to the masonry and does not drain under the pressure of the cinder block.
- If unmixed fragments of yellow sand are visible in the solution, then it must be continued to be stirred. If you find solid fragments of soil, stones, or some kind of vegetation that accidentally got into the solution, then they should be removed from the mixture. Poor homogeneity with sand stones and other substances will lead to cracking of the masonry in the future.
In order to reduce the cost of effort, it is advisable to use a concrete mixer. But for a mixture of small volumes of solution, it is more practical and faster to mix the solution by hand.
in a well-mixed solution no sand should be visible
Errors during operation
Cinder block is afraid of water and moisture.
Therefore, masonry work must be carried out in the warm season. Otherwise, in winter and during the rainy season, the blocks will absorb moisture and collapse. If construction takes place in winter, then anti-frost chemical additives and additives need to be added to the mixture.
It is better to veneer the finished building right away . Plaster is not suitable for this purpose because it has poor adhesion to the surface of the cinder block. After a short period of time, the plaster will begin to crack, peel and crumble.
Attention! If there is absolutely no other cladding option other than plaster, then you must definitely use reinforcing mesh.
Cinder block laying technique
Laying the first row of cinder blocks.
After completing all the above steps, you can proceed directly to laying the cinder block. The most important step after correct marking is laying the first row of cinder blocks.
- Laying the first row of cinder blocks begins from the corners of the foundation to the middle of the wall row.
- The prepared cement mortar is laid out on the foundation along the width and length of the cinder block. The optimal thickness of the solution is 1.5-2 cm. The solution is also applied to the end of the cinder block.
For laying mortar, especially for beginners, it is convenient to use a special construction device: a template for laying blocks. You can construct this device yourself or purchase it in a store.
template for laying mortar using the example of brickwork
- The cinder block, along a stretched cord from the corners, lies on the already laid mortar. Using a hammer or pick, the top is knocked into the same plane as the corner cinder block. The correct horizon from above is measured by the building level.
In the same way, the walls are laid from other corners of the foundation, towards each other.
- After the blocks are as close as possible in the central part of the row. It is necessary to measure the length of the last block along the foundation and cut it with a grinder to a suitable size. In the same way, lay the remaining block in a row along the cord and horizontally.
How to cut a cinder block
The easiest way is to cut the cinder block into the required size using a grinder. The circle used must be at least 150 mm - 200 mm. The cinder block is marked over the entire surface, on all sides, with chalk or pencil. Then, using a grinder, the cinder block is sawed around the entire perimeter. A wooden wedge is inserted into the cuts and thus the block is split in the middle. When working with an angle grinder, be sure to take safety precautions: use a mask or goggles, cut on a solid surface, secure the cinder block well.
cutting cinder block with a grinder
- Having laid the block flat and to size, remove excess mortar from the seams and from the bottom of the cinder block.
- The first row of cinder blocks must be reinforced with mesh or reinforcement.
What it is?
Slag concrete is a material consisting of volcanic ash, crushed granite, sand, expanded clay, river gravel, sawdust, slag and ash.
Depending on the place of application in the building, elements are created using different components .
Blocks are formed by pressing a mixture of the listed components and concrete.
Hollow blocks are used to build walls ; they are lighter in weight and retain heat better. It is allowed to use the same material for load-bearing walls and partitions; decorative elements are chosen for cladding. If desired, you can purchase colored ones.
Laying walls from cinder block is the formation of load-bearing structures and partitions of the building, which will create its foundation. Cinder blocks with a durable material in their composition are used as a material.
Here the main importance is the raw materials. The composition includes several components, the density of the material and its physical properties may change because of this. Before purchasing, you need to make sure the composition of the cinder blocks, check with the seller for certificates , and check the material visually. The best are considered blocks with a predominance of granite crushed stone, expanded clay and other dense components.
The markings of a cinder block indicate its ability to bear heavy weight. Strength is indicated by the letter M, the indicator behind it indicates the weight that one block can withstand.
For example, M40 - more than 40 kg of weight cannot be placed on 1 element. Materials with maximum performance are suitable for walls, since in addition to their weight they will need to support ceilings and installed elements (doors, windows, etc.). Blocks M50 and M75 are considered suitable for walls.
Useful tips from professionals
The evenness of the masonry along the cord and the building level should be checked as often as possible to avoid curvature of the walls and rows in the future.
If the walls are not planned to be finished with anything in the future, then the seams between the rows should have an attractive appearance. To do this, you can use a small rounded stick, which you need to slightly press the seams after each laid row, while the solution has not yet hardened.
When marking blocks, you must use colored crayons . They are best seen on cinder blocks, compared to, for example, a regular pencil.
To increase plasticity, you can add a little detergent to the solution .
It is necessary to mix exactly as much solution as will be used at one time. Otherwise, unused mortar may harden and will not be suitable for construction.
It is advisable to plaster the outer walls, because cinder block is afraid of moisture . In this case, the plaster will protect the material. But since the plaster is poorly applied to the cinder block and can fall off over time, it is necessary to use a reinforced mesh. Internal walls can be covered with plasterboard.
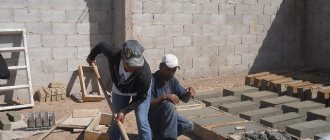
Pros and cons of styling yourself
The advantages of laying slag concrete with your own hands:
- Saving money, since all the work can be done with your own hands.
- The ability to create your own projects and implement them at your own discretion.
Disadvantages of self-masonry:
- Lack of skills can lead to incorrect work technique.
- Block weight. The average weight of the product is from 21 to 30 kg (hollow ones are lighter than solid ones). Each element will have to be carried, lifted and laid down manually, and this is unsafe for those who have back problems or who cannot lift heavy objects.
Buildings made of cinder blocks can be erected no higher than 2-3 floors, and this is provided that the product has a quality and safety certificate. If this is not the case, then cinder concrete can only be used for the construction of non-residential buildings no higher than the 1st floor.
The thickness of cinder concrete is determined based on the nature of the climate. If the winter is warm, then a thickness of 45 cm will be sufficient, and for severe winters, a minimum of 60 cm is needed.
In a separate article you can learn in more detail about all the pros and cons of houses built from cinder blocks.
Books on the topic:
Construction materials and products - Isaac Nanazashvili - 200 rubles - link to book review
Handbook of a construction technologist - Gennady Badin - 239 rubles - link to book review
Modern work on the construction of walls and partitions - Galina Serikova - 45 rubles - link to book review
We prepare estimates for construction and repairs - Vadim Ponomarenko - 352 rubles - link to book review
Concrete and concrete structures - Anatoly Zotkin - 205 rubles - link to book review
Today, cinder block is one of the most affordable materials for construction. It has gained its popularity not only because of its low cost and large size, which simplifies the process and time spent on construction, but also due to the fact that it can be made independently.
The first cinder block was made from cement mixed with sand, gravel, water and slag from a blast furnace. This is where it got its name.
Over time, technologies changed, and with them the composition of the blocks. Now it contains expanded clay, scrap bricks, fine crushed stone, and gravel.
Additional Tips
Professionals lay cinder blocks without any tools, but beginners should get a template for masonry or make it themselves, for example, from boards.
It is advisable to immediately plaster the finished walls. If you did not make a cinder block yourself, but purchased it, then you cannot be completely sure of its composition. There are types of blocks that are afraid of moisture.
To increase the viscosity of the solution, clay is added to it, plasticity - a little detergent, density - a plasticizer, it will also help increase the frost resistance of the wall.
It is better to mark blocks with colored chalk - it is clearly visible on the surface.
Cinder concrete blocks appeared on the construction market a long time ago. Already at the beginning of the last century, buildings were erected from them. However, the material became widely known and in demand relatively recently. It goes to outbuildings, utility buildings or residential buildings. Let's understand the intricacies of cinder block laying in order to build a house ourselves.