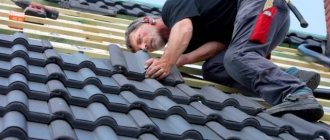
Every day, environmentally friendly, strong and durable ceramic tiles are becoming more and more popular in Russia and other CIS countries. Until recently, such roofing was in demand only in Europe, and in our country there were often either metal or bituminous shingles, which rather ineptly imitated the real thing. What changed? Import to the market of foreign natural tiles, with improved geometry and stunning design!
A house with such a coating looks so advantageous against the background of surrounding buildings that today there are a lot of people who want to study the installation of ceramic tiles and make the roof of their new family nest real armor. And now we will reveal to you all the technical secrets!
Material calculation
To calculate the number of tiles, you need to know the size of the roof, but not only that. The tiles are laid with an overlap, the amount of overlap is determined depending on the slope of the slope:
- Up to 16 degrees – from 10 cm;
- Up to 30 – from 8;
- Over 30 – from 7.
Ceramic tiles are laid on the roof using counter-lattice and sheathing. The second serves as a solid base for the coating, the first provides the necessary ventilation gap.
For the sheathing, sawn coniferous timber with a maximum moisture content of 25%, without knots, is used (SNiP, paragraph II-25-80).
- The pitch of the sheathing (and therefore the number of boards) depends on the slope of the roof and on the model of the tile (order - from 30 centimeters);
- The minimum cross-section of beams for sheathing and counter-lattice is 3 by 5 centimeters;
- For complex roofs or long slopes, use a square beam with a side of 5 cm.
To calculate the amount of material and its final cost, you can use the services of our company.
Or calculate it yourself: ceramic tiles in drawings (for example, Braas) can be presented in the form of a diagram indicating all sizes of the tiles.
Stage 1. Selecting a tool for installing (laying) metal tiles
The first thing you need to know is what tools you will need to properly install metal tiles.
- A screwdriver is useful for screwing in self-tapping screws. Attention: choose a screwdriver with a power of no more than 1800 rpm, otherwise you risk “overtightening” the screws and deforming the metal tiles and EPDM seal.
- Cutting shears - needed for cutting metal. With their help, you can evenly cut sheets of metal tiles. The polymer and zinc layers will not be damaged. Attention: using a grinder for cutting metal is strictly prohibited! It burns out the polymer and zinc coating. A metal base without corrosion protection will quickly rust.
- Special attachment for the drill - “cricket” . It is also useful for cutting roofing material.
- Knife for cutting insulation.
- Staple gun. Needed to fix vapor and waterproofing on rafters.
Ventilation and thermal insulation
The technology for laying ceramic tiles involves installing a ventilation system in the under-roof space. This is necessary to ensure that condensation does not accumulate inside the roofing pie, which leads to the destruction of the insulation and rafter system.
There are two options for constructing a roofing pie. In both cases, the main layers are the same:
- Vapor barrier (bottom layer);
- Insulation;
- Waterproofing.
The difference between single-layer and double-layer ventilation is that in the single-layer version there is only one air layer, directly between the waterproofing and the roof. Two-layer means the presence of two layers, the second - between the waterproofing and insulation.
The choice of technology depends on the waterproofing material. Only membranes with a vapor permeability of at least 750 grams per square can be placed directly on the insulation, which will protect the insulation from moisture and drain condensation to the outside.
note
The total height of the ventilation gap must be at least 20 centimeters.
With a two-layer scheme, about two centimeters are left from the insulation to the film. In addition to creating air gaps for roof ventilation, when laying ceramic tiles, special elements are used:
- Skates;
- Cornice.
The types of elements are different:
- Hard aerators;
- Rolled ventilation films;
- Ventilation grates;
- Ventilation tiles.
Elements are selected depending on the type and slope of the roof.
The brand of insulation and layer thickness depend on the region. Examples (for roofs in the Moscow region):
- Mineral wool P175 (thermal conductivity coefficient 0.072) – 40 centimeters;
- Fiberglass (coefficient 0.044) with a windproof membrane - 24 centimeters;
- Expanded polystyrene (0.032) - 15 centimeters.
Connection to chimneys
Junction node
Even at the stage of placing the waterproofing, the material used is carefully trimmed and placed on the chimney wall adjacent to the laying plane. After this, you can mount it on the wall in any way convenient for you.
Connection to the chimney
Directly near the chimney, the tiles are laid with a small gap (about 2-3 cm). To obtain a reliable connection, you can use a special corrugated tape made of aluminum or copper, painted to match the color of the tiles. In this case, using a piece of tape of the required length, the front part of the pipe is first closed (with a slight overlap), after which the same operations are repeated for its sides.
Connection diagram
Experts believe that to protect the back of the pipe, it would be more reliable to use two strips at once, combined into one with a slight overlap. Reinforcing the protective layer on the back side of the chimney will allow you to get a very reliable connection, eliminating the possibility of rain moisture and snow getting inside the structure.
More details about the installation procedure below:
Insulation and waterproofing
- The vapor barrier layer is attached to the rafters from the inside (from the ceiling) with vertical and horizontal overlaps of at least twenty centimeters.
- Fixed with wooden slats. In the future, when arranging the ceiling, the panels (boards) should not come into contact with the vapor barrier.
- The insulation is cut into blanks according to the width of the step between the rafters and placed between the rafters in a spacer.
Installation options for the top waterproofing layer
- Installation of the film directly onto the insulation is carried out with the steam-removing side facing outwards, i.e. towards the roof covering.
- The film should be rolled out along the cornice along the rafters, starting from the bottom row.
- The recommended overlap when installing the next row is approximately 10 cm for steep roofs. If the slope is less than 22 degrees, it is increased to 20 cm or the joints are taped with double-sided tape.
note
The film is secured with a stapler or roofing nails and finally fixed with counter-lattice boards.
Other methods:
- When using polyethylene-based membranes, the film is pulled over the rafters with a sag of one or two centimeters. At the same time, at least two centimeters should remain from it to the insulation. In cold weather, the film is stretched without sagging.
- With a small roof slope (within 16 centimeters), a welded roof can be used as a waterproofing layer. To do this, it is necessary to make a continuous flooring and fill it with trapezoidal counter-lattice slats up to 5 centimeters thick.
Arrangement of the roof ridge
Roof ridge installation
When installing a tiled covering in the area of the roof ridge, the main attention should be paid to the correct placement of the material in the area where the ridge beam is located. To design the ridge zone, special tile blanks (slats) are used, which allow the upper edge of the roof to be rounded, thereby ensuring reliable connection of all covering elements.
Individual ridge zone blanks are fixed to the sheathing elements using screws (self-tapping screws) of a suitable size.
The position of each ridge strip is selected in such a way that there is a gap of approximately half a centimeter between it and the sheets of tiles being laid.
The tiles are laid on top of the sealing tape
Note that such ridge blanks must be mounted on top of a special sealing tape, which allows the formation of a small gap necessary for ventilation of the under-roof spaces. In this case, each individual rail is attached to the supporting structure using a small bracket included in the ridge covering kit. Upon completion of their installation, special additional elements are installed to cover the end part of the ridge.
We also recommend reading the articles:
How to properly waterproof a roof
How to lay a vapor barrier
How to insulate a roof from the inside
Lathing and counter-lattice
- Along the rafters, on top of the waterproofing film, we lay counter-lattice bars approximately 1.3 meters long.
- We fix it with galvanized nails every 0.3 meters not higher than the marker line on the film.
- At the joints of opposite beams on the ridge, we saw the boards at an angle so that the joint is even. The angle of the cut will depend on the slope of your roof.
- Between the beams of the valley or hip ridge and the main counter-lattice we leave a ventilation gap of about 10 centimeters.
- We place the sheathing beams parallel to the earth's surface, starting from the overhangs.
- The step between the first two bars (on the overhang) is from 32 to 39 cm (measured along the outer edges of the bars).
- We place the third block under the ridge, at a distance of three centimeters from the joint of the counter-lattice bars. If the roof is steeper than 30 degrees - at a distance of two centimeters.
- We measure the distance between the second and third beams along their upper edges.
- We divide the resulting figure by the number of intermediate bars so that the step between them does not exceed the recommended parameters:
- Roof slope up to 22 degrees – 31-32 cm.
- Up to 30 – up to 33.5;
- Over 30 – up to 34.5.
We install the sheathing on other slopes in the same way.
Construction of the lower roof.
• If the slope angle is less than 16 degrees or increased demands are placed on waterproofing due to the complexity of the roof or climatic conditions, then a lower roof must be installed under the tiles: a continuous deck of edged or tongue-and-groove boards and roll polymer-bitumen or polymer waterproofing.
• To make a waterproof bottom roof, fill a trapezoidal counter-lattice with a thickness of 40...50 mm over the decking, and only then fuse the waterproofing.
• When installing a lower roof, be sure to leave ventilation gaps at the ridge and ridge, similar to the film.
9. Laying the valley groove
• Bend the edges and profile the groove along the block. No special roofing tools are required for this operation.
• Start laying the gutter from the eaves (bottom to top). Place the groove on the flooring or thick sheathing and trim it along the contour of the inner square with a margin of 3...4 cm.
• The overhang aerial element or leveling bar must reach the visible valley line (13...15 cm from the axis of the groove) to securely support the first cut tile.
• Secure the groove to the substructure with six brackets using 2.8x25 mm galvanized roofing nails. You cannot nail the groove itself along its length with nails.
• Stepping back 1...2 cm from the top edge, nail the groove to the flooring with two nails to prevent it from sliding longitudinally.
• The minimum overlap of the next groove on the bottom is 10 cm; when laying, align the transverse ribs of the grooves.
The junction of the valleys below the ridge
• Lay the grooves with a gap of approx. 1 cm, secure them with nails and seal the joint with sealing tape of the appropriate color, profiling it along the edges of the groove.
Installation of joints at the same level for multi-gable roofs
• Lay and secure the grooves with nails. • Equip the ridge with aero elements or Figarol. • Seal the joint of cut ridge tiles with sealing tape or Wakaflex.
Bird and leaf protection
• The best protection against birds, dirt, snow and leaves getting under the tiles is provided by self-adhesive foam strips with water-repellent impregnation.
• If a foam strip is not used, then nail the eaves grille along the edge to the decking with galvanized nails.
The second way to lay the groove is on top of the thick sheathing
• This option is used when installing valleys of dormer windows or valleys over wide pipes, when the groove is released onto the tiles.
• In this case, nail the brackets to additional bars, otherwise the brackets will interfere with the even laying of the tiles. Bend the edge of the groove inside the valley. The foam strip can be trimmed to a height of 30...40 mm.
Release unit for the groove on the ramp
• Glue the outlet of the groove with Wakaflex and begin laying a groove 70...80 cm long with an overlap of the groove on the tile of at least 12 cm. • Use scissors to round the bottom edge of the groove and shape it to the shape of the tile using a hammer handle or a rubber mallet. • Construct valleys in the same way using grooves made of copper, zinc and galvanized steel.
How to lay ceramic tiles
Attention: in this article I will only tell you how to lay ordinary ceramic tiles, i.e. on the slopes. In addition to slopes, the roof has other nodes:
- Endovy;
- Ridge (except hipped roofs);
- Cornices;
- Connections (to pipes, roof windows, etc.);
- Gables have pediments;
- The hip and tent ones have ridges.
Another article is devoted to the installation of all these elements.
Tile laying technology:
- Check the roof prepared for laying ceramic tiles for deviations from the plane. For two meters of roof, deviations for sheathing beams should not exceed half a centimeter.
- Lay out the tiles on opposite slopes in columns of five to six tiles.
- Lay out two rows, top and bottom, without fastening. If the length of the roof and the width of the tiles are non-multiple numbers, use half tiles.
- Mark the outer rows of tiles on the sheathing. Additional marking - after 3-5 intermediate rows.
- The bottom row of shingles should extend beyond the roof by one-third the diameter of the gutter running under the eaves.
- Lay tiles from bottom to top. Secure the first row with 4.5 mm by 5 centimeter screws or anti-wind clamps.
- On gable roofs, tiles are laid in the direction from one end to the other.
- On the hips - from the middle of the slope, which needs to be beaten off with a marking cord from the top to the middle of the cornice.
note
You need to lay tiles on triangular slopes in the following order:
- Middle vertical row;
- Bottom horizontal row:
- Second row from the bottom, from the middle to the ridges;
- Third, etc. to the top.
Which tiles should be fastened with hardware?
- Bottom row (cornice);
- Upper (at the ridge);
- Lateral (at the ends and ridges);
- Any trimmed tiles;
- At the junctions.
If the area is characterized by high wind loads, all tiles must be secured.
For different models of tiles, 4.5 by 50 galvanized screws (self-tapping screws) or universal stainless steel clamps can be used.
Laying ceramic tiles with your own hands is a long and energy-intensive process that requires highly qualified installers. Moreover, we are talking about expensive material.
Our company has extensive experience in laying roofing coverings, ceramic tiles are no exception. Entrust this matter to us, and you will receive a beautiful, high-quality roof quickly and inexpensively.
Installation of a gable overhang.
• For sheathing pitches less than 33.5 cm, use side tiles with a cutout of 11 cm, and for larger pitches, with a cutout of 8.8 cm. Secure each tile with two galvanized screws 5x50 mm.
• The gap between the ends of the sheathing and the inner surface of the side tiles should be 1 cm.
• Another option for constructing gables is using lightweight side tiles made of painted aluminum. In this case, lay the row tiles on the gable overhang flush with an additional 50x50 mm bar.
• Place the side piece over the shingles and secure it to the gable beam with a roofing nail at the top and a screw and sealing washer near the bottom edge. The next element will cover the place of fastening with a nail.
Do not fasten the two lightweight side tiles with an overlap with a screw!
Additional materials on the topic
Reviews about ceramic tiles
More details
Roofing units made of ceramic tiles
More details
Ceramic tiles koramic
More details
Your feedback, comments, questions
Dear visitors! We will periodically answer your questions in the comments as we are busy. In order for us to respond to you promptly (within an hour), you can: call, write a personal message or leave a request for a free consultation by phone.
Preparatory work
Before starting work, you need to make sure of the strength of the house's rafter system and the geometric accuracy of the location of the wooden elements of the rafter system. If the house design initially includes a roof made of clay tiles, you can immediately proceed to the next stage: checking the geometry and measuring the roof, including the lengths of the slopes, ridge, valleys, and ridges. Then you need to contact your clay tile supplier to calculate the number of products. If the project was developed for another type of covering, for example, metal tiles, you need to increase the cross-section of the rafters or reduce their pitch, and in some cases do both.
Roof measurement
Stage 2. Selecting related products for proper installation of metal tiles
Don't forget about related products for installation work.
- Roofing screws are fasteners equipped with a washer with an EPDM gasket and made of zinc-coated steel.
- Sealing materials are needed to isolate the most vulnerable places from moisture - the joints and junctions of roof elements. They can be produced in the form of tapes or in liquid form.
- Repair enamel aerosol. It will be useful if you need to restore the polymer coating (if it was damaged during installation or transportation of the material).
- Double-sided connecting tape. It is used to hermetically seal the joints of steam and waterproofing sheets. Otherwise, the vapor and waterproofing will not be able to perform its functions - it will allow moisture to pass through.
Stage II. Preparing clay
Clay for tiles must be constantly mixed and also filled with water.
Once a good clay has been selected, it can begin to be prepared for processing. Typically, clay is prepared for tiles at any time of the year, but it still needs to survive the winter.
So, the clay taken out of the ground needs to be piled on the ground surface in the form of ridges 2 m wide and 70 cm high. Such ridges are usually called stacks. This is how the clay will have to lie until it warms up - it will get wet from the rains in the fall, freeze in the winter, and thaw in the spring. After all this it will be much easier to process. And in order for the clay to freeze better, it is advisable to periodically stir the piles and even fill them with water. After all, the longer it is frozen, the better. Even if the clay lies like this for several years, it will only benefit it.
Video description
This video provides instructions for installing SHINGLAS flexible tiles from TechnoNIKOL:
Preliminary actions
In fact, before attaching the first roofing sheets, you need to strengthen the overhang. To do this, a metal strip with an L-shaped cross-section is fixed along it. This is the so-called drip. Also, as an alternative, you can use a higher quality option - a polymer coating. It will cost more, but it will last longer and you can choose the right color. In any case, the plank serves as mechanical protection and a barrier from precipitation for the end parts of the rafter legs and the edges of the roof support base.
Installation of eaves overhang Source ironspb.ru
The blanks are fastened with nails at intervals of 200-250 mm in a checkerboard pattern. The overlap between products is maintained at least 30 mm. Additionally, it is recommended to seal the joints with bitumen mastic or a sealant suitable for the roof. Next, you can install the drainage system or limit yourself at this stage to installing mounting hooks under the gutters.
Next, the pediment strips are fixed. They are also made of metal and have an L-shaped cross section. Only here the fold line is accompanied by a small longitudinal protrusion. Fixation is carried out in a checkerboard pattern with nails at a distance of about 150 mm between them. The overlap of the workpieces is maintained at least 30 mm.
Cornice and gable strips fixed alternately Source peredelka.shop
In the case of installing flexible tiles on top of an already formed membrane flooring, it is recommended to create an additional protective layer in the valley area. The so-called valley material is laid in a relatively larger width. In the area of the overhang, the film from the wrong side is not immediately removed. First, contact-enhancing mastic is pre-applied under the carpet in a strip of approximately 100 mm. Next, the canvas is pressed to the base, the edges are nailed in increments of 200 mm. The distance from the edge is maintained at 30 mm.
Another activity is the area of pipes and ventilation ducts. Here craftsmen also prefer to use a valley carpet, but you can take a sheet of galvanized metal with the front side painted in the desired color. From the selected material, patterns are formed with a hole whose diameter is similar to the specific channel. The blank from the valley carpet is cut so that there is an overhang of at least 300 mm on the pipe with brickwork, and over 200 mm remains on the slope.
Reliable protection of a brick chimney Source pomestye.ru
Fixation is carried out using bitumen mastic, first from the visible side (front), then from the sides and back. The surface of the “substrate” is also coated with mastic mass. And on top, the edges are secured to the bricks with metal strips using dowel-nails, and the joints are sealed. The tiles will subsequently be laid with an indentation of 80 mm from the technological opening.
With round air ducts the situation is simpler - for them there are special passage units with a platform that extends onto the shingles at the bottom. The joints are coated with bitumen mastic. The “skirt” of the element along the perimeter is attached with self-tapping screws.
In order not to deviate from the general geometry of the roofing in the future, it is worth first applying markings on the slopes. The craftsmen here adhere to calculations regarding 5 rows of flexible tiles and the length of one shingle (1 meter). The result is a grid-shaped landmark.


