All materials that can provide protection to various building structures from water and steam are called vapor barriers. Various materials are used as vapor barriers, so the fastening of vapor barriers varies. The various materials needed as a vapor barrier should be strengthened exclusively from the inside of the house. In special cases, for example, if the walls of the building are thin and weather conditions are associated with large temperature changes, a vapor barrier should be installed inside and outside the structure. Vapor barrier materials can be divided into sheet and roll.
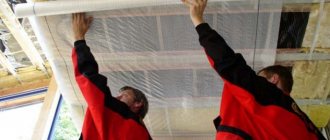
When vapor barriering the walls of a house, a vapor barrier film or membrane is attached to the frame studs using a construction stapler.
Vapor barrier of walls
Page navigation
Vapor barrier of walls during the construction and finishing of a house is one of the first tasks. Moisture protection will protect the building from destruction and bring warmth and comfort into the house. And also protection against fungus, which negatively affects the health of all household members.
Vapor barrier is carried out using various materials both outside and inside the room. Installation technology requires compliance with the stages of work, as well as compliance with the rules on which the quality of the work performed depends.
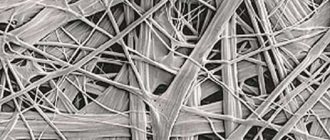
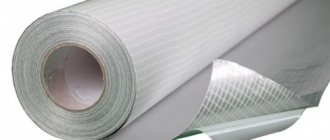
Membrane film:
This film is available in two versions, which differ in vapor permeability:
- limited, to control the removal of humidity from the room, leaving a minimum specified residual moisture;
- variable when permeability increases with changes in humidity.
To determine the location of the vapor barrier installation, it is necessary to understand where exactly the contact of cold and warmer structures, humid and dry air occurs. For the construction of a private house type, such areas are the basement, attic, roof and wall elements.
Membrane film
Why do you need to install a vapor barrier inside and outside your home?
When finishing the walls of a house inside and outside, insulation materials are often used, which absorb moisture like breathable materials. As a result, a condensate collection point appears. This leads to destruction of the insulation, the appearance of fungus, deformation and damage to finishing materials (detachment of wallpaper, falling off of tiles, deformation of plasterboard sheets).
To create the desired microclimate in the room, a vapor barrier is used that can prevent moisture from reaching the insulation. At the same time, many of these components are breathable, which is necessary for both walls and finishing materials. This feature allows for ventilation, which is necessary for all elements on the walls.
Cases when vapor barrier is required:
- When the walls inside the room are insulated with mineral wool. It is breathable and breaks down when exposed to moisture.
- Walls covered with plasterboard and other cladding. Basically, condensation is created between the rough wall and the cladding, which negatively affects the finish.
- A vapor barrier layer is installed on the outside to protect the walls from external moisture. This is done when insulating the facade of a building.
To create the necessary climate in a room with a vapor barrier, a ventilation system is necessary.
Penofol insulation technology
It should be noted that penofol insulation of private houses and apartments is becoming increasingly popular for various reasons. There is also a lot of talk around this relatively new insulation, including about its unique properties and ease of use. Understanding what penofol is, as well as finding out the whole truth about its characteristics, is the purpose of this article. In addition, we will talk about how it is better to insulate walls and other structures from inside the house with this material.
Types of vapor barrier material: which one is better
The construction market is overflowing with types of vapor barriers. It can be either liquid or in rolls. Each material has its own purpose and composition. Some are used for walls outside the house, others only indoors.
Mastic
The mastic has a bitumen-polymer base. It is applied to the surface, creating a layer that protects from moisture and allows the rough base to “breathe.” The mastic is applied to clean, dry walls made of various components (wood, brick, concrete) with a brush in 2 layers. The second time bitumen is applied to the dried first layer. The advantage is that the mixture is sold ready-made and does not require additional preparatory work for cutting or preparing. The service life of the mastic is more than 25 years.
Membranes
There is a large selection of membrane materials on the construction market. They have the following properties:
- laying on the outside of the insulation. The membrane protects the outer wall from precipitation and winds. Siding and lining are installed on top;
The membrane should fit tightly to the insulation and be firmly fixed. Because it can tear due to strong winds.
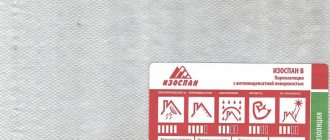
- For vapor barrier for walls inside the house, “Megaizol V” is used - polypropylene film in 2 layers with an “anti-condensation” surface. The film protects the walls from the appearance of dew points, which leads to the development of fungus and dampness;
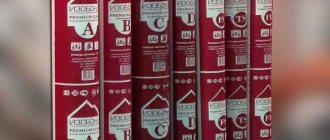
- Izospan FD, FS, FX – reflective surfaces used in bathrooms, baths, saunas.
When choosing a wide range of membranes, you need to pay attention to what purposes they are intended for - for the street, a bathhouse or vapor barrier inside the house.
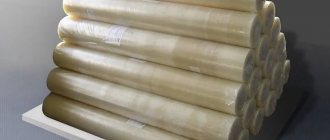
Vapor barrier film
For vapor barrier, a film with a thickness of less than 0.1 mm is used.
It is the most used of all listed. It has no perforation and does not allow air to pass through. However, recently breathable films have been produced. Vapor barrier film is applicable due to solutions to such problems:
- Micro-ventilation of walls and insulation occurs.
- The condensate collected when the outside temperature changes is partially removed.
- In saunas and baths, where there is high humidity and high temperature, which other vapor barriers cannot withstand.
The vapor barrier film does not allow small drops of water to pass through, but at the same time “breathes”, which allows you to solve problems.
Liquid rubber
This material is sold in the form of a bitumen-polymer liquid product. After application, a “rubber” covering appears on the surface, which follows all the recesses on the wall. The rubber surface prevents moisture from penetrating and provides hydro-thermal insulation protection.
Types of liquid rubber:
- Emulsion – applied by machine. Applicable on floors for vapor barrier.
- Emulsion applied to the floor manually.
Liquid rubber is also applicable to protect the foundation from the street side.
Approximate costs
Calculation of the cost of work on external hydro- and vapor barrier using the example of a residential building as part of a ventilated facade.
Initial data:
- residential building 10x10 m, one-story;
- building perimeter, 40 m;
- wall height, 300 cm;
- insulation - mineral wool, 10 cm;
- insulation density, 30 kg/m3;
- cost of insulation, 1500 rub./m3;
- cost of dowel “fungus”, 4 rubles;
- window area, 3.6 m2;
- door area, 2 m2;
- total insulation area, 114.2 m2;
- lumber consumption for sheathing, 1.2 m3;
- membrane consumption, 115 m2;
- construction tape consumption, 265 m;
- total weight of insulation, 343 kg.
Cost of work
| № | Name of expense item | Quantity | ISOSPAN price of work per m2, rub./total | Ondutis price of work per m2, rub./total | JUTA SP-1 price of work per m2, rub./total |
| 1 | Installation of step lathing, m2 | 115 | 200/23000 | 200/23000 | 200/23000 |
| 2 | Installation of insulation, m2 | 115 | 380/43815 | 380/43815 | 380/43815 |
| 3 | Installation of hydro-vapor barrier film and counter-batten, m2 | 115 | 120/13800 | 145/16675 | 150/17250 |
| 4 | Ventilation gap installation, m2 | 115 | 150/17250 | 150/17250 | 150/17250 |
| 5 | Cladding with clapboard, m2 | 115 | 300/34500 | 300/34500 | 300/34500 |
| Work, rub. | 132365 | 135240 | 135815 |
Installation of vapor barrier material for insulation inside a brick house
Vapor barrier of brick walls is made using several types of materials to choose from.
Indoors - these are films and membranes. Materials based on foil are also applicable. They have reflective properties. In this case, the foil side is placed inside the room.
If a brick wall is insulated from the inside with mineral wool, then it must be protected on both sides. On the wall side from condensation, and on the room side from vapors penetrating into the insulation.
Protective materials used include Aluf, Penotherm, and Penofol.
First of all, prepare the wall: it is cleaned of sharp protrusions and dust.
Afterwards, the vapor barrier is fixed, the insulation is placed in the created sheathing, and a vapor barrier is placed on top again. In this way, the mineral wool is protected on both sides.
Which side to lay to the insulation inside the building: how to lay
Depending on where the material is being installed, determine which side to lay it on:
- When laying insulation on the street side, the vapor barrier is fixed to the insulation on the street side.
- When treating ceilings and roofs, antioxidant materials are used. They are fixed to the insulation.
- If there is no additional fastening of the ceiling and roof insulation, then the material is attached to the bottom of the rafters.
- If there is thermal insulation on the inside of the walls, then fixation is done on the outside of the insulation.
Many materials are used that have the same surface on both sides. Therefore, it makes no difference which side the vapor barrier is attached to.
Which side to attach and nail?
When the question arises which side is used to fix the vapor barrier, nuances arise:
- There are materials that have the same sides. Their use does not affect the protective functions.
- The antioxidant insulator is placed with its smooth side facing the insulation.
- Foil membrane - fixed with a shiny surface inside the room.
- Film materials – smooth side to the insulation.
- When choosing a diffuse component, you need to study the instructions, since they can be double-sided.
The dark side of the material is the outer side.
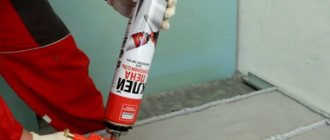
What to glue
The vapor barrier is fixed in several ways:
- use nails with wide heads;
- use of a construction stapler;
- on top of the layer, wooden planks are fixed at a certain distance.
The joints are glued together with adhesive tape for vapor barrier.
Sealing cracks and preparing sheathing
It is better to replace damaged walls or carry out major repairs. Gaps in joints are sealed with natural materials or synthetic stone sealants .
Before insulating the wall, you need to take care of preparing the sheathing. The distance between its bars should be determined based on the width of the insulation slab . It is important to use a building level to check the vertical and horizontal surface for finishing. The sheathing bars should be directed perpendicular to the direction of the facing panel.
Brick wall sheathing
Do not forget about installing transverse sheathing to ensure high-quality ventilation.
For the convenience of installing intermediate elements of the sheathing, a rope is pulled from the corner beam from below and above the facade . Some people mark future elements with chalk.
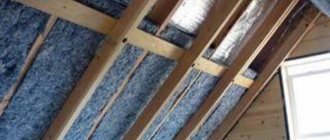
Features of vapor barrier of frame and wooden buildings
To protect the wooden walls of the house, a vapor barrier is made both outside and inside.
This is necessary, first of all, to protect the wooden beams, since after getting wet, slow drying occurs. During drying, the wood becomes deformed and rots. In a wooden house, it is imperative to fix a vapor barrier layer, because there is the possibility of temperature fluctuations and the appearance of humidity. Especially in the autumn-spring period.
Vapor barrier of walls in frame houses is carried out using a different method.
How to lay it correctly
Vapor barrier of the walls of a wooden house from the street is carried out in the following sequence:
- Overlapping layers are fixed onto wooden beams. All joints are sealed with tape or foil tape.
- Next, the frame base for the insulation is installed.
- After attaching the mineral wool, a hydraulic barrier is attached to the beams on top.
- The last stage is finishing the house.
If the beams create a flat surface, then the vapor barrier must be mounted on wooden slats. This will create ventilation.
Vapor barrier inside the house:
- a gap should be made using slats for ventilation;
- material is attached to the slats;
- the next step is the construction of a frame base for the insulation.
- after laying the insulation, fix the hydrobarrier;
- the last stage is finishing.
When laying vapor barrier material for a frame house, you must follow these rules:
- use membranes to create a layer of ventilation;
- Installation of vapor barrier on both sides is not done.
The material is secured with a stapler, the borders are sewn up with tape.
Is additional protection needed?
In a wooden house, additional protection is not required. But in frame buildings, materials such as hydro- and wind protection are applicable. It is fixed to the exterior finish. Then OSB, thermal insulation, vapor barrier and finishing are applied.
Is it possible to lay several layers
This is not necessary, because the vapor barrier material is created in such a way that it fully performs its functions. In addition, in some cases, in addition to vapor barrier, additional materials are used to protect the insulation and walls (wind protection, waterproofing).
Attention. Some types of membranes are created from several layers. By using this material, there will be additional protection for walls in damp rooms.
How difficult is it to make a vapor barrier with your own hands?
Despite the fact that vapor barrier of walls in a house is an important point for protecting the structure from destruction, it can be done independently. To do this you need to follow the rules:
- You need to know how to carry out installation correctly in specific cases (high humidity, wooden walls).
- Before carrying out installation work, you should familiarize yourself with the technical characteristics of the selected material.
- The roll must be cut by clearly measuring the correct length. The fewer joints there are, the better for the building.
- Fixing the layer cannot be done simply with nails to the surface. Over time, the vapor barrier will tear and weaken. Be sure to use either wooden slats or a stapler.
Peculiarities
Before installing the vapor barrier, the following features must be taken into account:
- Material. By studying the technical characteristics of the material, you can understand how suitable it is for working indoors or outdoors.
- Correctness of work. In addition to the fact that the rolled material is laid with an overlap of at least 20 cm, you need to know which side and in what method: vertically, horizontally.
- The joints of the material must be glued to avoid moisture getting on the insulation.
- The material is fixed every 60 cm.
For quality work done, craftsmen recommend purchasing vapor barrier and its components from the same company. Let's say that the tape for the joints should be of the same brand as the material itself.
Vapor barrier of the walls of a house can be carried out not only when a new building is being built, but also during renovation work. The walls of the house are destroyed under the influence of moisture, so to preserve them, the material is installed outdoors and in the house. Only in some cases is work carried out on one side (frame house). Having studied all the nuances of installation, the vapor barrier will last a long time, and the microclimate in the house will not be disturbed by moisture.
How to mount
Vapor barrier ensures the reliability and durability of the entire house structure. You need to understand which side to attach the vapor barrier, if it is not double-sided, and how to do it correctly. If you abandon this layer, then all the materials used on the roof will gradually begin to deteriorate and, over time, problems with the house will appear.
Installation of roof vapor barrier Source applesakhalin.ru
See also: Catalog of companies that specialize in engineering systems
This layer has its advantages:
- UV protection;
- high level of strength;
- resistance to temperature changes;
- multifunctionality.
Laying this layer has its own rules and requirements that must be taken into account. It is important to take into account the design features of the material. Different films are used on different sides of the insulating layer, carrying the opposite tasks discussed above. Materials may differ in installation method; there are single-sided or double-sided options. In the first case, the film is attached to a specific side, and in the second, both sides of the vapor barrier membranes are the same - this is a more practical option.
To find the required side, you must carefully study the manufacturer's instructions. But if nothing is indicated there, then you can determine the required plane yourself based on a number of factors. Izospan with the light side is mounted to the insulation. The fleecy side is the outer side, and the inner side is always smooth. Some manufacturers roll the rolls with the inside facing up, so when unwinding it is directed towards the floor.
Durable film option Source dekoriko.ru