Many people believe that connecting an electric meter is a very difficult and not an easy task, which only a competent, qualified electrician can do. In fact, everything is ridiculously easy and simple, especially if you have a detailed diagram for connecting the electric meter at hand, with step-by-step photographs and comments from a professional. This article contains just such instructions, which describe in detail the connection diagram for the electric meter. Using it, connecting yourself will not pose any difficulties for you.
There are counters of various designs:
- mechanical and electronic
- one tariff and two tariffs
- direct connection and secondary (the secondary meter is connected mainly in power cabinets and switchboards, for example, at the entrance to a multi-storey building, at substations where very large currents flow, it is connected to the circuit through current transformers), only direct connection meters are used in everyday life
One of the housing options for the meter
Types and features of meters
Single-phase, single-tariff electricity meter Taypit Neva 103.5 1S0
Electricity meter is a special device that allows you to keep track of DC or AC energy costs. It is intended for installation in an apartment or house. There are several types of devices.
According to the operating principle
Manufacturers produce the following modifications:
- Electromechanical. An induction electric meter operates on the principle of generating a magnetic field by two coils - current and voltage. The field ensures the rotation of the disk, and it activates the counting mechanism. As the current and voltage parameters increase, the disk spins faster. The guaranteed service life of the products is 15 years.
- Electronic. The device is compact and calculates according to several tariffs. The electronic device displays readings and stores them in memory. It can be connected to the smart home system.
The accuracy of induction models is 2.5. Electronic ones often fail.
By number of tariffs
There are models:
- single-tariff – keep records using one system;
- multi-tariff – calculate energy costs according to day and night tariffs.
Devices with multiple tariffs are optimal for rooms with a large number of household appliances.
By mounting method
The devices are installed on fixing bolts or DIN rail.
The power of the device must be selected according to the power of all equipment.
Answers to 5 Frequently Asked Questions
- How to check the operation of the meter without removing it? To check for self-propelled guns, you need to record the readings and turn off all machines, lighting and electrical appliances. Unplug all equipment. After such actions, it should stop reading consumption. Visually inspect the electric meter to see if the light is blinking. If the device is induction, then the disk should not spin. After a couple of hours, we look at the readings again, down to the last numbers.
- Is it better to install the device on a staircase or in an apartment? Since representatives of the energy company must take readings at least once every two months, in this case it is better to install it in the entrance to eliminate unnecessary questions for you. Also, the company servicing your home construction is responsible for the safety of the electrical system on the staircase.
- Is it necessary to install a three-phase electric meter in an apartment? People install a three-phase device in a private house, since three phases are supplied to the house to distribute a large load. In apartments, all current collectors are distributed without losses into one phase. There is no point in overpaying for three-phase, since they still use a single-phase connection.
Legality of self-connection
Connecting a residential electricity meter without sealing it is classified by the legislation of the Russian Federation as unmetered consumption. This means the absence of an agreement with the provider, independent installation or shutdown of the device, and failure to provide information about the amount of energy resources consumed. Sanctions in the form of a fine in the amount of 4 thousand rubles are applied to the violator. Basis – Art. 7.19 Code of Administrative Offences.
According to clauses 81 (8-9) and clause 81 (14) of Government Decree No. 354, citizens contact the energy sales office to sign an agreement and install a control seal. Only after installing the seals is it possible to connect the meter.
Sealing is a free procedure.
Rules and requirements for meter installation
The electricity meter screen must be easily viewed by representatives of the supplier company.
Before connecting the metering device, you need to study the standards. They specify the following connection conditions:
- transfer of the device on the basis of Government Decree No. 354 is carried out at the user’s expense, if this does not contradict the requirements of the PUE;
- installation of the device is carried out in rigid cabinets, switchgear, on panels, walls, in niches;
- calculation nodes are placed at the border of the operational responsibility of the consumer and the provider - input of the apartment, ASU, main switchboard;
- the screen of the accounting tool must be easily viewed by representatives of the supplier company;
- for a network with voltage up to 380 V, the rule applies - the distance of the electric meter to the switching devices is no more than 10 m;
- installation of the metering device on the street is carried out in a sealed case at a temperature of +5 degrees;
- the counter is placed at a height of 0.8 to 1.7 m. The optimal height is 1.4 m.
The period of the manufacturer's seal on a three-phase electrical device should not exceed 2 years, on a single-phase device - 1 year.
How to avoid 3 main mistakes
- If the meter is a new type, then the screws on the terminals need to be tightened again, since the metal is soft and relaxes over time. This will help avoid incomplete wire contact.
- To avoid a lack of power in the future, you need to buy ES with a reserve of the rated current limit.
- One of the most common mistakes is independence. Coordinate all your actions with the energy supplier, because if inaccuracies are identified, your nerves and wallet will suffer.
- At whose expense is the replacement of the device carried out? Installation and replacement of electrical equipment is carried out at the expense of the consumer.
- How is electricity consumption calculated when the device is temporarily unavailable? During the process of replacing the meter, during its absence, charges for consumed electricity are based on the average monthly consumption of previous billing periods.
How to connect the old meter
Outdated type metering devices include single-phase models that count electricity at a general tariff. They are installed in an apartment or private house.
Scheme selection
The sequence for connecting a single-phase electricity meter is indicated in the passport, instructions or form from the manufacturer. You can find the diagram in the instruction manual or on the back of the terminal cover.
Stages of work
The correct action depends on understanding the diagram. In the center there is a single-pole device, to which the power wire (zero and phase) is connected to the left. On the right are the load output cables. Current flows through them to the lighting system, sockets, and electrical appliances.
The terminals are connected to the wires as follows:
- terminal No. 1 – white/brown/black phase input cable;
- terminal No. 2 – white/black/brown input phase wire from which the apartment is powered;
- terminal No. 3 – neutral blue/blue-blue conductor of the input cable;
- terminal No. 4 – blue/blue-blue neutral load output cable.
Additional terminals are used for connection to service equipment.
Preparatory work
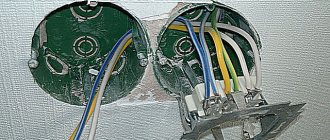
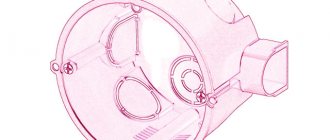
Before connecting the electricity meter, it is necessary to carry out preparatory work. Install a box in which all equipment will be mounted.
Most modern meters are modular. This means that they are installed on a special mounting rail, which greatly facilitates and simplifies the installation process. Also, household series of protective equipment are modular, these include:
- circuit breakers
- RCD (residual current devices)
- differential automata
- various adapter terminals and zero buses
- voltage limiters
- voltage indicators
They are installed in special boxes made of special non-flammable plastic. These boxes can be wall-mounted or built-in, and have different sizes, which depend on the number of installation spaces inside the panel.
Features of the connection diagram for a single-phase meter in the panel
Location of the meter in the electrical panel
For the home electrical network, the electricity meter is connected in conjunction with protection devices. All nodes are located in SCHUR. To connect a single-phase electricity meter you will need:
- Install a single-pole switch and insert the phase input cable into it.
- From a single-pole circuit breaker, bring the phase to terminal No. 1 of the metering device.
- Connect the working zero to terminal No. 3 and the protective zero to the neutral bus.
This scheme is recommended by the PUE and is suitable if an old accounting device is installed in the house.
There are 3 options for installing an ES in a private home.
- Energy companies insist on installing ES outside the building. The installation is carried out on the façade of the building in a special box.
- There are rare cases when the device is installed on a pole/support. They put a machine gun with it, which is also sealed.
- But for longer use it is better to install it in the house. There he is not threatened by weather conditions and outside interference.
Important! When installing a single-phase one, you need to install a general circuit breaker that can be used to turn off the power circuit to replace or repair the electric meter.
You can install the metering device in a common panel or cabinet. The shield can be wooden, metal, plastic. 1 example of a connection diagram for the Energomera SE-101 device
Connections of the Energomera se-101 device
Regardless of the type, the connection terminals are always located in the same connection order. The connection diagram is shown on the back of the terminal cover. This is done to ensure that the manufacturer has correctly connected the electricity meter.
Features of connecting three-phase meters
The three-phase meter circuit is implemented in a direct or indirect way. The first option is suitable for low-power consumers, the second - for equipment in a three-phase network.
Specifics of direct connection
Direct connection of a three-phase electric meter
Connect the device directly as follows:
- Stripping the cable of insulation and connecting it to a three-phase machine.
- Connecting three phase cables to terminals No. 2, 4 and 6 of the meter.
- Output of phase wires to terminals No. 1, 3 and 5.
- Supply of input (terminal No. 7) and output (terminal No.
 neutral wire.
 - Installation of 3-pole automatic protective switches.
For single-phase connection of single-phase devices from the outgoing phase, wires from the ground neutral are used. Several groups of single-phase consumers are powered evenly through switches of different phases.
Indirect connection
If the load exceeds the rated current consumption, a special separating device is used. The transformer is available with two windings. The first is a tire threaded through the middle that serves to protect the break of power wires. The secondary winding in the form of turns of a thin cable is fed to the meter.
An indirect connection scheme for a three-phase electric meter is implemented by fixing the transformers to the back of the cabinet. The primary windings are connected after the input switch and fuses protecting the phase cables. The connection is done like this:
- Connecting one end of a cable with a cross-section of 1.5 mm2 to the section from the A-phase power wire to the transformer.
- Output of the second end of the cable to terminal No. 2 of the meter.
- Similar connection of phase B and C wires, their output to terminals No. 5 and No. 8.
- Laying wires with a cross-section of 1.5 mm2 in the direction from the secondary winding terminals to terminals No. 2 and 3 of the electric meter.
- Similar connection of the windings of devices B and C to terminals No. 4, 6 and No. 7, 9.
- Connecting terminal No. 10 to the common neutral grounding bus.
Without observing phasing, the device will give incorrect readings.
Installation materials
DIN rail made of aluminum
The electrical metering device is connected after selecting a circuit and purchasing materials. To connect your apartment meter correctly and efficiently, you will need:
- auto switches taking into account the maximum current rating;
- insulating devices;
- instruments with handles coated with insulation;
- fastening elements – screws and nuts;
- wires;
- din rail.
Further work is carried out according to a strict algorithm.
Connection steps
Installing an electric meter
Initially, you need to calculate how many phases are in the home electrical network. The number of circuit breakers is selected for them. In the future, the device will be connected like this:
- Fastening the device in the panel with special clamps.
- Installing the rails onto the insulators with screws into the box.
- Mounting circuit breakers on a rail and fixing them with a latch.
- Fixing the earth and protection buses onto the rail or insulators in the shield so that there is a gap between them.
- Connecting the load to the switches.
- Connection of the machine with the meter.
- Load connection.
- Installation of connecting jumpers.
- Connecting the meter to consumers.
- Mounting the panel housing to the wall.
- Inspect the wires for correct connections.
Only after checking the cables can you turn on the power to your residential building or garage. At the last stage, the user contacts energy sales to test the equipment and install seals.
Contacts of modular electrical equipment
In order to make the connection correctly, the purpose of each of the contacts should be explained in detail.
Electricity meter contacts
Each of the four contacts of the meter has two clamping screws, due to this, the contact has uniform and reliable pressure of the contact plate to the wire. The need for such a clamp is due to the fact that in the future the meter will be sealed and there will no longer be free access to the contact group.
The first contact is designed to connect a suitable supply phase.
The second one is for connecting the outgoing phase.
The third is for connecting a suitable supply neutral wire.
Fourth, for the outgoing neutral wire.
Circuit breaker contacts
Let's start with the introductory machine. The top row of contacts is intended for connecting wires supplying the apartment.
The bottom row is for connecting outgoing wires, in our case, they will go to the meter.
Now, let's move on to outgoing single-pole circuit breakers. The phase from the meter is supplied to their upper contacts.
The lower contacts are intended for connecting outgoing phase conductors of wires.
We sorted out the contacts. Theoretical knowledge of how to connect an electricity meter has been obtained. Now, let's put them into practice.
Characteristics of some models of electricity meters
CE 102M
When choosing a meter yourself, you need to consider how electricity will be consumed. Manufacturers produce models that can accurately track energy costs:
- SRZU-I 70D. A pulse device that simultaneously transmits, collects and analyzes information. A measuring transformer is used to power the sensor. The receiving node, through an electrical circuit, receives an LED signal about energy consumption over a certain period of time. The data is displayed on the screen;
- Mercury 234 ARTM – RO PB. The three-phase multi-tariff model is designed for a network with a current of 5-10 A. It is installed outdoors, because works without failures at temperatures from -40 to +70 degrees. Device accuracy class – 0.5;
- PSCh-4TM.0.5 MK. A multi-tariff single-phase device operates at a current of 5-10 A. The accuracy of the readings is 0.5. Designed for operation in the temperature range from -40 to +60 degrees;
- CE 102M S7145-JV. Designed for 4 tariffs, has 1st accuracy class. The universal multi-tariff device is suitable for a 220-230V network with a current from 5 to 60 A.
The presented models are intended for apartments, residential buildings and cottages, because... allow you to plan energy costs and calculate fees for them.
The algorithm for connecting the meter yourself is based on its type and number of network phases. Before starting work, it is necessary to coordinate the installation and conclude an agreement with the energy sales company. The device must be sealed.