Today, slab insulation is used more and more often and there is evidence of this. Attaching expanded polystyrene to the wall is quite simple; it has minimal hygroscopicity, which provides good waterproofing without additional manipulation. In addition, the material is very light, has various degrees of compression, is resistant to ultraviolet radiation, temperature changes, adverse environmental influences, fungus, rotting, and is also endowed with good strength of the material itself.
Use of expanded polystyrene
This material has a wide range of applications: from roofing to foundation. They insulate houses both outside and inside. The main advantage belongs, of course, to the exterior decoration, since the interior has a number of disadvantages:
Warming the room
- Reducing the area of the room;
- Violation of heat transfer in the room;
- The appearance of drops of condensation;
- Rapid deterioration of insulation;
- Possible fungus on the walls and ceiling;
- Damp indoor air.
Therefore, this material is used mainly for exterior decoration, although it is more expensive than roll insulation, but gives good heat and air tightness. It is quite easy to install it with your own hands, but only if it is on the ground floor or in a private home. In other cases, you will have to contact specialists with special equipment. To work on low floors you will need:
- Drill;
- Mounting foam;
- Scotch;
- Stipler;
- Glue;
- Fungal fasteners;
- Spatulas;
- Rollers;
- Sandpaper.
Calculation of the required amount of materials
Any work related to repair and construction begins with the calculation of the required amount of material. To do this, it is enough to know the area of the surface to be covered. To insulate residential premises, foam plastic of various thicknesses is used, but the ideal material would be one whose thickness is more than 5 cm, and its density ranges from PSBS-15 to PSBS-35.
To fix the boards, you can use dowels, foam glue or regular cement-based glue. When choosing an adhesive, consider the following points:
- there should be a mark on the package that the adhesive is suitable for fastening polystyrene foam boards;
- the purpose of the glue can be installation of insulation and filling cracks or with the possibility of installing a protective layer.
Calculation of glue should be carried out taking into account the evenness of the surface. The average amount required to install insulation with your own hands is about 5 g/m2. Approximately the same amount will be required for attaching the reinforcing mesh and leveling layer.
There are general rules for preparing the solution:
- The thickness of the adhesive should be such that the solution does not change its shape when applied. That's why sometimes you should deviate a little from the manufacturer's recommendations;
- to attach the reinforcing mesh, the glue should be a little thinner. This is required for better deepening;
- The solution should be even more liquid when using it at the final stage, for installing the leveling layer.
Technological data
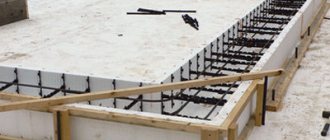
This type of fastening of extruded polystyrene foam to the wall is intended mainly for masonry; a sheet 5 cm thick is taken, with a density of 25 kg/m3. Such parameters will be sufficient for effective protection from cold and frost, since its properties are similar to two brick layers.
Expanded polystyrene has excellent vapor permeability and this guarantees good ventilation inside the material, absence of condensation and moisture. It will not rot, become damp or deteriorate quickly.
Preparatory activities
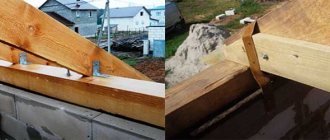
You can insulate a house with polystyrene foam in 2 ways: with glue or with special dowels
Insulation allows you to save on heating the room. You can attach the foam to the wall after preliminary preparation of the surface.
The process consists of performing a series of actions to level and strengthen the base. It all boils down to this:
- unnecessary structural elements are dismantled from the working surface; falling sections of the finishing coating are removed to a solid base, after which they are plastered again; the walls are checked for unevenness with a level; if necessary, the entire surface is leveled and puttied; after drying, the dust formed on the installation surface should be washed off with water (you can wipe with a damp cloth); when the moisture has evaporated, apply sequentially: a primer layer, a solution against mold and fungi (with a brush or spray); before attaching polystyrene foam, you should take measurements of the wall (to order consumables in the required quantity, in a convenient format).
Preparatory operations also include the selection of tools. To carry out the work, depending on the chosen fastening method, you will need the following set:
- spatulas of different sizes; construction knife, stapler; level, tape measure, pencil; hammer drill (impact drill); mixer or attachment for stirring the adhesive solution; sandpaper (grater); hammer; containers for glue, primer, plaster mixtures.
It is customary to pay great attention to preliminary preparation. Leveled walls without defects speed up further installation work, avoiding possible troubles (for example, panels falling off along with the plaster). It is recommended to use foam plastic 3 cm thick inside the rooms, and at least 5 cm thick outside.
Preparing the walls for installation
- For high-quality work, it is necessary to treat the wall from all kinds of irregularities, but if there are protruding elements, then you will need to make cutouts for them and paste them around the perimeter.
- The next step will be to work on processing all the depressions and scratches. They must be sealed and aligned with the wall as much as possible. There is no need to achieve perfect smoothness of the wall. It is enough for the material to lie flat against it. This can be checked by applying a vertical level. It is better to clean the wall surface from old paint, putty and other finishing materials, as they can prevent good sizing of the insulation, which will lead to its poor fastening or detachment from the wall.
- Then, when all these manipulations are done, you need to look at the evenness of the resulting wall using a level. If there are differences of 4-5 cm, then they can be easily adjusted with the future solution. Excessively large differences are very undesirable.
- The next step is to tear out and measure the bottom layer of the wall. The laying of insulation begins strictly from the bottom to the top in a horizontal position.
Which side should Penoplex be attached?
If you already have orange insulation at home, and you are completely confused and don’t know how to work with it, we will help you find out all the secrets. Which side should you lay extruded polystyrene foam on and does penoplex have a front side? These questions concern many developers, so let's sort it out immediately.
- Where is the front or back side of polystyrene foam? We answer: there is none! Unlike basalt-based stone wool slabs, both sides of the penoplex have the same structure. A significant disadvantage of extruded polystyrene foam is its weak adhesion to glue. A smooth surface requires a certain skill so that the plates do not slip and are firmly attached, therefore, to improve adhesion to the adhesive composition, experienced craftsmen treat the sheets with a needle roller or a metal brush until a rough surface is obtained.
This simple method significantly increases the tear strength of extruded polystyrene foam slabs and increases the resistance of the thermal insulation layer to the weight of the final decorative finish made of wet plaster. When using additional fastening with dowels, this procedure is not required.
- Which side should Penoplex be glued on: with the pattern inward and outward? According to the manufacturer's instructions, Penoplex brand insulation is strictly not recommended for use without finishing. Firstly, such an object will be unaesthetic and unfinished, secondly, exposure to ultraviolet radiation will lead to color fading, and thirdly, unprotected insulation will change its structure and lose the lion's share of its heat-insulating properties.
- On what surfaces can Penoplex be placed? Extruded polystyrene foam is suitable for thermal insulation of surfaces made of various wall materials: brick, reinforced concrete, foam blocks and aerated concrete. It makes no difference which side you put the Penoplex 50 mm wall on. It is not recommended to use extrusion for a wooden house due to its complete vapor permeability, which can lead to rotting of wooden structures.
What to do in this case?
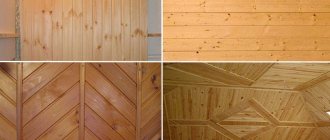
Material: plastic lining
The solution to this problem would be to use, for example, plastic lining or a material with similar properties. Before installation, the slope will need to be trimmed a little, 3-5 cm will be sufficient. Then, after this, waterproofing is laid, followed by the application of soft thermal insulation. As an option, you can take mineral wool. When all the layers are laid, the structure is covered with clapboard. You should also not forget that covering with clapboard and insulation occurs after finishing the entire surface of the walls with insulation.
Preparatory stage
First you need to buy all the necessary materials and tools that may be useful during the installation process:
Insulation.
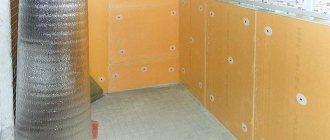
The required quantity is calculated in advance and must be purchased with a reserve. During transportation and even during fastening, the slabs may be damaged, so a few sheets in stock will not harm. Starting profile. Adhesive composition suitable for external work. You also need to pay attention to whether it is suitable for fastening foam plastic. Fasteners (fungus dowel) if this method was chosen for fixation. Deep penetration primer. Roller or wide paint brush (for applying primer). Sealant. Perforator.
After all the equipment and materials have been purchased, you can begin preparing the foundation. To do this you need:
- Remove old decorative trim.
If there are areas that are crumbling, then they are eliminated. All facade elements that interfere with the installation of insulation are removed. All cracks and recesses whose depth exceeds 5 mm are sealed. For polystyrene foam, it is not important that the base be perfectly level.
But if there are large depressions, then mechanical stress may cause cracks to appear both on the insulation itself and on the decorative finish. And this reduces the effectiveness of thermal insulation. Clean stains and traces of fungus or mold. The last stage of preparing the base will be the use of deep penetration soil. Particular care is taken in areas of constant exposure to moisture (basement, foundation).
Only after the soil has dried can you begin installing the foam using the chosen method. Now let's take a closer look at each method.
How to attach polystyrene foam to the wall?
All the walls are prepared and all that remains is to begin laying the insulation. To carry out the work, you need to follow step-by-step work. So, laying instructions:
- The first task should be to putty the walls with a solution on which the insulation itself will lie. The overlay layer should be dense and continuous. You can also take a special adhesive for installation, on which you can put a reinforced mesh. Expanded polystyrene sheets are installed independently as closely as possible to each other. The resulting cracks are processed and filled with foam cuttings.
- The installation itself is carried out overlapped. This position has a good effect on strength and prevents the formation of possible cracks. For maximum efficiency, the technique of alternating horizontal and vertical masonry is used, then the seams will be the same both in length and in height of the wall.
- Now the glue is diluted as indicated on the manufacturer's packaging. The resulting solution is applied in an even layer using a spatula with notches 8 cm wide. First, zigzag lines are made in the center, and then in the corners. The adhesive on the tile should occupy up to 40% of the area.
Fastening the thermal insulation material - In the strip that runs across the entire area of the tile, it is necessary to leave small gaps through which oxygen will subsequently pass. After the glue is applied, you need to wait for it to dry for 10-15 minutes. During this period, the tiles should already be installed.
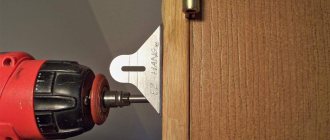
- When all the plates are installed, and the fastening of the polystyrene foam to the wall is also completed, they are secured with special fasteners with mushroom caps. They are attached first in the center and in all corners. A total of 5 pieces per sheet of insulation. To insert this fastener into the sheet, you need to drill a hole in it using a drill at a distance of 4-5 cm. Our dowel is inserted into the finished hole.
- You need to add the reinforced mesh to the polystyrene foam layer when all the fasteners are installed and the adhesive layer has dried. Another layer of glue is placed on top of the reinforced mesh with a special roller to completely embed it inside. This is a fixing layer for insulation.
- When the glue dries, you can treat the surface with decorative plasters, primers, or level the layer. Then you should paint it over.
- Laying and installation of polystyrene foam is completed.
Ceiling mount
Before fixing the slabs to the ceiling, it is necessary to remove all kinds of dirt from it and pre-lay the wiring where necessary.
There are several mounting options:
- Frame method
The lathing is made using wooden blocks. The size of the frame cells should be taken equal to the size of the insulation boards, so that they do not have to be cut later. The foam is fixed with fungi or glue. All gaps must be filled with foam. A vapor barrier film is attached to the sheathing on top of the foam.
The final step is attaching plasterboard sheets to the ceiling.
- Glue method
Such fastening is significantly cheaper. It is important to take a responsible approach to purchasing and preparing the adhesive composition. Before starting work, you should prepare the surface of the ceiling, not only by cleaning it from whitewash and dirt, but also by treating it with primer. If it is not possible to remove all the whitewash, it is recommended to apply an adhesive composition to the entire ceiling. The adhesive is applied to the insulation boards in intermittent strips. The foam is laid with a shift from the middle of the ceiling. For reliability, the slabs are fixed with dowels. Next, the reinforcing mesh is installed and putty is applied.
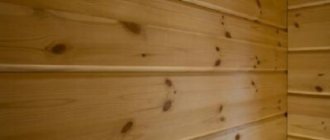
Insulation for a wooden house
Houses made of timber already have good thermal insulation, but they can rot without additional impregnation and layers. As insulation for this type of house, plasterboard slabs are used, on which polystyrene foam is mounted. Let's talk in more detail about the technique of attaching polystyrene foam to a wooden wall and laying the slab. It is also possible to attach directly.
Thermal insulation of a wooden house
So, the technology for attaching foam directly:
- Make sure the quality of the joints between the beams. If there is moss, unevenness or other growths, then you should caulk the walls and fill these cracks with mounting foam.
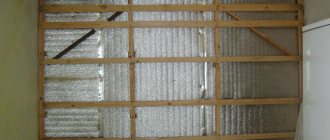
- Next, boards are nailed across the entire surface of the logs in a vertical position. Each of them is nailed at an even distance from each other. For a more convenient calculation, use the formula H + S-5, where H is the padding pitch, and S is the width of the sheet with insulation.
- In the very center of the board, other boards are nailed edgewise. The end result is a frame. Its depth must match the dimensions of the polystyrene foam.
- After this, the foam sheets are carefully inserted inside, starting from the very bottom. With the correct diameter, the slab will hold very securely. If the slabs are a little wobbly, then they are nailed down with small nails.
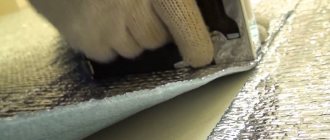
- Then a special membrane is laid. You can use isopane or film and lay it with the film side (white) to the polystyrene sheet, otherwise read the manufacturer's installation instructions.
- The membrane is laid in horizontal layers from bottom to top. The joints of the foam itself are covered by 10-15 cm.
- This membrane is attached to polystyrene foam using a mounting stapler, and all joints are sealed with adhesive tape.
- Finally, it is lined with clapboard, or a special thin-layer putty or siding.
Types of insulation
First you need to determine the type of insulation for the ceiling. which you can apply and it will suit you. The question is that there is a significant difference: the installation will be carried out from the inside of the room, or will be carried out from the outside. This will determine how to secure the insulation to the ceiling.
Mineral wool
This is perhaps the most common material used today. There are reasons for this. This insulation has many advantages over other materials:
- This is a fireproof material that can also be used to insulate a bath;
- Mineral wool has excellent sound insulation;
- Tolerates temperature changes well;
- Not subject to deformation;
- Environmentally friendly material that does not harm human health.
Note: Please be aware of the following. All porous insulation materials, when compressed during installation, lose their properties.
Therefore, during installation they should be placed tightly, but not deformed.
Mineral basalt slabs
This is approximately glass wool, from which there are actually serious differences:
- This material seriously resists fire and has increased fire safety;
- The material is impregnated with a substance that repels water, which is why it has increased moisture protection;
- Resistant to deformation. Here, a multidirectional arrangement of fibers is used, which increases resistance to deformation;
- During the production process, materials are used that increase service life;
- Can withstand almost any temperature;
- This material can be used to insulate not only ceilings, but also foundations.
Liquid thermal insulation materials
Such elements appeared on the sales market relatively recently and have truly unique properties:
- These are ceramic balls in huge quantities and have rather low thermal conductivity;
- This miracle is prepared in the form of paint, which can be applied to any type of surface;
- Excellent resistance to fire and moisture penetration;
This material is quite common and has many fans.
- In principle, this is a universal insulation. Insulation can be carried out both from the outside and from the inside of the building. Can be applied to almost any part of the house;
- It has a low price, which makes it quite attractive. Therefore, the cost of insulation will be affordable for anyone;
- This is a material that lasts quite a long time, and at the same time reliably protects the home;
- An environmentally friendly product that does not harm human health;
- Even a small layer provides good thermal insulation.
These were the most common materials for ceiling insulation. There are also many bulk mixtures that are used to insulate the ceiling at the initial stage of construction. For example, with expanded clay (see: We do the insulation of the ceiling with expanded clay ourselves).
Self-installation of polystyrene foam
As can be seen from the two descriptions, insulating walls using polystyrene foam yourself, both on a regular concrete and brick surface and on wooden beams, does not present many difficulties. The main condition for good masonry is step-by-step execution, high-quality materials used, strict adherence to recommendations and instructions, as well as desire and patience in the work. Any installation of such material will reliably protect the house from adverse conditions, protect the wood from rotting and deterioration, and also ensure good ventilation of the room and insulation.
This material is safe, non-toxic and will last for many years without repair or restoration. It has good thermal insulation, steam does not condense on it, and fungi and mold do not multiply. As an addition, you can treat the walls with a solution and disinfect the area before laying. This will help get rid of existing fungus and microorganisms on the surface of the wall. But this is done if necessary. There is no need to spend money and effort for prevention if the surface is normal.
Methods for gluing foam boards
To increase the effectiveness of thermal insulation, the slabs must be glued to each other. At the same time, it is important to choose the right adhesive that does not contain components that damage the foam. These include:
- alcohol-based solutions;
- solvents containing acetone;
- Oil and gas products.
The best options for gluing foam boards are:
- "liquid Nails";
- polyurethane glue;
- PVA.
It is impossible to give an unambiguous answer to the question of what is the best way to attach polystyrene foam to a particular surface. This depends on a number of factors, including the conditions in which the insulation will be used. If any controversial issues arise while carrying out the work yourself, consult with specialists.
Treatment
To ensure reliable insulation, an adhesive composition is used, self-tapping screws are screwed in, dowels, liquid nails and cement mortar are used. To properly glue penoplex, you need to take into account the type and thickness of the brick. Installation of penoplex is carried out in the following ways:
- Adhesive composition. Mounting adhesive is better suited for fastening polystyrene foam; it can be mounted both inside and outside the building.
- Self-tapping screws. The insulation is produced in a set with self-tapping screws that will fit different tile thicknesses. After processing, they leave holes that are covered with cement mortar to prevent moisture from appearing under the insulation sheets.
- Dowels. To work you will need assembly adhesive. The disadvantage of this method is the formation of an air cushion between the slab and the wall, which causes mold and moisture to appear, and a collapse may occur.
- Liquid Nails. It fits perfectly on the surface and provides a good bond between the material and the brick.
- Cement mortar. Treatment with the solution secures the insulation well. Since cement is heavy, it is recommended to additionally use glue to avoid detachment of the material.
- Polyurethane foam. The coating is carried out using a construction gun, which applies the solution over the entire sheet of foam plastic.
It is not recommended to use polyurethane foam as the main fastening, since it will not be able to withstand the weight of the insulation. It is used as an additional processing material.
Do you need hydro- and vapor barrier?
The presence of waterproofing in a wall pie using EPS is not required . Vapor barrier is present in the form of the insulation itself, which in itself is an excellent insulator, although in exceptional cases, when the room has a high content of water vapor, a layer of vapor barrier is laid on top of the EPS layer.
At the same time, simultaneously with laying a vapor barrier or insulation, it is necessary to take care of high-quality ventilation in order to organize the replacement of internal air and the removal of steam to the outside. Then the house will become much more comfortable, in addition, the passage of vapors through the cake material will be reduced.