Any person wants to make their apartment as comfortable as possible and does everything possible for a comfortable stay. Thanks to modern technologies, a lot of equipment is equipped with wireless devices, but still the number of wires from other equipment is a pressing problem. Wires sticking out everywhere certainly spoil the interior of your apartment. If there is a small child in the apartment, it is necessary to urgently solve the problem with the wires, since protruding wires are not only unsightly, but also unsafe.
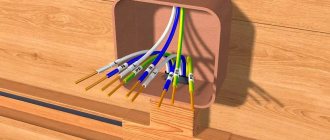
Wires hidden in ceiling beams
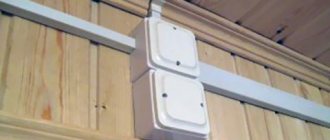
White panel for routing wires
Let's take a closer look at how to hide wires in an apartment.
Niche for TV wires
Types of cable channels
The first models were produced in the shape of the letter U, with single-section (single) boxes or double boxes in the form of the letter W (divided into sections). Modern products are produced in different sections and are distinguished by material.
Available in color options :
- white, light colors;
- colored;
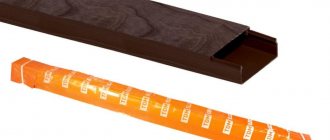
- with wood pattern;
- under natural stone.
White and wood-textured ones are most often used; such models are installed in offices. The shape is chosen not only rectangular, but boxes with a cross-section in the form of a hemisphere or triangle are installed. Hemispherical ones are the most popular. The length of one profile does not exceed 2 m, so there are no difficulties when cutting and installing.
Standard U-shaped boxes remain in demand, with the range varying in width and height from 10 to 60 mm, but there are exceptions for production on special orders.
According to the material of manufacture
The walls of the box must be strong, resistant to stress, and able to withstand the weight of the wires lying inside.
Materials used in production:
- metal;
- plastic;
- polyvinyl chloride (PVC).
Steel ones are made from cold-rolled and galvanized metal; such models are installed inside and outside the building. Iron boxes are painted with polymer compounds to improve their appearance and extend their service life.
Plastic products are made from polymer high-molecular compounds. The product takes shape under the influence of heat and retains it after hardening. Such boxes are not exposed to household chemicals.
Polyvinyl chloride is a plastic, chemically resistant material. It does not burn in its pure composition, but the fire resistance limit depends on the amount of additives during production. Operate at temperatures -15° - +65°C.
At the location of attachment
Installation of the cable channel depends on the placement option. Hidden lines are made in the construction of ceilings and walls; for this purpose, special grooves are chosen in the thickness of the fence. This type of arrangement is comparable to the overhaul of a room, because when the walls are cut with a grinder, a lot of dust appears. After laying the channels, the grooves must be plastered and finished with a material similar to the main cladding.
There are different cable designs on sale for placement in different options:
- on the floor and in the floor;
- as a plinth and instead of it;
- on staircases;
- ceiling options, if there are slabs on top, but they cannot be tapped;
- for laying long highways;
- for running cables outside and on parapets.
All varieties differ in material, mounting option, and size. Floor skirting boards are usually hollow - such channels are not externally visible in the interior, but they accommodate many wires.
By hardness
Special channels are laid, which include a perforated or solid base, accessories installed under the cover. If there is no covering profile, the channels go into the category of trays - such options are less rigid with reduced protection.
Possible degrees of route protection:
- IP00 - straight-section channels and components without covers;
- IP20 - perforated bottom and connecting elements with covers;
- IP40 - boxes with a base without perforation, accessories are closed with lids;
- IP44 - similar to IP40, there is an additional bandage mounted at all joints, adhesive seals for vertical lines, covers on the same connectors.
They use rigid, smooth pipes that are installed inside and outside the wall. Wiring repair elements allow you to pull out wires for replacement or inspection. Such cables require connecting elements, turns, and corner joints. If there are a lot of turns, it is difficult to pull out the wires, so rigid pipes are used on straight sections.
Valera
The voice of the construction guru
Ask a Question
Mini-channels are produced in the form of a profile with rounded corners and the upper part is fastened in such a way that the effect of integrity is obtained, and the connecting seams are not visible. The lid covers the base completely; cleaning is not necessary during operation.
External camouflage
If they have an artistic taste, many people prefer to decorate rather than hide the wires. From standard wiring it is quite possible to make a real art object, painting, panel with your own hands. Typically, cables come in black or white, but if desired, you can find a material of a brighter shade.
Next, you should choose a drawing that suits the style of the interior, sketch it with a non-greasy pencil directly on the wall. Afterwards, you need to measure the length of the circuit using a thread in order to purchase the missing amount of cable (part of it will only serve a decorative role).
You can make any wall pattern out of wires. Often the following are taken as a basis:
- branch with leaves, sitting birds;
- one or more trees;
- giant light bulb;
- power station;
- highway (in the nursery);
- decorative fence.
The wires are attached to the wall with special fasteners, which can then be decorated with any suitable material - fabric, special paper, designer decorations. Also, unsightly protruding wires are hidden behind tall indoor plants, well-placed furniture, carpeting, door frames, and windows.
Criterias of choice
More often they use options with a double lock, which makes the structure durable and independent of mechanical stress. Such clamps allow you to open and close the lid many times, while the rigidity and integrity of the box does not change.
When choosing a channel model, the following factors are taken into account:
- material of the walls and base, presence of a lid;
- appearance of the channel or tray, shape;
- ability to use standard fasteners .
of the width and height matters Pay attention to the presence of separation barriers if power and low-current lines are combined in one channel. The regulations state that the wires in the box should not fill more than 1/3 of the internal space.
Valera
The voice of the construction guru
Ask a Question
The PUE recommendations contain a recommendation that the sum of the external cross-sections of all wires inside the channel should not be more than 35% of the internal cross-section of the box. The method of laying the cable (loose or orderly) does not matter.
Hiding the wire from the TV
Most often, the TV is placed on the walls. The question of how to hide the wires from the TV on the wall becomes relevant. A decorative box will help hide them; this method is described above.
The best option is to disguise the wire in the wall and install sockets behind the TV.
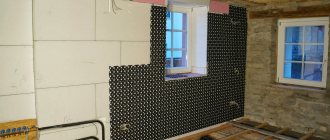
This is quite simple to do: a small hole is made in the wall, the wires are laid in corrugation. The hidden wire is fixed in the groove and the wall is covered with plaster. Thanks to this solution, all wires will be hidden.
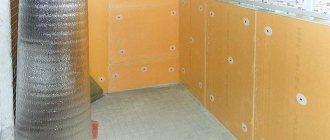
Wires from the TV under the wall panel
TV panel for wires
TV wires hidden in the wall
Mounting methods
The choice of method is determined by the material of the enclosing structures. For example, hollow slabs on the ceiling do not allow grooves, so the boxes are fixed only from above.
Use cable channel mounting options :
- wood screws are used for fixing to wood, drywall;
- flea screws are installed if the channel is fixed to a metal surface with a thickness of at least 2 mm;
- using plastic dowels and screws;
- glue is used for installation on any surface, cardboard, wood, concrete;
- double-sided tape is a type of adhesive fixation if the weight of the channels with wires is small.
They produce channels with ready-made holes for fasteners - this makes the work faster and more convenient. Boxes can be mounted to a concrete wall using a gun, which allows you to drive in special mounting dowels.
Hiding wires from the computer
In the modern world, there is a computer in almost every apartment, so the most pressing problem is how to hide the wires from the computer. A string of wires not only looks messy, but is also unsafe. To make things a little easier, use wireless technology where possible. Today you can do without the use of wires in the following computer components:
- Computer mouse.
- WiFi router.
- Keyboard.
- Acoustic system.
Computer wires in a black case
Computer wire clamps
A wireless connection will help you get rid of several unnecessary wires. To ensure that the electrical wires do not lie twisted on the floor, it is necessary to purchase wires of the required length, this way the wires will be stretched. Wires that lie on the floor can be secured under the table with tape or other adhesive tape.
Excess wires can also be disguised in a decorative box. You can choose a box that will look beautiful in combination with the design of the room or cover it with suitable materials.
Another option is to hide the wire in the baseboard. You can read above how this is done.
Computer wire box
Preparatory work
To begin with, determine the location of the route, line turns, and intersection points. They draw up a project for the highway so that after installation they do not have to redo the work. The drawings indicate the cross-section of the wires, the places of passage so that they do not interfere with pieces of furniture or other elements.
Procedure for preparing for work:
- selection of tools;
- acquisition of necessary materials and elements;
- surface preparation;
- marking routes on walls, ceilings, floors, taking into account the design and safety precautions.
The cable channel can be moved from one place to another, but traces of hardware or glue will remain on the surface. Therefore, special attention is paid to design.
Tools and materials
For marking you need a tape measure and a pencil. It is better to lay the route using a laser level, which will show an exactly horizontal line. Vertical sections are marked with a level, or a plumb line is used.
Tools needed (some can be omitted, depending on the method of mounting the cable channel in the wall or on top):
- a hammer drill with an impact element (for cutting grooves for boxes); for drilling holes, use drills with diamond or pobedite tips;
- drill, screwdriver;
- mounting gun for “liquid nails” glue.
You will need: screwdriver, hammer, pliers. For marking, instead of a pencil, use blue tape with tapping thread.
Prepared from materials:
- external and internal corners;
- end caps;
- connecting parts (L, X and T-shaped).
Plastic and metal boxes are produced by many companies, so the configuration and shape of the parts differ.
Marking
The operation plays a significant role in order not to redo the work in case of inaccurate fastening (the route can go down or up, the beginning and end of the line in the plane do not coincide.
Marking order:
- The length of the box is applied to the surface, the remaining areas are marked with a tape measure, and marks are made with a pencil or core.
- They mark a line horizontally, aiming a thread with blue (a cone with a cord) from one corner to another; when working, they try to pull the thread so as not to get sagging in the center.
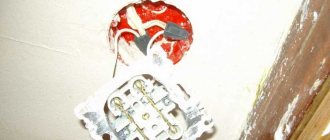
- The locations of sockets and switches are marked on the line, and holes are cut out using a crown on cardboard or concrete.
- Vertical lines are also measured with a plumb line and beaten with thread.
The box cannot be placed at an angle; this is important for products installed inside the wall.
Preparing the walls
It is necessary to level the plane:
- Channels placed on glue will experience tension in the area of kinks and over time will move away from the wall completely or partially.
- Products mounted on self-tapping screws hold tighter, but they can also break out of the wall.
- Straight cable ducts will emphasize the curvature of the surface.
For leveling, plaster and starting putty are used. If the curvature is large, part of the layer can be knocked down, and a metal mesh can be nailed under the greater thickness. It is better to use beacons that make the plane ideal.
General information
To ensure that the final result is aesthetically pleasing, and also makes it possible to safely use electrical energy, and all this at a minimal cost, you should take into account 4 simple rules:
- Think through the progress of the work from start to finish and depict everything in the form of a drawing.
- Purchase the required number of tools and components, which must be selected for certain conditions for laying highways in the room.
- Draw lines on building structures at route locations.
- Carry out installation work.
So, let's figure out step by step how to install wiring into a cable channel.
Installation procedure
To temporarily support the channels, various elements are used, for example, sections of the cover are cut off. Before installing screws or dowels, such supporting parts are removed. Experts recommend immediately snapping the covers on, then removing them before installing cables, and starting work from the corners.
The order includes operations:
- unpacking materials;
- measurements, cutting of blanks;
- removing the cover, installing it in the mounting position;
- checking with a level;
- drilling holes;
- fastening with hardware.
After this, the wiring is placed in the box and the lid is closed. For internal channels, a diagram is drawn up that indicates the distance to the ceiling or floor, the distance from the window, the doorway.
To drywall
The slabs are a gypsum panel framed with cardboard on both sides. To install channels on such surfaces, glue is often used . If you use screws, carefully monitor the drilling depth - any twisting in depth will lead to cracking of the fastening site.
Procedure for fixing with glue:
- the tube is inserted into the mounting gun, the spout is cut off, the glue is squeezed out so that it fills the tube, after which the tension is released by releasing the trigger;
- glue is applied to the prepared piece of the channel from the outside of the base;
- use spot application, or make a snake (depending on the weight of the product and the number of wires);
- the profile is applied to the wall, pressed, then removed;
- After the glue has set (the time indicated on the packaging), press again.
The cables are laid after the mass has hardened. It will not be possible to dismantle such products from the surface without damaging the finish.
To a brick or concrete wall
A labor-intensive option, because they use dowels , for which you need to make holes according to the markings. The same holes are drilled at the base of the channel if they are not provided by the manufacturer.
Operating procedure:
- holes are made in the channels with a drill, then placed against the wall, laying lines and drilling locations are marked;
- the profile is removed, holes are made in the fences with a puncher, plastic dowels are inserted;
- The channel is applied, the holes are aligned, and steel screws are installed.
At crossings and intersections, connectors and corners are installed in a similar way. The wires can be placed immediately, then the covers are snapped on.
To the tree
The marking order does not change, but installation work is easier. The channel is placed against the wall, then a hole is drilled with a drill into which a self-tapping screw is inserted. It is tightened with a screwdriver , or you can do it manually with a Phillips screwdriver.
On wooden surfaces, cable channels can be removed without damaging the finish, but traces of drilling will remain.
The length of the screws is 25 - 30 mm , this is enough to hold the wiring box. Difficulty arises when fixing it to a layer of lining, since the material has bulges and depressions. It is necessary to adjust the tension of the screws so that the channel does not bend.
Installation of corners and joints
Connectors and corner elements are convenient because you do not need to cut corners at 45°. This way the work looks neat and holds tightly. The elements are installed along with the fastening of the main profile. They also have their own lids that match the top of the boxes. They cut trays and lids at right angles, but do not ensure the evenness of the edges, since the covers will cover everything.
Select elements according to the cross-section of the cable channel . Any plugs or connecting elements will not work. Corners and connectors will affect the cost of the material, but without them you will have to tinker with cutting corners.
Decor with stickers, stickers, improvised means
Decorative elements that help hide or neatly secure numerous cords are sold almost everywhere and are quite inexpensive. In this way you can decorate the cord coming from the sconce above the bed in the bedroom. You can decorate the cable from the TV or the cord from the heater running along the floor using a “toy” mini-fence glued to the baseboard. If you plan to carefully hide many elements behind a fence, tie clamps are used.
Decorative clamps are now sold in all electrical stores. They are an adjustable flexible clip decorated with leaves, flowers, butterflies, birds, and houses. In romantic interiors, laces are decorated with sparkles and feathers, in a children's room - with stickers depicting fairy tale characters and favorite cartoons.
Useful tips
In order not to get confused when masking the wires and not to get into trouble during repairs, they must be marked in advance. This will help you immediately find the right cable later. It is better to separate low-power wiring from power wiring, without connecting it into a single bundle. Wires from the antenna and the Internet should be placed separately from others so as not to spoil the signal quality.
Cables should have the shortest possible length and the minimum number of connections: this increases their safety and reduces the risk of injury. It happens that the braid of hidden cables frays due to poor placement, so in dangerous places the wiring must be checked more often. If you need to mask wiring, you can use any ideas, especially since the range of tools and materials for decoration is now huge!
What is cable hose used for?
Cable ducts are suitable for collecting and bundling cables where fixed cable duct is not suitable. In an IT environment or for home theater and stereo systems, many power lines are combined due to different devices. Also, with electrical appliances, sometimes you have to replace one component and remove or add a cable. To do this, cable hoses with a zipper or segmented design can be easily opened. They are ideal for the normal background chaos of PCs and consumer electronics.

