A socket is not only a mandatory functional element of electrical wiring, used to connect electrical household appliances, but also a significant interior detail.
The trouble-free operation of the outlet, as well as its neat appearance, depend to a large extent on how well the installation is done, right? To make the correct installation, it is necessary to take into account a number of nuances that are present in this work, one of which is the correct installation of socket boxes.
Have you never installed a socket box and are afraid of making mistakes? We will help you understand all the features - the article discusses in detail the types of installation boxes and the intricacies of installing each of them.
Attention is also paid to the installation of socket boxes in common types of bases - concrete, plasterboard, tiled wall. The material is supplemented with visual photos and useful videos.
How to fix a socket box in the wall: installation and installation
When carrying out electrical installation work, you often have to deal with the installation of socket boxes. Indeed, in reality, despite the name, they are used not only for installing sockets. Let's say that to install the same switches you also need a socket box. Installing the latter is not something special or complicated, but it will not be superfluous to know how to choose and how to fix the socket box in the wall.
- Function and types of socket boxes
- Preparation before work
- Installation in concrete
- Installation in drywall
- Working with a wooden wall
- Alternative Hole Creation Methods
- Some nuances
Preparation
At the preparatory stage, it is necessary to choose the right type of socket box depending on the required functionality and wall material. Also common to all cases will be a set of tools and consumables:
- Hammer or drill;
- Suitable attachment for wall slitting;
- Building level;
- Meter;
- Pencil;
- Chisel;
- Hammer;
- Putty knife;
- Putty.
Standard sizes of socket boxes
A regular socket box has dimensions of 68 mm by 45 mm, where 68 is the diameter and 45 is its depth. When installed as a block, the distance between the centers of the drilled holes is 71 mm.
Standard sizes of socket boxes
It is believed that any socket box has standard dimensions. Here the diameter is equal to 68 mm, and its depth is equal to 45 mm. But the master needs to know that we are talking about the external dimensions of the product. The internal cross-section of the box will be 65 mm, and the internal depth will be only 40 mm.
There are also smaller installation parts on the market. Their depth is equal to 25 mm. In the largest socket boxes, the parameter can reach 80 mm. In this case, the diameter sometimes changes by 60 mm. The shallow depth of the socket boxes is especially useful if you need to install two power points into one thin wall on both sides. Standard elements simply will not fit here or will stick out above the level of the partition plane.
To form a seat in the wall, you need to take a crown with a cross-section of 70 mm for a hammer drill. These parameters allow you to freely set any diameter of a standard socket using the required amount of fixing solution. The master has 0.5-1 cm left from the circumference of the mounted element.
The dimensions of the square socket box are 70x70 mm. Less common are products with dimensions of 60x60 mm.
By 70 mm we mean the parameter of the part at the base. That is, its protruding edges, edges and borders are often not taken into account. Sometimes the craftsman has to remove them with sandpaper in order to mount the box into the nest.
Grouping rules
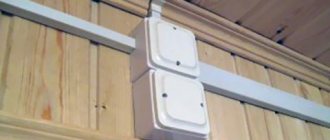
It is allowed to install several devices in the socket block; their number is almost unlimited, but usually more than 6–8 pieces are not installed . In addition to sockets, the block may contain switches, regulators, television and computer connectors.
Rules for grouping and carrying out work :
- The locations of socket boxes (not switches and regulators, but casings) are marked on the wall.
- To form recesses, crowns for a rosette with a diameter of 70 mm are used to give freedom to adjust the interaxial distances.
- The housings are adjusted by center and aligned vertically and horizontally.
- If you neglect the level, all the sockets in the block will stand askew (the way the boxes are mounted under them).
- Take into account the edge of the casing.
- As a standard, the side should be in the same plane as the wall - then the socket with the lid will fit tightly to the surface.
Valera
The voice of the construction guru
Ask a Question
After drilling the holes, a block is installed in them to check all parameters. The deviation of the sides of the block from the axis by 1.5 - 2 mm is allowed. Coordinate the possibility of entering all wires into the socket boxes so that they do not interfere with each other. Low-current and power connectors are separated from each other by a gap equal to another diameter of the socket. This way, electromagnetic waves will not interfere with the operation of devices.
Types and characteristics of socket boxes
Modern sockets, both in appearance and in the installation method, differ significantly from those installed in Soviet-era houses.
If previously they were simply embedded in the wall without the possibility of replacement, today installing them and, if necessary, changing the socket is not particularly difficult.
And all this thanks to the socket box, which, in fact, is a box that securely holds the socket in its depths and at the same time ensures its fire safety.
Socket boxes come in different shapes and sizes, differ in materials of manufacture and installation method, so before you buy, you need to understand their types.
Selecting a socket box based on wall material
The main selection criterion is the material of the walls into which the socket boxes will be installed.
On this basis, there is the following classification of boxes:
- structures intended for installation in walls made of solid materials: concrete, reinforced concrete, aerated concrete, brick;
- glasses for walls made of composite materials: plasterboard, plastic boards, chipboard, plywood and others.
In the first case, the socket box is a round glass without any additional elements. It is fixed to the wall using mortar.
There are mounting holes in its walls or bottom for electrical wiring. When installing a socket box, it is enough to remove the jumpers and push out the plug.
Socket boxes with side docking units allow you to quickly and easily install two or more sockets at once.
To install several sockets located nearby, you can use glasses, on the side of which there is a fastening mechanism. The socket boxes are connected to each other using special grooves and combined into blocks.
Drywall boxes contain special plastic or metal clamping tabs designed to secure elements into hollow walls. The clamps are attached to screws, which rotate to adjust their position.
When the screw is turned, the foot rises or lowers. Clockwise rotation brings the clamping element closer to the wall and secures the glass in the drywall.
What shapes are the products produced in?
Round socket boxes have become most widespread. It is very easy for them to make a hole in the wall using a variety of tools.
Round glasses can be used both for mounting a single socket or switch, and they can be combined into groups, connecting to each other using docking units.
Square boxes, although not used as often, have certain advantages. Their volume is much larger, so you can hide a lot of wires in them.
They are often used to install elements of the “smart home” system. There are single and group square-shaped socket boxes designed to install up to five sockets.
There are also oval boxes on sale, which, like square ones, have a large internal space. They are convenient because you can immediately connect a double socket to them. All the products described above are mounted in walls and used for hidden wiring.
There is another type of mounting boxes that stand somewhat apart - plastic linings or multiboxes, designed for open installation on the baseboard. They are designed for one or more outlets and are usually square in shape.
This type of installation of plastic overlays can only be used on dismountable plastic skirting boards.
External socket boxes have two modifications - designs with installation to the middle of the baseboard or to the floor. Since multiboxes are mounted on top of the baseboard, their distinctive feature is their aesthetic appeal and original design.
Material for making mounting boxes
The most popular are socket boxes made of non-flammable plastic. They can be installed in concrete walls and structures made of composite materials.
There are also metal boxes, which were used everywhere in the past, but today they have almost been replaced by plastic products.
Metal socket boxes are usually installed when installing electrical wiring in wooden houses. They are made of galvanized or non-ferrous metal and cannot be welded, so the connection to a metal pipe is made by soldering.
For safety reasons and fire prevention, when installing electrical wiring in wooden houses, it is necessary to use metal socket boxes.
Installation of a single socket box
In order to fix one box in the wall you will need:
- Level,
- Pencil, brush/spray bottle, small spatula,
- Chisel,
- Hammer,
- Drill with a round attachment, having a diameter of 68 mm,
- Alabaster, water.
To begin with, we mark a line along the horizontal level, then draw another line from the wire down, this will be the left extreme point of the socket box. Focusing on the vertical stripe and horizontal line, we outline the back of the element as a guide.
The rim diameter is 68 mm, the outer installation depth is 45 mm, this should be taken into account when choosing an attachment. We make marks, drill holes along them, wetting the nozzle with water so that it does not overheat.
The box has 2 sides: one is slightly narrower than the other, we install the wide part horizontally, the narrow part vertically, otherwise the box may not fit. Also, the “ears” transitions for mounting a block of socket boxes are removed; they are absolutely not needed when installing a single element. If we don't remove them, the box won't fit into the hole and we'll have to widen it.
We marked a line down from the wire, this is our left edge. We need the wire to go into the diagonal hole, not straight, but diagonal, because the fastening screw is located directly above the vertical hole, it damages the wire.
After we tried on the socket box and made sure that the diameter was suitable, all we had to do was wet the hole and our element for attaching the sockets with water so that the alabaster would hold better. We mix alabaster with water in a ratio of 1:4, where one part is water and four alabaster, and apply it to the wall, side edges, and to the bottom of the socket adjacent to the surface.
After installation, the box needs to be corrected, to achieve strictly the same level with the wall, so that it does not stick out and is not deeply planted, all extreme points have the same distance to the wall. Use all the excess alabaster to mask the wire going to the future outlet.
Installation of a new socket box in an old one
It often happens that the old, Soviet metal socket box has a diameter larger than necessary, new sockets do not sit tightly in it, dangling, despite the widest possible size between the legs.
Work must be done in the following order:
- Turn off the light in the panel.
- We check that there is no voltage by turning on the light bulb.
- Remove the cover and unscrew the socket.
- Disconnect the wires.
- We look at the box, if it is rusty iron, without a bottom, then we will need alabaster to firmly secure the new box.
If the box is held securely, there is no doubt, it has a wall, then you can simply screw the new box to the back wall of the old one using a metal screw with a drill. Do not forget about the location of the box with the narrow part vertically and the wide part horizontally.
You also need to remember about the wire, if in the old days it runs in the center, then you should tighten the screws very carefully so that there is an optimal distance and permissible depth for tightening the screws. If possible, it is advisable to grind off the tip so that it has some distance from the wire, or is at least not sharp, otherwise damage can result in a short circuit.
Mounting on various surfaces
In drywall the task is simplified because there is no need for alabaster. You need to do the same operations, marking, cutting a certain size hole that matches the socket box, fixing.
The box is fixed in the drywall using special fastening tabs, which are pressed against the drywall when screwed. It is called universal, it can be attached to various thin-walled surfaces that include drywall.
If the box, despite being tightly fixed, sticks out strongly, it is necessary to remove the thickness and make the edges of the hole in the drywall at an angle.
The universal socket box is large in size because the distance between the legs is 83 mm, which is convenient if we have a socket or a non-standard switch, in which the distance between the mounts may be slightly larger.
Similarly for wood, if it is a thin wooden partition, but if the house is from a log house, then the option of screwing the wall of the box to the log frame using self-tapping screws is possible.
If you purchased a universal socket box for a brick wall or log house, then the tabs must be unscrewed.
It is better to make holes in a single socket box with a heated knife to avoid breaking the housing. In this case, you need to have a safe distance from drywall and wood.
When installing on a surface that will be plastered or tiles will be laid on it, there is no need to drill holes to the full depth. The socket box should be made slightly protruding, 5-7 mm, or less, depending on the thickness of the plaster/tile.
When choosing, it is important to consider that the depth of the socket may differ from the depth of the socket, as well as the diameter.
We proceed to the direct installation of socket boxes
Before starting work, it is advisable to have a complete set of consumables. Power cable, required number of socket boxes (with a small reserve for scrap), building mixtures, PVA glue. The power tool you plan to use to cut the holes.
Marking
Regardless of whether the power cable is laid in advance, or you will be trenching the walls for it at the same time as drilling niches for sockets, the installation of socket boxes begins with careful marking.
It is impossible to guess where electrical appliances will be placed. Perhaps tomorrow you will want to rearrange your apartment. Therefore, sockets are installed according to the following principle:
- For universal use - at a height of 30 cm from the finished floor (meaning the height from the laid finishing coating).
- For large household appliances (washing machine, refrigerator) at a height of 1 meter.
- If the socket blocks are mounted above countertops or bedside tables - no less than 10 cm from the surface.
- A special case is the installation of sockets for a TV hung on the wall. This is an individual project.
- But the distance between the centers of the socket boxes is a constant (applies to a group installation, in a row). This value for installing standard sockets is 71 mm.
The horizontal position must also be taken into account. From corners, ceiling, floor, door frames - a distance of at least 15 cm. From heating radiators, no closer than 50 cm. Of course, you cannot place sockets above heating appliances (with the exception of the “warm floor” system) and above kitchen stoves. Electrical installation rules and SNiP prohibit the installation of sockets and the laying of wires on walls directly facing the street.
Making holes
There are three main ways. There are no advantages or disadvantages between them. It all depends on the tools and attachments you have. There is no fundamental difference between installing socket boxes in a brick or concrete wall, so the technology is similar.
- Crown for stone (concrete, brick). The classic and fastest option for drilling a wall for a round box.
The diameter of such a nozzle is usually 70 or 75 mm. Considering the external dimensions of the socket boxes (61–65 mm), it is better to use a larger crown. Firstly, it’s easier to fill an extra gap with a solution than to squeeze a box into a tight hole. Secondly, you have a small margin in case of a miscalculation in the markup. Then, adhering to strictly central markings, we drill holes to a depth exceeding the length of the socket box by 10–15 mm. You won’t be able to make ready-made holes; most likely the installation location will look like this:
It's okay, the core can be easily knocked out with a chisel or bolt.
Advice! What to do if reinforcement gets in the way of the crown? (Applies to concrete walls only).
Identifying the metal under the crown is not difficult. You definitely can’t go wrong: the deepening stops and a characteristic knocking and vibration appears.
The best advice is to change the location of the outlet. The reinforcement has a pitch of 15–30 mm; if the placement is not so important, move the hole by 3–5 cm. Before doing this, try to determine which reinforcement you are in: vertical or horizontal. This will help avoid further mistakes.
If it is impossible to move the socket block, you will have to remove a piece of reinforcement. To do this, knock out a “glass” of concrete to see the metal. Use a bolt to break the area around the reinforcement a couple of centimeters. A wire with a diameter of 5–6 mm can be cut with a chisel.
Thicker reinforcement will have to be drilled out.
The best option is to cut out this area with a grinder. We will get acquainted with this method further. Drilling holes using a drill. Not the easiest way, but if you don’t have a crown, you can make one or two seats. The fundamental difference is that the contour is not drilled at the center marking point. It is necessary to draw a circle with a diameter of 75 mm around it. Then you need to drill holes along the contour as often as possible.
And then, as in the first option, a bolt or chisel.
Tip: Don't be afraid to damage the integrity of the wall around the holes. Of course, you want everything to look beautiful even at the preparatory stage: the holes are like in the picture, a perfectly even row. You will simply waste extra time; all uneven areas will be plastered over and covered with the finishing surface.
By the way, if you are installing socket boxes in a brick wall, drilling will not be a difficult task. The material is soft, easy to drill even without a hammer drill: with a conventional drill with a Pobedit drill bit.
If you are making a niche in red brick, try to get between the cement layers. There is less damage (concrete breaks out in pieces), and it is easier to select a hole.
Installation of socket boxes using a grinder. This method is not used due to the lack of a drill or crown for concrete. If you have an angle grinder, then you also have a hammer drill. It's just another technology, no better or worse than the others.
The only condition under which this method is indispensable is working with a reinforced concrete wall of special strength. You will simply dull an expensive bit, and the discs on an angle grinder cost pennies.
Together with the grooves for the power cable, we simply cut out rectangular or square holes with a margin around the socket boxes.
It definitely looks rough. On more or less treated walls, the hand does not rise to such blasphemy. And if finishing is still a long way off, this is the fastest and most effective way. Also suitable for brick walls.
The least aesthetically pleasing way is to use a hammer drill in jackhammer mode. It should be resorted to only if other methods are impossible. However, the technology is there and we cannot ignore it.
The end result is ready-made holes for socket boxes with connected grooves. We clean the niches with a brush or a construction vacuum cleaner, and be sure to prime them.
Installation of boxes
In accordance with the markings, we try on the assembled blocks. Installation of socket boxes is carried out regardless of the quality of the holes. If the box rests on an incorrectly drilled niche, it needs to be expanded. Marking is our everything! Don’t be lazy at this stage, even if you don’t want to pick up a chisel again and make a mess.
Experienced installers attach the socket boxes to some kind of guide, fix the ideal location, and then cover the boxes with alabaster.
If you simply sit the socket boxes in a liquid solution, they may move before they dry completely. You'll have to redo everything again.
The wires must be left with a margin of 10–15 cm. When installing sockets, you will remove the excess, leaving a small installation loop.
Why group
Of course, you can place sockets in the house in different places. However, too many of them over the entire wall area will most likely greatly spoil the appearance of the room. Therefore, in modern apartments, sockets in most cases are simply placed several times in one place.
This allows you to maintain the attractive appearance of the walls and make the connection sockets less noticeable. Also, this installation method makes the subsequent operation of sockets more convenient. After all, most often different kinds of household appliances are located in apartments not far from each other.
How to install enclosures
Thus, the distance between socket boxes mounted into the wall should be 71 mm. After the nests are punched, grooves are made in the wall for the leash. They are usually pierced using a grinder. At the next stage, the cables themselves are laid in the grooves and brought out into the sockets for the socket boxes. At the next stage, the procedure should be as follows:
- The socket boxes are installed into the sockets using a template and leveled;
- the template is fixed on the wall;
- the nests are covered with gypsum or cement putty.
After hardening, you just need to unscrew the template from the wall and remove it from the sockets. Next, you can begin installing the sockets themselves.
Selection of electrical equipment
First of all, you should choose the right box for the outlet. There are no special rules for boxes for hidden installations. Therefore, you should rely on common sense and fire safety techniques.
In former times, socket boxes were made exclusively of iron. This was not entirely convenient, since they passed electric current and were poorly attached to the wall.
Nowadays, metal socket boxes are used only when installing sockets in wooden houses. In all other cases, plastic boxes are used.
The technical parameters of the socket box must meet the following requirements:
- Pay special attention to the strength of the product. You should not buy a cheap, thin or fragile socket box that crumbles with a little effort.
- No less important is such an indicator as combustion resistance. Non-flammable material - ideal for installing electrical equipment. Of course, a brick wall will not catch fire in the event of a short circuit. But, if the plastic starts to burn, the fire can spread to wallpaper, curtains, furniture or carpeted flooring.
- The next thing you should pay attention to is the presence on the outside of the box of cast ribs, grooves and hooks that will firmly fix the box in the hardened solution. If the outer surface of the box is flat and smooth, then it can slide out of the wall with little force.
- That is, by pulling the cord, pulling the plug out of the socket, you can pull the entire device out of the wall. Not a superfluous element are the mounting holes for screw fastening of the socket box, which are located inside the boxes, in specially molded ribs.
- If you are going to install several sockets in a row, then it would be a good idea to purchase products equipped with standard latches in advance. They securely fasten the boxes to each other, connecting them into a single structure.
That is, choose quality products that will last for many years.
Required materials for installation
In order to install a socket box in a brick wall, you will need the following materials:
- To drill into a brick wall you need the right tool. This could be an electric drill, a hammer drill, and so on;
- Attachment to the tool – a brick crown or a Pobedit drill bit;
- You can make markings using a building level and a marker;
- Using gypsum putty, alabaster or other building mixture, and a spatula, the socket box is securely fixed and fixed in the brick wall;
- Using a hammer and chisel or a bolt, you can knock out the core, remove chips, protrusions, and irregularities when creating holes for installing a socket box.
This is a set of the most necessary tools needed to implement such a task as installing a socket box in a brick wall.
How to install a socket box in a brick wall, markings
Installing a socket box in a brick wall begins with marking. Markings are applied using a building level and marked with a marker.
You should think in advance and determine the location of the sockets in the brick wall. Even before the wiring diagram is drawn up.
Of course, it is impossible to calculate and provide for everything, so you should adhere to the following rules:
- For living rooms in which various electrical appliances are used, sockets are located at a height of thirty centimeters from the floor;
- In the kitchen or bathroom, where a refrigerator, washing machine and other electrical equipment will be used, sockets are located at a height of one meter from the floor;
- In the bedroom, sockets are installed under the bedside tables to turn on table lamps or floor lamps. There is a strict restriction - they should not be located below ten centimeters from the floor.
Of course, when rearranging furniture, sockets will be needed in other places, but, in principle, extension cords can help out in such cases.
When drawing up a wiring diagram, the following nuances should be taken into account:
- The distance from corners, ceilings and doorways to sockets and electrical cables must be at least fifteen centimeters;
- To heating devices - at least fifty centimeters;
- It is prohibited to place sockets above stoves, stoves or near fire;
- It is prohibited to lay wires and install sockets on load-bearing walls facing the street.
Brick wall, socket boxes, plaster and tiles
The sequence of actions when installing socket boxes in a regular brick wall is somewhat different from working on pure concrete. All the techniques, tools and materials used here are the same, but there are some nuances that need to be considered in advance.
The socket box must be installed flush to the outside of the wall. If wallpaper is glued to concrete, then a layer of plaster will be laid on the brick wall. Of course, you can estimate in advance what the thickness of the plaster will be and move the socket box a little forward, but this will be an order of magnitude more hassle than with a simple installation. When planning sockets in the bathroom or kitchen, where additional tiles will be laid, the calculations become even more complicated.
A long and complex way to solve the problem lies in careful measurements after each stage of work - a place is marked, wiring is connected to it, plaster is applied, a hole is cut in it, then the same is done with the tiles during its installation.
It will be much easier to make an initial recess in the wall where you can hide the wire (it is advisable to twist it tightly and secure it in the center). Then close the hole with a lid - you can even cut it out of thick cardboard, remember the “coordinates” of the future outlet and now you can putty. If you are laying tiles and you need to maintain symmetry, then it would be useful to figure out in advance what kind of pattern it will be laid in this place.
This video shows how to install socket boxes on gypsum plaster:
When the plaster or tile adhesive has hardened, the installation of the socket box itself begins - one or for a block of sockets. A hole is drilled according to the required coordinates, carefully so as not to catch the wire (if it is a tile, then at the time of drilling you need to continuously water the crown or drill). Next, the standard installation of the selected socket boxes is carried out - putty is applied, the box itself is recessed into it, the excess solution is cleaned off and after it hardens, everything is ready for installation of the socket.
Common mistakes
Common mistakes made when installing socket boxes:
- Installation of socket boxes before the walls are finished, which makes subsequent leveling of the surfaces difficult. When installing parts that are skewed, you will have to remove the mounted boxes and then seal the parts again. An additional layer of plaster reduces the likelihood of contact between the crown and the reinforcement during drilling.
- Installation of socket mechanisms in walls without transition elements. This installation method is strictly prohibited, since it does not provide insulation of the wall material from the power cables.
- Horizontal skew of the socket block and erroneous determination of the distance between the centers of the mounting boxes. Incorrect positioning leads to the formation of gaps between the wall surface and the decorative frame of the socket module.
- It is prohibited to use foam for fixing socket boxes, since the material does not meet fire safety requirements. There are non-flammable foams of class B1, but the strength of the material is inferior to gypsum or alabaster mixtures.
Installation in high-strength concrete with reinforcement
Property owners often have a question about how to install socket boxes in a concrete wall reinforced with steel rods. Then the surface is marked, holes are drilled along the contour of the socket box with a drill, an additional channel marks the center of installation of the box. Then a diamond bit is installed in the perforator, with which the canal hole is drilled.
If steel reinforcement gets in the way of the tool, it is possible to cut the element with a crown. To do this, the hammer drill is switched to shockless operation mode, the diamond working edges will cut off the reinforcement made of mild steel.
It is allowed to destroy the rod using a metal drill or cutting disc mounted on a grinder. The further installation procedure does not differ from the method of installing products in standard concrete surfaces.
Preparing the solution
Since it is necessary to quickly fix the socket in a concrete wall, gypsum or alabaster-based mixtures are used for fastening. A pure gypsum solution hardens in 3-5 minutes, which requires constant mixing of small portions of the mixture and regular cleaning of the container from the hardened material.
To increase the shelf life of the solution, use a mixture consisting of 3 parts gypsum and 2 parts Knauf Rotband gypsum plaster or equivalent. It is not recommended to use pure plaster due to the reduced mechanical strength of the hardened material.
The solution is mixed in a 3-4 liter container made of elastic material. To dissolve the powder in water, use a mixer clamped in the chuck of a drill or hammer drill (in non-stress mode). Before mixing the batch mixtures, the container is cleared of any remaining solidified solution.
The nuances of installing a multibox on a plinth
What should you do if your house has already undergone high-quality repairs, but you need another point to connect electrical household appliances?
In this case, it is not at all necessary to rip off the new wallpaper and ditch the wall; you can make a socket directly on the baseboard.
Multiboxes fit all types of standard single sockets. They can accommodate not only electrical, but also telephone sockets, as well as Internet cable connectors.
However, it should be noted that this method can only be used on collapsible plastic skirting boards with a cable channel. Before installing the socket box, it is necessary to lay the wire inside the baseboard.
To do this, remove the cover from the part where the socket will be located. This operation is performed from a corner or from a nearby plug; simply pry the cover with a screwdriver and carefully remove it.
Cut the baseboard so that there is a gap the width of which matches the size of the plastic trim. Insert the multibox into it, thread the wire through the hole in its body, and secure the socket box with dowels.